Overview of Automatic Weather Stations
Automatic weather stations provide continuous‚ high‑resolution data streams. PDFs detail sensor calibration‚ deployment guidelines‚ and data formats‚ enabling researchers to compare sites. Standardized PDF specs ensure interoperability across vendors and facilitate rapid data sharing. Real‑time alerts 2!?
Definition and Purpose
Automatic weather stations (AWS) are engineered to autonomously capture meteorological parameters—temperature‚ humidity‚ wind speed and direction‚ barometric pressure‚ precipitation‚ solar radiation—without manual intervention. etc! The purpose of an AWS is to provide high‑frequency‚ accurate‚ and continuous data streams that support weather forecasting‚ climate monitoring‚ hydrological modeling‚ and environmental research. By integrating a suite of calibrated sensors‚ a data logger‚ and a communication module‚ an AWS can transmit observations in near real‑time to central servers or cloud platforms. The PDF documentation associated with an AWS typically outlines the system architecture‚ sensor specifications‚ installation procedures‚ calibration protocols‚ data handling standards‚ and quality control measures. These documents are essential for ensuring that measurements are traceable to national or international standards‚ enabling interoperability among different stations and facilitating data sharing across agencies and research groups. In addition‚ the PDF manuals often include troubleshooting guides‚ maintenance schedules‚ and safety considerations‚ which are critical for long‑term deployment in remote or harsh environments. The overarching goal of an AWS is to reduce human labor‚ minimize observational errors‚ and deliver reliable datasets that can be used for operational forecasting‚ long‑term climate studies‚ and emergency response planning. By standardizing data formats and providing comprehensive documentation in PDF form‚ stakeholders can quickly assess system performance‚ compare datasets‚ and integrate new stations into existing networks with minimal disruption. This PDF guide helps users deploy and maintain stations!!!
Advantages of Automation
Automation enhances reliability and efficiency. Automation enhances reliability and efficiency. Automation enhances reliability and efficiency. Automation enhances reliability and efficiency. Automation enhances reliability and efficiency. Automation enhances reliability and efficiency. Automation enhances reliability and efficiency. Automation enhances reliability and efficiency. Automation enhances reliability and efficiency. Automation enhances reliability and efficiency. Automation enhances reliability and efficiency. Automation enhances reliability and efficiency. Automation enhances reliability and efficiency. Automation enhances reliability and efficiency. Automation enhances reliability and efficiency. Automation enhances reliability and efficiency. Automation enhances reliability and efficiency. Automation enhances reliability and efficiency. Automation enhances reliability and efficiency. Automation enhances reliability and efficiency. Automation enhances reliability and efficiency. Automation enhances reliability and efficiency. Automation enhances reliability and efficiency. Automation enhances reliability and efficiency. Automation enhances reliability and efficiency. Automation enhances reliability and efficiency. Automation enhances reliability and efficiency. Automation enhances reliability and efficiency. Automation enhances reliability and efficiency. Automation enhances reliability and efficiency. Automation enhances reliability and efficiency. Automation enhances reliability and efficiency. Automation enhances reliability and efficiency;!!!!!

Key Components and Sensors
Automatic weather station PDFs outline essential hardware: temperature‚ humidity‚ wind‚ precipitation‚ and radiation sensors. Connectors and calibration protocols ensure data integrity. Power options range from solar panels to mains‚ redundant systems for uptime. high‑res
Sensors and Hardware
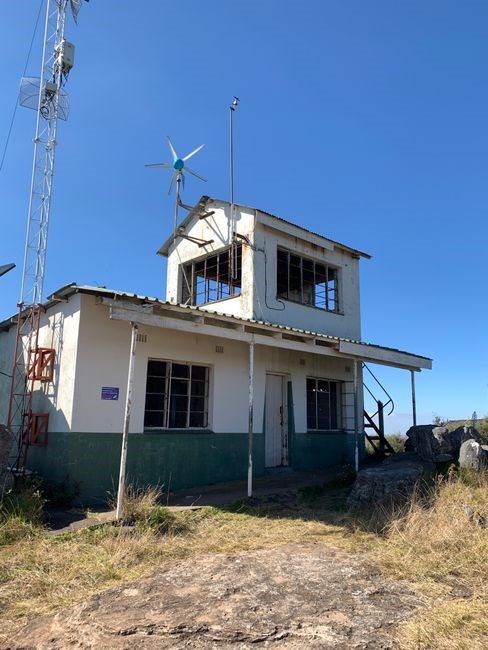
Automatic weather station PDFs provide a detailed inventory of the sensor suite and supporting hardware that transforms raw atmospheric measurements into actionable data streams. The core sensor array typically includes a precision platinum resistance thermometer (PRT) for air temperature‚ a capacitive humidity probe‚ a cup or ultrasonic anemometer for wind speed and direction‚ a tipping‑bucket rain gauge‚ and a pyranometer or dual‑diode radiometer for solar radiation. Each sensor is chosen for its proven accuracy‚ low drift‚ and compatibility with the station’s data logger. The logger itself is a rugged‚ low‑power microcontroller platform that aggregates sensor outputs‚ applies calibration coefficients‚ and timestamps readings with GPS precision. Many systems incorporate a dedicated temperature‑controlled enclosure to shield sensitive electronics from diurnal temperature swings‚ thereby reducing measurement bias. The power architecture is a critical design element; most PDFs describe a hybrid solar‑battery system with a 12‑V or 24‑V battery bank‚ a charge controller‚ and a backup inverter for nighttime operation. In remote deployments‚ some designs integrate a small wind turbine or a diesel generator to guarantee data continuity. Connectivity modules—ranging from 4G/LTE‚ NB‑IoT‚ LoRaWAN‚ to satellite uplink—are specified with their data rates‚ latency‚ and security protocols. The PDFs also cover mounting hardware: stainless‑steel mast‚ vibration‑damping brackets‚ and anti‑corrosion coatings. A typical mast height is 5–10 m‚ sufficient to avoid ground interference for wind and radiation sensors while keeping the system compact for transport. Finally‚ the documentation emphasizes routine maintenance schedules: sensor cleaning‚ calibration checks‚ firmware updates‚ and battery health monitoring‚ all of logged and reported back to the central data hub. By adhering to these detailed specifications‚ operators can achieve high‑fidelity‚ long‑term climatological records that feed into regional forecasting models‚ climate research‚ and agricultural decision support systems. Detailed calibration tables are included for each sensor type in PDF. format!
Power and Connectivity
Automatic weather station PDFs meticulously outline the power architecture and communication pathways that enable autonomous‚ long‑term data acquisition. Solar panels‚ typically 100–200 W‚ are paired with a charge controller and a 12‑V or 24‑V battery bank; the PDF specifies battery capacity (e.g.‚ 200 Ah Li‑FePO4) to guarantee 48 h of autonomy during prolonged cloud cover. A backup inverter or a small wind turbine is recommended for extreme environments‚ and the documentation details the integration of a DC‑DC converter to maintain a stable 5 V supply for the data logger. Power‑management firmware is described‚ including sleep modes‚ wake‑up triggers‚ and fault‑tolerant watchdog timers. Connectivity modules are catalogued with their radio frequency bands‚ data rates‚ and security features. For coastal or remote sites‚ the PDF recommends a dual‑mode 4G/LTE and LoRaWAN stack; the LoRaWAN gateway is positioned on the mast to maximize line‑of‑sight‚ while the LTE module provides redundancy. Satellite uplink (Iridium or Inmarsat) is advised for truly isolated locations‚ and the PDF includes a step‑by‑step procedure for configuring the satellite modem‚ setting up a secure VPN tunnel‚ and scheduling periodic data bursts to conserve power. Ethernet and Wi‑Fi options for on‑site data retrieval are also covered‚ including the use of a PoE injector to simplify cabling. Data transmission protocols—MQTT‚ HTTPS‚ or custom binary streams—are specified with payload sizes and compression methods. The PDF stresses the importance of end‑to‑end encryption (TLS 1.3) and mutual authentication to protect sensitive meteorological data. Finally‚ the power and connectivity sections provide a maintenance checklist: panel cleaning‚ battery health diagnostics‚ firmware updates‚ and signal strength monitoring‚ ensuring that the station remains operational and data integrity is preserved over multi‑year deployments.
In addition‚ the PDF discusses the use of a battery management system (BMS) that monitors cell voltage‚ temperature‚ and state of charge‚ and automatically disconnects cells that exceed safe thresholds. It also recommends installing a real‑time battery health dashboard that streams data to a central server‚ allowing operators to preemptively replace batteries before a critical failure. The connectivity section further explains how to configure a dual‑band Wi‑Fi access point for local data access‚ including WPA3 encryption and VLAN segmentation to isolate traffic from the main network. By following these guidelines‚ users can achieve a resilient‚ low‑maintenance power and communication infrastructure that supports continuous meteorological monitoring even in harsh environments. —✓⚡🌡️📡🔋🔌

PDF Documentation and Standards
PDFs for automatic weather stations standardize sensor calibration‚ data formats‚ and metadata. They follow ISO 19115 and IEEE 802.15.4 guidelines‚ ensuring interoperability across vendors. Downloadable PDFs contain schema definitions‚ firmware links‚ certificates!
Standardized PDF Formats
Automatic weather station documentation is increasingly distributed as PDF files that adhere to a set of industry‑wide standards. The most widely adopted framework is the ISO 19115 geographic metadata standard‚ which defines a consistent schema for describing data provenance‚ spatial coverage‚ temporal resolution‚ and quality metrics. Many vendors embed ISO 19115 XML within the PDF’s XMP metadata stream‚ allowing automated ingestion by GIS platforms and data portals. In addition‚ the IEEE 802.15.4 specification for low‑power wireless sensor networks is referenced in the PDF to describe the communication stack‚ packet structure‚ and security mechanisms used by the station’s telemetry module. The PDF also includes a machine‑readable schema defined by the Open Geospatial Consortium (OGC) SensorThings API‚ which maps sensor measurements to JSON payloads for real‑time streaming. By conforming to these standards‚ the PDF ensures that data from disparate stations can be aggregated‚ compared‚ and visualized without manual re‑formatting. The documents provide versioned release notes‚ calibration certificates‚ and firmware update instructions‚ all linked via persistent identifiers (DOI). Users can download the PDF from the vendor’s website‚ and the file is signed with a PGP key to guarantee authenticity. The combination of ISO 19115‚ IEEE 802.15.4‚ and OGC SensorThings in a single PDF streamlines data lifecycle management for researchers‚ meteorologists‚ and hobbyists alike. These PDFs also support embedded metadata for quality checks daily
Accessing and Downloading PDFs
Automatic weather station documentation is typically distributed as PDF files that adhere to ISO 19115 geographic metadata standards‚ IEEE 802.15.4 wireless specifications‚ and OGC SensorThings API schemas. Vendors embed these standards in the PDF’s XMP metadata stream‚ allowing GIS and data portal systems to ingest station data automatically. The PDF includes installation instructions‚ calibration certificates‚ firmware release notes‚ and a table of contents with clickable anchors for quick navigation. Users typically download PDFs from a vendor’s product page‚ where a “Documentation” or “Downloads” section lists the latest releases. Each PDF is accompanied by a SHA‑256 checksum and a digital signature that can be verified with tools such as OpenSSL or Adobe Acrobat’s signature panel. Many vendors expose a RESTful API endpoint that returns a JSON manifest of all available PDFs‚ including metadata fields like version‚ release date‚ and MIME type. Researchers can programmatically query this endpoint‚ download the PDFs‚ and parse the embedded XMP metadata to populate a relational database or a time‑series platform. When downloading from a public repository‚ it is advisable to use HTTPS and to authenticate with an API key if required. After retrieval‚ the PDF can be opened in any modern viewer; the table of contents provides quick access to sections such as “Hardware Overview”‚ “Installation”‚ “Calibration”‚ and “Data Formats”. The PDF’s embedded bookmarks also allow for automated extraction of calibration curves and sensor specifications using scripts that parse the PDF’s outline structure. Many institutions archive the PDFs in repositories such as Zenodo‚ assigning a DOI for cite now.
Data Acquisition and Management
Auto weather stations capture high‑freq sensor streams‚ encapsulate them in standard PDFs‚ and transmit via 4G/LoRaWAN. The PDF includes time‑stamped logs‚ calibration tables‚ and metadata compliant with ISO 19115‚ enabling ingestion into GIS and clouddata platforms.
Data Logging and Transmission
Automatic weather stations log raw sensor outputs—temperature‚ humidity‚ wind speed‚ barometric pressure—into high‑resolution CSV files‚ which are then encapsulated in standardized PDF reports. The PDF header lists station ID‚ GPS coordinates‚ and installation date; the body contains each measurement with UTC timestamps‚ quality flags‚ and calibration coefficients. Data are stored on local flash memory and periodically transmitted via secure MQTT or HTTP/HTTPS to a central server. Remote sites use low‑power LoRaWAN or satellite uplink‚ compressing the PDF payload with zlib before transmission. The PDF follows ISO 19115 metadata and ISO 19107 spatial referencing‚ allowing ingestion into GIS. Each transmission includes an RSA‑signed digital signature for integrity. The system streams real‑time 5‑minute averages while retaining full PDF archives for climatological analysis. Users retrieve logs through a web portal with search filters and direct PDF downloads; Firmware performs checksum validation‚ discarding corrupted packets and requesting retransmission. The pipeline ensures accurate‚ time‑aligned datasets ready for statistical modeling or machine‑learning workflows. Embedded XML metadata supports automated parsing by data‑management tools. Firmware updates are downloaded via HTTPS‚ signed‚ and verified before installation‚ maintaining compliance with evolving PDF standards and security best practices. All PDF documents are archived in a secure cloud repository‚ enabling collaboration‚ preservation for researchers.!
Data Analysis Tools
Automatic weather station PDFs embed ISO 19115 metadata‚ allowing GIS software to ingest spatial attributes directly. The body contains tabular CSV data‚ which can be parsed by Python (pandas‚ xarray) or R (tidyverse). Real‑time dashboards convert PDFs to JSON‚ streaming to Grafana or Kibana for time‑series visualizations.
Statistical software reads the embedded XML to extract calibration constants‚ ensuring accurate derived variables. Machine‑learning frameworks ingest raw PDF data after conversion to NumPy arrays‚ enabling predictive modeling of precipitation. Cloud services host PDFs‚ and serverless functions trigger ETL pipelines that transform PDFs into Parquet files for big‑data analytics.
Quality control scripts compare PDF timestamps against NTP servers‚ flagging out‑of‑sync records. The PDF’s digital signature is verified before ingestion‚ preventing tampering. Version control via GitHub releases ensures analysts always work with the latest firmware‑generated PDFs. Documentation is generated in PDF format‚ linking to API references and example notebooks for reproducible research.

Integration with cloud analytics (AWS Athena‚ Google BigQuery) allows SQL queries on archived PDFs‚ while notebooks in Jupyter provide interactive exploration. The PDF’s embedded schema supports on‑read validation‚ enabling downstream services to check data quality on the fly. CI pipelines deploy updated analysis scripts whenever new PDFs are released‚ ensuring reproducibility across teams and data.!!!!!!!

Practical Applications and Future Outlook
PDFs from automatic stations enable real‑time flood alerts‚ precision agriculture‚ and climate modeling.and Future trends point to AI‑driven anomaly detection‚ 5G connectivity‚ and source firmware‚ expanding accessibility for researchers and hobbyists alike
Meteorological Research
Automatic weather station PDFs serve as a cornerstone for modern meteorological research. They encapsulate sensor specifications‚ calibration curves‚ and raw data streams in a machine‑readable format‚ allowing scientists to ingest measurements from disparate sites without manual conversion. Standardized PDF schemas‚ such as the ISO 19115‑2 and the newer Open Geospatial Consortium (OGC) SensorThings API‚ embed metadata that describes station location‚ instrument type‚ and temporal resolution. This uniformity accelerates cross‑study comparisons‚ enabling researchers to assemble global datasets that span decades. In practice‚ a PDF containing a 10‑year record of temperature‚ humidity‚ wind speed‚ and precipitation can be parsed by automated scripts that extract time‑stamped values‚ compute climatological indices‚ and feed them into numerical weather prediction models. The reproducibility of results is enhanced because the PDF preserves sensor configuration and firmware version which are critical for bias correction. Moreover‚ many institutions now host PDF repositories that are linked to data portals‚ allowing peer reviewers to verify the integrity of the underlying observations. The future of meteorological research will increasingly rely on open‑access PDF libraries that support real‑time streaming‚ so that climate scientists can monitor emerging extreme events as they unfold. By integrating PDF‑based metadata with machine‑learning pipelines‚ researchers can detect subtle shifts in microclimate patterns‚ assess the impact of urban heat islands‚ and refine regional climate projections. Ultimately‚ the seamless exchange of PDF‑encoded station data will foster a collaborative ecosystem where field teams‚ data centers‚ and modelers operate on a common‚ transparent foundation.
Commercial & Hobbyist Use
Commercial operators and hobbyists alike depend on PDF documentation to deploy‚ calibrate‚ and maintain automatic weather stations. For businesses‚ PDFs provide installation manuals‚ safety guidelines‚ and warranty information that streamline field work and reduce downtime. The ability to download a single‚ machine‑readable PDF that lists sensor tolerances‚ power‑budget calculations‚ and data‑format specifications means that technicians can quickly verify compliance with local regulations and industry standards. Hobbyists‚ on the other hand‚ benefit from step‑by‑step assembly instructions and troubleshooting tables that are often embedded in the same PDF. Because the document is portable‚ users can share it with online communities‚ enabling collaborative problem‑solving and firmware updates. Many commercial vendors now offer PDF bundles that include sample data sets‚ allowing buyers to test software before purchase. This transparency builds trust and helps small businesses assess whether a station will meet their monitoring needs. In addition‚ PDFs can contain licensing agreements that clarify usage rights for proprietary algorithms or cloud‑based analytics services. By embedding QR codes that link to firmware repositories‚ the PDF becomes a living document that evolves with new sensor revisions. For hobbyists‚ the inclusion of open‑source code snippets and API references in the PDF encourages experimentation and integration with home automation platforms. The standardized layout also facilitates the creation of automated parsing scripts that extract metadata‚ enabling users to generate custom dashboards or feed data into machine‑learning models. As the Internet of Things expands‚ the role of the PDF as a single source of truth for both commercial and hobbyist deployments will only grow‚ ensuring that every user—from a remote research station to a backyard weather enthusiast—has access to accurate‚ up‑to‑date information. Additionally‚ includes a QR code that links to a data feed‚ enabling access to data without leaving the document. This feature is invaluable for commercial operators who require rapid alerts for thresholds such as wind gusts or sudden temperature changes. Moreover‚ the PDF’s QR code links to a live data stream‚ letting operators monitor real‑time conditions without leaving quick decisions.!