Author: ernestine

sun joe pressure washer soap instructions

Sun Joe Pressure Washer Soap is specifically designed to enhance cleaning efficiency for outdoor surfaces. It offers effective dirt removal, versatile application, and eco-friendly solutions, making it ideal for various cleaning tasks.

Overview of Sun Joe Pressure Washer Soap

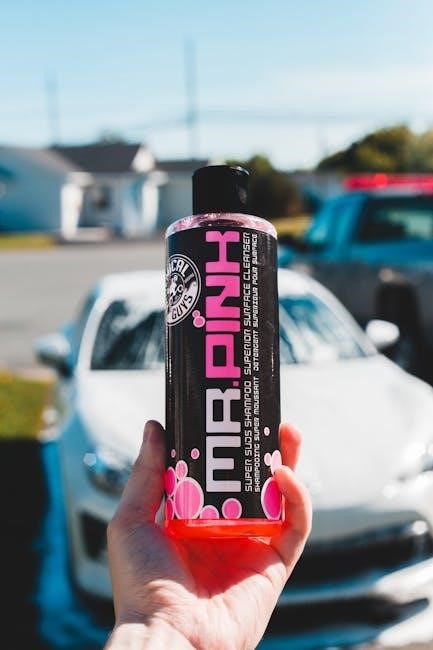
Sun Joe Pressure Washer Soap is a specially formulated detergent designed to work seamlessly with Sun Joe pressure washers. It is crafted to deliver superior cleaning power, breaking down tough dirt, grime, and stains efficiently. This soap is optimized for outdoor use, making it ideal for cleaning driveways, sidewalks, decks, cars, and other surfaces. Its eco-friendly formula is biodegradable and free from harsh chemicals, ensuring it is safe for the environment and various surfaces. The soap is also designed to maintain the longevity of your pressure washer by preventing damage to the machine and its components. With its versatile application and compatibility with Sun Joe pressure washer models, this detergent is a must-have for effective and safe cleaning. Always follow the manufacturer’s instructions for proper use to achieve the best results and avoid any potential damage to your equipment or surfaces.

Importance of Using the Right Soap for Your Pressure Washer

Using the right soap for your pressure washer is essential to ensure optimal cleaning performance and protect your equipment. Sun Joe Pressure Washer Soap is specifically designed to work in harmony with Sun Joe pressure washers, providing superior cleaning power while maintaining the longevity of your machine. The correct detergent helps prevent damage to the pump, hoses, and other components by ensuring proper lubrication and flow. It also prevents clogging in the soap dispenser and maintains the overall efficiency of the pressure washer. Additionally, using the right soap enhances safety by reducing the risk of malfunction during operation. Always choose a detergent that is compatible with your pressure washer model and follows the manufacturer’s guidelines to achieve the best results and extend the lifespan of your equipment. Proper detergent use not only improves cleaning effectiveness but also protects your investment in the pressure washer.

Preparing Your Sun Joe Pressure Washer for Soap Use

Attach the soap dispenser to the pressure washer, ensuring it’s securely connected. Prepare the machine by rinsing the system and following manufacturer guidelines for detergent compatibility to avoid damage.

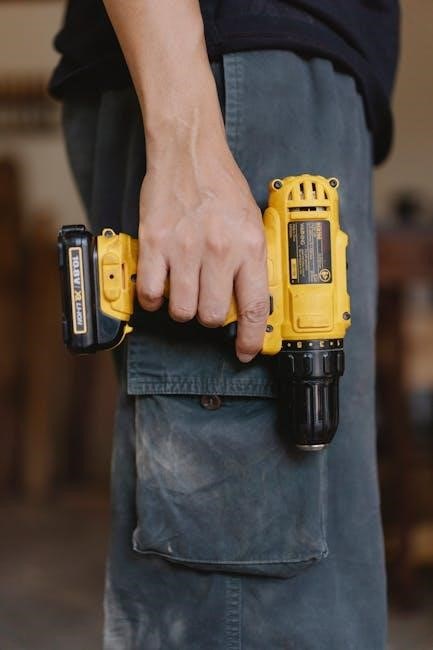
Step-by-Step Instructions for Assembling the Soap Attachment

To assemble the soap attachment for your Sun Joe Pressure Washer, begin by attaching the foam cannon to the trigger gun. Ensure the connection is secure to maintain proper pressure. Next, adjust the soap-to-water mixture using the built-in dial on the dispenser. This allows you to customize the cleaning power based on the surface. After assembling, run the pressure washer briefly to test the flow and ensure no leaks are present. Always refer to the manufacturer’s instructions for specific guidance, as improper assembly can affect performance. Once assembled, apply the detergent from the bottom to the top of the surface to avoid dilution. Remember to rinse the system thoroughly after use to prevent soap buildup. For any uncertainties, contact Snow Joe customer support for assistance.

How to Properly Mix Sun Joe Pressure Washer Soap

Properly mixing Sun Joe Pressure Washer Soap ensures optimal cleaning performance. Start by filling the soap dispenser with water, then add the recommended amount of Sun Joe Pressure Washer Soap. The mixture ratio is typically preset, but adjustments can be made using the built-in dial on the dispenser. Ensure the mixture is well-balanced to avoid excessive foam or insufficient cleaning power. Apply the detergent directly to the surface, working from the bottom up to prevent streaks. Avoid pre-wetting the surface, as this can dilute the soap. For best results, follow the manufacturer’s guidelines for the correct soap-to-water ratio. This ensures effective cleaning without damaging surfaces or wasting detergent. Always test the mixture on a small area first to confirm the desired cleaning effect. Proper mixing enhances efficiency and extends the life of your pressure washer. For further assistance, refer to the Sun Joe instruction manual or contact customer support.

Using Sun Joe Pressure Washer Soap Effectively

For effective cleaning, apply Sun Joe Pressure Washer Soap evenly, adjusting the soap-to-water ratio as needed. Use the built-in dispenser for consistent coverage and optimal cleaning results on various surfaces.

Adjusting the Soap-to-Water Mixture for Optimal Cleaning

Properly adjusting the soap-to-water mixture is crucial for effective cleaning with your Sun Joe Pressure Washer. Start by following the manufacturer’s recommended ratio, typically found on the detergent label or in the user manual. Over-saturating the solution can leave residue and reduce efficiency, while too little soap may not adequately remove dirt. Use the built-in dial on the soap dispenser to regulate the mixture flow. For lighter tasks, such as washing cars or windows, a lower concentration works best. For heavier jobs, like cleaning driveways or decks, increase the soap concentration for better grime removal. Always test the mixture on a small area first to ensure it doesn’t damage the surface. Adjusting the nozzle pressure can also help distribute the solution evenly, enhancing cleaning results. Proper calibration ensures both cleaning effectiveness and longevity of your pressure washer.

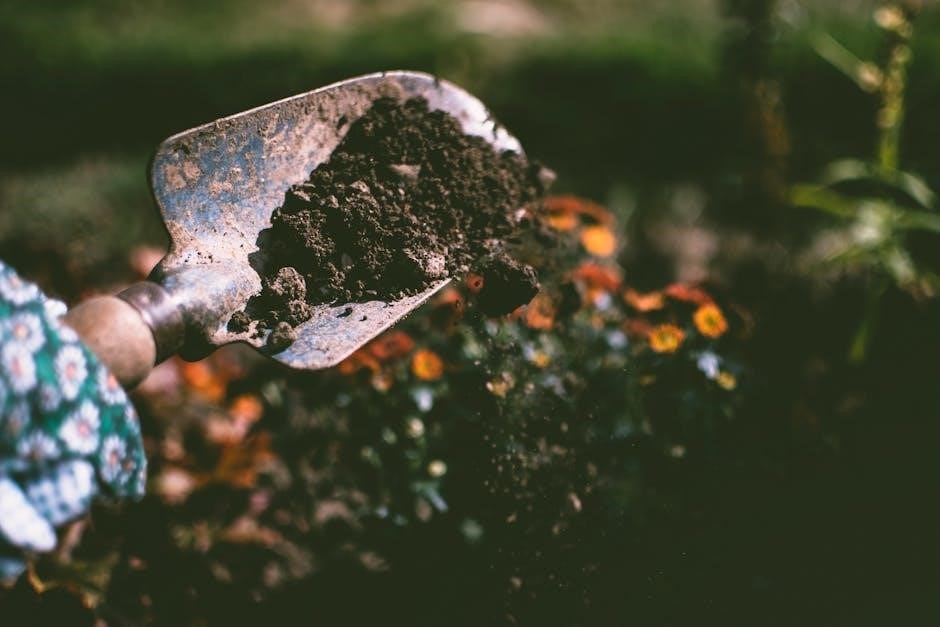
Best Practices for Applying Detergent to Surfaces

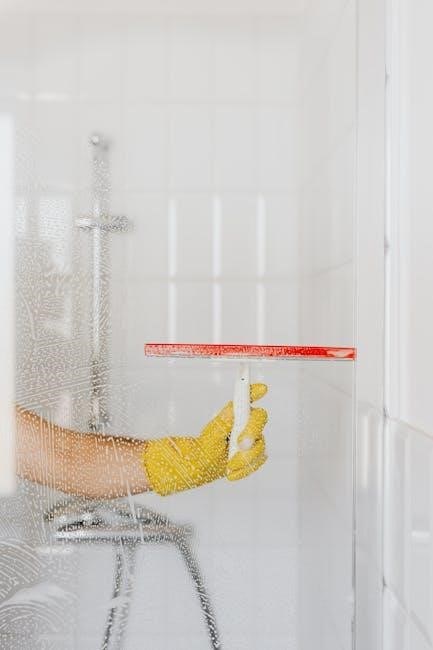
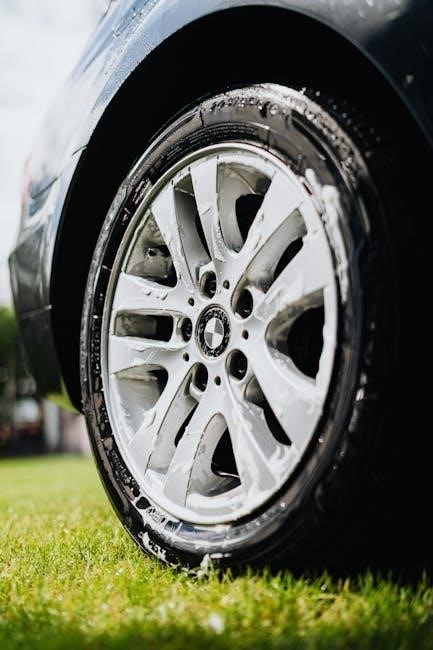
When using Sun Joe Pressure Washer Soap, always apply detergent to dry surfaces for maximum effectiveness. Start by spraying from the bottom and work your way up to prevent streaks and runoff. Avoid wetting the surface beforehand, as this can dilute the soap and reduce its cleaning power. Use the appropriate nozzle for the task, ensuring the spray pattern matches the surface type. For delicate surfaces, use a wide fan tip, while narrow tips are better for tough stains. Always test the detergent on a small, inconspicuous area first to ensure it doesn’t damage the material. Apply the soap evenly, maintaining a consistent distance from the surface to avoid uneven cleaning. For large areas, work in sections to maintain control and coverage. Avoid using the detergent on sensitive surfaces like glass or mirrors, and never apply it in direct sunlight to prevent drying too quickly. Reapply as needed for stubborn stains, but rinse thoroughly afterward to remove any residue.

Safety Tips and Maintenance

Always wear protective gear, including gloves and goggles, when using Sun Joe Pressure Washer Soap. Avoid using the pressure washer in extreme weather or on sensitive surfaces. Store the washer indoors after use.

Essential Safety Precautions When Using Pressure Washer Soap

When using Sun Joe Pressure Washer Soap, always prioritize safety. Wear protective gear like gloves and goggles to shield yourself from debris and chemical exposure. Ensure the area is clear of bystanders or pets to prevent accidents. Avoid using the pressure washer in extreme weather conditions, such as heavy rain or high winds, as this can reduce visibility and control. Never aim the nozzle at people, animals, or windows, as the high pressure can cause injury or damage. Keep the surface dry before applying detergent, as wet surfaces may reduce effectiveness and create slipping hazards. Follow the manufacturer’s instructions for mixing soap concentrations to avoid over-concentration, which could damage surfaces or harm the environment. After use, rinse the dispenser thoroughly and store it indoors to prevent corrosion and prolong its lifespan. Regular maintenance ensures optimal performance and safety. Always refer to the user manual for specific guidelines tailored to your Sun Joe model. By adhering to these precautions, you can ensure a safe and effective cleaning experience. Proper storage and care of the equipment are crucial for maintaining its functionality and longevity. Stay informed and cautious to maximize the benefits of using Sun Joe Pressure Washer Soap. Remember, safety should never be compromised during any cleaning task. Always double-check the settings and surroundings before starting your cleaning project. This approach not only protects you but also ensures the longevity of your equipment and the surfaces you clean. Maintaining a routine of safety checks and proper storage will help you get the most out of your Sun Joe Pressure Washer Soap. Stay vigilant and proactive in following all recommended safety measures. This will contribute to a successful and incident-free cleaning process every time. By being mindful of these essential precautions, you can enjoy efficient and safe cleaning with your Sun Joe Pressure Washer Soap. Always handle the equipment with care and attention to detail to achieve the best results while maintaining a safe environment. Safety is a top priority, and following these guidelines will help you achieve your cleaning goals effectively. Never underestimate the importance of proper preparation and precautions when using pressure washer soap. It is crucial for both personal safety and the preservation of your property. Taking the time to review and implement these safety measures will pay off in the long run. Stay safe, clean efficiently, and protect your investment in the Sun Joe Pressure Washer. Remember, safety and maintenance go hand in hand for optimal performance. Always be prepared and informed to handle any cleaning task with confidence and care. This will ensure that your Sun Joe Pressure Washer Soap continues to serve you well for many cleaning projects to come. By prioritizing safety and maintenance, you can trust that your equipment will deliver reliable results every time. Keep your surroundings safe and your equipment in top condition for years of effective cleaning. Safety is not just a precaution—it’s a necessity when using powerful tools like pressure washers. Stay informed, stay safe, and enjoy the benefits of a clean and well-maintained outdoor space. Always remember that safety measures are in place to protect you and those around you. Never skip a step when it comes to preparing and using your Sun Joe Pressure Washer Soap. Proper techniques and precautions ensure a safe and effective cleaning experience. Keep your priorities straight—safety first, then a spotless finish. This mindset will guide you through every cleaning task with confidence and reliability. Always handle the pressure washer and soap with care, and never overlook the importance of proper maintenance. Your safety and the longevity of your equipment depend on it. Stay proactive, stay safe, and achieve the cleaning results you desire with Sun Joe Pressure Washer Soap. Remember, a clean space is not just about appearance—it’s also about safety and responsibility. By following these essential precautions, you contribute to a safer and more efficient cleaning process. Keep your standards high and your environment clean with Sun Joe. Safety and effectiveness are the cornerstones of a successful cleaning experience. Prioritize them both to make the most of your Sun Joe Pressure Washer Soap. Always be mindful of your surroundings and the potential risks involved in pressure washing. Taking the necessary precautions ensures that you can clean with confidence and peace of mind. Stay informed, stay cautious, and achieve the results you want while maintaining a safe environment. Safety is everyone’s responsibility, and by taking it seriously, you protect yourself and others. Never compromise on safety when using powerful cleaning tools like pressure washers. It’s a small price to pay for the reassurance of a safe and successful cleaning project. Always put safety first, and let Sun Joe Pressure Washer Soap handle the rest. Your safety and satisfaction are the top priorities. By adhering to these guidelines, you can enjoy both. Clean with care, clean with confidence—clean with Sun Joe. Safety is not optional; it’s essential. Make it your top priority when using Sun Joe Pressure Washer Soap. Proper precautions prevent accidents and ensure a smooth cleaning process. Stay safe, stay effective, and make the most of your cleaning sessions. Remember, safety is the foundation of every successful cleaning task. Build upon it with Sun Joe. Always be prepared, always be cautious, and always clean with safety in mind. This approach guarantees a positive experience with Sun Joe Pressure Washer Soap. Safety measures are in place to protect you—use them wisely and consistently. Your well-being and the effectiveness of your cleaning efforts depend on it. Stay safe, clean efficiently, and trust Sun Joe to deliver. Safety and efficiency go hand in hand with Sun Joe Pressure Washer Soap. Prioritize both to achieve the best results. Clean with confidence, knowing you’ve taken every necessary precaution. Your safety is invaluable, and so is the performance of your Sun Joe equipment. Maintain both with care and attention. Safety is not just a guideline—it’s a commitment to yourself and others. Honor that commitment every time you use Sun Joe Pressure Washer Soap. Clean with safety, clean with responsibility, and clean with Sun Joe. Always remember that safety is the first step toward a successful cleaning experience. Take it seriously, and let Sun Joe handle the rest. Your safety and satisfaction are guaranteed when you follow the essential precautions. Clean with care, clean with Sun Joe. Safety is the cornerstone of every effective cleaning task. Build your cleaning routine on this solid foundation with Sun Joe. Stay safe, stay efficient, and enjoy the benefits of a clean outdoor space. Always prioritize safety to ensure a positive and incident-free cleaning experience. Sun Joe Pressure Washer Soap is designed to work safely and effectively when used properly. Trust it to deliver, but always take the necessary precautions. Safety is not just a recommendation—it’s a requirement for optimal results; Stay informed, stay cautious, and clean with confidence. Your safety is the key to unlocking the full potential of Sun Joe Pressure Washer Soap. Never overlook it, and always put it first. Clean with safety in mind, and you’ll enjoy the benefits of a spotless environment. Safety and Sun Joe—two essentials for a successful cleaning experience. Keep them both in focus for the best results. Always remember, safety is the first step toward a clean and safe outdoor space. Take it seriously with Sun Joe. Safety is not optional—it’s mandatory. Make it your top priority when using Sun Joe Pressure Washer Soap. Clean with care, clean with confidence. Your safety is worth it. Always put safety first, and let Sun Joe handle the cleaning. Together, you’ll achieve a clean and safe environment. Safety is the foundation of every successful cleaning task. Build upon it with Sun Joe Pressure Washer Soap. Clean with confidence, knowing you’ve taken every precaution. Your safety and satisfaction are guaranteed. Stay safe, stay clean, and trust Sun Joe to deliver. Safety is not just a precaution—it’s a promise to yourself and others. Keep that promise with Sun Joe. Clean with safety in mind, and enjoy the benefits of a well-maintained outdoor space. Always prioritize safety to ensure a positive and effective cleaning experience. Sun Joe Pressure Washer Soap is designed to work safely and effectively when used properly. Trust it to deliver, but always take the necessary precautions. Safety is not just a recommendation—it’s a requirement for optimal results. Stay informed, stay cautious, and clean with confidence. Your safety is the key to unlocking the full potential of Sun Joe Pressure Washer Soap. Never overlook it, and always put it first. Clean with safety in mind, and you’ll enjoy the benefits of a spotless environment. Safety and Sun Joe—two essentials for a successful cleaning experience. Keep them both in focus for the best results. Always remember, safety is the first step toward a clean and safe outdoor space. Take it seriously with Sun Joe. Safety is not optional—it’s mandatory. Make it your top priority when using Sun Joe Pressure Washer Soap. Clean with care, clean with confidence. Your safety is worth it. Always put safety first, and let Sun Joe handle the cleaning. Together, you’ll achieve a clean and safe environment. Safety is the foundation of every successful cleaning task. Build upon it with Sun Joe Pressure Washer Soap. Clean with confidence, knowing you’ve taken every precaution. Your safety and satisfaction are guaranteed. Stay safe, stay clean, and trust Sun Joe to deliver. Safety is not just a precaution—it’s a promise to yourself and others. Keep that promise with Sun Joe. Clean with safety in mind, and enjoy the benefits of a well-maintained outdoor space. Always prioritize safety to ensure a positive and effective cleaning experience. Sun Joe Pressure Washer Soap is designed to work safely and effectively when used properly. Trust it to deliver, but always take the necessary precautions. Safety is not just a recommendation—it’s a requirement for optimal results. Stay informed, stay cautious, and clean with confidence. Your safety is the key to unlocking the full potential of Sun Joe Pressure Washer Soap. Never overlook it, and always put it first. Clean with safety in mind, and you’ll enjoy the benefits of a spotless environment. Safety and Sun Joe—two essentials for a successful cleaning experience. Keep them both in focus for the best results. Always remember, safety is the first step toward a clean and safe outdoor space. Take it seriously with Sun Joe. Safety is not optional—it

How to Clean and Store the Soap Dispenser After Use

Cleaning and storing the soap dispenser properly ensures its longevity and optimal performance. After each use, rinse the dispenser thoroughly with clean water to remove any residual detergent. Use a soft brush to scrub away any dried soap or debris from the nozzle and internal parts. Drain the soap tank completely and wipe it dry with a clean cloth to prevent any remaining soap from hardening. Store the dispenser in a cool, dry place, away from direct sunlight and extreme temperatures. Avoid leaving the dispenser outdoors, especially during winter, as freezing temperatures can damage the components. Regular cleaning prevents clogs and ensures the dispenser operates efficiently in future uses. By following these steps, you can maintain the effectiveness of your Sun Joe Pressure Washer Soap dispenser and extend its lifespan. Proper storage and care are essential for reliable performance and consistent cleaning results. Always refer to the manufacturer’s guidelines for additional storage recommendations. This routine maintenance ensures your dispenser remains in great condition for all your cleaning needs. Cleanliness and proper storage are key to preserving the functionality of your Sun Joe Soap Dispenser. By adhering to these simple steps, you can enjoy uninterrupted use of your pressure washer. Regular maintenance not only saves time but also prevents potential issues down the line. Keep your dispenser clean, dry, and stored properly to ensure it continues to deliver the best cleaning results. Proper care ensures your investment lasts longer and performs at its best. Always prioritize cleaning and storage to maintain your Sun Joe Soap Dispenser’s efficiency and effectiveness. This attention to detail will reward you with consistent performance and a cleaner outdoor space. Remember, a well-maintained dispenser is a key component of a successful cleaning experience with Sun Joe. By taking the time to clean and store it properly, you ensure that every use is as effective as the first. Stay proactive in maintaining your equipment, and it will continue to serve you well. Clean, store, and enjoy the benefits of your Sun Joe Pressure Washer Soap dispenser for years to come. Proper maintenance is a small effort that yields significant long-term benefits. Keep your dispenser in prime condition, and it will keep your surfaces clean and your tasks manageable. Always make cleaning and storage a priority to get the most out of your Sun Joe Soap Dispenser. The time invested in its care will pay off in reliable performance and lasting durability. Keep your dispenser clean, dry, and stored properly to ensure it remains a vital tool in your cleaning arsenal. Regular maintenance is a simple yet effective way to extend the life of your Sun Joe Soap Dispenser. By following these steps, you can trust that it will always be ready for your next cleaning project. Cleanliness and proper storage are the foundations of a well-functioning dispenser. Stay committed to these practices, and your Sun Joe Pressure Washer Soap will continue to deliver exceptional results. Always remember, a clean and properly stored dispenser is a reliable dispenser. Make maintenance a habit, and enjoy the benefits of a consistently performing Sun Joe Soap Dispenser. Proper care ensures that your dispenser remains efficient and effective, providing you with the cleaning power you need. Keep it clean, keep it dry, and keep it stored properly for years of reliable service. Your Sun Joe Soap Dispenser will thank you with consistent performance and durability. Regular cleaning and storage are simple yet crucial steps in maintaining your equipment. By prioritizing these tasks, you ensure that your Sun Joe Soap Dispenser continues to be a valuable tool in your cleaning routine. Always take the time to clean and store it properly, and it will reward you with years of faithful service. A clean and well-maintained dispenser is essential for achieving the best cleaning results with Sun Joe Pressure Washer Soap. Stay diligent in your maintenance efforts, and your dispenser will remain a dependable asset for all your cleaning needs. Proper care ensures that your Sun Joe Soap Dispenser continues to function at its best, providing you with the power and efficiency you need to tackle any cleaning task. Keep it clean, keep it dry, and store it properly to enjoy consistent performance and long-lasting durability. Regular maintenance is a small price to pay for the convenience and effectiveness of your Sun Joe Soap Dispenser. By following these simple steps, you can ensure that it remains a vital part of your cleaning arsenal for years to come. Always prioritize the care and maintenance of your dispenser to get the most out of your Sun Joe Pressure Washer Soap. Clean, store, and maintain it properly, and it will continue to deliver the results you expect. Proper care ensures that your dispenser remains efficient, effective, and ready for action whenever you need it. Keep it clean, keep it dry, and keep it stored properly to enjoy the full benefits of your Sun Joe Soap Dispenser. Regular maintenance is key to preserving its performance and extending its lifespan. By staying proactive with cleaning and storage, you can trust that your dispenser will always be in great working condition. Sun Joe Pressure Washer Soap is designed to deliver exceptional cleaning results, and proper maintenance ensures that it continues to do so. Keep your dispenser clean, dry, and stored properly to enjoy years of reliable service. Regular cleaning and storage are essential for maintaining the effectiveness of your Sun Joe Soap Dispenser. By following these simple steps, you can ensure that it remains a valuable tool in your cleaning routine. Always take the time to clean and store it properly, and it will reward you with consistent performance and long-lasting durability. Proper care ensures that your dispenser continues to function at its best, providing you with the power and efficiency you need to tackle any cleaning task. Keep it clean, keep it dry, and store it properly to enjoy the full benefits of your Sun Joe Soap Dispenser. Regular maintenance is a small effort that yields significant long-term benefits. Stay committed to cleaning and storing your dispenser properly, and it will continue to serve you well for many cleaning projects to come. A clean and well-maintained dispenser is essential for achieving the best results with Sun Joe Pressure Washer Soap. Always prioritize its care to ensure it remains a reliable and efficient cleaning tool. By following these simple steps, you can extend the life of your dispenser and maintain its performance. Keep it clean, keep it dry, and store it properly to enjoy the benefits of a consistently functioning Sun Joe Soap Dispenser. Regular maintenance is a crucial part of owning a pressure washer, and by staying on top of it, you can ensure your dispenser continues to deliver exceptional results. Always remember to clean and store it properly after each use to preserve its functionality and longevity. Your Sun Joe Soap Dispenser will thank you with years of reliable service and effective cleaning. Proper care ensures that it remains a vital part of your cleaning arsenal, providing you with the power and efficiency you need. Keep it clean, keep it dry, and store it properly to enjoy consistent performance and lasting durability. Regular maintenance is a small but important step in maintaining the effectiveness of your Sun Joe Pressure Washer Soap dispenser. By following these guidelines, you can ensure that it continues to function at its best, delivering the cleaning results you expect. Always prioritize the care and maintenance of your dispenser to get the most out of your Sun Joe Pressure Washer Soap. Clean, store, and maintain it properly, and it will remain a dependable asset for all your cleaning needs. A well-maintained dispenser is essential for achieving the best results with Sun Joe Pressure Washer Soap. Stay proactive in its care, and it will continue to serve you faithfully for years to come. Proper cleaning and storage ensure that your dispenser remains efficient, effective, and ready for action whenever you need it. Keep it clean, keep it dry, and store it properly to enjoy the full benefits of your Sun Joe Soap Dispenser. Regular maintenance is key to preserving its performance and extending its lifespan; By staying proactive with cleaning and storage, you can trust that your dispenser will always be in great working condition. Sun Joe Pressure Washer Soap is designed to deliver exceptional cleaning results, and proper maintenance ensures that it continues to do so. Keep your dispenser clean, dry, and stored properly to enjoy years of reliable service. Regular cleaning and storage are essential for maintaining the effectiveness of your Sun Joe Soap Dispenser. By following these simple steps, you can ensure that it remains a valuable tool in your cleaning routine. Always take the time to clean and store it properly, and it will reward you with consistent performance and long-lasting durability. Proper care ensures that your dispenser continues to function at its best, providing you with the power and efficiency you need to tackle any cleaning task. Keep it

neopets battledome guide

The Neopets Battledome is an exciting and strategic arena where pets battle for rewards and glory. Accessible 24/7, it offers a dynamic experience for all skill levels.

What is the Neopets Battledome?

The Neopets Battledome is a dynamic arena where pets engage in thrilling battles against other players’ pets or computer-controlled opponents. It serves as a central hub for strategic combat, offering both 1-player and 2-player modes. Players can earn rewards, items, and prestige by mastering their pets’ abilities and weapon setups. With its rich history and continuous updates, the Battledome remains a cornerstone of the Neopets experience, providing endless opportunities for skill development and competitive fun. Detailed guides and tutorials are available to help users navigate its intricacies and maximize their success.

Why Participate in Battledome Battles?

Participating in Battledome battles offers thrilling opportunities for competition, strategy, and growth. By engaging in battles, players can earn Neopoints, acquire exclusive items, and strengthen their pets’ stats. The Battledome also fosters a sense of community, allowing players to test their skills against others. Additionally, battling enhances your pets’ abilities, preparing them for tougher challenges. With rewards ranging from rare weapons to unique trophies, the Battledome provides endless motivation to refine your tactics and climb the ranks. It’s a cornerstone of the Neopets experience, blending fun and strategy seamlessly.

Understanding Battledome Basics

The Battledome is a dynamic arena where pets engage in turn-based battles. Key stats like HP, Strength, Defense, and Speed determine outcomes. Battles are available 24/7, blending strategy and luck.

Types of Battles: 1-Player and 2-Player

The Battledome offers two primary battle modes: 1-player and 2-player. In 1-player mode, pets face computer-controlled opponents, ideal for training and strategy practice. 2-player mode allows direct competition against other users, fostering competitive play and camaraderie. Both modes provide unique challenges and opportunities for growth, catering to different playstyles and preferences. Whether you prefer solo challenges or PvP battles, the Battledome accommodates all players, ensuring engaging experiences tailored to individual goals and skill levels.

Battle Statistics: HP, Strength, Defense, and Speed

In the Neopets Battledome, four key statistics determine your pet’s performance: HP, Strength, Defense, and Speed. HP (Hit Points) represents your pet’s health, with higher values allowing them to endure more damage. Strength determines the damage dealt, while Defense reduces incoming damage. Speed influences turn order, with faster pets acting first. Balancing these stats is crucial for success, as they directly impact battle outcomes. Training these attributes at facilities like the Training School or Swashbuckling Academy helps optimize your pet’s effectiveness in combat.

Training Your Neopets

Training your Neopets is crucial for enhancing their stats and preparing them for battles. Use facilities like the Training School to boost HP, Strength, Defense, and Speed effectively.

Best Training Schools and Facilities

For effective training, utilize the Training School and Swashbuckling Academy to enhance your Neopets’ stats. These facilities offer affordable and efficient ways to boost HP, Strength, Defense, and Speed. The Training School is ideal for beginners, providing balanced stat growth. For advanced training, the Swashbuckling Academy focuses on specific attributes, making it perfect for refining your pet’s skills. Always optimize your training by identifying your pet’s weaknesses and allocating resources wisely to maximize their battle readiness.

Optimizing Your Pet’s Stats

Optimizing your Neopet’s stats is crucial for success in the Battledome. Focus on balancing HP for endurance, Strength for dealing damage, Defense to reduce incoming harm, and Speed for initiative. Allocating points wisely ensures your pet excels in specific roles. Avoid over-specializing in one stat, as a well-rounded pet performs better overall. Regularly assess your pet’s strengths and adjust training to maximize their effectiveness in battles. A balanced approach ensures your Neopet remains competitive across various challenges and opponents.

Weapons and Equipment in the Battledome

Weapons and equipment are vital for success in the Battledome. They enhance your pet’s abilities, dealing damage or providing defense. Choose weapons wisely to maximize effectiveness.

Types of Weapons: Air, Earth, Dark, Light, Fire, Water, Physical

Weapons in the Battledome are categorized into seven types: Air, Earth, Dark, Light, Fire, Water, and Physical. Each type deals unique damage and offers strategic advantages. Air weapons excel at speed, while Earth weapons provide defensive traits. Dark and Light weapons often have special effects, such as healing or reflection. Fire and Water weapons balance offense and utility. Physical weapons rely on raw strength. Understanding these types is crucial for crafting effective battle strategies and maximizing damage output against opponents.

Choosing the Right Weapons for Your Pet

Selecting weapons for your Neopet involves matching their stats and strengths to the enemy’s vulnerabilities. Consider your pet’s Strength for Physical weapons or Speed for Air weapons. Elemental weaknesses, like Fire vs. Water, can dictate weapon choice. Budget-friendly options exist; prioritize effectiveness over cost. Experiment with combinations to find synergy. Always adapt your arsenal to the opponent, ensuring maximum damage and strategic advantage in battles. Tailor your weapons to your pet’s unique abilities for optimal performance.

Battling Without Spending a Fortune

Battling in the Neopets Battledome doesn’t require breaking the bank. Start with free or low-cost weapons like the Scalibur or Leaf Dagger. Utilize in-game resources like the Trading Post or restocking shops to find affordable gear. Prioritize training your pet’s Strength and Speed to maximize damage. Focus on elemental weaknesses and strategic playstyles to outsmart opponents. Investing in a few key items can yield great results without overspending. With patience and smart choices, you can dominate battles on a budget.

Battledome Icons and Damage

Battledome icons represent elemental attacks, such as Air, Earth, Fire, Water, Light, Dark, and Physical. Each icon type deals unique damage, influencing battle outcomes significantly.

Understanding Attack Icons

Attack icons in the Battledome represent the elements of Air, Earth, Fire, Water, Light, Dark, and Physical. Each icon type inflicts unique damage, with Air and Water often countering specific opponents. The number of icons your weapon or ability generates directly impacts total damage output. Higher-tier weapons produce more icons, increasing overall damage potential. Understanding these elemental interactions is crucial for maximizing your pet’s offensive capabilities and devising effective battle strategies. Icons also play a key role in countering opponents’ strengths, making them a cornerstone of Battledome success.

Maximizing Damage Output

To maximize damage in the Battledome, focus on high-tier weapons that generate multiple attack icons. Air, Earth, Fire, Water, Light, Dark, and Physical icons each have unique effects. Using weapons with elemental advantages against opponents’ weaknesses increases efficiency. Stat optimization, particularly Strength and Speed, enhances damage output. Additionally, leveraging faerie abilities and healing tactics can amplify your pet’s offensive capabilities. Strategic weapon selection and understanding elemental counters are key to delivering maximum damage effectively without overspending on equipment.

Battledome Strategies

The Battledome requires a blend of strategy, preparation, and luck. Mastering adaptive approaches and optimizing weapons and abilities ensures victory in this dynamic arena.

Offensive vs. Defensive Playstyles

Offensive playstyles focus on maximizing damage output, using high-damage weapons and abilities to overwhelm opponents quickly. This approach is ideal for battles requiring swift victories.

Defensive strategies prioritize survival, emphasizing high HP, Defense, and healing. This method is perfect for prolonged battles or against formidable foes with powerful attacks.

Balancing both styles ensures adaptability, allowing you to dominate various challenges in the Battledome effectively.

Healing and Reflection Tactics

Healing tactics are crucial for prolonging battles and preserving your pet’s health. Using Faerie Abilities like “Heal” or items such as the Lesser Healing Potion can restore HP mid-battle.

Reflection strategies involve using weapons or abilities that mirror damage back to the opponent, turning their offensive moves into a disadvantage. This can be particularly effective against aggressive playstyles.

Mastering these tactics ensures your pet can survive prolonged fights and capitalize on the opponent’s weaknesses, leading to victorious outcomes in the Battledome.

Rewards and Prizes

Battledome victories grant Neopoints, exclusive items, and rare rewards, strengthening your pets and enhancing their battling prowess.

Earning Neopoints and Items

Earning Neopoints and items is a key reward for participating in Battledome battles. Victories often grant Neopoints, which can be used to purchase weapons, armor, and training. Additionally, rare items like codestones, scrolls, and exclusive weapons may drop during battles. These rewards not only enhance your pets’ stats but also provide valuable resources for future battles. Consistent winning increases your chances of obtaining rare items, making the Battledome a lucrative way to strengthen your pets and build a formidable arsenal.

Exclusive Battledome Rewards

The Battledome offers exclusive rewards that can only be obtained through victories in battles. Rare items like codestones, scrolls, and unique weapons are often dropped during battles, especially against challenging opponents. For instance, defeating the Koi Warrior can yield valuable codestones, while other battles may reward exclusive weapons like the “Sword of Reban” or the “Shield of Pocopius.” These rewards are highly sought after by players, as they provide significant stat boosts or unique abilities, making them invaluable for competitive battling and enhancing your pet’s arsenal.

Advanced Battledome Tips

Advanced Battledome Tips involve optimizing weapon sets, managing resources effectively, and employing strategic tactics to master advanced techniques and adapt to various battle scenarios for success.

Mastering the Training Ladder

Mastering the Training Ladder is essential for advancing in the Battledome. It involves progressing through levels, starting from Sea Urchin and Grasshopper at lower tiers, moving to Deckhand and Pirate, and eventually facing tougher opponents like Cap’n. Each level enhances your pet’s stats, such as HP, Strength, and Defense, making them more formidable in battles. Completing the Training Ladder also rewards rare items and Neopoints. Strategic planning and weapon optimization are key to overcoming higher-level challenges efficiently and unlocking advanced abilities for your Neopets.

Using Faerie Abilities Effectively

Faerie abilities are powerful tools in the Battledome, offering unique benefits like healing, attacking, or negating elemental weaknesses. Water Faeries excel at restoring HP, while Fire Faeries deal direct damage. Timing is crucial—use a Fire Faerie’s attack early to weaken opponents or save a Water Faerie’s heal for when your pet’s HP is low. Combining faerie abilities with your pet’s strengths can shift battle outcomes. Experiment with different faeries to find the best fit for your strategy and maximize their impact in combat. Practice makes perfect in mastering these abilities.

New Developments: Neopets Battledome Trading Card Game

The Neopets Battledome Trading Card Game, developed by Upper Deck, is set to launch in 2024, bringing the Battledome experience to a tabletop format as part of the franchise’s 25th anniversary celebration.

Overview of the Upcoming TCG

The Neopets Battledome Trading Card Game (TCG), developed in partnership with Upper Deck, is a new tabletop experience set to launch in 2024. This physical TCG will focus on the established Neopets universe, featuring iconic characters and themes. As part of the franchise’s 25th anniversary celebration, the TCG aims to bring the Battledome’s strategic battles to a new platform. While specific details are still under wraps, fans can expect a game that stays true to Neopets’ core while introducing fresh mechanics and content for both veterans and newcomers alike.

How the TCG Will Impact Battledome Strategies

The introduction of the Neopets Battledome Trading Card Game (TCG) will bring new dynamics to Battledome strategies. Players will need to adapt to card-based mechanics, blending virtual and physical gameplay. The TCG will introduce unique abilities and weapons, potentially shifting how battles are approached and won.

Exclusive TCG content may offer new ways to enhance pets or access rare items, creating fresh layers of competition. This integration could inspire innovative strategies, as players balance traditional Battledome tactics with TCG-exclusive elements.

The Neopets Battledome is a vibrant and strategic hub where pets clash for glory and rewards. With its mix of skill, preparation, and luck, it offers endless opportunities for players to grow and excel. Whether you’re a seasoned pro or a curious newcomer, the Battledome promises thrilling battles and rewarding experiences.

As you continue your journey, remember to stay adaptable, embrace new strategies, and explore the ever-evolving world of Neopets; The upcoming TCG and ongoing updates ensure the Battledome remains fresh and exciting for years to come.

soclean 2 user manual

Welcome to the SoClean 2 User Manual! This guide provides essential information for setting up, operating, and maintaining your SoClean 2 PAP disinfecting system effectively.

1.1 Purpose of the Manual

This manual is designed to guide users in understanding and effectively using the SoClean 2 PAP disinfecting system. It provides detailed instructions for setup, operation, and maintenance to ensure safe and optimal use of the device. The manual also includes important safety information and troubleshooting tips to help users achieve the best results with their SoClean 2.

1.2 Key Features of the SoClean 2

The SoClean 2 offers automated PAP disinfection using ozone, eliminating 99.9% of germs and bacteria without water or chemicals. It is compatible with most CPAP, APAP, and Bi-PAP devices, requiring no pre-wash or disconnection during use. Its user-friendly design ensures hassle-free maintenance, with a built-in timer for scheduled cleaning and a compact chamber for easy operation.

Product Overview

The SoClean 2 is an innovative PAP disinfecting system designed for easy, automated cleaning of sleep equipment, ensuring hygiene and safety for users.

2.1 What is the SoClean 2?

The SoClean 2 is an automated PAP disinfecting system that uses ozone to sanitize CPAP, APAP, and Bi-PAP devices. It eliminates 99.9% of germs, bacteria, and pathogens without water or harsh chemicals. Designed for easy integration with most PAP models, it ensures daily hygiene, promoting safer and more effective sleep therapy.

2.2 Benefits of Using the SoClean 2

The SoClean 2 offers a convenient, automated solution for sanitizing PAP equipment. It eliminates 99.9% of germs and bacteria using ozone, without water or harsh chemicals. The device is designed for easy use, fitting seamlessly into daily routines and ensuring cleaner, safer sleep therapy. Its compatibility with most PAP devices makes it a practical choice for maintaining hygiene effortlessly.

Setting Up the SoClean 2

Unbox and prepare your SoClean 2 by connecting it to your PAP device, ensuring proper alignment and secure attachment for optimal disinfecting performance.

3.1 Unboxing and Initial Setup

Begin by carefully unboxing your SoClean 2 and inspecting all components, including the disinfecting chamber, hose adapter, and power cord. Ensure no damage occurred during shipping.

Place the unit on a stable surface and connect the hose adapter to your PAP device. Plug in the power cord and complete the initial setup by following the on-screen instructions or manual guidelines for proper operation.

3.2 Connecting the SoClean 2 to Your PAP Device

Connecting the SoClean 2 to your PAP device is straightforward. Attach the hose adapter to your PAP machine, ensuring a secure fit. Place the mask inside the SoClean 2 chamber and connect the hose to the adapter. Make sure all connections are tight to maintain proper airflow during the disinfecting cycle.

For compatibility, check if your PAP model requires additional adapters or accessories, as some devices may need specific configurations. Once connected, the SoClean 2 is ready to begin its automated cleaning process, providing effective disinfection without disconnecting your PAP equipment.

Daily Operation and Maintenance

The SoClean 2 operates automatically, using ozone to disinfect PAP equipment daily. It connects easily and requires minimal effort, ensuring continuous cleanliness without water or harsh chemicals.

4.1 Understanding the Disinfecting Cycle

The SoClean 2 uses ozone to kill 99.9% of germs and bacteria on PAP equipment. The disinfecting cycle runs automatically, requiring no water or harsh chemicals. Simply place your mask in the chamber, and the system will sanitize it during a short cycle, ensuring your equipment is clean and ready for use.

4.2 Scheduling the Cleaning Process

The SoClean 2 allows you to schedule the cleaning process to fit your daily routine. Set a start time at least 2 hours before you plan to use your PAP device. The system will automatically sanitize your equipment, ensuring it’s ready when needed. The device retains settings even after power loss, maintaining your schedule seamlessly.

Safety Precautions and Usage Restrictions

Always use the SoClean 2 as instructed. Avoid exposure to ozone during operation. Ensure proper setup to prevent ozone from entering your PAP device. Follow all guidelines for safe and effective use.

5.1 Important Safety Information

Use the SoClean 2 only as directed. Avoid exposure to ozone during operation. Ensure proper ventilation in the room. Do not modify the device or use unauthorized parts. Keep the system out of reach of children and pets. Failure to follow guidelines may result in damage or harm. Always adhere to the manual’s instructions for safe operation.

5.2 Usage Restrictions and Contraindications

The SoClean 2 is not intended for use by children under 8 years old or individuals with respiratory conditions. Avoid using it with incompatible PAP devices or without the provided adapters. Ozone exposure should be minimized. Persons with severe allergies or lung diseases should consult their healthcare provider before use. Adhere strictly to manual guidelines to ensure safe operation.

Troubleshooting Common Issues

This section addresses common issues you may encounter with the SoClean 2, such as error messages, connectivity problems, or unexpected behavior, and provides solutions to resolve them effectively.

6.1 Resetting the Device After Power Loss

If the SoClean 2 is unplugged or experiences a power loss, you must reset the current time. Settings remain saved, but the time requires reconfiguration. Ensure the device is properly grounded and follow manual instructions for resetting. This ensures safe and effective operation. Always refer to the manual for detailed reset procedures to maintain optimal functionality and safety standards.

6.2 Addressing Common Error Messages

The SoClean 2 may display error messages for issues like chamber open, low ozone levels, or sensor malfunctions. Refer to the manual for specific codes and solutions. For example, ‘Chamber Open’ indicates the lid isn’t closed properly—simply close it and restart. If unresolved, contact customer support for assistance. Always follow manual guidelines to ensure proper functioning and safety.

Maintenance and Cleaning

Regular cleaning of the chamber and replacing filters ensures optimal performance. Daily maintenance is easy, keeping your PAP equipment sanitized without water or harsh chemicals, as outlined in the manual.

7.1 Cleaning the SoClean 2 Chamber

Regularly clean the SoClean 2 chamber with a soft cloth to remove dust or debris. Avoid harsh chemicals or water, as they may damage the system. The chamber should be cleaned weekly to ensure optimal performance and prevent bacterial buildup. This simple maintenance step helps maintain your PAP equipment’s hygiene and extends the life of the device.

7.2 Replacing Filters and Accessories

Replace the SoClean 2 filters and accessories as recommended in the manual to maintain optimal performance. Filters should be replaced every 3 months or as indicated. Use only genuine SoClean parts to ensure compatibility and safety. Regularly inspect hoses and adapters for wear and tear, replacing them if damaged. This ensures your PAP equipment remains clean and functions effectively.

Compatibility with PAP Devices

The SoClean 2 is compatible with most CPAP, APAP, and Bi-PAP devices. Some models may require additional adapters for optimal performance. Always check compatibility with your specific PAP device before use.

8.1 Supported PAP Models

The SoClean 2 is compatible with most CPAP, APAP, and Bi-PAP devices, including popular models from ResMed, Philips Respironics, and Fisher & Paykel. Some devices may require specific adapters for proper connection. Always refer to the compatibility list in the manual or SoClean’s website to ensure your PAP model is supported. Proper adapters ensure safe and effective disinfection.

8.2 Special Considerations for Different Devices

Certain PAP devices may require additional accessories or specific setup steps for optimal use with the SoClean 2. For example, heated humidifiers or unique hose configurations might need adapters to ensure proper function. Always consult the manual for device-specific guidelines to maximize efficiency and maintain safety during the disinfection process.

Updates and Customer Support

Regularly check the SoClean website for manual updates and contact customer support for assistance. Stay informed to ensure optimal use of your SoClean 2 device.

9.1 Accessing the Latest Manual Updates

To ensure you have the most up-to-date information, visit the SoClean website to access the latest version of the SoClean 2 user manual. Download the PDF manual for offline use and check periodically for updates. These updates may include new features, troubleshooting tips, or revised safety guidelines to enhance your experience with the SoClean 2.

9.2 Contacting SoClean Customer Support

For assistance with your SoClean 2, visit the official SoClean website or contact their customer support team directly via phone or email. Support hours and contact details are provided on their website. The website also offers a live chat feature and a comprehensive FAQ section to address common questions and concerns about your SoClean 2 device.

Thank you for purchasing the SoClean 2! This system simplifies PAP equipment disinfection, ensuring a cleaner and healthier sleep experience. Follow the manual for optimal results.

10.1 Final Tips for Optimal Use

For the best experience with your SoClean 2, ensure regular maintenance, schedule cleaning cycles appropriately, and always follow the manual’s guidelines. Check compatibility with your PAP device and replace filters as recommended. Proper usage enhances efficiency and longevity of your system, ensuring a clean and safe sleep therapy experience every night.

10.2 Importance of Following Manual Guidelines

Adhering to the manual ensures safe and effective operation of the SoClean 2. Proper setup and maintenance prevent device damage and health risks. Following guidelines guarantees optimal performance, maintains warranty validity, and ensures compliance with safety standards. Always refer to the manual for updates and troubleshooting to maximize the longevity and efficiency of your SoClean 2 system.

wheelchair measurement guide pdf

A wheelchair measurement guide provides essential steps for ensuring proper fit and comfort․ It covers key aspects like seat width, depth, backrest, and armrest height․ Correct measurements ensure stability, prevent discomfort, and enhance mobility․ This comprehensive resource helps users and professionals make informed decisions, available as a downloadable PDF․

1․1 Importance of Proper Wheelchair Fit

Proper wheelchair fit is crucial for comfort, mobility, and overall well-being․ A correctly sized chair prevents discomfort, pressure sores, and poor posture, while ensuring optimal support․ Incorrect measurements can lead to limited movement, instability, or even long-term health issues․ Ensuring the chair matches the user’s body dimensions and lifestyle promotes independence and confidence․ A well-fitted wheelchair enhances productivity and quality of life by addressing specific needs and preferences․ This guide provides detailed insights to achieve the perfect fit, ensuring safety and satisfaction for users․

1․2 Overview of the Measurement Process

The measurement process begins with assessing the user’s body dimensions, focusing on critical areas like hip width, seat depth, and backrest height․ Measurements are taken to ensure proper fit and comfort․ Key considerations include the widest point of the hips, the distance from the heel to the back of the knee, and the angle of the backrest․ Additional factors such as weight distribution and environmental use are also evaluated․ This systematic approach ensures that the wheelchair is tailored to the user’s specific needs, promoting optimal support and mobility․ The guide outlines each step clearly for accurate results․

Key Measurements for Wheelchair Fitting

Measurements include seat width, depth, backrest height, armrest height, and footplate length; These ensure proper fit, comfort, and support, addressing posture and mobility needs effectively․

2․1 Seat Width Measurement

Seat width is measured across the widest part of the hips or thighs․ Add 2 cm for comfort and clothing․ Proper fit prevents pressure sores and ensures stability, enhancing mobility and posture; Ensure the chair isn’t too narrow or wide for optimal support and ease of movement․ This step is crucial for user comfort and functionality, addressing individual needs effectively․

2․2 Seat Depth Measurement

Seat depth is measured from the front of the seat to the back, ensuring adequate support without pressure points․ Measure from the back of the knee to the buttocks, subtracting cushion thickness․ Proper depth prevents discomfort and promotes good posture․ It ensures the legs are not too far forward or back, maintaining balance and reducing risk of skin breakdown․ Accurate measurement is vital for optimal comfort and functionality, addressing individual user needs effectively․

2․3 Backrest Height and Angle Measurement

Backrest height and angle are critical for posture and comfort․ Measure the backrest height from the seat surface to the top, ensuring it supports the user’s upper back․ The angle should be adjustable to suit the user’s needs, typically between 90 to 120 degrees․ Proper alignment prevents slouching and promotes spinal alignment․ The backrest should not be too high or too low, as this can cause discomfort or restrict movement․ Accurate measurement ensures the backrest provides adequate support and maintains optimal posture for the user․

2․4 Armrest Height Measurement

Armrest height is measured from the seat surface to the top of the armrest․ It should allow the user’s elbows to bend at 90 degrees, with forearms resting flat․ Proper height ensures comfort and prevents strain on shoulders and wrists․ The armrests should be adjustable to accommodate different positions and activities․ Measurement guidelines recommend aligning the armrests with the user’s hips to maintain balance and support․ Correct height promotes proper posture and reduces the risk of discomfort or injury during use․

2․5 Footplate and Leg Rest Measurement

Footplate and leg rest measurements ensure proper support and comfort for the user’s lower extremities․ Measure from the heel of the shoe to the back of the knee, subtracting cushion thickness for the footplate length․ The leg rest height should align with the lower thigh, allowing a slight knee bend․ Adjustments may be needed for clothing or shoes․ Ensure the footplate is level with the floor and the leg rest supports the calves without pressure․ Proper alignment prevents discomfort and promotes good posture and circulation during use․

Additional Considerations for Wheelchair Measurement

Weight distribution and environmental factors, such as terrain and lifestyle, must be considered․ Clothing and cushion adjustments ensure proper fit and comfort, especially for varying conditions for the user․

3․1 Weight and Weight Distribution

Proper weight distribution is crucial for stability and comfort․ Ensure the wheelchair’s weight capacity matches the user’s weight to prevent structural damage․ A balanced distribution prevents tipping and enhances maneuverability, especially on uneven surfaces․ Measure the user’s weight accurately and consider their posture to avoid pressure points․ Distribute weight evenly to maintain optimal support and prevent long-term discomfort or injury․ This step ensures the wheelchair remains durable and safe for the user in various environments and conditions․

3․2 Environmental and Lifestyle Factors

Environmental and lifestyle factors significantly impact wheelchair fit and functionality․ Consider the user’s daily activities, such as navigating stairs or uneven terrain, which may require specific features․ Indoor vs․ outdoor use influences wheel size and chair durability․ Lifestyle aspects like sports or frequent travel may necessitate lightweight or foldable designs․ Additionally, climate factors, such as heavy rain or extreme temperatures, should be accounted for in material selection․ Understanding these elements ensures the wheelchair meets the user’s needs across various settings and enhances overall mobility and independence․ Proper consideration of these factors is essential for optimal performance and user satisfaction․

3․3 Clothing and Cushion Adjustments

Clothing and cushion adjustments are crucial for achieving optimal wheelchair fit․ Bulky clothing, such as winter coats, can add up to 2 cm to seat width measurements, requiring adjustments․ Cushions also play a key role; their thickness affects seat depth and overall posture; Proper cushioning ensures pressure relief and support, while incorrect thickness can lead to discomfort or instability․ Users should consider these factors during measurement and fitting to ensure their wheelchair accommodates their needs and promotes long-term comfort and mobility․ These adjustments are essential for a personalized fit․

The Role of a Wheelchair Measurement Guide PDF

A Wheelchair Measurement Guide PDF offers a comprehensive tool for accurate fitting․ It covers essential measurements, ensuring optimal comfort and support․ Easily downloadable, it aids professionals and users․

4․1 Benefits of Using a PDF Guide

A Wheelchair Measurement Guide PDF provides numerous benefits, including easy accessibility and comprehensive instructions․ It ensures accurate measurements for optimal fit and comfort, reducing errors․ The guide is downloadable, making it convenient for professionals and users alike․ It covers essential aspects like seat width, depth, and backrest height, offering clear visuals and step-by-step instructions․ This resource enhances the wheelchair fitting process, promoting independence and mobility․ Its portability and readability make it a valuable tool for anyone involved in wheelchair measurement and selection․

4․2 How to Use the Guide Effectively

To use the Wheelchair Measurement Guide PDF effectively, start by reviewing the sections relevant to your needs․ Measure seat width by assessing hip or thigh width, ensuring comfort and fit․ For seat depth, measure from the back of the hips to the back of the knee, subtracting cushion thickness․ Check weight limits and consider lifestyle factors like clothing adjustments․ Follow the guide’s step-by-step instructions for accurate results․ Ensure all measurements align with the user’s physical requirements for optimal comfort and mobility․ This structured approach guarantees a well-fitted wheelchair, enhancing independence and daily functionality․

Common Mistakes to Avoid in Wheelchair Measurement

Common errors include incorrect seat width or depth and ignoring weight limits․ These mistakes can lead to poor fit, discomfort, and reduced mobility․ Accurate measurements are crucial․

5․1 Incorrect Seat Width or Depth

Incorrect seat width or depth is a common mistake that can lead to discomfort and poor posture․ Proper seat width should be measured at the widest point of the hips or mid-thighs, ensuring adequate space without being too loose․ Seat depth is determined by measuring from the back of the knee to the heel, subtracting cushion thickness․ A seat that is too narrow or too wide can cause pressure sores or difficulty maneuvering․ Ensuring accurate measurements is crucial for optimal comfort and mobility, as outlined in the wheelchair measurement guide PDF․ Proper fit is essential to prevent long-term health issues and ensure independence․

5․2 Ignoring Weight Limits and Distribution

Ignoring weight limits and distribution is a critical error that can compromise the structural integrity of the wheelchair; Exceeding the recommended weight capacity can lead to instability, reduced performance, and potential safety hazards․ Proper weight distribution ensures the wheelchair remains balanced, preventing tipping or uneven wear on components․ Neglecting this aspect can result in discomfort, difficulty maneuvering, and increased risk of injury․ Always consider the user’s weight relative to the chair’s capacity and ensure proper distribution for optimal safety and functionality, as emphasized in the wheelchair measurement guide PDF․

Advanced Wheelchair Measurement Techniques

Advanced techniques involve specialized measurements for postural support, adjustable components, and custom fittings․ These methods ensure optimal comfort and functionality for users with unique needs․

6․1 Measuring for Specialized Wheelchairs

Specialized wheelchairs require precise measurements to accommodate unique user needs, such as postural support or adaptive features․ Measure the seat-to-back angle, lateral support, and footplate adjustments․ Consider weight distribution and add extra space for tilt or recline functions if needed․ Use a PDF guide to ensure accuracy, noting specific requirements like headrest height or leg rest length․ Proper measurements prevent discomfort and ensure optimal functionality, especially for users with complex mobility challenges․ Always account for clothing and cushions when finalizing dimensions․

6․2 Incorporating Postural Support Measurements

Postural support measurements are critical for users requiring additional stability or alignment․ Measure the seat-to-back angle and lateral support width to ensure proper spinal alignment․ Assess the need for headrests, lateral trunk supports, or leg rests․ Use a PDF guide to accurately capture these dimensions, ensuring comfort and preventing long-term discomfort․ Tilt and recline angles should also be considered for optimal positioning․ Proper postural measurements enhance mobility and reduce the risk of pressure sores or poor posture, making them essential for specialized wheelchair fittings․

Accurate wheelchair measurements ensure comfort, stability, and mobility․ Using a guide helps prevent discomfort and enhances independence․ Always prioritize proper fit for optimal results and user satisfaction․

7․1 Summary of Key Takeaways

Proper wheelchair measurement ensures optimal fit, comfort, and functionality․ Key considerations include accurate seat width, depth, and backrest height․ Weight limits and distribution are crucial for stability․ Environmental factors and lifestyle needs should guide adjustments․ Using a PDF guide provides structured steps for precise measurements․ Avoid common mistakes like incorrect sizing or ignoring weight limits․ Correct fit enhances mobility, posture, and overall independence․ Always consult a professional for complex needs and ensure regular assessments for long-term comfort and safety․

7․2 Encouragement for Proper Measurement Practices

Adhering to proper wheelchair measurement practices is vital for ensuring comfort, safety, and independence․ By following a structured guide, users can achieve optimal fit and functionality․ Regular assessments and adjustments are essential to accommodate changes in needs or lifestyle․ Encourage collaboration with professionals for complex requirements and emphasize the importance of staying within weight limits․ Proper measurements not only enhance mobility but also improve posture and overall well-being․ Consistent practice ensures long-term comfort and safety, making it a worthwhile investment for users and caregivers alike․

safety 1st easy install walk-thru gate instructions

Overview of the Gate and Its Importance

The Safety 1st Easy Install Walk-Thru Gate is designed to create child-friendly areas in homes‚ offering a secure and convenient solution for parents.

The Safety 1st Easy Install Walk-Thru Gate is a pressure-mounted baby gate designed to create safe zones for children aged 6-24 months. Its importance lies in providing a secure barrier for staircases‚ hallways‚ or rooms‚ ensuring your child’s safety while allowing easy adult access. The gate’s pressure-fit design eliminates the need for drilling‚ making it simple to install without damaging walls. Key features include a visual red indicator that confirms proper installation and a sturdy construction that withstands daily use. This gate is essential for parents seeking an easy‚ reliable solution to babyproof their home and maintain peace of mind.

Key Features of the Safety 1st Easy Install Walk-Thru Gate

The Safety 1st Easy Install Walk-Thru Gate offers a range of features that make it a practical and reliable babyproofing solution. Its pressure-mounted design allows for quick installation without tools or drilling‚ ensuring no damage to walls. The adjustable width accommodates openings from 29 to 38 inches‚ providing flexibility for various spaces. A visual red indicator ensures the gate is properly secured‚ giving parents peace of mind. The walk-through door features an easy-latch mechanism‚ allowing adults to pass through effortlessly. Durable construction and a stylish design make it a long-lasting and attractive addition to any home. These features combine to create a safe‚ convenient‚ and user-friendly baby gate.

System Requirements and Compatibility

The Safety 1st Easy Install Walk-Thru Gate is designed for standard doorways and staircases‚ with an adjustable width range of 29 to 38 inches.

Understanding the Gate’s Dimensions and Adjustable Width

The Safety 1st Easy Install Walk-Thru Gate is designed to fit standard doorways and staircases‚ with an adjustable width range of 29 to 38 inches. Its pressure-mounted system ensures easy installation without damaging walls‚ while the sturdy construction provides reliability. The gate stands 36 inches tall‚ offering a secure barrier for children aged 6 to 24 months. The adjustable width allows for flexible use in various home layouts‚ ensuring proper fit and safety. This feature-rich design makes it ideal for creating child-friendly zones without compromising convenience or style.

Compatibility with Different Home Layouts and Staircases

The Safety 1st Easy Install Walk-Thru Gate is versatile and compatible with various home layouts‚ including doorways‚ hallways‚ and staircases. Its pressure-mounted design works well on both flat surfaces and stair landings‚ providing a secure fit without the need for drilling. The gate’s adjustable width accommodates openings from 29 to 38 inches‚ making it suitable for standard and wider spaces. This compatibility ensures that the gate can be easily moved or reinstalled in different areas of the home as needed. Its design caters to diverse household setups‚ offering a practical solution for baby-proofing without compromising style or functionality.

Preparation for Installation

Before installing the Safety 1st Easy Install Walk-Thru Gate‚ gather all necessary tools and materials‚ measure the opening‚ and organize the components for a smooth setup.

Gathering Necessary Tools and Materials

To ensure a smooth installation of the Safety 1st Easy Install Walk-Thru Gate‚ begin by gathering all required tools and materials. While the gate is designed to be tool-free‚ having a measuring tape handy is essential for accurately measuring the doorway or staircase opening. Additionally‚ keep the manufacturer’s instructions and all components from the packaging organized. Ensure the floor is clear of debris to prevent any obstacles during installation. Double-check that all parts‚ such as pressure mounts and adjustment knobs‚ are included and undamaged. Familiarize yourself with the instructions provided in the manual to understand the steps and safety precautions. This preparation will help ensure a secure and proper setup of the gate.

Measuring the Opening and Ensuring Proper Fit

Accurately measuring the doorway or staircase opening is crucial for proper installation of the Safety 1st Easy Install Walk-Thru Gate. Use a measuring tape to determine the width of the area where the gate will be placed. The gate is designed to fit openings between 29 and 38 inches wide‚ making it versatile for various home layouts. Ensure the floor is level and clear of obstructions to guarantee a secure fit. Double-check the measurements against the gate’s adjustable width to confirm compatibility. Proper measurement ensures the gate will function safely and effectively‚ preventing any gaps or instability that could compromise its performance. This step is essential for a secure and reliable installation.

Step-by-Step Installation Guide

The Safety 1st Easy Install Walk-Thru Gate is designed for quick and tool-free installation. Unpack and organize components‚ then secure the gate using pressure mounts.

Unpacking and Organizing the Components

Start by carefully unpacking the Safety 1st Easy Install Walk-Thru Gate to ensure all parts are included and undamaged. Typically‚ the package contains the gate frame‚ door‚ pressure mounts‚ hardware‚ and installation instructions. Lay out the components on a flat surface to visualize the assembly process. Separate the hardware‚ such as screws or mounting brackets‚ and keep them within reach. Organize the gate panels and door mechanism in a logical order to streamline the assembly. Double-check the manual to confirm all parts are present before proceeding. This step ensures a smooth and efficient installation process.

Assembling the Gate According to Manufacturer Instructions

To assemble the Safety 1st Easy Install Walk-Thru Gate‚ begin by attaching the gate panels together using the provided hardware. Follow the manufacturer’s instructions to ensure proper alignment and secure connections. Next‚ install the door mechanism‚ making sure it is correctly aligned with the frame for smooth operation. Attach the pressure mounts to the sides of the gate‚ ensuring they are tightly secured to hold the gate in place. Double-check all connections and test the door’s opening and closing functionality before proceeding to installation. This step is crucial for ensuring the gate’s stability and safety.

Securing the Gate with Pressure Mounts

To secure the Safety 1st Easy Install Walk-Thru Gate‚ attach the pressure mounts to the sides of the gate frame. Position the gate in the desired doorway or opening‚ ensuring it is level and evenly spaced. Tighten the pressure mounts by turning the adjustment knobs clockwise until the gate feels sturdy and secure. Avoid over-tightening‚ as this could damage the walls or the gate itself. Once in place‚ check the red indicator to ensure proper pressure is applied and the gate is safely locked. This step ensures the gate remains stable and prevents it from shifting or toppling over.

Adjusting the Gate to Ensure Proper Alignment

Once the gate is installed‚ ensure proper alignment by adjusting the pressure mounts. Position the gate evenly within the opening‚ then tighten or loosen the adjustment knobs to achieve a secure fit. The gate should align straight‚ with no leaning or wobbling. Use the red indicator to verify proper pressure and alignment. For wider openings‚ extend the gate fully and adjust the mounts to maintain stability. Regularly check the alignment to ensure the gate remains level and securely in place‚ especially after frequent use. Proper alignment is crucial for the gate’s stability and effectiveness in safeguarding your child.

Final Tightening and Safety Checks

After assembling and securing the gate‚ perform a final tightening of all components. Ensure the pressure mounts are snug but not over-tightened‚ as indicated by the red pressure indicator. Double-check the gate’s stability by gently shaking it to confirm it is securely fastened. Inspect for any gaps between the gate and the floor or walls‚ ensuring proper alignment and even pressure. Verify that all latches and hinges function smoothly. Conduct a final safety check by testing the gate’s ability to withstand normal use. Ensure no parts are loose or damaged‚ and the gate remains level. This step is crucial for maintaining the gate’s effectiveness and your child’s safety.

Using the Gate Safely and Effectively

The Safety 1st Easy Install Walk-Thru Gate is designed for secure and convenient use. Always ensure the gate is properly latched and pressure-mounted for stability. Regularly inspect the gate and adjust as needed to maintain alignment and tightness. Keep the walk-through area clear to prevent tripping hazards. Avoid over-tightening‚ as this may damage walls or compromise safety. Refer to the manual for guidance on proper usage and maintenance to ensure long-term reliability and effectiveness.

Understanding the Latching and Unlocking Mechanisms

The Safety 1st Easy Install Walk-Thru Gate features a user-friendly latching system designed for ease of use while ensuring maximum safety. The gate includes a visual red indicator that alerts parents when the gate is unlatched or improperly pressurized‚ providing peace of mind. To unlock‚ simply lift the handle and push the gate open. The pressure-mounted design ensures secure installation without damaging walls. Regularly check the latch mechanism to ensure it engages properly. For added convenience‚ the gate allows for one-handed operation‚ making it easy to navigate while carrying items. Always ensure the gate is fully closed and latched to maintain a safe environment for children.

Best Practices for Daily Use and Maintenance

To ensure optimal performance and longevity of the Safety 1st Easy Install Walk-Thru Gate‚ follow these best practices. Always inspect the gate for any damage or worn parts‚ replacing them immediately if necessary. Regularly clean the gate with a soft cloth to prevent dust buildup. Avoid over-tightening the pressure mounts to prevent damage to walls. Never leave the gate unlatched or partially closed‚ as this can compromise safety. For maintenance‚ check the hinges and latching mechanism periodically to ensure smooth operation. Store the gate’s manual for future reference and contact the manufacturer if any issues arise. Proper care will extend the gate’s lifespan and maintain its effectiveness in safeguarding your child.

Troubleshooting Common Issues

If the gate’s pressure mounts fail to secure or the latch malfunctions‚ ensure all parts are properly aligned and tightened. Replace any worn components promptly.

Addressing Installation Problems and Gate Malfunctions

Common installation issues include improper alignment or insufficient pressure‚ which can cause instability. To resolve‚ ensure the gate is measured correctly and mounts are tightened evenly. Malfunctions like a stuck latch may require lubrication or adjustment. If parts are damaged‚ contact the manufacturer for replacements. Always refer to the user manual for specific guidance and avoid over-tightening‚ as this can damage the gate or walls. Regular inspection and maintenance are crucial to ensure the gate functions safely and effectively‚ providing reliable protection for your child. Proper troubleshooting can extend the gate’s lifespan and maintain its effectiveness.

Resolving Common User Concerns and FAQs

Common concerns include difficulty in adjusting the gate’s width or issues with the latch mechanism. Users should ensure the gate is properly aligned and mounted. FAQs often address the gate’s compatibility with various doorways and staircases‚ which can vary depending on the model. For troubleshooting‚ refer to the installation manual or contact customer support. Regularly inspecting the gate for wear and tear is recommended to maintain safety. Additionally‚ users should not exceed the recommended weight limits or modify the gate‚ as this could compromise its stability and effectiveness in securing areas for children. Always follow the manufacturer’s guidelines for optimal performance.

The Safety 1st Easy Install Walk-Thru Gate is a practical solution for babyproofing‚ offering ease of installation and reliable safety features for busy parents.

Summarizing the Benefits of the Safety 1st Easy Install Walk-Thru Gate

The Safety 1st Easy Install Walk-Thru Gate offers a hassle-free solution for babyproofing‚ with its pressure-mounted design requiring no tools for installation. Its adjustable width ensures compatibility with various doorways and staircases‚ while the secure latching mechanism provides peace of mind. The gate’s durable construction and easy-to-use features make it ideal for busy parents. Visual indicators confirm proper installation‚ and the gate’s portability allows for easy relocation. Designed for children aged 6 to 24 months‚ it promotes safety without compromising convenience‚ making it a reliable choice for creating secure‚ child-friendly environments.

Encouraging Proper Usage for Maximum Safety

To ensure the Safety 1st Easy Install Walk-Thru Gate functions effectively‚ it’s crucial to follow the manufacturer’s instructions and maintain regular safety checks. Always inspect the gate for damaged or missing parts and tighten any loose components. Parents should teach older children how to open and close the gate safely to avoid accidents. Keeping the area around the gate clear of clutter prevents tripping hazards. Regularly test the latching mechanism to ensure it secures properly. By adhering to these guidelines and monitoring usage‚ families can create a safer environment for their children while enjoying the convenience the gate provides. Proper care ensures long-term reliability.

74 bus schedule pdf

The 74 Bus Schedule PDF is a convenient resource for planning trips, offering detailed timetables, real-time tracking, and route maps․ It covers service frequencies, stops, and special schedules, ensuring passengers can navigate efficiently on weekdays, weekends, and holidays․

How to Download the 74 Bus Schedule PDF

To download the 74 Bus Schedule PDF, visit the official transit authority website or use a trusted transportation app like Moovit․ Navigate to the “Schedules” or “PDF Maps” section, enter “74” in the search bar, and select the desired route; Click the download link to save the PDF, which includes timetables, route maps, and stop details․ Ensure your device has sufficient storage and a stable internet connection․ For offline access, download the PDF before your trip․ Some apps also allow offline viewing of schedules․ Check periodically for updated versions to ensure you have the latest information․ This method is quick, convenient, and ideal for planning your journey efficiently․

Understanding the 74 Bus Route and Stops

The 74 bus route operates across multiple neighborhoods, connecting key destinations and providing accessible transportation to passengers․ The route typically runs between Germantown Transit Center and destinations like Shady Grove, with stops at major intersections such as Great Seneca Hwy & Clopper Rd, Mateny Rd, and Muddy Branch Rd․ Specific stops include Squirrel Hill Murray Ave, Point Breeze Dallas Ave, and Homewood Ave at Penn Ave, ensuring comprehensive coverage of the area․ The bus serves both urban and suburban regions, making it a vital link for commuters․ Passengers can identify their destination through signs displayed on the front and side of the bus, such as “74 Shady Grove” or “74 Germantown Trns Cntr․” The route operates Monday through Saturday, with no service on Sundays and certain holidays like Good Friday and Christmas Day․ Bike racks are available on all buses, accommodating cyclists․ For lost items, passengers can contact the transit authority’s Lost & Found department․ Detailed maps and stop lists are available in the PDF schedule, helping riders plan their journeys efficiently․

Real-Time Tracking of the 74 Bus

Real-time tracking of the 74 bus is a valuable feature for passengers, enabling them to monitor the bus’s location and arrival time accurately․ Through the Moovit app or websites like www․mta․info, riders can track the 74 bus live on a map as it moves between stops․ This feature provides up-to-the-minute updates, helping passengers plan their journeys without unnecessary waiting․ The live tracker displays the bus’s current position, estimated arrival times, and any potential delays due to traffic or weather conditions․ Additionally, push notifications can be set up to alert users when their bus is approaching their stop․ For specific routes, such as the 74u Branch Brook Park Station via Union Ave, real-time data ensures passengers can adjust their plans accordingly․ This tool is especially useful during peak hours or unexpected disruptions, offering peace of mind and improved punctuality․ By leveraging real-time tracking, commuters can optimize their travel time and rely on the 74 bus service more efficiently․

Service Frequency and Timetables

The 74 bus schedule PDF provides detailed information about service frequency and timetables, ensuring passengers can plan their trips efficiently․ The timetable includes departure and arrival times for weekdays, weekends, and holidays, with clear distinctions between AM and PM schedules․ Service frequency varies throughout the day, with buses running more frequently during peak hours to accommodate higher demand․ Special notations are included for any exceptions or adjustments, such as reduced service on holidays like Christmas Day or Good Friday․ Riders can view the full schedule or filter it by specific stops, making it easier to navigate․ The PDF format allows for easy access and offline use, ensuring passengers always have the latest timetable on hand․ By understanding the service frequency and referring to the timetable, commuters can plan their journeys with precision, minimizing wait times and ensuring punctuality․ This feature is particularly useful for those relying on the 74 bus for daily commutes or occasional trips․

Special Schedules and Holiday Service

The 74 bus schedule PDF includes detailed information about special schedules and holiday service, ensuring passengers are prepared for changes in service․ On holidays such as Christmas Day and Good Friday, the 74 bus typically does not operate, as noted in the PDF․ During other holidays or special events, the timetable may be adjusted to accommodate reduced demand or altered traffic patterns․ The PDF highlights these exceptions clearly, often with bolded notations or separate sections dedicated to holiday schedules․ Additionally, some routes may operate on reduced frequencies during peak holiday seasons, while others may maintain regular service․ The schedule also provides guidance for passengers traveling during these periods, such as alternative routes or nearby stops․ By referencing the PDF, riders can plan their trips accordingly, avoiding disruptions caused by holiday service changes․ This feature is especially useful for commuters who rely on the 74 bus for consistent travel, as it ensures they stay informed about any temporary adjustments to the usual timetable․

Accessing the 74 Bus Schedule PDF Offline

To access the 74 bus schedule PDF offline, passengers can download the document from official transit websites or mobile apps like Moovit․ This feature is particularly useful for travelers without internet access․ Once downloaded, the PDF can be viewed at any time, ensuring uninterrupted access to timetables, maps, and route details․ Many transit apps also offer offline functionality, allowing users to store the schedule locally on their devices․ This is especially helpful for planning trips in areas with limited or no internet connectivity․ By downloading the PDF, passengers can avoid reliance on real-time data and enjoy a seamless experience․ The offline version includes all essential information, such as departure times, stops, and service alerts, making it a reliable resource for trip planning․ This feature is a convenient option for commuters and occasional riders alike, ensuring they stay informed even without an active internet connection․

Tips for Using the 74 Bus Schedule Effectively

Maximizing the use of the 74 bus schedule PDF requires a strategic approach․ Start by planning your trip in advance, using the PDF to identify the most convenient stops and departure times․ Download the schedule offline to access it without internet, ensuring you can view it anywhere․ Utilize real-time tracking features to monitor delays or changes, adjusting your plans accordingly․ Check for service alerts or holiday schedules to avoid unexpected disruptions․ Familiarize yourself with the route map to recognize landmarks and optimize your travel time․ For recurring trips, bookmark frequently used stops or times to save time․ Consider integrating the schedule with mobile apps like Moovit for real-time updates and navigation․ Lastly, review the PDF periodically for updates, as schedules may change․ By following these tips, you can use the 74 bus schedule PDF efficiently, ensuring smooth and stress-free travel․

Mobile Apps for Bus Schedules and Tracking

Mobile apps are essential tools for enhancing your experience with the 74 bus schedule․ Apps like Moovit, Transit, and Citymapper provide real-time tracking, live updates, and interactive route maps․ Moovit, for instance, allows users to track the 74 bus on a live map, receive arrival notifications, and plan trips seamlessly․ These apps often integrate with the 74 bus schedule PDF, offering a digital alternative for on-the-go access․ Additionally, many transit agencies provide their own apps, such as NJ Transit or MBTA, which include features like ticket purchasing and service alerts․ Using these apps alongside the PDF schedule ensures you stay informed about delays, detours, or special schedules․ They also offer offline functionality, making them useful in areas with limited internet coverage․ By leveraging these apps, passengers can optimize their travel experience, reducing wait times and improving overall efficiency․ Mobile apps are a modern and convenient way to manage your 74 bus travels effectively․

Troubleshooting Common Issues with the Schedule

When using the 74 bus schedule PDF, common issues may arise, such as outdated timetables, unclear stop information, or difficulty accessing real-time tracking․ To resolve these, ensure you download the latest version of the PDF from the official transit website․ If the schedule appears incorrect, check for service alerts or holiday schedules, as these can alter regular timetables․ For real-time tracking issues, verify your internet connection or try alternative apps like Moovit or Transit, which often provide reliable live updates․ If the PDF is hard to read, zoom in or adjust your device’s display settings․ Additionally, cross-reference stops and times with the route map to clarify any confusion․ If the 74 bus is delayed, consider using the NJ Transit or MBTA apps for alternative routes or service notifications․ Always check the official transit website for the most accurate and up-to-date information․ By addressing these issues proactively, you can navigate the 74 bus route smoothly and efficiently․

The 74 bus schedule PDF is an essential tool for anyone relying on this route, providing clear and concise information to plan trips efficiently․ By understanding the timetables, stops, and special schedules, passengers can navigate their journeys with confidence․ Real-time tracking and mobile apps enhance the experience, offering flexibility and adaptability․ Whether commuting daily or traveling occasionally, the 74 bus schedule PDF ensures you stay informed and on track․ Remember to download the latest version for the most accurate details and utilize troubleshooting tips if issues arise․ With its comprehensive coverage and user-friendly format, the 74 bus schedule PDF is a valuable resource for seamless travel․ Always check for updates and service alerts to make the most of your commuting experience․ Safe travels!

difco manual

The Difco Manual is a comprehensive resource for microbiologists‚ providing detailed information on dehydrated culture media and reagents․ It serves as an authoritative guide for laboratory practices and protocols․

Overview of the Difco Manual

The Difco Manual is a detailed guide for microbiological culture media and reagents‚ widely used in laboratory settings․ It provides comprehensive information on the preparation‚ use‚ and application of various microbiological media․ The manual is organized into chapters‚ covering topics such as introductory concepts‚ scope‚ and detailed procedures․ It includes a glossary of terms‚ an index for easy navigation‚ and references to official compendia․ The manual is designed to support microbiologists‚ laboratory staff‚ and regulatory professionals in their work․ It emphasizes standardized methods and protocols‚ ensuring accuracy and reproducibility in microbiological analyses․ With over 500 pages‚ the manual is a robust resource for both routine and advanced microbiological practices․ Its content is regularly updated to reflect current standards and advancements in the field‚ making it an indispensable tool for professionals in microbiology and related disciplines․

Scope and Purpose of the Manual

The Difco Manual is designed to provide a detailed framework for microbiological laboratory practices․ Its primary purpose is to standardize the preparation and use of culture media and reagents‚ ensuring consistency across various laboratory settings․ The manual covers a wide range of topics‚ including the composition of media‚ preparation techniques‚ and quality control measures․ It serves as a reference for microbiologists‚ laboratory technicians‚ and researchers‚ offering practical guidance for both routine and specialized procedures․ The manual also emphasizes compliance with official standards and regulations‚ making it a valuable resource for maintaining laboratory accreditation․ By focusing on precise methodologies and best practices‚ the Difco Manual aims to enhance the accuracy and reliability of microbiological testing and analysis․ Its scope extends to supporting educational and research initiatives‚ fostering a deeper understanding of microbiological principles and applications․

Key Features of the Difco Manual

The Difco Manual offers detailed formulations‚ preparation methods‚ and quality control guidelines for microbiological media․ It includes a glossary and comprehensive index‚ enhancing navigation and understanding of critical procedures․

Glossary of Terms Used in the Manual

The Difco Manual includes an extensive glossary that defines technical terms and specific jargon used throughout the document․ This section ensures clarity and consistency in understanding microbiological concepts and procedures․ It covers definitions of culture media components‚ laboratory techniques‚ and reagents‚ making it an invaluable resource for both novice and experienced microbiologists․ The glossary is alphabetically organized for easy reference‚ allowing users to quickly locate and comprehend unfamiliar terminology․ This feature enhances the manual’s usability‚ ensuring that all users can effectively apply the guidelines and protocols outlined in the document․ By providing clear definitions‚ the glossary supports accurate implementation of microbiological practices and maintains the precision required in laboratory settings․

Index and Navigation

The Difco Manual features a detailed index and intuitive navigation system‚ enabling users to efficiently locate specific information․ The index is alphabetically organized‚ providing quick access to key terms‚ procedures‚ and media formulations․ Each entry is cross-referenced with relevant page numbers‚ ensuring seamless navigation through the document․ The manual’s structure is divided into clear sections‚ with headings and subheadings that guide users through its comprehensive content․ This design enhances usability‚ particularly for microbiologists and laboratory staff who require rapid access to critical information․ The index also includes references to figures‚ tables‚ and appendices‚ further streamlining the search process․ By incorporating robust navigation tools‚ the Difco Manual ensures that its wealth of information is both accessible and user-friendly‚ making it an indispensable resource for microbiological research and laboratory practices․

Applications of the Difco Manual

The Difco Manual is widely used in microbiology laboratories for media preparation‚ analytical procedures‚ and regulatory compliance․ It supports research‚ quality control‚ and education in microbiological sciences effectively․

Microbiology Laboratory Management

The Difco Manual is an essential tool for microbiology laboratory management‚ providing detailed protocols for media preparation‚ quality control‚ and standard operating procedures․ It ensures consistency and accuracy in laboratory practices‚ aiding in the maintenance of regulatory compliance; The manual also serves as a reference for troubleshooting common issues in media preparation and handling․ By following the guidelines outlined in the Difco Manual‚ laboratory staff can optimize workflows‚ reduce errors‚ and ensure reliable results in microbiological analyses․ Additionally‚ it supports the training of new personnel by offering clear‚ standardized methods for various laboratory tasks․ This makes it an indispensable resource for laboratories aiming to meet high standards of quality and efficiency in their operations․

Analytical Procedures and Protocols

The Difco Manual provides detailed analytical procedures and protocols for microbiological testing‚ ensuring accuracy and reproducibility․ It includes step-by-step methods for media preparation‚ bacterial isolation‚ and propagation․ Specific protocols‚ such as those for antimicrobial susceptibility testing and phage isolation‚ are thoroughly outlined․ The manual also covers the use of specialized media‚ like Difco GC Medium Base and Lactobacilli Agar AOAC‚ for cultivating specific microorganisms․ These procedures are designed to meet regulatory standards and laboratory requirements‚ making the manual a vital resource for consistent and reliable results․ By adhering to these protocols‚ microbiologists can ensure the quality and precision of their analyses‚ whether in research‚ clinical‚ or industrial settings․

Accessing the Difco Manual

The Difco Manual is accessible through authorized distributors and online resources‚ offering convenient downloading in PDF format for microbiology professionals and researchers‚ ensuring easy access to essential protocols and guidelines․

Downloading the Manual in PDF Format

Downloading the Difco Manual in PDF format is a straightforward process‚ offering users a portable and easily accessible version of the guide․ This format ensures that all content‚ including detailed protocols‚ diagrams‚ and references‚ remains intact and searchable․ The PDF version is particularly useful for researchers and laboratory personnel who need to reference the manual frequently or in environments with limited internet connectivity․ Many authorized distributors and online platforms provide direct links for downloading the PDF‚ often free of charge․ Users can store the manual on their devices or print specific sections as needed․ This convenience makes the Difco Manual a versatile tool for both academic and professional settings‚ ensuring that critical information is readily available whenever required․

Authorized Distributors and Online Resources

Accessing the Difco Manual is made convenient through authorized distributors and online resources․ BD‚ the parent company of Difco‚ offers the manual as part of its product catalog‚ ensuring authenticity and reliability․ Reputable distributors provide direct links for downloading the manual‚ often in PDF format‚ while online platforms like official BD websites and partner sites host the resource․ These channels ensure that users receive the most updated and accurate version of the manual․ Additionally‚ some academic and microbiology-focused websites may offer free access or guided navigation to the manual․ Users are encouraged to verify the credibility of sources to avoid unauthorized or outdated versions․ This streamlined access ensures that microbiologists‚ researchers‚ and laboratory staff can easily obtain the manual‚ supporting their work in microbiology and analytical procedures․

manual ti 89 titanium

Welcome to the TI-89 Titanium manual‚ your comprehensive guide to mastering Texas Instruments’ advanced graphing calculator. Designed for students and professionals‚ this manual covers everything from basic operations to advanced functions‚ ensuring you maximize the calculator’s potential for education and professional use.

Overview of the TI-89 Titanium

The TI-89 Titanium is a high-performance graphing calculator designed for advanced math and science applications. It features a large‚ high-resolution display‚ a powerful processor‚ and extensive memory for storing programs and data. With a user-friendly interface and a wide range of built-in functions‚ it supports complex calculations‚ graphing‚ and symbolic computations. Ideal for students and professionals‚ the TI-89 Titanium is a versatile tool for education and real-world problem-solving.

History and Development of the TI-89 Titanium

The TI-89 Titanium was developed by Texas Instruments as an upgraded version of the original TI-89‚ released in 2004. It introduced enhanced memory‚ a faster processor‚ and improved software features. Designed for advanced mathematical computations‚ it became popular among students and professionals for its ability to handle complex calculations‚ graphing‚ and symbolic computations. The Titanium version also improved upon the original with increased FLASH ROM and RAM for better performance and storage.

Purpose and Target Audience of the Manual

This manual is designed to help users unlock the full potential of the TI-89 Titanium calculator. It serves as a detailed guide for students‚ educators‚ and professionals‚ providing step-by-step instructions for basic and advanced operations. The manual covers troubleshooting‚ customization‚ and optimization of calculator functions‚ ensuring users can efficiently utilize its features for academic and professional applications. Its clear structure makes it accessible to both newcomers and experienced users seeking to enhance their skills.

Key Features and Specifications

The TI-89 Titanium features a 100×160 display‚ 639K FLASH ROM‚ 188K RAM‚ and operates on OS 2.09. It uses AAA batteries for power and supports advanced calculations.

Display Size and Resolution

The TI-89 Titanium features a 100×160 pixel display‚ providing a large‚ high-resolution screen for clear visibility of graphs‚ equations‚ and text. The display size is 100×160 mm‚ ensuring readability and ease of use for complex calculations. Its backlit screen enhances clarity‚ making it ideal for detailed mathematical work and graphing multiple functions simultaneously. The display also supports Pretty Print‚ allowing symbolic expressions to appear as they would in a textbook.

Memory Capacity (FLASH ROM and RAM)

The TI-89 Titanium boasts 639K FLASH ROM and 188K RAM‚ offering ample storage for programs‚ data‚ and applications. This robust memory capacity ensures efficient performance‚ allowing users to store complex calculations‚ graphs‚ and custom applications. The generous FLASH ROM provides long-term storage‚ while the RAM supports smooth operation during calculations and graphing sessions‚ making it ideal for demanding mathematical tasks.

Operating System Compatibility

The TI-89 Titanium operates on Operating System 2.09‚ ensuring compatibility with the latest software and updates. This system supports advanced mathematical functions‚ providing a reliable platform for academic and professional use. The calculator’s operating system is optimized for performance‚ enabling smooth execution of complex calculations‚ graphing‚ and data management. Regular updates enhance functionality‚ making it a versatile tool for users seeking precision and efficiency in their work.

Battery Type and Power Management

The TI-89 Titanium uses four AAA alkaline batteries for primary power and includes a button cell backup battery to preserve memory and settings. Installing batteries is straightforward: remove the cover‚ insert the provided AAA batteries‚ and ensure the backup battery is securely in place. The calculator features efficient power management‚ extending battery life and ensuring uninterrupted performance during extended use. This design provides reliability and convenience for users.

Installation and Setup

Unbox and insert four AAA alkaline batteries‚ ensuring the backup battery is in place. Follow the on-screen instructions to configure settings and begin using your calculator.

Unboxing and Initial Setup

Upon unboxing your TI-89 Titanium‚ you’ll find the calculator‚ a user manual‚ and a USB cable. Carefully remove the protective cover and inspect the device. The calculator comes with a pre-installed backup battery‚ and four AAA alkaline batteries are included. To begin‚ remove the battery cover‚ insert the provided AAA batteries‚ and replace the cover. Press the power button to turn it on. Follow the on-screen instructions to complete the initial setup‚ including language selection and date/time configuration. Refer to the manual for detailed guidance on personalizing your calculator settings.

Installing Batteries and Backup Battery

To power your TI-89 Titanium‚ remove the battery cover on the back. Insert the four provided AAA alkaline batteries into the compartment‚ ensuring they are properly aligned. The backup battery‚ which preserves memory and settings‚ is pre-installed. Replace the cover securely. Turn on the calculator by pressing the power button. The device is now ready for use. Refer to the manual for guidance on battery replacement and maintenance.

Connecting to Video Display/Recording Devices

Connect your TI-89 Titanium to video devices using the TI-Presenter video adapter. This adapter allows you to project the calculator’s screen onto TVs‚ projectors‚ or video cameras. The TI ViewScreen overhead panel further enhances this by enlarging the display for classroom presentations. Follow the adapter’s instructions to ensure a stable connection. This feature is ideal for sharing calculations and graphs with a larger audience during lectures or demonstrations.

Basic Operations

Master fundamental tasks like complex number calculations‚ graphing multiple functions‚ and solving equations symbolically. These operations form the foundation for utilizing the TI-89 Titanium effectively.

Performing Calculations with Complex Numbers

To perform calculations with complex numbers on your TI-89 Titanium‚ use the complex number functions in the MATH menu. These functions allow you to add‚ subtract‚ multiply‚ and divide complex numbers with ease. Simply access the MATH menu‚ select the desired operation‚ and enter the complex numbers in the form a+bi. Ensure proper syntax to avoid errors during calculations. This feature simplifies working with complex arithmetic for both educational and professional purposes.

Graphing Multiple Functions

To graph multiple functions on your TI-89 Titanium‚ navigate to the Y screen and enter each function‚ separating them with commas. Press the GRAPH button to display all functions simultaneously. This feature allows you to compare trends and analyze interactions between functions. Ensure the graphing settings are adjusted appropriately for clarity‚ enabling a comprehensive visual representation of the equations entered. This is ideal for analyzing relationships between multiple variables or functions.

Solving Equations Symbolically

Advanced Functions

The TI-89 Titanium offers sophisticated tools for calculus‚ matrix operations‚ and complex calculations. Its advanced functions make it a versatile tool for students and professionals alike.

Matrix Operations and Syntax

The TI-89 Titanium supports advanced matrix operations‚ including multiplication‚ inversion‚ and determinant calculation. Access matrix functions by pressing 2ND followed by MATRIX. Enter matrices using square brackets and commas to separate elements. Perform operations like addition‚ subtraction‚ and multiplication by selecting the appropriate function from the matrix menu. Ensure proper syntax when defining and manipulating matrices for accurate results in engineering and scientific applications.

Calculus Functions (Derivatives and Integrals)

Use the CALC menu on the TI-89 Titanium to compute derivatives and integrals. For derivatives‚ select derivative( and specify the function and variable. For integrals‚ choose integral( and enter the function‚ variable‚ and limits if required. The calculator provides symbolic results‚ making it ideal for calculus applications. These functions are essential for solving complex mathematical problems in engineering‚ physics‚ and advanced mathematics.

Using the MATH Menu for Complex Calculations

The MATH menu on the TI-89 Titanium offers advanced functions for complex calculations. Access vector and matrix operations‚ summations‚ and equation solving tools. Use the sum( function for series summation and fnInt( for numerical integration. The MATH menu also supports symbolic equation solving‚ enabling precise results for advanced mathematical problems. These features make it a powerful tool for engineering‚ physics‚ and higher-level mathematics.

Customization and Settings

Customize your TI-89 Titanium experience by adjusting display settings‚ setting calculation preferences‚ and managing memory. Tailor the calculator to suit your specific needs for optimal performance and convenience.

Configuring Display Settings

The TI-89 Titanium allows you to customize its display settings for optimal viewing. Adjust the brightness and contrast to enhance visibility. The calculator features a 100×160 pixel display‚ providing clear visuals for graphs and text. You can also modify the display mode to suit your preferences. These settings ensure that the calculator remains easy to use in various lighting conditions‚ making it ideal for both classroom and professional environments.

Setting Up Calculation Preferences

Configure your TI-89 Titanium’s calculation preferences to tailor its behavior to your needs. Access the MODE menu to set calculation modes‚ such as degrees or radians‚ and choose between numeric or symbolic calculations. Adjust settings for floating-point precision and enable or disable automatic simplification of expressions. These preferences optimize performance for specific tasks‚ ensuring accuracy and efficiency in engineering‚ finance‚ or academic applications.

Managing Memory and Storage

The TI-89 Titanium features 639K FLASH ROM and 188K RAM for ample storage of programs and data. To manage memory effectively‚ regularly delete unused apps‚ files‚ and variables. Archive infrequently used items to free up space. Use the memory management tools in the calculator’s OS to monitor usage and optimize storage. A low-memory warning alerts you when storage is low‚ allowing you to clean up before performance is affected. This ensures smooth operation and extends the calculator’s functionality.

Troubleshooting Common Issues

Address common issues like overflow errors and memory management. Understand the AC function to clear data and resolve errors. Regular cleaning and battery checks ensure optimal performance and longevity.

Resolving Overflow Errors

An overflow error occurs when the calculator cannot display the result due to its size. This often happens with division by zero or logarithms of negative numbers. To resolve this‚ press the AC key to clear the error‚ then check your input for validity. Simplify complex expressions or adjust calculation limits in the settings to prevent future occurrences. Ensuring correct syntax and avoiding undefined operations can also help minimize overflow errors.

Understanding AC (All Clear) Function

The AC (All Clear) function on the TI-89 Titanium resets the calculator by clearing all stored data‚ settings‚ and the current display. It is useful for starting fresh or resolving errors. Pressing AC erases unsaved work‚ so ensure important calculations are stored before use. This function helps maintain calculator performance and prevents data overload. Use it cautiously‚ as it cannot be undone once activated.

Cleaning and Maintaining the Calculator

Regular maintenance ensures the TI-89 Titanium performs optimally. To clean‚ remove the batteries and gently scrub the battery compartment with a toothbrush and vinegar. Allow it to dry before inserting new batteries. For the display and keyboard‚ use a soft‚ dry cloth to wipe away dust and debris. Avoid harsh chemicals or liquids‚ as they may damage the calculator. Proper care extends its lifespan and ensures reliable functionality.

Compatibility and Accessories

The TI-89 Titanium is compatible with TI-89‚ Voyage 200‚ and TI-92 Plus. Use the TI-Presenter video adapter for connecting to display devices and the TI ViewScreen for overhead projection.

Compatibility with Other TI Calculators

The TI-89 Titanium is fully compatible with the TI-89‚ Voyage 200‚ and TI-92 Plus calculators. This compatibility allows for seamless sharing of programs and data between devices. Users can engage in collaborative activities such as analyzing mathematical problems‚ running tutorial scripts‚ and exploring advanced functions together. This feature enhances productivity and learning across different platforms‚ making it a versatile tool for both individual and group work.

Using the TI-Presenter Video Adapter

The TI-Presenter video adapter enables connection of the TI-89 Titanium to external display devices such as TVs‚ VCRs‚ video cameras‚ and projectors. This feature allows users to project the calculator’s screen‚ making it ideal for classroom demonstrations or presentations. The TI ViewScreen overhead panel further enhances this by enlarging the display‚ ensuring everyone can view calculations and graphs clearly. This capability promotes collaborative learning and efficient communication of mathematical concepts.

Recommended Accessories for Enhanced Functionality

To enhance your TI-89 Titanium experience‚ consider essential accessories like the USB cable for computer connectivity and data transfer. The TI ViewScreen overhead panel is ideal for projecting the calculator’s display‚ perfect for classroom use. Additionally‚ a protective hard case ensures durability‚ while the guidebook provides in-depth instructions for advanced operations. These accessories optimize functionality‚ ensuring a seamless and productive experience for both educational and professional applications.

oral b io manual

Welcome to the Oral-B iO manual! This guide provides comprehensive instructions to maximize your toothbrush’s advanced features for a superior oral care experience, ensuring optimal performance and longevity.

1.1 Overview of the Oral-B iO Toothbrush

The Oral-B iO toothbrush is a cutting-edge, rechargeable electric toothbrush designed to enhance oral hygiene. It features advanced technology, including a smart pressure sensor, multiple brushing modes, and an ergonomic design for comfort. With a sleek handle and interactive display, it offers personalized brushing experiences. Compatible with the Oral-B app, it provides real-time feedback for improved dental care, ensuring a superior cleaning experience tailored to your needs.

1.2 Importance of Reading the Manual

Reading the Oral-B iO manual is essential for understanding its advanced features, ensuring safe usage, and optimizing performance. It provides detailed instructions for setup, operation, and troubleshooting, helping you make the most of your toothbrush. The manual also outlines warranty terms and maintenance tips, ensuring longevity and proper care for your device. Take a few minutes to review it for the best experience.

Product Specifications

The Oral-B iO toothbrush features a rechargeable battery, advanced brushing technology, and multiple modes for tailored cleaning. It includes a sleek design, smart pressure sensor, and travel case for convenience.

2.1 Key Features of the Oral-B iO Series

The Oral-B iO Series boasts advanced features like a long-lasting rechargeable battery, smart pressure sensor, and multiple brushing modes. It includes an interactive display, ergonomic design, and seamless integration with the Oral-B app for real-time feedback, enhancing your oral care routine with personalized insights and superior cleaning performance.

2.2 Technical Details and Design

The Oral-B iO Series features a high-capacity rechargeable battery, offering up to two weeks of use on a single charge. It includes an advanced iOsense charger for efficient charging. The toothbrush boasts a sleek, ergonomic design with a lightweight handle, ensuring comfort and ease of use. Operating in the 2.4-2.48 GHz range, it uses low-power radio modules for safe and reliable performance.

Manual Instructions for First-Time Use

First-time users should begin by carefully unboxing and charging their Oral-B iO toothbrush. Next, follow the interactive display prompts to pair with the Oral-B App and complete the initial setup.

3.1 Unboxing and Initial Setup

Begin by carefully unboxing your Oral-B iO toothbrush and inspecting the contents, including the handle, brush head, iOsense charger, and travel case. Ensure all components are undamaged. Place the toothbrush on the charger to initiate the charging process. Once charged, press the on/off button to activate the device and follow the interactive display prompts for initial setup and customization.

3.2 Charging the Toothbrush

To charge your Oral-B iO toothbrush, place the handle on the iOsense charger. The LED light indicators will show charging progress. Allow 2-3 hours for a full charge, which provides up to two weeks of use. Avoid overcharging to maintain battery health. Ensure the charger is connected to a power source and the toothbrush is properly aligned for optimal charging performance.

3.3 Pairing with the Oral-B App

To pair your Oral-B iO toothbrush with the app, ensure Bluetooth is enabled on your device. Open the Oral-B App, navigate to settings, and select “Connect Device.” Turn on your toothbrush and follow the in-app instructions to complete the pairing process. Once connected, the app will sync data like brushing modes and pressure sensors, enhancing your oral care experience with real-time feedback and personalized recommendations.

Understanding the Oral-B iO Components

The Oral-B iO toothbrush features a sleek handle with an interactive display, rechargeable battery, and interchangeable brush heads. It also includes the iOsense charger and travel case for convenience.

4.1 Toothbrush Handle and Interactive Display

The Oral-B iO toothbrush handle features an ergonomic design for comfort and control. The interactive display provides real-time feedback, guiding you through brushing modes and settings. It also indicators for the smart pressure sensor, ensuring gentle brushing. The display shows the selected mode, such as Daily Clean or Sensitive, and battery status, making it easy to monitor your brushing routine effectively.

4.2 Brush Heads and Accessories

The Oral-B iO series offers a variety of brush heads, including Ultimate Clean and Gentle Care, designed for specific oral care needs. These heads provide precise cleaning and are compatible exclusively with the iO handle. The set also includes a travel case for convenient storage, ensuring your toothbrush and brush heads stay clean and dry on the go.

4.3 iOsense Charger and Travel Case

The iOsense Charger is equipped with a radio module operating at 2.4-2.48 GHz and 100mW maximum power. It ensures efficient charging and connectivity. The Travel Case stores your toothbrush and brush heads securely, keeping them clean and dry. To maintain hygiene, clean both with a damp cloth. Note that the warranty is void if unauthorized repairs or non-Oral-B parts are used.

Operating the Oral-B iO Toothbrush

Learn how to power on your Oral-B iO, navigate through brushing modes, and utilize the Smart Pressure Sensor for an enhanced cleaning experience.

5.1 Turning On and Navigating Modes

Press the on/off button to activate your Oral-B iO toothbrush. Use the mode button to cycle through options like Daily Clean, Whitening, and Tongue Clean. The interactive display guides you through mode selection, while the Smart Pressure Sensor provides real-time feedback. Adjust settings seamlessly for a personalized brushing experience tailored to your oral care needs.

5.2 Using the Smart Pressure Sensor

The Smart Pressure Sensor monitor’s brushing force, ensuring gentle care; A green light indicates optimal pressure, while red signals excessive force. Adjust your technique to maintain healthy brushing habits and prevent damage to gums or the toothbrush. This feature promotes effective cleaning without compromising comfort or safety.

5.3 Understanding Brushing Modes

The Oral-B iO offers multiple brushing modes, including Daily Clean, Whitening, Gum Care, and Sensitive+, each tailored for specific oral care needs. The toothbrush adjusts brushing speed and pressure based on the selected mode, ensuring a personalized cleaning experience. Use the mode button to cycle through options and achieve your oral hygiene goals effectively.

Maintenance and Care

Regular cleaning and proper storage are essential for maintaining your Oral-B iO toothbrush. Store it in the travel case to keep it organized and protected.

6.1 Replacing Brush Heads

To replace the brush head, pull the old one straight off. Align the new head with the handle and push until it clicks. Use genuine Oral-B heads for optimal performance. Replace every 3 months or when the indicator bristles fade. Proper replacement ensures effectiveness and maintains warranty. Always dispose of the old head responsibly.

6.2 Cleaning the Toothbrush Handle

Regularly clean the toothbrush handle to maintain hygiene. Use a damp cloth to wipe down the handle, avoiding harsh chemicals or submerging it in water. Dry thoroughly after cleaning to prevent moisture buildup. For tougher stains, a mild soap solution can be used, but ensure the handle is rinsed and dried properly. Always clean the brush head separately for optimal results.

Troubleshooting Common Issues

Address common issues like connectivity problems or charging faults by checking Bluetooth settings, ensuring the app is updated, and following proper charging procedures. Restarting the toothbrush or consulting the manual can often resolve persistent issues quickly and effectively.

7.1 Resolving Connectivity Problems

To resolve connectivity issues with your Oral-B iO toothbrush, ensure Bluetooth is enabled on your device and the toothbrush is in pairing mode. Restart both devices and check the Oral-B app for updates. If issues persist, reset the toothbrush by holding the power button for 10 seconds and retry pairing. Ensure the toothbrush is fully charged and within range of your device.

7.2 Addressing Charging Issues

If your Oral-B iO toothbrush isn’t charging, ensure the charger is properly connected to a power source and the toothbrush is aligned correctly on the iOsense charger. Clean the charging contacts gently with a damp cloth. Allow up to 8 hours for a full charge. If issues persist, reset the toothbrush by holding the power button for 10 seconds and contact Oral-B support if needed.

Accessories and Compatibility

The Oral-B iO toothbrush comes with a travel case for convenient storage and various brush heads designed for specific oral care needs. Ensure compatibility by using only Oral-B original accessories for optimal performance and longevity of your toothbrush.

8.1 Types of Brush Heads Available

Oral-B iO offers a range of brush heads, including Ultimate Clean for everyday use, Whitening Mode for surface stain removal, and Sensitive+ for gentle cleaning. Each design ensures superior plaque removal while catering to different oral care needs. Using genuine Oral-B replacement heads guarantees compatibility and optimal performance, maintaining your toothbrush’s advanced features and longevity.

8.2 Travel Case and Storage Tips

The Oral-B iO travel case is designed for convenient storage of your toothbrush and brush heads. Store the clean, dry toothbrush in the case to protect it during travel. Regularly clean the case with a damp cloth to maintain hygiene. Ensure the toothbrush is dry before storing to prevent moisture buildup, preserving its functionality and longevity.

Oral-B iO App Integration

The Oral-B iO app seamlessly connects to your toothbrush, offering real-time feedback, brushing tracking, and personalized recommendations to enhance your oral hygiene routine effectively and conveniently.

9.1 Downloading and Installing the App

To download the Oral-B app, visit the App Store (iOS) or Google Play Store (Android). Search for “Oral-B” and select the app. Download and install it, ensuring your device supports the app. Once installed, open the app to begin the setup process, which includes pairing your toothbrush and exploring features to track and improve your brushing habits.

9.2 Syncing Data for Better Oral Care

Syncing your Oral-B iO toothbrush with the app enables real-time data tracking, providing insights into your brushing habits. The app records brushing duration, pressure applied, and coverage. It offers personalized feedback and recommendations to improve your technique. Regular syncing ensures your progress is saved and helps you achieve better oral hygiene outcomes tailored to your needs.

Battery Life and Management

The Oral-B iO toothbrush offers a rechargeable battery with up to two weeks of use on a single charge. Proper charging and storage maximize performance and longevity.

10.1 Maximizing Battery Performance

To maximize the battery life of your Oral-B iO toothbrush, ensure it is charged on a stable surface and avoid overcharging. Use the provided iOsense charger for optimal performance. Store the toothbrush in a cool, dry place when not in use to prevent battery degradation. Regularly cleaning the charging contacts also helps maintain efficiency.

10.2 Charging Indicators and Guidelines

The Oral-B iO toothbrush features a light ring indicator that shows charging status. A green light indicates a full charge, while red signals low battery. The light flashes during charging. For optimal performance, use the provided iOsense charger and avoid overcharging. Ensure the toothbrush is placed correctly on the charger and keep the charging contacts clean for consistent power delivery.

Warranty and Customer Support

Oral-B offers a warranty covering defects in materials and workmanship. For assistance, contact Oral-B support via their website or phone. Unauthorized repairs void the warranty.

11.1 Understanding the Warranty Terms

The Oral-B iO warranty covers manufacturing defects for a specified period, typically two years. It excludes damage from misuse or unauthorized repairs. Ensure original parts are used to maintain coverage. Refer to the manual for detailed terms and conditions. Warranty varies by region and is valid only for products purchased from authorized distributors or retailers.

11.2 Contacting Oral-B Support

For assistance, visit www.oralb.com or www.service.oralb.com. Use the contact form or call the support team at 1-800-566-7252. Ensure your product’s 4-digit type number is ready for efficient service. Braun GmbH is located at Frankfurter Str. 145, 61476 Kronberg/Germany.

The Oral-B iO manual guides you to enhance oral hygiene with advanced features. Follow instructions for optimal performance and a superior brushing experience, ensuring long-term satisfaction and dental health.

12.1 Summary of Key Takeaways

The Oral-B iO manual provides a comprehensive guide to unlocking its advanced features. Key takeaways include understanding the toothbrush’s smart pressure sensor, various brushing modes, and proper maintenance routines. Regularly replacing brush heads, charging the device, and using the Oral-B app for real-time feedback are essential for optimal performance. By following these guidelines, users can achieve a superior oral care experience and extend the product’s longevity.

12.2 Encouragement for Proper Usage

Consistently using your Oral-B iO toothbrush as directed will significantly enhance your oral hygiene and overall dental health. By following the manual’s guidelines, you’ll maximize the toothbrush’s performance and enjoy its advanced features for a longer period. Proper usage not only ensures effective cleaning but also prolongs the lifespan of your device, making it a worthwhile investment in your smile and well-being.

2013 subaru outback manual

The 2013 Subaru Outback Manual provides essential guidance for owners to understand and maintain their vehicle effectively․ Available as a free PDF download‚ it covers key features‚ operation‚ and maintenance requirements‚ ensuring optimal performance and longevity of the Subaru Outback․

1․1 Overview of the 2013 Subaru Outback

The 2013 Subaru Outback is a versatile all-wheel-drive station wagon designed for both on-road comfort and off-road capability․ It belongs to Class I and features a restyled design unveiled at the 2012 New York Auto Show․ The updated model includes a refreshed front end and improved interior․ Known for its reliability and performance‚ the Outback is a popular choice for outdoor enthusiasts․ Its manual provides detailed insights into its features‚ operation‚ and maintenance‚ ensuring owners can maximize their driving experience․

1․2 Importance of the Owner’s Manual

The owner’s manual is a crucial resource for understanding and maintaining the 2013 Subaru Outback․ It provides detailed instructions for operating the vehicle‚ scheduling maintenance‚ and troubleshooting common issues․ The manual ensures owners can maximize performance‚ safety‚ and longevity․ It also includes essential information about emission control systems and proper maintenance practices․ By following the guidelines outlined in the manual‚ owners can avoid potential problems and ensure their vehicle remains in optimal condition․ It is a comprehensive guide tailored to help drivers make the most of their Subaru Outback experience․

Availability and Access to the 2013 Subaru Outback Manual

The 2013 Subaru Outback Manual is readily available online as a free PDF download․ It can be accessed through Subaru’s official website‚ CarManualsOnline․info‚ or other trusted automotive databases‚ ensuring easy access for owners to maintain their vehicle effectively․

2․1 Online Access and PDF Download

The 2013 Subaru Outback Manual is widely available online‚ offering convenient access to owners․ It can be downloaded as a free PDF from Subaru’s official website‚ CarManualsOnline․info‚ or other trusted automotive databases․ This digital format allows users to easily store the manual on their computer or smartphone‚ ensuring quick reference anytime․ The PDF version is fully searchable and printable‚ making it a practical resource for understanding and maintaining the vehicle․ Its accessibility ensures that owners can effortlessly access critical information without physical storage constraints․

2․2 Sources for Free PDF Manuals

The 2013 Subaru Outback Manual is available for free download from multiple online sources․ Subaru’s official website provides direct access to the PDF version‚ while platforms like CarManualsOnline․info and ManualsLib offer comprehensive databases of Subaru manuals․ Additionally‚ ManualsOnline․com and other automotive forums host downloadable versions․ These sources ensure easy access to the manual‚ allowing owners to reference it anytime without physical storage․ Users can search using specific keywords like “2013 Subaru Outback manual PDF” to find reliable sources quickly and efficiently․

Key Features of the 2013 Subaru Outback

The 2013 Subaru Outback features a robust all-wheel drive system‚ updated exterior design from its 2012 restyling‚ and enhanced interior comfort‚ ensuring versatility and reliability for drivers․

3․1 All-Wheel Drive System

The 2013 Subaru Outback is equipped with a sophisticated all-wheel drive (AWD) system‚ designed to provide exceptional traction and control on diverse terrain․ This system automatically distributes power to all four wheels‚ ensuring stability and grip‚ whether on paved roads or off-road trails․ Its symmetric design enhances balance and reduces understeer‚ delivering a more responsive and secure driving experience․ The AWD system is a core feature of the Outback‚ making it a reliable choice for drivers seeking versatility and performance in varying conditions․

3․2 Design Updates and 2012 Restyling

The 2013 Subaru Outback received a refreshed design following its 2012 restyling‚ unveiled at the New York Auto Show․ Exterior updates included a new front grille‚ bumper‚ and headlights‚ enhancing its rugged yet sophisticated appearance․ Inside‚ the cabin was refined with upgraded materials‚ improved ergonomics‚ and added convenience features․ These design updates aimed to enhance both functionality and aesthetic appeal‚ ensuring the Outback remained a versatile and stylish choice for drivers seeking a capable crossover wagon․

Maintenance and Repair Information

The 2013 Subaru Outback Manual provides detailed maintenance schedules‚ repair procedures‚ and diagnostic tips to keep your vehicle in optimal condition․ Regular servicing ensures reliability and performance․

4․1 Scheduled Maintenance Requirements

The 2013 Subaru Outback Manual outlines a detailed maintenance schedule to ensure optimal vehicle performance․ It specifies intervals for oil changes‚ tire rotations‚ and fluid checks․ Regular inspections of belts‚ brakes‚ and suspension are recommended to prevent wear and tear․ Additionally‚ the manual emphasizes adherence to these schedules to maintain warranty coverage and ensure the vehicle’s longevity․ By following these guidelines‚ owners can keep their Outback running smoothly and avoid potential issues down the road․

4․2 Troubleshooting Common Issues

The 2013 Subaru Outback Manual provides a dedicated section for diagnosing and resolving common issues․ It guides owners through identifying problems such as warning lights‚ unusual noises‚ or performance concerns․ The manual offers step-by-step solutions and recommends when professional assistance is needed․ Topics include troubleshooting the all-wheel-drive system‚ addressing battery issues‚ and resolving common error codes․ By following these guidelines‚ owners can quickly identify and address problems‚ ensuring their vehicle remains in optimal condition and minimizing repair costs over time․

Technical Specifications of the 2013 Subaru Outback

The 2013 Subaru Outback features a 2․5L boxer engine‚ Lineartronic CVT‚ and standard all-wheel drive․ It offers a ground clearance of 8․7 inches and a towing capacity of up to 3‚000 lbs․

5․1 Engine and Transmission Details

The 2013 Subaru Outback is equipped with a 2․5L horizontally opposed boxer engine‚ delivering 173 horsepower and 174 lb-ft of torque․ This engine is paired with a Lineartronic continuously variable transmission (CVT)‚ designed for smooth and efficient power delivery․ The boxer engine’s flat design ensures a low center of gravity‚ enhancing stability and handling․ The CVT optimizes fuel efficiency while maintaining responsive acceleration․ Together‚ these components provide a balance of performance and economy‚ making the Outback versatile for both urban and off-road environments․ The engine’s durability and efficiency are well-suited for long-term reliability․

5․2 Performance and Capabilities

The 2013 Subaru Outback delivers robust performance with its all-wheel-drive system‚ ensuring superior traction on various terrains․ Its 8․7 inches of ground clearance enhances off-road capability‚ while the boxer engine provides smooth power delivery; The Outback can tow up to 2‚700 pounds‚ making it suitable for light trailers or boats․ Fuel efficiency is impressive‚ with an estimated 24 MPG city and 30 MPG highway․ This combination of capability‚ versatility‚ and efficiency solidifies the Outback’s reputation as a reliable and adaptable vehicle for diverse driving needs․

Owner’s Manual Content Highlights

The 2013 Subaru Outback Manual includes detailed operating instructions‚ safety features‚ and maintenance tips․ It covers essential systems‚ emission control‚ and proper vehicle care for optimal performance․

6․1 Operating Instructions for Vehicle Systems

The 2013 Subaru Outback Manual provides detailed instructions for operating key vehicle systems‚ including the all-wheel-drive‚ transmission‚ and safety features․ It explains how to use the instrument panel‚ infotainment system‚ and climate controls․ The manual also covers proper operation of adaptive cruise control and other advanced driver-assistance systems․ Clear guidelines are offered for optimal performance‚ fuel efficiency‚ and longevity of the vehicle․ By following these instructions‚ owners can ensure safe and efficient operation of their Subaru Outback․

6․2 Safety Features and Precautions

The 2013 Subaru Outback Manual emphasizes safety‚ detailing features like airbags‚ ABS‚ and electronic stability control․ It provides precautions for seatbelt use‚ child restraints‚ and safer driving practices․ The manual also highlights proper procedures for emergency situations‚ such as tire blowouts or brake failure․ Owners are advised to follow guidelines for loading cargo and towing to ensure vehicle stability․ Adherence to these safety measures helps protect occupants and prevents potential hazards while driving․

Additional Resources and Guides

The 2013 Subaru Outback Manual offers additional resources‚ including service bulletins‚ recall notices‚ and accessories guides‚ all available as free PDF downloads for comprehensive support․

7․1 Service Bulletins and Recalls

Service bulletins and recalls for the 2013 Subaru Outback are essential for addressing safety and performance issues․ These documents‚ available in the owner’s manual or online‚ provide detailed instructions for resolving specific problems․ Recalls often involve mandatory repairs to ensure compliance with safety standards‚ while service bulletins offer updates or fixes for known issues․ Owners can access these resources through official Subaru websites or authorized dealerships‚ ensuring their vehicle remains safe and reliable․ Regularly checking for updates is crucial for maintaining optimal performance and adhering to manufacturer recommendations․

7․2 Accessories and Optional Equipment Manuals

The 2013 Subaru Outback accessories and optional equipment manuals provide detailed instructions for installing and using additional features․ These manuals‚ available online or through authorized dealers‚ cover items like roof racks‚ cargo carriers‚ and interior accessories․ They ensure proper installation and compatibility‚ enhancing the vehicle’s functionality․ Owners can reference these guides to explore customization options and maintain their vehicle’s performance․ The manuals also highlight safety precautions and warranty information‚ helping owners make informed decisions about aftermarket additions․

Language Availability and International Access

The 2013 Subaru Outback Manual is available in multiple languages‚ including English‚ to cater to global users․ International owners can access PDF versions online for convenience․

8․1 English-Language Manuals

The 2013 Subaru Outback Manual is widely available in English‚ catering to a global audience․ It provides detailed instructions on vehicle operation‚ maintenance‚ and troubleshooting․ The English-language version ensures clarity and accessibility for users worldwide; Owners can download the PDF manual for free from various online sources‚ including Subaru’s official website and third-party databases like CarManualsOnline․info․ This comprehensive guide is essential for understanding the Outback’s features‚ ensuring proper care‚ and maximizing its performance․ Its availability in English makes it a convenient resource for international users․

8․2 Manuals in Other Languages

While the primary 2013 Subaru Outback Manual is in English‚ Subaru also provides support for international users․ Manuals in other languages‚ such as Spanish and Italian‚ are available for select regions․ These translations ensure global accessibility‚ though they may not cover all sections in detail․ Users can access multilingual resources through Subaru’s global websites or authorized dealers․ This approach caters to diverse linguistic needs‚ ensuring drivers worldwide can understand and maintain their vehicles effectively․

Frequently Asked Questions

The 2013 Subaru Outback Manual addresses common FAQs about maintenance schedules‚ troubleshooting‚ and performance optimization‚ helping owners resolve issues and keep their vehicle in top condition․

9․1 Common Maintenance Questions

The 2013 Subaru Outback Manual answers frequently asked questions about routine maintenance‚ such as oil change intervals‚ tire rotation schedules‚ and fluid checks․ It provides clear guidance on when to replace air filters‚ belts‚ and other components to ensure optimal performance․ The manual also addresses common concerns like battery maintenance and windshield wiper replacement․ By following the recommended maintenance schedule‚ owners can extend the lifespan of their vehicle and prevent potential issues․ This section is essential for keeping the Subaru Outback in excellent condition․

9․2 Troubleshooting and Repair FAQs

The 2013 Subaru Outback Manual includes a dedicated section for troubleshooting and repair FAQs‚ helping owners identify and address common issues․ It covers topics like warning lights‚ unusual noises‚ and performance problems․ The manual provides step-by-step guidance for diagnosing issues and offers repair solutions for minor faults․ Additionally‚ it highlights when professional assistance is required․ This section ensures owners can resolve problems efficiently‚ maintaining their vehicle’s reliability and safety․ Regular reference to this guide helps prevent minor issues from becoming major repairs․