Author: ernestine

soap notes occupational therapy pdf

SOAP notes in occupational therapy provide a structured framework for documenting patient care‚ ensuring clear communication and effective treatment planning through the SOAP components‚ ultimately enhancing patient outcomes and interprofessional collaboration․

What Are SOAP Notes?

SOAP notes are a standardized method of documentation used in occupational therapy‚ standing for Subjective‚ Objective‚ Assessment‚ and Plan․ They provide a structured format to record patient interactions‚ ensuring comprehensive and organized documentation․ The Subjective section captures the patient’s personal experiences and concerns‚ while the Objective section documents measurable observations and data․ The Assessment synthesizes this information to form a clinical judgment‚ and the Plan outlines the next steps in treatment․ SOAP notes are essential for monitoring progress‚ communicating with other healthcare providers‚ and maintaining accountability in patient care․ They also serve as a legal and professional record of the therapy process and outcomes․

The Structure of a SOAP Note

The SOAP note structure includes four sections: Subjective (patient’s report)‚ Objective (measurable data)‚ Assessment (clinical judgment)‚ and Plan (future actions)‚ ensuring comprehensive and organized documentation․

Subjective

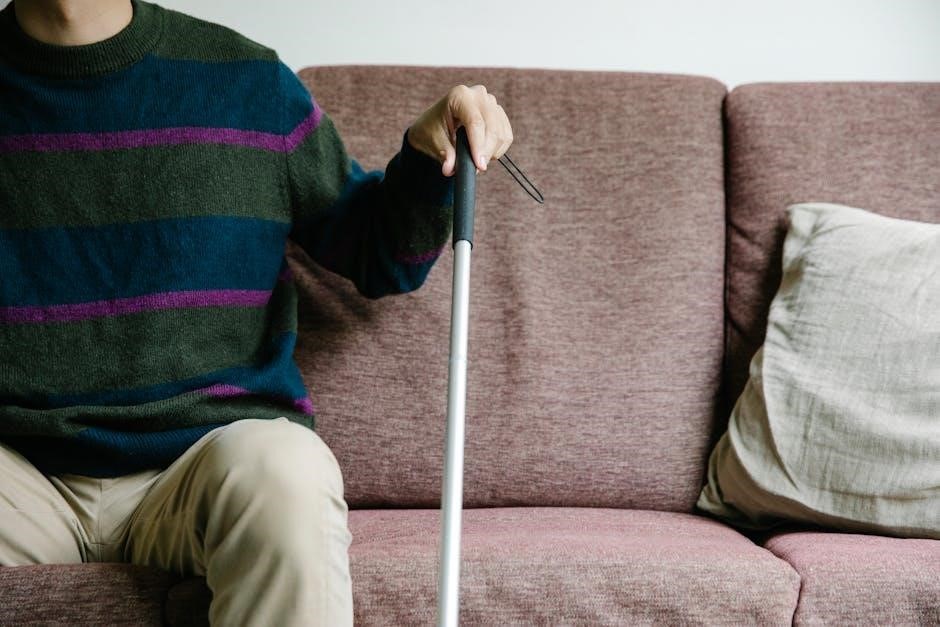
The Subjective section of a SOAP note captures the patient’s personal experience and perspective‚ including their concerns‚ symptoms‚ and medical history․ This part is based on what the patient reports‚ such as pain levels‚ functional limitations‚ or challenges in daily activities․ It is essential to document the patient’s voice using direct quotes when possible to ensure accuracy․ The subjective information helps occupational therapists understand the patient’s perceived needs and goals‚ guiding the development of a patient-centered treatment plan; Clear and concise documentation in this section ensures that the patient’s voice is heard and integrated into their care․ This lays the foundation for the objective assessment and overall treatment strategy․

  • Patient-reported symptoms and concerns․
  • Medical history and relevant background information․
  • Functional limitations and daily living challenges․
  • Direct quotes to capture the patient’s voice․

Objective

The Objective section of a SOAP note in occupational therapy documents measurable and observable data‚ such as physical examination findings‚ test results‚ and the patient’s performance in activities․ This section is factual and based on the therapist’s observations‚ providing clear evidence of the patient’s current status․ Key elements include range of motion‚ strength‚ coordination‚ balance‚ and the ability to perform daily tasks․ This section helps track progress‚ identify areas for improvement‚ and inform treatment adjustments․ It is essential to document quantifiable metrics to ensure transparency and accountability in the patient’s care plan․

  • Physical examination findings (e․g․‚ range of motion‚ strength)․
  • Performance in activities of daily living (ADLs) and instrumental activities of daily living (IADLs)․
  • Quantifiable metrics and health indicators․
  • Results from standardized assessments or tests․

Assessment

The Assessment section of a SOAP note in occupational therapy represents the therapist’s professional judgment based on the Subjective and Objective data․ It synthesizes the patient’s condition‚ linking symptoms‚ examination findings‚ and functional limitations to diagnose or reassess their status․ This section highlights progress toward treatment goals‚ identifies barriers to recovery‚ and provides a clinical rationale for ongoing interventions․ The assessment should be clear‚ concise‚ and evidence-based‚ guiding the next steps in the patient’s care plan․ It also serves as a reference point for future SOAP notes‚ ensuring continuity in documentation and treatment․

Plan

The Plan section outlines the next steps in the patient’s care‚ detailing specific interventions‚ goals‚ and strategies for achieving optimal outcomes․ It includes recommendations for therapeutic exercises‚ adaptive techniques‚ or assistive devices to enhance functional abilities․ The plan may also specify home programs‚ education on joint protection‚ or pain management strategies․ Regular monitoring of progress and adjustments to the treatment plan are emphasized․ This section ensures a clear direction for future sessions‚ fostering collaboration among healthcare providers․ The plan is tailored to address the patient’s unique needs‚ promoting independence and participation in daily activities․ It serves as a roadmap for achieving measurable‚ patient-centered goals․ Documentation of the plan ensures accountability and continuity of care․

Importance of SOAP Notes in Occupational Therapy

SOAP notes are vital in occupational therapy for capturing patient information‚ monitoring progress‚ and enabling clear communication among healthcare providers‚ ensuring effective and coordinated care․

Why Use SOAP Notes?

SOAP notes are essential in occupational therapy as they provide a standardized method for documenting patient care‚ ensuring consistency and clarity in communication․ They help track patient progress‚ identify treatment effectiveness‚ and support evidence-based decision-making․ By capturing subjective‚ objective‚ assessment‚ and plan details‚ SOAP notes facilitate coordinated care among healthcare providers․ They also serve as legal documentation‚ protecting practitioners and organizations․ Using SOAP notes ensures that treatment plans are well-documented‚ patient outcomes are measurable‚ and care is aligned with professional standards․ This structured approach enhances accountability‚ improves patient outcomes‚ and streamlines interprofessional collaboration‚ making them indispensable in occupational therapy practice․

Best Practices for Writing SOAP Notes

Best practices for writing SOAP notes include ensuring clarity‚ conciseness‚ and timeliness while avoiding assumptions․ Use objective data and clear language to enhance accuracy and effectiveness․

Clarity and Conciseness

Clarity and conciseness are essential in SOAP notes to ensure effective communication․ Use simple language‚ avoid jargon‚ and focus on relevant details․ This ensures all healthcare providers can understand the information without ambiguity․ Being concise prevents unnecessary details from overshadowing key findings․ Proper use of headings and bullet points enhances readability․ Additionally‚ avoiding vague terms and sticking to measurable observations ensures accuracy; This approach supports better patient care and collaboration among healthcare professionals․ By maintaining clarity and brevity‚ SOAP notes become a reliable tool for documenting patient progress and treatment plans effectively․

Timeliness and Accuracy

Timeliness and accuracy are critical in SOAP note documentation․ Notes should be completed immediately after sessions to ensure freshness and reliability of information․ Delays can lead to inaccuracies or omissions‚ potentially affecting patient care․ Accuracy involves recording objective‚ measurable data‚ avoiding assumptions‚ and cross-referencing patient reports with observations․ This ensures trustworthiness and legal compliance․ Using digital tools or templates can enhance both speed and precision‚ reducing errors․ Prioritizing these elements supports seamless communication among healthcare providers and maintains high standards of patient care․ By documenting promptly and accurately‚ occupational therapists ensure informed decision-making and accountability in treatment planning․

Example of a SOAP Note in Occupational Therapy

Subjective: A 45-year-old female reports difficulty performing daily activities due to shoulder pain‚ rated 6/10‚ worsened by overhead movements․

Objective: Limited shoulder flexion (0-100°)‚ strength 4/5‚ no swelling or redness noted․

Assessment: Shoulder impingement syndrome‚ impacting ADLs and work-related tasks․

Plan: Initiate twice-weekly OT sessions focusing on shoulder strengthening‚ joint mobilization‚ and ergonomic training․ Patient educated on activity modification to avoid aggravating movements․

This example illustrates a clear‚ concise SOAP note structure‚ effectively communicating patient status and treatment direction in occupational therapy․

Templates and Tools for SOAP Notes

Digital tools like SafetyCulture offer customizable SOAP note templates‚ enhancing documentation efficiency and accuracy‚ while AI-powered solutions streamline the process for occupational therapists․

Using Digital Templates

Digital templates streamline SOAP note creation‚ reducing paperwork and enhancing efficiency․ Tools like SafetyCulture and AI-powered solutions such as Heidi simplify documentation‚ allowing therapists to generate accurate and compliant notes․ These platforms offer customizable templates‚ checklists‚ and cloud storage‚ ensuring easy access and organization․ Digital templates also enable real-time collaboration and secure sharing among healthcare providers․ Features like electronic signatures and automated data entry further improve workflow‚ reducing errors and saving time․ By leveraging digital tools‚ occupational therapists can focus on patient care while maintaining high-quality‚ standardized documentation‚ making SOAP notes more efficient and effective in supporting treatment plans and patient progress tracking․

SOAP notes are a cornerstone of occupational therapy‚ providing a clear and structured method for documenting patient care․ By using digital templates‚ therapists can enhance efficiency and accuracy‚ ensuring comprehensive and compliant documentation․ These templates streamline the SOAP note process‚ allowing for better organization and easier access to patient information․ As occupational therapy continues to evolve‚ the use of digital tools and standardized documentation practices will remain essential for delivering high-quality‚ patient-centered care․ By adopting these practices‚ therapists can focus on improving patient outcomes while maintaining thorough and professional records․ SOAP notes‚ supported by digital solutions‚ will continue to play a vital role in occupational therapy practice․

masterbuilt electric turkey fryer manual

This manual provides essential guidance for safe and effective use of the Masterbuilt Electric Turkey Fryer, covering setup, cooking, and maintenance to ensure delicious results.

1.1 Overview of the Appliance and Its Features

The Masterbuilt Electric Turkey Fryer is a versatile kitchen appliance designed for safe and efficient frying. It features an electric heating element, adjustable temperature control, and a sturdy cooking basket. The fryer is ideal for preparing crispy, flavorful turkeys without the need for large amounts of oil.

1.2 Importance of Reading the Manual for Safe and Proper Use

Reading the manual ensures safe operation, highlights essential safety precautions, and provides guidance for proper assembly and maintenance. It also includes troubleshooting tips and warranty information to maximize performance and longevity of the Masterbuilt Electric Turkey Fryer.

Safety Precautions and Warnings

  • Avoid outdoor use to prevent exposure to rain or environmental hazards.
  • Never use less than 2 gallons of oil or water during frying or boiling.
  • Ensure the turkey is fully thawed before cooking to avoid safety risks and uneven frying.
  • Always unplug the fryer when not in use or after completing the cooking process.

2.1 General Safety Guidelines

Always follow safety guidelines to prevent accidents. Ensure the turkey is fully thawed before frying. Use the recommended oil quantity and avoid overfilling. Keep children away from the appliance. Never leave the fryer unattended while in use. Ensure proper ventilation in the cooking area.

2.2 Specific Dangers and Precautions

Avoid oil spills and splatters, as they can cause burns. Never add water to hot oil, as it may result in violent eruptions. Keep the appliance away from flammable materials and ensure proper ventilation to prevent gas buildup. Always unplug the fryer before cleaning or servicing.

2.3 Emergency Procedures (e.g., Gas Leaks, Oil Spills)

In case of a gas leak, immediately shut off the gas supply and exit the area. For oil spills, never use water, as it can cause splashing. Turn off the fryer, unplug it, and allow the oil to cool before cleaning. Ensure proper ventilation after any incident.

Assembly and Initial Setup

Begin by unboxing and inventorying all parts. Attach the legs to the fryer base for stability. Follow step-by-step instructions for assembling components like the heating element and control panel. Conduct initial testing to ensure proper function before first use.

3.1 Unboxing and Inventory of Parts

Begin by carefully unboxing the fryer and inspecting for damage. Check the box contents against the manual’s parts list to ensure all components, such as the turkey basket, drain clip, and power cord, are included. Contact customer support immediately if any parts are missing or damaged.

3.2 Step-by-Step Assembly Instructions

Wash your hands before starting. Attach the drain clip to the basket and connect the heating element securely. Place the basket into the fryer pot, ensuring proper alignment. Plug in the unit and follow the manual’s diagram for final adjustments. Test the fryer with water to confirm it’s working correctly.

3.3 Initial Testing and Calibration

Plug in the fryer and fill the pot with water to test functionality. Ensure the heating element activates and the temperature gauge works accurately. Allow the unit to heat for 10 minutes, then check the temperature with a food thermometer to confirm calibration. Drain water and let the fryer cool before storing.

Cooking Instructions

Fry your turkey for 3 1/2 to 4 minutes per pound. Ensure the internal temperature reaches 165°F in the breast and 180°F in the thigh for food safety and optimal doneness.

4.1 Thawing and Preparing the Turkey

Ensure the turkey is completely thawed and free of ice before frying. Remove giblets and neck, then pat dry with paper towels to eliminate excess moisture for even cooking and proper seasoning adhesion.

4.2 Seasoning and Marinating Tips

Season the turkey generously with herbs, spices, and oils before frying for enhanced flavor. Marinate for 2-4 hours or overnight for deeper taste. Avoid excess liquid to ensure crispy results, and pat dry before cooking for optimal seasoning adhesion.

4.3 Frying Times and Temperatures

Fry your turkey at 375°F (191°C) for 3 ½ to 4 minutes per pound. Ensure the internal temperature reaches 165°F in the breast and 180°F in the thigh. Always check the internal temperature, as cooking times may vary based on turkey size and shape.

4.4 Resting and Serving the Turkey

After frying, turn off the turkey fryer and unplug it. Lift the basket and hook it to drain excess oil. Let the turkey rest for 20 minutes to allow juices to redistribute. Carve and serve while hot for the best flavor and texture.

Maintenance and Cleaning

Regular cleaning ensures optimal performance. Drain oil, wash parts with mild detergent, and dry thoroughly. Store in a dry place to prevent rust and damage.

5.1 Cleaning the Fryer After Use

After each use, unplug the fryer and let it cool. Drain the oil into a disposable container. Wipe the exterior with a damp cloth and wash interior parts with mild soap and warm water. Avoid abrasive cleaners to prevent damage to the non-stick surfaces. Regular cleaning prevents grease buildup and ensures longevity, while also maintaining hygiene and safety standards for future use. Always dry thoroughly before storing to prevent rust or bacterial growth. This routine maintenance will keep your Masterbuilt Electric Turkey Fryer in optimal condition. By following these steps, you can ensure your fryer remains efficient and ready for the next cooking session. Proper cleaning also helps in maintaining the appliance’s performance and prevents any residual odors from affecting the taste of your next meal. It is crucial to clean immediately after use to avoid hardened oil, which can be difficult to remove and may require harsh chemicals. Remember to check all parts, including the heating element and basket, for any food residue. For tough stains, soak parts in warm soapy water before scrubbing gently. Never submerge electrical components in water or use scouring pads, as this can cause irreversible damage. By adhering to these cleaning guidelines, you will extend the lifespan of your fryer and continue to achieve perfect frying results every time. Always refer to the manual for specific cleaning recommendations tailored to your model.

5.2 Storing the Appliance Properly

Store the Masterbuilt Electric Turkey Fryer in a cool, dry place, away from direct sunlight and moisture. Ensure the unit is clean and dry before storage. Keep it upright to prevent oil leakage. Avoid exposing it to outdoor elements unless in a covered area like a garage or patio. Use the original packaging or a protective cover to shield it from dust and damage. Proper storage preserves the appliance’s condition and ensures safety and longevity. Always disconnect the power cord before storing. This will prevent any accidental electrical issues and maintain the fryer’s performance for future use. By storing the fryer correctly, you protect your investment and ensure it remains ready for the next cooking session. Regular inspections before and after storage can also help identify any potential issues early. Keep the fryer out of reach of children and pets to avoid accidental damage or hazards. Following these storage guidelines will help maintain the appliance’s efficiency and safety features. Remember to refer to the manual for specific storage recommendations tailored to your model. This ensures compliance with manufacturer guidelines and warranty terms. Proper storage is a crucial step in maintaining the longevity and performance of your Masterbuilt Electric Turkey Fryer. Always prioritize safety and care when handling electrical appliances, even during storage. This will ensure your fryer remains in excellent condition for years to come. By taking these precautions, you can enjoy consistent and reliable performance every time you use the fryer. Storing the appliance properly is a simple yet effective way to protect your investment and ensure continued satisfaction with your cooking results. Never store the fryer near flammable materials or in areas prone to pests, as this could lead to damage or safety risks. Always check for any manufacturer-specific storage instructions to ensure optimal care for your appliance. This attention to detail will help maintain the fryer’s performance and extend its lifespan. Proper storage also prevents the buildup of dust and debris, which can interfere with the appliance’s functionality. By keeping the fryer clean and dry before storage, you reduce the risk of mold or mildew growth, ensuring a safe and hygienic environment for future use. Storing the appliance properly is a key part of responsible ownership and will help you get the most out of your Masterbuilt Electric Turkey Fryer. Remember, proper storage is an essential step in maintaining the quality and safety of your appliance. Always handle the fryer with care, even when storing it, to avoid any accidental damage. This will ensure it remains in great condition and continues to deliver excellent results. By following these storage tips, you can enjoy your Masterbuilt Electric Turkey Fryer for many cooking sessions to come. Proper storage is a simple yet effective way to protect your investment and ensure continued satisfaction with your appliance. Always prioritize safety and care when handling and storing electrical appliances like the Masterbuilt Electric Turkey Fryer. This will help maintain its performance and extend its lifespan, providing you with delicious meals for years to come. By taking the time to store the fryer correctly, you demonstrate a commitment to maintaining its quality and ensuring its longevity. This is an important step in responsible appliance ownership and will pay off in the long run. Always refer to the manual for specific storage recommendations to ensure you are following the manufacturer’s guidelines. This will help you avoid any potential issues and keep your fryer in optimal condition. Proper storage is a crucial part of maintaining your Masterbuilt Electric Turkey Fryer, and by following these tips, you can ensure it remains a reliable and efficient cooking companion. Never underestimate the importance of proper storage in preserving the functionality and safety of your appliance. By taking these steps, you protect your investment and ensure continued satisfaction with your cooking results. Always store the fryer in a secure, dry location, away from potential hazards, to maintain its performance and longevity. This simple practice will help you enjoy your Masterbuilt Electric Turkey Fryer for many years. Proper storage is an essential part of appliance care, and by adhering to these guidelines, you can ensure your fryer remains in excellent working condition. Remember, safety and maintenance go hand in hand when it comes to electrical appliances like the Masterbuilt Electric Turkey Fryer. By storing it properly, you contribute to both its performance and your peace of mind. Always handle the fryer with care, even during storage, to avoid any damage or safety risks. This will ensure it remains a trusted and reliable tool in your kitchen for future cooking endeavors. Proper storage is a key aspect of responsible appliance ownership, and by following these tips, you can enjoy your Masterbuilt Electric Turkey Fryer for many delicious meals to come. Never compromise on storage practices, as they play a vital role in maintaining the appliance’s efficiency and safety. By taking the time to store the fryer correctly, you invest in its longevity and your continued satisfaction. This simple yet effective practice will help you get the most out of your Masterbuilt Electric Turkey Fryer. Always prioritize proper storage to protect your appliance and ensure it remains in top condition for years to come. By doing so, you can enjoy consistent and reliable performance every time you use the fryer. Proper storage is an important step in maintaining the quality and safety of your Masterbuilt Electric Turkey Fryer. Always handle the appliance with care and follow the manufacturer’s guidelines for storage. This will help you avoid any potential issues and keep your fryer in optimal working order. By taking these precautions, you can ensure your Masterbuilt Electric Turkey Fryer remains a valuable and reliable addition to your kitchen. Proper storage is a simple yet effective way to protect your investment and ensure continued satisfaction with your appliance. Always refer to the manual for specific storage recommendations to ensure compliance with manufacturer guidelines. This will help you maintain the fryer’s performance and extend its lifespan, providing you with delicious meals for years to come. By following these storage tips, you can enjoy your Masterbuilt Electric Turkey Fryer with confidence, knowing it is well-maintained and ready for use whenever you need it. Proper storage is an essential part of responsible appliance ownership, and by adhering to these practices, you can ensure your fryer remains in excellent condition. Always prioritize safety and care when handling and storing the Masterbuilt Electric Turkey Fryer to maintain its performance and longevity. This will help you enjoy consistent and reliable results every time you cook. Proper storage is a key aspect of maintaining your appliance’s quality and safety, ensuring it continues to deliver exceptional performance for many cooking sessions to come. By taking the time to store the fryer correctly, you protect your investment and contribute to its longevity. Always handle the appliance with care and follow the manufacturer’s storage guidelines to avoid any potential issues. This will help you maintain the fryer’s efficiency and ensure it remains a trusted tool in your kitchen. Proper storage is a simple yet effective way to protect your Masterbuilt Electric Turkey Fryer and ensure it continues to provide you with delicious results. Always refer to the manual for specific instructions to ensure you are following the recommended storage practices. By doing so, you can enjoy your fryer for many years, knowing it is well-maintained and safe to use. Proper storage is an important step in preserving the functionality and safety of your appliance, and by adhering to these guidelines, you can ensure it remains in optimal condition. Always prioritize proper storage to protect your Masterbuilt Electric Turkey Fryer and maintain its performance and longevity. This will help you enjoy consistent and reliable results every time you use it. By taking these precautions, you can ensure your fryer remains a valuable and reliable addition to your kitchen for many delicious meals to come. Proper storage is a crucial part of maintaining the quality and safety of your Masterbuilt Electric Turkey Fryer. Always handle the

5.3 Replacing or Servicing Parts

Regularly inspect the fryer for worn or damaged parts. Replace components like heating elements or seals as needed to ensure optimal performance. Use only genuine Masterbuilt replacement parts to maintain safety and efficiency. Contact customer support for assistance with servicing or locating specific parts. Always follow the manual’s guidelines for replacements to avoid voiding the warranty and ensure continued safe operation. Proper servicing and timely replacements are crucial for extending the appliance’s lifespan and maintaining its functionality. Refer to the manual for detailed instructions on servicing and replacing parts correctly. This will help preserve the fryer’s performance and prevent potential hazards. By addressing parts needing replacement promptly, you can ensure your Masterbuilt Electric Turkey Fryer continues to deliver excellent results for years to come. Always prioritize using authentic parts to uphold the appliance’s quality and safety standards. Regular maintenance and servicing are essential for maintaining the fryer’s efficiency and prolonging its useful life. If unsure about any replacement or servicing, consult the manual or reach out to Masterbuilt customer support for professional guidance. This ensures that all repairs are done safely and correctly, adhering to the manufacturer’s recommendations. Proper care and servicing of the fryer will help maintain its performance and ensure it remains a reliable cooking companion. Always handle parts with care and follow the manual’s instructions to avoid any accidental damage or safety risks. By taking these steps, you can ensure your Masterbuilt Electric Turkey Fryer operates at its best for many cooking sessions. Regular servicing and replacing parts as needed are key to maintaining the appliance’s functionality and safety. Always refer to the manual for specific guidance on servicing and replacing parts to ensure compliance with manufacturer guidelines. This will help you avoid any potential issues and keep your fryer in optimal working condition. Proper servicing and part replacement are vital for the longevity and performance of your Masterbuilt Electric Turkey Fryer. By addressing these needs promptly, you can ensure your appliance continues to deliver exceptional results. Always use genuine Masterbuilt parts to maintain the quality and safety of your fryer. Regular inspections and timely replacements will help prevent unexpected breakdowns and ensure consistent performance. If you are unsure about any aspect of servicing or replacing parts, consult the manual or contact customer support for assistance. This will ensure that all maintenance is performed safely and effectively, preserving the fryer’s efficiency and extending its lifespan. By prioritizing proper servicing and part replacement, you can enjoy your Masterbuilt Electric Turkey Fryer for many years to come. Always handle the appliance and its parts with care, and follow the manual’s instructions to maintain its performance and safety. Regular maintenance is a simple yet effective way to protect your investment and ensure continued satisfaction with your cooking results. Proper servicing and part replacement are essential for the optimal functioning of your Masterbuilt Electric Turkey Fryer. By addressing these needs, you can ensure your appliance remains a reliable and efficient addition to your kitchen. Always refer to the manual for specific guidance on servicing and replacing parts to ensure your fryer continues to perform at its best. This attention to detail will help maintain the appliance’s quality and safety, providing you with delicious meals for years to come. By taking the time to service and replace parts as needed, you can ensure your Masterbuilt Electric Turkey Fryer remains in excellent condition and continues to deliver outstanding performance. Always prioritize proper maintenance to protect your investment and ensure the longevity of your appliance. Regular servicing and part replacement are crucial for maintaining the fryer’s efficiency and safety. By following the manual’s guidelines, you can ensure your Masterbuilt Electric Turkey Fryer remains a trusted and reliable cooking companion. Proper care and maintenance will help extend the lifespan of your appliance and ensure it continues to provide you with exceptional results. Always handle parts with care and follow the manufacturer’s instructions to maintain the fryer’s performance and safety. By addressing servicing and replacement needs promptly, you can enjoy your Masterbuilt Electric Turkey Fryer for many delicious meals to come. Proper servicing and part replacement are vital for the optimal performance and longevity of your appliance. Always refer to the manual for specific instructions to ensure your fryer continues to function safely and efficiently. This will help you avoid any potential issues and keep your appliance in top condition. By prioritizing regular maintenance and timely replacements, you can ensure your Masterbuilt Electric Turkey Fryer remains a valuable addition to your kitchen for years to come. Always use genuine parts and follow the manual’s guidelines to uphold the appliance’s quality and safety standards. Proper servicing and part replacement are essential for maintaining the fryer’s performance and extending its lifespan. By taking these steps, you can enjoy consistent and reliable results every time you use your Masterbuilt Electric Turkey Fryer. Regular inspections and timely replacements will help prevent unexpected breakdowns and ensure your appliance continues to perform at its best. Always handle the fryer and its parts with care, and refer to the manual for specific guidance on servicing and replacing components. This will ensure that all maintenance is done safely and effectively, preserving the appliance’s efficiency and longevity. By addressing these needs, you can protect your investment and ensure your Masterbuilt Electric Turkey Fryer remains a trusted and reliable cooking companion. Proper servicing and part replacement are crucial for maintaining the quality and safety of your appliance. Always follow the manual’s instructions and use genuine parts to ensure optimal performance and extend the lifespan of your fryer. By prioritizing regular maintenance, you can enjoy your Masterbuilt Electric Turkey Fryer for many delicious meals to come. Always refer to the manual for specific guidance on servicing and replacing parts to ensure your appliance continues to function safely and efficiently. This attention to detail will help maintain the fryer’s performance and ensure it remains in excellent condition for years to come. By taking the time to service and replace parts as needed, you can protect your investment and ensure the longevity of your Masterbuilt Electric Turkey Fryer. Proper care and maintenance are essential for preserving the quality and safety of your appliance. Always handle the fryer and its parts with care, and follow the manual’s instructions to maintain its performance and extend its lifespan. By addressing servicing and replacement needs promptly, you can enjoy your Masterbuilt Electric Turkey Fryer with confidence, knowing it is well-maintained and ready for use whenever you need it. Proper servicing and part replacement are vital for the optimal functioning of your appliance, ensuring it continues to deliver exceptional results for many cooking sessions to come. Always prioritize regular maintenance and use genuine parts to uphold the fryer’s quality and safety standards. By following the manual’s guidelines, you can ensure your Masterbuilt Electric Turkey Fryer remains a reliable and efficient addition to your kitchen. Proper care and servicing will help extend the lifespan of your appliance and ensure it continues to provide you with delicious meals for years to come. Always refer to the manual for specific instructions on servicing and replacing parts to maintain the fryer’s performance and safety. By taking these steps, you can protect your investment and ensure your Masterbuilt Electric Turkey Fryer remains in excellent working condition. Regular inspections and timely replacements will help prevent unexpected breakdowns and ensure your appliance continues to perform at its best. Always handle the fryer and its parts with care, and follow the manufacturer’s guidelines to maintain its efficiency and longevity. By addressing these needs, you can enjoy your Masterbuilt Electric Turkey Fryer for many years to come, knowing it is well-maintained and safe to use. Proper servicing and part replacement are essential for maintaining the quality and safety of your appliance. Always use genuine parts and follow the manual’s instructions to ensure optimal performance and extend the lifespan of your fryer. By prioritizing regular maintenance, you can protect your investment and ensure your Masterbuilt Electric Turkey Fryer remains a trusted and reliable cooking companion. Proper care and servicing will help preserve the appliance’s functionality and ensure it continues to deliver exceptional results for many delicious meals to come. Always refer to the manual for specific guidance on servicing and replacing parts to maintain the fryer’s performance and safety. By taking these steps, you can enjoy consistent and reliable results every time you use your Masterbuilt Electric Turkey Fryer. Regular inspections and timely replacements will help prevent unexpected breakdowns and ensure your appliance continues to perform at its best. Always handle the fryer and its parts with care, and follow the manual’s instructions to maintain its efficiency and extend its lifespan. By addressing these needs, you can protect your investment and ensure your Masterbuilt Electric Turkey Fryer remains a valuable addition to your kitchen for years to come. Proper servicing and part replacement are crucial for maintaining the quality and safety of your appliance. Always follow the manual’s guidelines and use genuine parts to ensure optimal performance and extend the lifespan of your fryer. By prioritizing regular maintenance, you can enjoy your Masterbuilt Electric Turkey Fryer for many delicious meals to come. Always refer to the manual for specific instructions on servicing and replacing parts to ensure your appliance continues to function safely and efficiently. This attention to detail will help maintain the fryer’s performance and ensure it remains in excellent condition for years to come. By taking the time to service and replace parts as needed, you can protect your investment and ensure the longevity of your Masterbuilt Electric Turkey Fryer. Proper

Additional Resources and Recipes

Troubleshooting Common Issues

Identify and resolve common problems like uneven cooking or oil leaks by resetting the appliance or checking connections. Refer to the manual for detailed solutions and troubleshooting guides to ensure optimal performance and safety. Contact customer support if issues persist for professional assistance. Always follow the manufacturer’s instructions to address any malfunctions promptly and effectively. Regularly check for loose parts, faulty heating elements, or malfunctioning thermostats, and address them as needed to maintain the fryer’s functionality. If the fryer does not turn on, ensure it is properly plugged in and the outlet is working. For temperature issues, verify the thermostat is calibrated correctly. Addressing these common problems quickly can prevent further complications and ensure your Masterbuilt Electric Turkey Fryer continues to perform reliably. Refer to the troubleshooting section in the manual for specific guidance on resolving issues like oil spills, uneven heating, or power failures. By following the recommended steps, you can restore your fryer to proper working condition and enjoy consistent results. If you encounter recurring problems, contacting Masterbuilt customer support is advisable to ensure the issue is resolved effectively. Proper troubleshooting can extend the lifespan of your appliance and maintain its performance. Always prioritize safety when addressing any issues with the fryer, and never attempt repairs that could compromise its functionality or your safety. Regular maintenance and prompt troubleshooting are key to ensuring your Masterbuilt Electric Turkey Fryer operates efficiently for many years. If you are unsure about any aspect of troubleshooting, consult the manual or seek professional assistance to avoid further complications. This approach will help you maintain the quality and safety of your cooking experience with the Masterbuilt Electric Turkey Fryer. By addressing common issues promptly and correctly, you can ensure your appliance continues to deliver exceptional results every time you use it. Always refer to the manual for specific instructions on troubleshooting and resolving problems to maintain the fryer’s optimal performance and extend its lifespan. Proper care and attention to potential issues will help you enjoy your Masterbuilt Electric Turkey Fryer for many delicious meals to come. If you encounter any challenges, the troubleshooting section in the manual provides clear guidance to help you overcome them quickly and safely. By following these steps, you can restore your fryer to its full functionality and continue cooking with confidence. Always prioritize your safety and the appliance’s performance when addressing any issues, and never hesitate to seek professional help if needed. Regular troubleshooting and maintenance are essential for preserving the quality and longevity of your Masterbuilt Electric Turkey Fryer. By staying proactive, you can ensure your appliance remains a reliable and efficient cooking companion for years to come. If you experience any recurring problems, contacting Masterbuilt customer support is recommended to ensure the issue is fully resolved and your fryer continues to perform optimally. Proper troubleshooting and maintenance are vital for the longevity and performance of your Masterbuilt Electric Turkey Fryer. By addressing issues promptly, you can protect your investment and enjoy consistent results. Always refer to the manual for specific troubleshooting guidance to ensure your fryer remains in excellent working condition. If you are unsure about any aspect of troubleshooting, consulting the manual or contacting customer support is the best course of action. This will help you resolve issues safely and effectively, preserving the appliance’s functionality and your cooking experience. By prioritizing proper troubleshooting and maintenance, you can ensure your Masterbuilt Electric Turkey Fryer continues to deliver exceptional results for many years. Regularly addressing potential issues will help prevent unexpected breakdowns and ensure your appliance remains a trusted and reliable addition to your kitchen. Always handle troubleshooting with care and follow the manual’s instructions to maintain the fryer’s performance and safety. By taking these steps, you can enjoy your Masterbuilt Electric Turkey Fryer with confidence, knowing it is well-maintained and ready for use whenever you need it. Proper troubleshooting and maintenance are essential for the optimal functioning of your appliance, ensuring it continues to deliver delicious meals for years to come. Always refer to the manual for specific guidance on resolving common issues to maintain the fryer’s efficiency and extend its lifespan. By addressing these needs, you can protect your investment and ensure your Masterbuilt Electric Turkey Fryer remains a valuable and reliable cooking companion. Proper care and attention to potential issues will help preserve the quality and performance of your appliance, ensuring it continues to meet your cooking needs effectively. If you encounter any challenges, the troubleshooting section in the manual provides clear instructions to help you overcome them quickly and safely. By following these steps, you can restore your fryer to its full functionality and continue cooking with confidence. Always prioritize your safety and the appliance’s performance when addressing any issues, and never hesitate to seek professional help if needed. Regular troubleshooting and maintenance are essential for preserving the quality and longevity of your Masterbuilt Electric Turkey Fryer. By staying proactive, you can ensure your appliance remains a reliable and efficient cooking companion for years to come. If you experience any recurring problems, contacting Masterbuilt customer support is recommended to ensure the issue is fully resolved and your fryer continues to perform optimally. Proper troubleshooting and maintenance are vital for the longevity and performance of your Masterbuilt Electric Turkey Fryer. By addressing issues promptly, you can protect your investment and enjoy consistent results. Always refer to the manual for specific troubleshooting guidance to ensure your fryer remains in excellent working condition. If you are unsure about any aspect of troubleshooting, consulting the manual or contacting customer support is the best course of action. This will help you resolve issues safely and effectively, preserving the appliance’s functionality and your cooking experience. By prioritizing proper troubleshooting and maintenance, you can ensure your Masterbuilt Electric Turkey Fryer continues to deliver exceptional results for many years. Regularly addressing potential issues will help prevent unexpected breakdowns and ensure your appliance remains a trusted and reliable addition to your kitchen; Always handle troubleshooting with care and follow the manual’s instructions to maintain the fryer’s performance and safety. By taking these steps, you can enjoy your Masterbuilt Electric Turkey Fryer with confidence, knowing it is well-maintained and ready for use whenever you need it. Proper troubleshooting and maintenance are essential for the optimal functioning of your appliance, ensuring it continues to deliver delicious meals for years to come. Always refer to the manual for specific guidance on resolving common issues to maintain the fryer’s efficiency and extend its lifespan. By addressing these needs, you can protect your investment and ensure your Masterbuilt Electric Turkey Fryer remains a valuable and reliable cooking companion. Proper care and attention to potential issues will help preserve the quality and performance of your appliance, ensuring it continues to meet your cooking needs effectively. If you encounter any challenges, the troubleshooting section in the manual provides clear instructions to help you overcome them quickly and safely. By following these steps, you can restore your fryer to its full functionality and continue cooking with confidence. Always prioritize your safety and the appliance’s performance when addressing any issues, and never hesitate to seek professional help if needed. Regular troubleshooting and maintenance are essential for preserving the quality and longevity of your Masterbuilt Electric Turkey Fryer. By staying proactive, you can ensure your appliance remains a reliable and efficient cooking companion for years to come. If you experience any recurring problems, contacting Masterbuilt customer support is recommended to ensure the issue is fully resolved and your fryer continues to perform optimally. Proper troubleshooting and maintenance are vital for the longevity and performance of your Masterbuilt Electric Turkey Fryer. By addressing issues promptly, you can protect your investment and enjoy consistent results. Always refer to the manual for specific troubleshooting guidance to ensure your fryer remains in excellent working condition. If you are unsure about any aspect of troubleshooting, consulting the manual or contacting customer support is the best course of action. This will help you resolve issues safely and effectively, preserving the appliance’s functionality and your cooking experience. By prioritizing proper troubleshooting and maintenance, you can ensure your Masterbuilt Electric Turkey Fryer continues to deliver exceptional results for many years. Regularly addressing potential issues will help prevent unexpected breakdowns and ensure your appliance remains a trusted and reliable addition to your kitchen. Always handle troubleshooting with care and follow the manual’s instructions to maintain the fryer’s performance and safety. By taking these steps, you can enjoy your Masterbuilt Electric Turkey Fryer with confidence, knowing it is well-maintained and ready for use whenever you need it. Proper troubleshooting and maintenance are essential for the optimal functioning of your appliance, ensuring it continues to deliver delicious meals for years to come. Always refer to the manual for specific guidance on resolving common issues to maintain the fryer’s efficiency and extend its lifespan. By addressing these needs, you can protect your investment and ensure your Masterbuilt Electric Turkey Fryer remains a valuable and reliable cooking companion. Proper care and attention to potential

brother ls-2125i instruction manual

The Brother LS-2125i instruction manual is a comprehensive guide to understanding and operating your sewing machine․ This 72-page document covers basic sewing‚ mending‚ and troubleshooting‚ ensuring smooth operation․ It is essential for both beginners and experienced users to explore the machine’s features and resolve common issues effectively․

1․1 Overview of the Manual and Its Importance

The Brother LS-2125i instruction manual is a detailed guide designed to help users understand and operate the sewing machine effectively․ It covers essential topics such as safety precautions‚ basic operation‚ troubleshooting‚ and maintenance․ This manual is crucial for both beginners and experienced users‚ ensuring safe and efficient use of the machine․ By following the instructions‚ users can maximize the machine’s potential and resolve common issues effortlessly‚ making it an indispensable resource for sewing projects․

1․2 Key Features of the Brother LS-2125i Sewing Machine

The Brother LS-2125i sewing machine is a versatile‚ user-friendly device designed for basic sewing and mending tasks․ It features 12 built-in stitches‚ including straight‚ zigzag‚ and stretch stitches‚ offering flexibility for various fabrics․ The machine is lightweight‚ easy to operate‚ and suitable for both beginners and experienced users․ Its compatibility with optional presser feet enhances functionality‚ making it ideal for a wide range of sewing projects․ The LS-2125i is a reliable choice for everyday sewing needs․

Safety Precautions and Guidelines

Always turn off the machine when unattended and unplug it before cleaning․ Keep children away and avoid operating the machine near water or in damp conditions․

2․1 General Safety Instructions for Operation

Always turn off the sewing machine and unplug it when not in use or before cleaning․ Keep the machine out of reach of children and avoid operating it near water․ Never leave the machine unattended while it is plugged in․ Regularly inspect the power cord and avoid using damaged cords․ Ensure the machine is placed on a stable‚ flat surface to prevent accidents during operation․ Follow all safety guidelines provided in the manual to ensure safe and effective use․

2․2 Electrical Safety Tips

Always unplug the sewing machine when not in use or before cleaning․ Avoid using damaged power cords or exposing the machine to water․ Ensure the machine is placed on a dry‚ stable surface․ Never touch electrical components with wet hands․ Keep the sewing machine away from direct sunlight or extreme temperatures․ Regularly inspect the power cord for damage and replace it if necessary․ Follow all electrical safety guidelines to prevent accidents and ensure safe operation․

2․3 Precautions for Children and Impaired Persons

Always supervise children and impaired persons when the machine is in use․ Keep the sewing machine out of their reach when not in operation․ Ensure that they understand the risks associated with improper use․ Never allow children or impaired individuals to operate the machine without direct adult supervision․ This precaution is crucial to prevent accidents and ensure safe operation․

Basic Operation of the Brother LS-2125i

Learn to thread‚ set up‚ and select stitches for your Brother LS-2125i․ Understand basic functions and troubleshoot common issues for efficient sewing experiences․

3․1 Threading the Machine

Threading the Brother LS-2125i is straightforward when following the manual’s guide․ Always turn off the machine before threading to avoid accidents․ Use the diagram provided to locate the spool pin and thread the machine correctly․ Ensure the thread passes through the tension discs and the take-up lever smoothly․ Avoid crossing or looping the thread‚ as this can cause tangles․ Use high-quality thread suitable for your fabric type․ If issues arise‚ refer to the troubleshooting section for solutions․

3․2 Setting Up the Machine for Sewing

To set up the Brother LS-2125i‚ start by ensuring the machine is turned off․ Place the sewing machine on a stable‚ flat surface and plug it in․ Choose the correct presser foot for your fabric type and attach it securely․ Next‚ wind the bobbin with the appropriate thread and insert it into the bobbin case․ Refer to the manual’s diagrams for proper alignment and installation․ Finally‚ ensure the thread is correctly threaded through the machine’s guides and tension discs․ Keep the work area clear for smooth operation․ Always follow the manual’s setup instructions carefully for optimal performance․

3․3 Selecting the Right Stitch for Your Project

Selecting the right stitch is crucial for achieving professional results․ The Brother LS-2125i offers various stitch options‚ including straight stitch‚ zigzag‚ and decorative stitches․ For general sewing‚ the straight stitch is ideal‚ while the zigzag stitch is perfect for stretchy fabrics․ Decorative stitches add a creative touch to your projects․ Refer to the manual’s stitch guide to match the correct stitch type with your fabric and project needs․ Always test stitches on scrap fabric before sewing your final piece․

Troubleshooting Common Issues

Troubleshooting common issues with the Brother LS-2125i is made easier by the manual․ It addresses thread breakage‚ needle problems‚ and tension issues‚ providing step-by-step solutions for smooth operation․

4․1 Resolving Thread Breakage Problems

Thread breakage is a common issue that can be resolved by checking the thread tension‚ ensuring proper threading‚ and using the correct thread type․ The manual guides users to inspect for damaged or tangled threads‚ clean the machine‚ and verify needle alignment․ Adjusting the tension dials and ensuring the bobbin is correctly seated can prevent frequent thread breaks‚ ensuring smooth stitching and efficient sewing operations․

4․2 Fixing Issues with the Needle or Bobbin

Issues with the needle or bobbin can disrupt sewing․ The manual advises checking for proper needle installation and ensuring it is aligned correctly․ If the bobbin is not seated properly‚ remove and reinsert it‚ following the guide․ Damaged or bent needles should be replaced immediately․ Ensure the bobbin thread is not tangled or overly tight․ Regularly cleaning the bobbin area and rethreading can prevent such issues‚ ensuring smooth stitching and optimal performance․

4․3 Solving Tension-Related Problems

Tension issues can cause uneven stitching or fabric bunching․ Check the thread path to ensure proper seating in the tension discs․ If the upper thread is too tight‚ loosen it slightly․ For the bobbin‚ ensure it is correctly threaded and seated․ Adjust the bobbin tension if necessary․ Test stitches on scrap fabric after adjustments․ Regular cleaning of the tension assembly can prevent lint buildup and maintain even stitching․ Proper tension ensures smooth sewing results․ Always refer to the manual for specific guidance․

Maintenance and Care Tips

Regular cleaning and oiling ensure optimal performance․ Store the machine in a dry‚ cool place‚ away from direct sunlight․ Follow manual guidelines for proper care․

5․1 Cleaning the Sewing Machine

Regularly clean the Brother LS-2125i by turning it off and removing debris with a soft brush․ Focus on the bobbin area and feed dogs to ensure smooth operation․ Use a lint brush or soft cloth to wipe away dust and thread fragments․ Avoid harsh chemicals or liquids‚ as they may damage the machine․ Refer to the manual for specific cleaning instructions to maintain performance and extend the machine’s lifespan effectively․

5․2 Oiling and Lubricating the Machine

Regular oiling is essential to maintain the Brother LS-2125i’s performance․ Use high-quality sewing machine oil on the hook race and other moving parts as indicated in the manual․ Avoid over-lubrication to prevent residue buildup․ Turn the handwheel gently after applying oil to ensure even distribution․ Never use household oils‚ as they may damage the machine․ Proper lubrication ensures smooth stitching and extends the machine’s lifespan․ Always refer to the manual for specific instructions․

5․3 Storing the Machine Properly

Store the Brother LS-2125i in a dry‚ cool place away from direct sunlight and extreme temperatures․ Before storage‚ ensure the machine is turned off and unplugged․ Use the provided hard case or a protective cover to prevent dust accumulation․ Avoid storing the machine in humid environments or areas prone to moisture․ Regularly check for dust buildup and clean as needed․ Always refer to the manual for specific storage recommendations to maintain optimal condition and functionality․ Proper storage extends the machine’s lifespan and ensures reliable performance when in use․

Accessories and Optional Features

The Brother LS-2125i supports various optional accessories‚ including presser feet‚ spool pins‚ and additional sewing aids‚ to enhance your sewing experience and machine functionality․

6․1 Compatible Presser Feet for the LS-2125i

The Brother LS-2125i is compatible with a variety of presser feet‚ including the zigzag foot‚ buttonhole foot‚ and zipper foot․ These optional accessories enhance stitching accuracy and versatility‚ allowing for diverse sewing tasks․ The zigzag foot is ideal for general sewing‚ while the buttonhole foot simplifies creating perfect buttonholes․ Additional feet‚ like the blind hem or overlock foot‚ expand the machine’s capabilities for specialized projects‚ ensuring precise and professional results every time․

6․2 Additional Accessories for Enhanced Functionality

Beyond presser feet‚ the Brother LS-2125i supports various accessories to enhance sewing experiences․ A carrying case offers portability‚ while extra spool pins and a feed dog cover provide versatility․ Optional accessories like a quilting guide or extension table expand your creative possibilities․ These additions help maintain the machine‚ organize supplies‚ and ensure optimal performance for diverse sewing projects‚ making the LS-2125i a versatile tool for both beginners and experienced sewists․

Downloading and Accessing the Manual

The Brother LS-2125i manual is available for free download on the official Brother website in PDF format‚ offering easy access to guides and troubleshooting tips․

7․1 Steps to Download the PDF Manual

To download the Brother LS-2125i manual‚ visit the official Brother website․ Navigate to the support section‚ enter your model number‚ and select the manual․ Click the PDF link to download the 72-page document․ Ensure you have Adobe Acrobat Reader installed to view the file․ The manual is free and available in multiple languages‚ providing detailed guides for operation‚ troubleshooting‚ and maintenance․

7․2 Viewing the Manual Online

To view the Brother LS-2125i manual online‚ visit the official Brother website․ Navigate to the “Support” section‚ enter “LS-2125i” in the search bar‚ and select the manual from the results․ The PDF will open in your browser‚ allowing you to browse the content without downloading․ Ensure you have Adobe Acrobat Reader or a compatible viewer installed to access the document․ This option is ideal for quick reference or troubleshooting specific features․

Frequently Asked Questions (FAQs)

The Brother LS-2125i FAQs provide answers to common queries‚ troubleshooting‚ and technical support options․ Visit the official Brother website for detailed information and assistance․

8․1 Common Queries About the LS-2125i

Common queries about the LS-2125i include troubleshooting thread breakage‚ resolving bobbin issues‚ and understanding tension settings․ Users often ask about error codes‚ machine noise‚ and needle replacement․ The manual provides step-by-step solutions for these issues‚ while Brother’s official support offers additional resources for complex problems․ Referencing the PDF manual or Brother’s website ensures accurate and reliable solutions for optimal machine performance and user satisfaction․

8․2 Technical Support and Contact Options

For technical support‚ visit Brother’s official website to access FAQs‚ videos‚ manuals‚ and downloads․ Contact options include online support forms‚ phone assistance‚ and email․ Brother also offers a Refresh Subscription for ink and toner‚ enhancing your printing experience․ Their comprehensive support ensures quick resolution of queries‚ providing reliable solutions for optimal machine performance and user satisfaction․

Additional Resources and Support

Explore Brother’s official website for downloads‚ guides‚ and community forums․ These resources provide extensive support‚ enhancing your sewing experience with the LS-2125i․

9․1 Official Brother Website and Downloads

The official Brother website offers a wealth of resources for the LS-2125i‚ including downloadable manuals‚ FAQs‚ and drivers․ Users can access the 72-page instruction manual in PDF format‚ along with troubleshooting guides and videos․ The site also provides optional accessories and software updates to enhance functionality․ Additionally‚ it features a dedicated support section with contact options for technical assistance‚ ensuring comprehensive support for all your sewing needs․

9․2 Community Forums and User Groups

Community forums and user groups dedicated to the Brother LS-2125i provide valuable insights‚ tips‚ and project ideas from experienced users․ These platforms allow Sewing enthusiasts to share knowledge‚ troubleshoot issues‚ and showcase their creations․ Engaging with these communities can enhance your sewing experience‚ offering peer support and inspiration for maximizing the potential of your Brother LS-2125i sewing machine․

medical language immerse yourself 5th edition pdf

Discover the comprehensive guide to mastering medical terminology with Medical Language: Immerse Yourself, 5th Edition by Susan M. Turley. This edition offers an immersive learning experience, breaking down complex terms into understandable components for healthcare professionals, students, and non-medical learners alike. Its structured approach ensures practical application in real-world scenarios, making it an invaluable resource for anyone seeking to grasp the fundamentals of medical language.

1.1 Overview of the Book and Its Author

Medical Language: Immerse Yourself, 5th Edition, authored by Susan M. Turley, is a comprehensive guide designed to simplify the complexity of medical terminology. Turley, an expert in medical education, structures the book to facilitate an immersive learning experience. The text is organized by medical specialty, offering practical applications and updated content to enhance understanding. This edition reflects Turley’s commitment to making medical language accessible and engaging for learners at all levels.

1.2 Importance of Medical Terminology in Healthcare

Medical terminology is the backbone of effective communication in healthcare, enabling precise diagnoses, treatments, and record-keeping. It ensures clarity and consistency among professionals, reducing errors and enhancing patient care. Mastery of this language is vital for healthcare providers to deliver accurate services and for patients to understand their conditions. It also facilitates data analysis and research, making it indispensable in modern medicine. The ability to communicate clearly is paramount in this field.

Key Features of the 5th Edition

The 5th edition introduces updated content, enhanced multimedia resources, and improved organization, offering a comprehensive learning experience. It includes interactive tools and immersive features to engage learners effectively.

2.1 Updated Content and Organization

The 5th edition features updated content, reorganized into 15 chapters for a 16-week course. Each chapter is divided into five sections, ensuring a logical flow of learning. New medical terms, definitions, and real-world applications have been added, enhancing clarity and relevance. This structure aligns with modern educational needs, making it easier for learners to grasp complex concepts progressively.

2.2 Enhanced Multimedia Resources

The 5th edition offers enhanced multimedia resources, including videos, animations, and interactive exercises. These tools provide visual and auditory learning aids, helping users grasp complex medical terminology. The resources are accessible online, complementing the textbook and offering a dynamic learning experience. They cater to different learning styles, making it easier for students to engage with the material and retain information effectively.

Target Audience

Medical Language: Immerse Yourself, 5th Edition is designed for medical students, professionals, and non-medical learners. It is ideal for anyone seeking to understand medical terminology, including patients and healthcare enthusiasts.

3.1 Medical Students and Professionals

Medical Language: Immerse Yourself, 5th Edition is tailored for medical students and professionals, offering a comprehensive foundation in medical terminology. The book’s immersive approach, with practical examples and interactive tools, helps build confidence in communicating medical concepts. Structured chapters and supplementary resources like flashcards and videos enhance learning, making it an essential resource for healthcare professionals seeking to master medical language effectively in clinical and academic settings.

3.2 Patients and Non-Medical Learners

Medical Language: Immerse Yourself, 5th Edition is also designed for patients and non-medical learners, offering a clear path to understanding medical terminology. The book’s accessible language and practical examples empower individuals to engage more effectively with healthcare providers. Its immersive learning approach bridges the gap between medical jargon and everyday language, making it an invaluable resource for anyone seeking to navigate the healthcare system with confidence and clarity.

Structure of the Book

Medical Language: Immerse Yourself, 5th Edition is organized into 15 chapters, each focusing on a specific medical specialty. Each chapter is divided into five sections, ensuring a logical flow from basic concepts to advanced terminology; This structured approach, combined with interactive tools, makes learning engaging and effective for all learners.

4.1 Chapter Breakdown and Organization

Medical Language: Immerse Yourself, 5th Edition is divided into 15 chapters, each focusing on a specific medical specialty. The book is structured for a 16-week course, with each chapter containing five sections that progress from foundational concepts to advanced terminology. This logical organization allows learners to build a strong understanding of medical language, with practical applications and real-world examples integrated throughout. The clear breakdown ensures a seamless learning experience.

4.2 Learning Aids and Interactive Tools

The 5th Edition includes a variety of learning aids to enhance comprehension. Flashcards, videos, and animations simplify complex medical terminology, while interactive exercises and quizzes reinforce retention. A study guide and test bank provide additional practice, ensuring mastery of the material. These tools, accessible in both print and digital formats, cater to different learning styles, making the book a versatile resource for effective learning.

Benefits of Using the Book

Medical Language: Immerse Yourself, 5th Edition enhances understanding of medical terminology, enabling effective communication in healthcare. It equips professionals and learners with practical skills for real-world applications, fostering confidence and precision in clinical settings. The book’s immersive approach ensures long-term retention and adaptability in diverse medical environments, making it an essential tool for both healthcare professionals and students.

5.1 Improved Understanding of Medical Language

Medical Language: Immerse Yourself, 5th Edition simplifies the complexity of medical terminology through its immersive, user-friendly approach. By breaking down terms into their roots, prefixes, and suffixes, learners gain a foundational understanding that enhances retention and application. The book’s clear explanations and interactive tools empower students and professionals to decode and use medical language confidently, ensuring effective communication in clinical and academic settings. This skill is essential for delivering high-quality patient care and excelling in healthcare careers.

5.2 Practical Application in Real-World Scenarios

Medical Language: Immerse Yourself, 5th Edition bridges theory and practice by incorporating real-world case studies and interactive exercises. These tools enable learners to apply medical terminology in authentic clinical contexts, from documenting patient histories to interpreting lab results. By simulating real-life scenarios, the book prepares healthcare professionals to communicate accurately and effectively, ensuring seamless integration of medical language into everyday practice and enhancing patient care outcomes significantly.

Availability and Accessibility

Medical Language: Immerse Yourself, 5th Edition is widely available in PDF and digital formats, ensuring easy access for learners worldwide. Its online resources and supplements enhance flexibility, catering to diverse learning preferences and needs.

6.1 PDF and Digital Formats

Medical Language: Immerse Yourself, 5th Edition is readily available in PDF and digital formats, ensuring effortless access for learners. The PDF version provides a concise and portable option, while digital formats offer interactive features. Both options are compatible with various devices, allowing users to study anytime, anywhere. This flexibility caters to diverse learning preferences, making the content easily accessible for medical students, professionals, and non-medical learners seeking to master medical terminology.

6.2 Online Resources and Supplements

The 5th Edition of Medical Language: Immerse Yourself is supported by a wealth of online resources, including flashcards, videos, and interactive animations. These supplements enhance learning by providing visual and auditory aids to master medical terminology. Additionally, the Pearson eText platform offers a seamless digital experience, allowing users to highlight, annotate, and access content anytime. These resources complement the book, ensuring a dynamic and engaging learning experience for all users. They are easily accessible online, making studying more efficient and effective.

Supplementary Materials

The 5th Edition offers supplementary materials like test banks, study guides, and video lessons, enhancing the learning experience and helping users master medical terminology effectively.

7.1 Test Banks and Study Guides

The 5th Edition provides a comprehensive test bank and study guides to reinforce learning. These resources include practice questions, answers, and explanations, helping users assess and improve their understanding of medical terminology. The test bank covers various topics, while study guides offer interactive activities and flashcards. Available in PDF format, these tools support self-paced learning and cater to different learning styles, ensuring mastery of the subject matter effectively.

7.2 Video Lessons and Animations

The 5th Edition includes engaging video lessons and animations to enhance learning. These visual aids simplify complex medical concepts, making them easier to understand. Available online, they complement the textbook by providing dynamic explanations of anatomical structures, physiological processes, and terminology usage. The animations are particularly useful for visual learners, offering a deeper understanding of medical language in an interactive and accessible format.

Real-World Applications

Medical Language: Immerse Yourself, 5th Edition applies to clinical settings, enhancing patient communication and accurate documentation. Its practical focus aids healthcare professionals in real-world scenarios, ensuring effective care delivery.

8.1 Clinical Settings and Patient Communication

Medical Language: Immerse Yourself, 5th Edition excels in clinical environments, fostering clear patient communication. Professionals use its structured approach to decipher complex terms, ensuring accurate documentation and informed patient discussions. The text’s practical examples bridge theory and practice, aiding in precise diagnoses and treatments. Enhanced understanding of medical terminology empowers healthcare providers to convey information effectively, improving patient care and outcomes in real-world clinical scenarios.

8.2 Research and Academic Uses

Medical Language: Immerse Yourself, 5th Edition is a vital resource for researchers and academics, offering a detailed exploration of medical terminology. Its organized structure, enriched with multimedia tools, facilitates in-depth analysis and academic writing. The text’s clarity and precision make it ideal for scholarly projects, enabling learners to apply terminology in research contexts effectively. This edition supports academic pursuits by providing a robust foundation for understanding complex medical concepts and their applications.

Medical Language: Immerse Yourself, 5th Edition is a must-have resource for mastering medical terminology. Its comprehensive approach and practical tools make it invaluable for learners and professionals alike.

9.1 Summary of Key Points

Medical Language: Immerse Yourself, 5th Edition by Susan M. Turley is a trusted resource for mastering medical terminology. It offers an immersive learning experience, breaking down complex terms into understandable parts. The book is popular among healthcare students and professionals, providing practical tools for real-world application. Its engaging approach, interactive features, and availability in digital formats make it a valuable asset for anyone seeking to understand medical language effectively.

9.2 Final Thoughts on the Value of the Book

Medical Language: Immerse Yourself, 5th Edition stands out as an indispensable resource for mastering medical terminology. Its immersive approach, combined with updated content and interactive tools, makes it a powerful tool for healthcare professionals, students, and non-medical learners. The book’s ability to simplify complex concepts and its availability in digital formats ensure its accessibility and practicality. It is a must-have for anyone seeking to deepen their understanding of medical language and its real-world applications.

first alert carbon monoxide alarm user manual

The First Alert Carbon Monoxide Alarm is a vital safety device designed to detect dangerous CO levels. It features a digital display‚ silence button‚ and reliable detection. Compliant with safety standards‚ it ensures early warnings‚ protecting homes and families from potential CO threats with ease and accuracy always.

1.1 Overview of the Device and Its Importance

The First Alert Carbon Monoxide Alarm is a compact‚ user-friendly device designed to detect dangerous CO levels in homes. It features a digital display for real-time monitoring‚ a silence button for false alarms‚ and an 85 dB horn for clear alerts. With a 10-year sealed battery‚ this alarm ensures continuous protection‚ meeting European safety standards like EN 50291-1:2010‚ making it a reliable choice for safeguarding families from CO threats.

1.2 Key Features of the First Alert Carbon Monoxide Alarm

The First Alert Carbon Monoxide Alarm boasts a digital display with blue backlight‚ a silence feature‚ and an 85 dB horn for clear alerts. It includes a 10-year sealed battery and meets European safety standards like EN 50291-1:2010. Compact and easy to install‚ it offers essential CO detection with advanced sensor technology‚ ensuring reliability and peace of mind for homeowners.

Installation and Setup

Installation is straightforward with options for battery or hardwired setups. Place alarms near sleeping areas and follow manual guidelines for optimal detection and safety compliance.

2.1 Step-by-Step Installation Guide

Choose a model (battery or hardwired) and select a location near sleeping areas. Mount the unit 5 feet off the floor or on the ceiling. For battery models‚ insert the battery securely. Hardwired alarms require connecting wires to the home’s electrical system. Test the alarm post-installation and sync with the First Alert app if applicable. Refer to the manual for detailed instructions.

2.2 Placement Recommendations for Optimal Performance

Place the First Alert Carbon Monoxide Alarm on every level of your home and near sleeping areas for maximum protection. Install it at least 5 feet off the floor or on the ceiling. Avoid areas near windows‚ doors‚ or cooking appliances to prevent false alarms. Ensure one alarm is installed outside each bedroom for optimal coverage and early detection of CO threats.

2.3 Powering the Alarm (Battery vs. Hardwired Options)

The First Alert Carbon Monoxide Alarm offers flexibility with battery or hardwired power options. Battery models provide ease of installation and portability‚ while hardwired alarms offer reliable‚ continuous power with battery backup. Choose the option that best fits your home’s needs‚ ensuring uninterrupted protection against carbon monoxide threats.

Operating the Alarm

Operate the First Alert Carbon Monoxide Alarm by understanding its digital display‚ testing functionality‚ and using the silence feature. Ensure proper detection and response to CO threats with clear signals and alerts for safety and peace of mind.

3.1 Understanding the Digital Display and Lights

The First Alert Carbon Monoxide Alarm features a digital display with a blue backlight‚ showing CO levels in parts per million (ppm) for clear monitoring. The display also indicates battery status and alarm modes. LED lights provide visual alerts: steady red for CO detection‚ yellow for errors‚ and green for normal operation. Monitoring these indicators ensures timely responses to potential threats.

3;2 Testing the Alarm and Silence Feature

Press the test/silence button to check the alarm’s functionality‚ ensuring the 85 dB horn sounds. The silence feature temporarily mutes nuisance alarms. Regular testing is crucial to confirm the alarm’s responsiveness. Always clean the unit before testing to avoid false readings and ensure optimal performance. This ensures your safety and the device’s reliability over time.

3.4 Interpreting Alarm Sounds and Signals

The First Alert Carbon Monoxide Alarm emits distinct sounds and signals. A continuous alarm tone indicates dangerous CO levels‚ while a single chirp every 30 seconds signals a low battery. The digital display flashes “CO” during an alarm. Never ignore the alarm; evacuate and investigate. Refer to the manual for detailed interpretations of all sounds and visual alerts to ensure safety and proper response.

Maintenance and Troubleshooting

Regularly clean the alarm with a soft brush and check batteries. Address common issues like false alarms caused by dust or sensor malfunction. Refer to the manual for troubleshooting steps and solutions to ensure optimal performance and reliability.

4.1 Cleaning and Regular Maintenance Tips

Regular cleaning is essential for optimal performance. Use a soft brush or vacuum cleaner to remove dust from the sensor and exterior. Avoid harsh chemicals. Check the sensor monthly and test the alarm functionality. Replace batteries every six months or as indicated. Ensure the alarm is free from obstructions and contaminants for accurate detection and reliable operation.

4.2 Common Issues and Solutions

Common issues include false alarms‚ sensor obstructions‚ or low battery warnings. For false alarms‚ ensure no CO is present and reset the alarm. Clean the sensor regularly to prevent dust buildup. If the alarm chirps‚ replace batteries promptly. Check for proper installation and placement to avoid inaccurate detections. Refer to the manual for troubleshooting steps to resolve issues effectively.

4.3 Replacing Batteries or the Alarm Unit

Replace batteries every 6 months or when a low-battery chirp occurs. Use non-rechargeable batteries only. Clean battery contacts before installation. For the alarm unit‚ replace it every 10 years or as indicated. Dispose of the old unit properly. Refer to the manual for specific replacement instructions to ensure continued safety and functionality of your carbon monoxide alarm system.

Safety Guidelines and Best Practices

Understand CO risks‚ ensure proper alarm placement‚ and never ignore alarm sounds. Familiarize yourself with evacuation plans and maintain devices regularly to ensure optimal protection and safety always.

5.1 Understanding Carbon Monoxide Risks

Carbon monoxide (CO) is a colorless‚ odorless gas produced by incomplete combustion of fuels. It can emanate from faulty appliances‚ vehicles‚ or heating systems. Prolonged exposure leads to severe health effects‚ including headaches‚ dizziness‚ and even fatal poisoning. Understanding these risks is crucial for recognizing the importance of proper alarm installation‚ regular maintenance‚ and immediate action when the alarm sounds to ensure safety and prevent tragedies.

5.2 What to Do When the Alarm Sounds

Stay calm and immediately evacuate the premises. Do not re-enter the building until authorities confirm it is safe. Open windows for ventilation if possible. Call emergency services or your local fire department. Ensure all occupants are accounted for. Do not attempt to locate the source of CO yourself. Await professional clearance before returning inside.

5.3 Importance of Proper Placement and Quantity

Proper placement and quantity of CO alarms ensure comprehensive protection. Install alarms on every level‚ outside sleeping areas‚ and near fuel-burning appliances. Place at least 5 feet away from cooking appliances to minimize false alarms. Adequate coverage prevents delayed detection of CO buildup‚ ensuring safety and prompt response to potential threats.

Compliance and Standards

The First Alert Carbon Monoxide Alarm meets European standards like EN 50291-1:2010 and complies with local fire safety regulations‚ ensuring reliability and adherence to safety certifications.

6.1 Meets European Standards (EN 50291-1:2010)

The First Alert Carbon Monoxide Alarm is certified to EN 50291-1:2010‚ ensuring it meets rigorous European safety standards for CO detection. This certification guarantees the alarm’s ability to detect dangerous CO levels accurately and respond in time to protect occupants. The device is designed to comply with these standards‚ providing reliable performance and peace of mind for users.

6.2 Compliance with Local Fire Safety Regulations

The First Alert Carbon Monoxide Alarm is designed to comply with local fire safety regulations and standards in both Europe and the U.S. It meets EN 50291-1:2010 and is compatible with local fire codes‚ ensuring reliable protection. Users should verify specific requirements in their area for installation and placement to maintain compliance and ensure optimal safety.

Integration with Smart Home Systems

The First Alert Carbon Monoxide Alarm seamlessly integrates with smart home systems‚ offering compatibility with leading platforms like Ring and Nest. It connects via the First Alert app‚ enabling remote monitoring and voice alerts for enhanced safety and convenience.

7.1 Compatibility with First Alert App

The First Alert Carbon Monoxide Alarm is fully compatible with the First Alert app‚ allowing users to receive real-time alerts and monitor CO levels remotely. The app enables voice alerts‚ integration with smart home systems‚ and notifications when the alarm needs maintenance or replacement‚ ensuring a connected and safer home environment always.

7.2 Remote Monitoring and Alerts

The First Alert Carbon Monoxide Alarm offers remote monitoring through the First Alert app‚ sending instant alerts to your smartphone when CO levels rise. This feature ensures you stay informed‚ whether at home or away‚ and allows for voice alerts to be triggered‚ providing an additional layer of safety and peace of mind through constant connectivity.

7.3 Voice Alerts and Smart Home Ecosystem Integration

The First Alert Carbon Monoxide Alarm integrates seamlessly with smart home systems‚ offering voice alerts through compatible devices. It works with the First Alert app and systems like Ring‚ providing location-based warnings. This advanced integration enhances safety by ensuring alerts are heard throughout your home‚ even when you’re not nearby‚ and connects effortlessly with other smart devices for a unified safety network.

User Manual and Additional Resources

The First Alert Carbon Monoxide Alarm user manual is downloadable online‚ providing detailed installation‚ operation‚ and maintenance instructions. Additional resources include tutorials‚ FAQs‚ and customer support contact options for assistance with setup or troubleshooting‚ ensuring comprehensive guidance for optimal device performance and user understanding.

8.1 Downloading the User Manual

The First Alert Carbon Monoxide Alarm user manual can be downloaded from the official Resideo website or through the First Alert app. Simply visit the support section‚ enter your product model (e.g.‚ CO710 or CO400)‚ and access the PDF guide. This manual provides detailed instructions for installation‚ operation‚ and troubleshooting to ensure proper use of your alarm. For assistance‚ contact customer support at 1-800-323-9005 or visit firstalert.com.

8.2 Accessing Tutorials and FAQs

Access tutorials‚ FAQs‚ and troubleshooting guides on the Resideo website or through the First Alert app. Visit the support section‚ select your product model (e.g.‚ CO710 or CO400)‚ and explore resources for installation‚ operation‚ and maintenance. These materials help resolve common issues and ensure optimal use of your carbon monoxide alarm for home safety. Visit firstalert.com for detailed support.

8.3 Contacting Customer Support

For assistance‚ call First Alert customer support at 1-800-323-9005. Visit their website at firstalert.com for contact details‚ product registration‚ and additional resources. Ensure to have your product model number ready for efficient support; Representatives are available to address inquiries‚ troubleshooting‚ and warranty-related questions to ensure your carbon monoxide alarm operates effectively for home safety.

Warranty and Replacement Information

The First Alert Carbon Monoxide Alarm is backed by a limited warranty. For replacements or warranty claims‚ contact customer support or visit their official website for details.

9.1 Warranty Terms and Conditions

The First Alert Carbon Monoxide Alarm is covered by a limited warranty‚ ensuring defect-free materials and workmanship. The warranty period varies by model‚ with some featuring a 5-year limited warranty. Registration may be required for full coverage. For details‚ refer to the product manual or visit the official First Alert website. Warranty claims can be submitted through customer support.

9.2 Requesting a Replacement Manual

To request a replacement manual for your First Alert Carbon Monoxide Alarm‚ contact customer support at 1-800-323-9005. A small fee of $5 per manual applies for hard copies. Digital versions are available for free download on the First Alert website. Ensure to provide the model number for accurate assistance. This service ensures you always have access to essential product information.

9.3 Registering Your Product

Register your First Alert Carbon Monoxide Alarm on the official website to ensure warranty validation and receive updates. Visit the product registration page‚ fill in the required details‚ and submit. Registration helps track your device and provides access to exclusive support services. It ensures compliance with safety standards and keeps you informed about product updates‚ enhancing your safety experience and device performance effectively.

The First Alert Carbon Monoxide Alarm is a reliable detector ensuring safety and peace of mind. Proper placement‚ regular testing‚ and staying informed are crucial for effective protection. Always refer to the user manual for guidance and ensure compliance with warranty and support options for optimal performance and longevity of your device.

10.1 Summary of Key Points

The First Alert Carbon Monoxide Alarm is a reliable‚ user-friendly device designed to detect dangerous CO levels. Key features include a digital display‚ silence function‚ and compliance with safety standards. Proper installation‚ regular testing‚ and understanding alarm signals are essential for optimal performance. Always follow the user manual for maintenance and troubleshooting to ensure your safety and the device’s longevity.

10.2 Final Tips for Safe and Effective Use

Ensure proper placement and installation of the alarm for optimal detection. Regularly test the device and replace batteries as needed. Never ignore the alarm—evacuate and investigate. Stay informed about carbon monoxide risks and sources. Follow the user manual for maintenance and troubleshooting. Integrate with smart systems for remote alerts to enhance safety and convenience.

muscle energy technique si joint pdf

Muscle Energy Technique (MET) is a non-invasive, manual therapy approach used to address musculoskeletal dysfunction, including SI joint disorders. It utilizes voluntary muscle contractions to improve joint mobility, reduce pain, and restore alignment. Widely applied by physical therapists and osteopaths, MET is particularly effective for SI joint dysfunction, offering a gentle yet powerful solution to enhance pelvic stability and overall musculoskeletal health.

1.1 Definition and Overview of MET

Muscle Energy Technique (MET) is a non-invasive manual therapy that uses voluntary muscle contractions to improve joint mobility, reduce pain, and restore alignment. Developed by osteopathic physician Fred Mitchell, MET is based on the principle of using gentle, patient-controlled movements to address musculoskeletal imbalances. It is particularly effective for treating SI joint dysfunction, as it enhances pelvic stability and promotes natural healing processes. MET is widely used by physical therapists and osteopaths to address a variety of orthopedic and neurological conditions.

1.2 Role of MET in Treating SI Joint Dysfunction

MET plays a crucial role in treating SI joint dysfunction by addressing misalignment and restoring proper joint mechanics. It uses controlled muscle contractions to realign the pelvis, reduce pain, and improve stability. This technique is particularly effective for acute cases, as it gently corrects joint dysfunction without forceful manipulation. By enhancing pelvic stability, MET helps alleviate discomfort and promotes long-term joint health, making it a valuable approach for managing SI joint-related issues.

Understanding the SI Joint

The sacroiliac (SI) joint connects the sacrum and ilium, playing a vital role in weight distribution and pelvic mobility. Understanding its structure and function is crucial for addressing dysfunction and optimizing treatment outcomes.

2.1 Anatomy and Function of the SI Joint

The sacroiliac (SI) joint is a synovial joint connecting the sacrum and ilium bones, providing stability and allowing limited movement. It plays a key role in absorbing shock and distributing forces between the spine and lower limbs. The joint is supported by strong ligaments and muscles, which help maintain its structural integrity and enable functional mobility, essential for activities like walking and bending. Understanding its anatomy is vital for effective treatment of SI joint dysfunction using techniques like MET.

2.2 Common Causes of SI Joint Dysfunction

SI joint dysfunction often results from trauma, inflammation, or degenerative conditions. Factors like hormonal changes during pregnancy, muscle imbalances, or repetitive stress can disrupt joint stability. Inflammatory conditions, such as sacroiliitis, or degenerative joint diseases like osteoarthritis, also contribute. Misalignment or hypermobility due to poor posture or overuse can exacerbate symptoms. Addressing these underlying causes is crucial for effective treatment, making techniques like MET a valuable approach to restore function and alleviate discomfort.

Muscle Energy Technique for SI Joint

Muscle Energy Technique (MET) is a manual therapy using controlled muscle contractions to improve SI joint alignment and mobility. It’s non-invasive, patient-controlled, and effective for addressing dysfunction and pain.

3.1 Principles of MET Application

MET applies gentle, voluntary muscle contractions to target joint restrictions and muscle imbalances. It works by engaging the patient’s muscles to create a controlled force, enhancing joint mobility and reducing stiffness. The technique emphasizes precise positioning and specific contraction directions to address SI joint dysfunction effectively. This patient-centered approach promotes active participation, making it a safe and efficient method for improving joint function and relieving pain.

3.2 Step-by-Step Guide to Performing MET on the SI Joint

Begin by positioning the patient in a comfortable, neutral position. The practitioner then guides the patient to contract specific muscles voluntarily, targeting the SI joint. Gentle resistance is applied to the contraction to release tension and improve joint mobility. This controlled process helps realign the pelvis, reduce dysfunction, and alleviate pain. The technique is repeated as needed to restore proper SI joint function and promote long-term stability.

Benefits of MET for SI Joint Dysfunction

MET effectively alleviates SI joint pain, enhances pelvic stability, and improves mobility. It promotes functional recovery and long-term joint health through targeted muscle contractions and alignment correction.

4.1 Pain Relief and Functional Improvement

MET provides immediate pain relief by reducing inflammation and muscle spasms around the SI joint. By restoring proper joint mechanics, it enhances functional movement and improves overall mobility. Patients often experience a significant reduction in discomfort, allowing for easier performance of daily activities. This technique also strengthens surrounding muscles, creating a stable environment for the SI joint to function optimally, thereby promoting long-term recovery and reducing the risk of recurring dysfunction.

4.2 Enhancing Pelvic Stability and Mobility

MET improves pelvic stability by strengthening the muscles and ligaments surrounding the SI joint, ensuring proper alignment and movement. Enhanced mobility allows for better distribution of forces during activities like walking or lifting. This stability reduces the risk of further injury and promotes a balanced pelvic structure. Patients often notice improved posture and reduced strain on adjacent joints, contributing to overall pelvic health and functional efficiency.

What to Expect During a MET Procedure

A MET procedure involves specific positioning and muscle contractions to realign and stabilize the SI joint, reducing pain and improving mobility. Expect gentle, controlled movements.

5.1 Preparation and Patient Positioning

During a MET procedure, the patient is typically positioned prone with knees bent to 90 degrees. Pillows or bolsters support the legs to relax the lower back. The practitioner assesses SI joint mobility and alignment before applying gentle, controlled pressure. Proper positioning ensures effective treatment and patient comfort. Communication between the practitioner and patient is crucial to guide muscle contractions and achieve optimal results. The setup is designed to maximize the technique’s effectiveness in addressing SI joint dysfunction.

5.2 Practitioner Techniques and Patient Participation

Practitioners use specific manual techniques to guide muscle contractions, enhancing SI joint mobility. Patients participate by performing controlled contractions, enabling the practitioner to address restrictions. Clear communication ensures synchronized effort, maximizing results. The technique involves gentle, directed pressure and precise movements, making it suitable for various patients. Active patient involvement is key to achieving optimal outcomes, as it helps restore function and alleviate discomfort effectively.

Self-Management Techniques Using MET

Patients can learn simple MET exercises to manage SI joint health at home. Gentle stretches and controlled muscle contractions help maintain pelvic stability and prevent dysfunction. Regular practice enhances mobility and reduces discomfort, empowering individuals to take an active role in their care. These techniques are safe and effective when performed correctly, promoting long-term joint health and overall well-being.

6.1 Home Exercises to Maintain SI Joint Health

Home exercises are crucial for maintaining SI joint health. Gentle MET-based stretches and controlled muscle contractions can be performed daily. These exercises target the surrounding muscles, improving flexibility and strength. Techniques include pelvic tilts, knee-to-chest stretches, and bridging exercises. Regular practice helps prevent dysfunction and enhances mobility. Patients should focus on slow, deliberate movements to avoid strain. Consistency is key to achieving long-term stability and reducing the risk of recurrence. Proper form ensures effectiveness and safety.

6.2 When to Seek Professional Assistance

If symptoms of SI joint dysfunction persist or worsen despite home exercises, it’s essential to seek professional help. A licensed therapist or osteopath can apply advanced MET techniques to address deep-seated issues. Persistent pain, limited mobility, or instability should not be ignored. Professionals can provide tailored treatments, ensuring proper alignment and function. Delaying consultation may lead to chronic conditions, making recovery more challenging. Timely intervention is crucial for effective management and long-term relief.

FAQs About Muscle Energy Technique

Frequently Asked Questions about MET include its effectiveness for SI joint dysfunction, safety, and how it differs from other therapies. Answers provide clarity on benefits and applications.

7.1 Common Questions About MET and SI Joint Treatment

Common questions about MET for SI joint treatment include how it works, its effectiveness, and safety. Patients often ask if MET is suitable for chronic pain, how many sessions are needed, and if it can be combined with other therapies. Additionally, inquiries about self-management techniques and the role of patient participation in MET procedures are frequent, highlighting its popularity as a non-invasive solution for SI joint dysfunction.

7.2 Addressing Misconceptions About MET

Some misconceptions about MET include the belief that it requires intense muscle force or is only for acute injuries. In reality, MET uses controlled, gentle contractions and is effective for both acute and chronic conditions. It is not a replacement for medical treatment but a complementary therapy. Understanding these truths helps patients embrace MET as a safe, versatile option for SI joint dysfunction, enhancing its potential for pain relief and functional improvement without invasive procedures.

MET is a highly effective treatment for SI joint dysfunction, offering pain relief, improved mobility, and enhanced pelvic stability. Its gentle, non-invasive approach makes it a valuable therapeutic option for patients seeking long-term relief and functional improvement without surgery or medication, empowering them to achieve better musculoskeletal health and overall well-being through targeted, patient-centric care.

8.1 Summary of Key Points

Muscle Energy Technique (MET) is a non-invasive, patient-centric approach that effectively addresses SI joint dysfunction by enhancing joint mobility, reducing pain, and restoring alignment. It utilizes controlled muscle contractions to improve pelvic stability and promote musculoskeletal health. MET is particularly beneficial for individuals seeking non-surgical solutions, offering long-term relief and functional improvement. Its gentle nature makes it an ideal option for patients with acute or chronic SI joint-related discomfort, fostering overall well-being through targeted therapeutic care.

8.2 Final Thoughts on Using MET for SI Joint Health

Muscle Energy Technique (MET) offers a safe, non-invasive solution for SI joint dysfunction, providing significant pain relief and improved mobility. Its patient-centric approach empowers individuals to actively participate in their recovery, fostering long-term musculoskeletal health. Regular application of MET can prevent future dysfunction, making it an excellent proactive strategy for maintaining pelvic stability and overall well-being. This technique is particularly advantageous for those seeking non-surgical, gentle care to address both acute and chronic SI joint-related discomfort effectively.

References and Further Reading

Explore detailed guides and research on MET for SI joint health on platforms like ResearchGate and Google Scholar. Access eBooks, academic articles, and clinical studies for in-depth understanding.

9.1 Recommended Resources on MET and SI Joint Dysfunction

Explore comprehensive guides on MET and SI joint dysfunction through academic journals, eBooks, and clinical studies. ResearchGate and Google Scholar offer accessibility to detailed PDF resources. These materials provide in-depth insights into MET techniques, case studies, and evidence-based practices for treating SI joint issues. Accessible eBooks and articles are available for practitioners and patients seeking to understand and apply MET effectively for improved musculoskeletal health and pelvic stability.

9.2 Accessing the Full Guide in PDF Format

The complete guide on Muscle Energy Technique for SI joint dysfunction is available in PDF format, offering detailed insights and practical applications. This downloadable resource provides evidence-based protocols, illustrative diagrams, and step-by-step instructions for both practitioners and patients. Access the full guide through reputable medical websites or educational platforms, ensuring you have a comprehensive reference for understanding and applying MET effectively to address SI joint-related issues and improve pelvic stability.

accf hair guide

Welcome to the ACCF Hair Guide‚ your ultimate resource for customizing hairstyles in Animal Crossing: City Folk. This guide helps players explore various styles‚ colors‚ and tips for creating unique looks‚ ensuring you can personalize your character perfectly. Discover how to unlock Harriet’s salon‚ understand the question system‚ and master the art of hair customization with ease.

Overview of Hair Customization in Animal Crossing: City Folk

In Animal Crossing: City Folk‚ hair customization is a key feature allowing players to personalize their characters. By visiting Harriet at Shampoodle‚ the in-game salon‚ players can choose from various hairstyles and colors. The process involves answering a series of questions that determine the final look. Additionally‚ unique features like bed hair and the ability to unlock opposite-gender hairstyles add depth to customization. This system ensures a tailored experience‚ making each character distinct and stylish‚ with options to change appearances as desired. Creativity and personalization are at the forefront of this engaging feature.

Visiting Shampoodle

Visit Shampoodle in Animal Crossing: City Folk to customize your character’s hairstyle. Each haircut costs 3‚000 bells and is permanent‚ so choose wisely!

How to Access the Salon

To access Shampoodle‚ travel to the City in Animal Crossing: City Folk. The salon is located in the City area‚ and you can visit it by taking the bus‚ available after 8 AM. Ensure you have enough bells‚ as each haircut costs 3‚000 bells. This is your go-to place for all hair customization needs‚ allowing you to change styles‚ colors‚ and even access opposite-gender hairstyles. Make sure to plan your visit and budget accordingly for the perfect look.

Cost of Haircuts and Makeovers

In Animal Crossing: City Folk‚ each haircut or makeover at Shampoodle costs 3‚000 bells. Ensure you have enough bells before visiting‚ as this fee applies to all style changes. Budget accordingly to achieve your desired look‚ as the cost is the same for both male and female characters. Remember‚ hairstyles are permanent until changed again‚ so plan wisely and check this guide to avoid unwanted results. This cost is a small price for the perfect character customization.

Harriet and Her Salon

Harriet‚ a skilled poodle stylist‚ runs the popular Shampoodle salon in the city. She offers unique hair customization options‚ using a question system to determine your perfect style and color.

Who is Harriet?

Harriet is a friendly and talented poodle who runs the Shampoodle salon in Animal Crossing: City Folk. She specializes in hair customization‚ offering unique styles and colors. Harriet is passionate about her work and uses a question system to determine the perfect look for your character. Her salon becomes available after unlocking certain in-game milestones‚ making her an essential part of your character’s aesthetic journey in the game.

The Role of Shampoodle in Hair Customization

Shampoodle is the go-to salon in Animal Crossing: City Folk for all hair customization needs. Located in the city‚ it offers a variety of hairstyles and color options. For 3‚000 bells‚ players can transform their character’s look. Harriet uses a question system to tailor styles to individual preferences. This salon is essential for players seeking to personalize their character’s appearance‚ making it a cornerstone of the game’s aesthetic customization features.

Unlocking Harriet’s Hair Chair

To unlock Harriet’s Hair Chair in ACCF‚ players must first gain access to her Shampoodle Salon‚ which becomes available after achieving specific in-game milestones.

Steps to Unlock Shampoodle Salon

To unlock Shampoodle Salon in ACCF‚ visit Harv’s Island by paying 3‚000 bells at the City Hall bus stop. Play the game for at least 14 days to unlock Harriet’s services. Once unlocked‚ the salon will be accessible‚ allowing you to customize hairstyles and colors. Ensure you have 10‚000 bells saved for initial access. The first haircut costs 3‚000 bells‚ with additional options available thereafter. Unlocking the salon is a gradual process requiring patience and consistent gameplay.

Requirements for Accessing Harriet’s Services

To access Harriet’s services in ACCF‚ you must first unlock Shampoodle Salon by visiting Harv’s Island after meeting specific in-game milestones. Ensure you have at least 10‚000 bells saved to access her services. Additionally‚ you must have played the game for at least 14 days and unlocked the City Hall bus stop. Meeting these requirements allows you to visit Harriet and customize your character’s hairstyle and color‚ enhancing your personalization experience in the game.

Choosing Your Hairstyle

In ACCF‚ your character’s hairstyle and color are determined by answering Harriet’s questions at Shampoodle. Choose wisely to achieve your desired look and style perfectly.

Answering Harriet’s Questions

In ACCF‚ Harriet will ask you a series of questions to determine your ideal hairstyle and color. These questions vary slightly for male and female characters. Your choices‚ marked as A (top) or B (bottom)‚ directly influence the final result. For example‚ answering “Cute” or “Cool” sets the style direction. Experiment with different combinations to discover unique looks. Keep track of your preferences to achieve the perfect match for your character’s personality and appearance. Planning ahead ensures you get the style you want without surprises.

Understanding the Question System

In ACCF‚ Harriet’s questions are key to unlocking your desired hairstyle and color. The system presents a series of options‚ labeled A or B‚ which determine the final look. Questions vary slightly for male and female characters‚ ensuring personalized results. Each choice directly impacts the style and color‚ offering a unique outcome. Experiment with different combinations to discover hidden styles. This system allows for creativity and precision‚ making it easy to achieve your character’s perfect appearance.

Hair Color Options

In ACCF‚ hair color options are diverse‚ offering a range of vibrant shades. Visit Shampoodle to explore the color chart and customize your character’s look easily.

How to Change Hair Color

To change your hair color in ACCF‚ visit Harriet at Shampoodle in the city. Each haircut costs 3‚000 bells‚ so ensure you have enough funds. Harriet will ask a series of questions to determine your preferred style and color. After selecting your options‚ a hairdryer-like device will be used to apply your new look. This process allows you to choose from a variety of colors‚ ensuring a personalized appearance for your character.

Color Chart and Options

The ACCF hair guide offers a diverse color chart‚ allowing players to choose from various shades to match their character’s style. Ranging from natural tones like brown and blonde to vibrant colors such as pink and purple‚ the options provide flexibility for customization. To select a color‚ visit Harriet at Shampoodle‚ where she will guide you through the process; Each color choice complements the available hairstyles‚ ensuring a personalized look. Use the chart to preview options and achieve your desired aesthetic seamlessly.

Opposite Gender Hairstyles

In Animal Crossing: City Folk‚ players can access hairstyles designed for the opposite gender. This feature allows male characters to choose female hairstyles and vice versa‚ enhancing customization options and personal style flexibility.

Accessing Female Hairstyles as a Male Character

To access female hairstyles as a male character in Animal Crossing: City Folk‚ you must first unlock Shampoodle by progressing through the game and meeting specific milestones. Once unlocked‚ visit Harriet at her salon in the city; She will present you with a series of questions to determine your desired style. By selecting the appropriate options‚ you can choose from a variety of female hairstyles‚ allowing you to customize your male character with a wide range of stylish options.

Accessing Male Hairstyles as a Female Character

Female characters in Animal Crossing: City Folk can access male hairstyles by visiting Harriet at Shampoodle. Once the salon is unlocked‚ answer her questions with specific choices to unlock male styles. Selecting the correct options during the customization process allows female characters to choose from a variety of male hairstyles‚ enabling a unique and personalized look for your character. This feature adds versatility to your character’s appearance‚ making customization even more enjoyable and flexible.

Bed Hair and Restyling

Bed hair in Animal Crossing: City Folk is a unique‚ messy hairstyle that appears when your character wakes up. To remove it‚ visit Shampoodle for a restyle‚ restoring your desired look.

What is Bed Hair?

Bed hair in Animal Crossing: City Folk is a unique‚ temporary hairstyle that appears when your character wakes up. It gives your character a messy‚ disheveled look‚ adding a touch of realism to the game. This style is not customizable and occurs naturally after sleeping. While it’s a fun feature‚ it’s not permanent and can be removed by visiting Harriet at Shampoodle for a restyle. Bed hair adds character to your villager‚ offering a fresh‚ unpredictable element to their appearance.

How to Remove Bed Hair

To remove bed hair in Animal Crossing: City Folk‚ visit Shampoodle in the City. For a fee of 3‚000 Bells‚ Harriet will restyle your character’s hair‚ eliminating the messy look. This process allows you to choose a new hairstyle or color‚ providing a fresh appearance. Removing bed hair is straightforward and ensures your character looks their best. Use this opportunity to explore different styles and customize your villager’s look to your liking;

Pro Tips for Using the ACCF Hair Guide

Plan your character’s look and experiment with styles to find the perfect fit. Use the guide to customize hairstyles and maximize your character’s unique potential in ACCF.

  • Plan your character’s look thoroughly.
  • Experiment with different styles to find the perfect fit.

Planning Your Character’s Look

Planning your character’s look is essential for achieving the desired style in Animal Crossing: City Folk. Consider your character’s personality‚ lifestyle‚ and personal preferences when choosing a hairstyle. Use the ACCF Hair Guide to explore options and ensure your look aligns with their traits. Experiment with different styles and colors before committing‚ as this saves time and Bells. Check the guide thoroughly before each visit to Harriet to make informed decisions and achieve your vision effortlessly.

Experimenting with Different Styles

Experimenting with different styles in Animal Crossing: City Folk allows you to find the perfect look for your character. Harriet’s questions guide you through various options‚ ensuring a personalized result. Each style is unique‚ ranging from cute to cool‚ fancy‚ or even crazy. Don’t hesitate to try new looks‚ as each visit to Shampoodle offers a fresh opportunity to redefine your character’s appearance. With 3‚000 Bells per visit‚ feel free to explore and discover the style that best matches your character’s personality and vibe.

Thank you for using the ACCF Hair Guide! With Shampoodle’s options and Harriet’s guidance‚ you can create unique looks‚ making your character truly special. Enjoy exploring and personalizing your Animal Crossing: City Folk experience to the fullest!

Final Thoughts on Hair Customization in ACCF

Hair customization in Animal Crossing: City Folk is a fun‚ creative way to personalize your character. With Shampoodle’s variety of styles and colors‚ you can craft a look that truly reflects your personality. Whether you’re aiming for a sleek‚ modern cut or a vibrant‚ bold color‚ Harriet’s expertise ensures endless possibilities. Don’t hesitate to experiment and enjoy the unique features‚ like opposite gender hairstyles and bed hair options‚ making your character stand out in the world of ACCF.

bt decor 2200 user guide

The BT Decor 2200 is a sleek, functional corded phone designed for home and office use, offering simplicity, a clear display, and hands-free functionality for effortless communication․

Key Features of the BT Decor 2200

The BT Decor 2200 offers a range of practical features, including a clear 3-line display for easy caller ID and time/date viewing․ It supports hands-free functionality, a 100-name and number directory, and 10 two-touch memories for quick dialing․ The phone is compatible with hearing aids and includes an inductive coupler․ It operates on 4 x AA batteries, ensuring reliable performance without the need for a power supply․ With a sleek, contemporary design, this corded phone is both durable and stylish, making it suitable for home or office environments․ Its intuitive interface and essential features make it a user-friendly choice for seamless communication․

Benefits of Using the BT Decor 2200

The BT Decor 2200 provides reliable, high-quality communication with essential features that enhance usability․ Its hands-free function allows for convenient conversations without holding the handset․ The 100-name directory and caller ID streamline call management, while the hearing aid compatibility ensures accessibility for all users․ The phone’s corded design eliminates battery life concerns, offering uninterrupted service․ With its clear display and user-friendly interface, the BT Decor 2200 is ideal for both home and office settings, delivering simplicity and functionality in a stylish package․

Setting Up Your BT Decor 2200

Setting up your BT Decor 2200 is straightforward․ Unbox, connect the line cord, insert batteries, and follow the user guide for a quick start․

Unboxing and Initial Setup

Begin by carefully unboxing your BT Decor 2200 phone․ The package includes the telephone, a pre-installed telephone line cord, 4 AA batteries, and the user guide․ Ensure all items are included and undamaged․ Place the phone on a flat, stable surface․ The sleek design fits seamlessly into any home or office decor․ Insert the batteries into the handset to power it up․ Connect the telephone line cord to the appropriate socket․ Follow the user guide for step-by-step instructions to complete the initial setup, ensuring your phone is ready for making and receiving calls effortlessly․ This setup process is quick and straightforward, requiring minimal technical knowledge․

Activating the Batteries

The BT Decor 2200 is battery-powered, requiring 4 x AA batteries, which are pre-installed in the handset․ To activate the batteries, ensure they are correctly positioned in the battery compartment․ No additional setup is required, as the batteries are designed to power the phone automatically․ Once the batteries are activated, the phone will be ready for use․ Note that the phone does not have a power button, so it will turn on as soon as the batteries are properly installed․ For optimal performance, use high-quality batteries and avoid mixing old and new ones․ This ensures reliable operation and clear communication․

Connecting the Telephone Line Cord

To connect the BT Decor 2200, locate the telephone line cord, which is pre-installed in the phone․ Plug one end of the cord into the phone’s dedicated port, ensuring it is securely fitted․ Next, insert the other end into a nearby telephone socket․ Make sure the connection is tight to avoid any signal issues․ The phone is ready for use once the line cord is properly connected․ Note that only the supplied telephone line cord should be used, as other cords may not be compatible․ If your phone will be connected to a switchboard, ensure the correct external line access code is configured․ Proper connection ensures reliable functionality․

Using the BT Decor 2200

The BT Decor 2200 offers a user-friendly design, allowing seamless call management, directory access, and hands-free functionality․ Its clear display and intuitive controls make communication simple and efficient․

Making and Receiving Calls

Making and receiving calls with the BT Decor 2200 is straightforward․ To make a call, simply lift the handset and dial the desired number using the keypad․ The phone features a clear display that shows caller ID, allowing you to identify incoming calls․ For hands-free conversations, use the built-in speakerphone․ When receiving a call, the phone rings, and the caller’s information appears on the screen if available․ The BT Decor 2200 also supports quick dialing from the directory, making it easy to connect with frequently called numbers․ Its intuitive design ensures seamless communication, whether you’re making or receiving calls․

Using the Directory and Caller ID

The BT Decor 2200 allows you to store up to 100 names and numbers in its directory, making it easy to dial frequently called contacts․ To store a number, navigate to the directory menu, enter the name and number, and save․ Caller ID displays the caller’s name or number on the screen, helping you identify incoming calls․ The phone also keeps a calls list, showing recent missed, answered, and dialed calls․ This feature enables you to quickly return calls or add new contacts to your directory․ Managing your contacts and call history is intuitive, ensuring efficient communication and organization․

Enabling Hands-Free Functionality

To enable hands-free functionality on the BT Decor 2200, press the hands-free button located on the base unit․ This feature allows you to answer calls without lifting the handset, making it ideal for multitasking or group conversations․ The phone is equipped with a built-in speaker and microphone, ensuring clear audio quality․ For optimal performance, ensure the phone is placed on a flat surface and the volume is adjusted to your preference․ If you encounter issues, check that the phone is properly connected and the hands-free feature is activated․ This convenient function enhances your calling experience, offering flexibility and comfort during calls․

Maintenance and Troubleshooting

Regularly clean the handset and base with a soft cloth to prevent dust buildup․ Check connections and restart the phone if issues arise․ Consult the manual for troubleshooting guides or contact BT support for assistance․

Cleaning the Phone

To maintain your BT Decor 2200’s performance and appearance, clean it regularly using a soft, dry cloth․ Gently wipe the handset, base, and display to remove dust and dirt․ Avoid using harsh chemicals, abrasive materials, or excessive moisture, as they may damage the phone’s finish or internal components․

  • Avoid submerging the phone in water or exposing it to liquids․
  • For stubborn marks, dampen a cloth with water, but ensure it is not soaking wet before wiping․
  • Allow the phone to dry completely before reuse to prevent any damage․

Regular cleaning ensures optimal functionality and preserves the phone’s sleek design․

Resolving Common Issues

If you encounter issues with your BT Decor 2200, start by checking the telephone line cord and ensuring it is securely connected․ For problems like message retrieval, try having someone call and leave a message, then retrieve and delete it to clear the issue․ If the phone is not compatible with your switchboard, consult your system administrator․ Avoid using damaged or non-supplied cords, as they may cause malfunction․ For hearing aid compatibility, ensure the phone is correctly set up․ If problems persist, refer to the user guide or contact BT customer support at 0800 145 6789 for assistance;

BT Services and Support

BT provides comprehensive support for the Decor 2200, including online resources at www․bt․com/producthelp and customer assistance via phone at 0800 145 6789․

Accessing BT Services

Accessing BT services for your Decor 2200 is straightforward, ensuring you get the most out of your phone․ Visit www․bt․com/producthelp for troubleshooting guides, user manuals, and interactive resources․ For personalized assistance, contact BT’s customer support at 0800 145 6789․ This service provides help with setup, resolving issues, and maximizing your phone’s features․ BT also offers online tutorials and FAQs to address common queries․ With these resources, you can effortlessly navigate and enhance your BT Decor 2200 experience, ensuring optimal performance and functionality․

Contacting Customer Support

If you need assistance with your BT Decor 2200, BT’s customer support is available to help․ You can reach them by calling 0800 145 6789, where a team of experts will guide you through troubleshooting, setup, or any queries you may have․ Additionally, you can visit www․bt․com/producthelp for comprehensive resources, including user manuals, FAQs, and interactive guides․ Customer support is accessible during standard working hours and can assist with issues like directory setup, caller ID, or hands-free functionality․ For further convenience, online support is also available to address your concerns efficiently․

gary soto the jacket pdf

Gary Soto, a Mexican-American author, explores themes of self-esteem and identity in The Jacket, a poignant tale of a boy embarrassed by his worn-out jacket, reflecting his struggles with confidence and social acceptance in a vivid, emotional narrative.

Background of the Author

Gary Soto, born in 1952 in Fresno, California, is a celebrated Mexican-American poet, novelist, and memoirist. His work often reflects his upbringing in a Latino household and explores themes of identity, culture, and adolescence. Known for his vivid storytelling, Soto has written extensively for both children and adults, with The Jacket being one of his notable works that delves into the struggles of self-esteem and social acceptance during youth.

Overview of the Story

The Jacket by Gary Soto narrates the story of a young boy who feels humiliated by his outdated and ill-fitting jacket. The story captures his emotional turmoil as he struggles with embarrassment and low self-esteem, highlighting how clothing can influence social acceptance and self-perception; Through vivid descriptions and emotional language, Soto conveys the protagonist’s journey of self-discovery and the challenges of fitting in during adolescence.

Plot Summary

In The Jacket, a young boy receives a new jacket from his mother, but it brings him embarrassment and bad luck, affecting his school performance and social interactions.

Key Events in the Narrative

The narrator receives a new jacket from his mother, which he finds embarrassing and believes brings bad luck. His school performance declines, and he struggles with homework. Socially, he feels isolated as peers, including formerly friendly girls, distance themselves. The jacket becomes a symbol of his shame, affecting his confidence and self-esteem. These events highlight the emotional and social challenges the protagonist faces due to the jacket.

The Impact of the Jacket on the Protagonist

The jacket profoundly affects the protagonist, causing emotional distress and self-consciousness. His grades drop, and he becomes socially isolated, as peers mock his appearance. The jacket symbolizes his feelings of inadequacy and low self-esteem, reflecting internalized shame and frustration. This struggle mirrors common adolescent challenges, highlighting the lasting emotional impact of the jacket on his confidence and sense of belonging.

Themes in “The Jacket”

The Jacket by Gary Soto explores themes of self-esteem, identity, and social status, highlighting the protagonist’s struggle with embarrassment and acceptance, reflecting universal adolescent challenges.

Self-Esteem and Confidence

The jacket deeply impacts the protagonist’s self-esteem, as its appearance and condition make him feel embarrassed and insecure. His embarrassment prevents him from performing well academically, as seen in his poor quiz grades and forgetfulness. The jacket symbolizes his low confidence, making him feel isolated and overshadowed by peers in neater attire. This struggle reflects common adolescent challenges with self-image and social acceptance, highlighting the emotional toll of feeling inadequate.

Identity and Belonging

The jacket serves as a symbol of the protagonist’s struggle with identity and belonging. His worn, outdated jacket makes him feel out of place among peers, particularly the girls and boys in neater attire. This reflects his desire to fit in and be accepted, while also highlighting the challenges of asserting his individuality in a socially conscious environment. The jacket becomes a visual marker of his internal conflict between standing out and blending in.

Social Status and Peer Pressure

The jacket symbolizes the protagonist’s low social status, as his outdated attire makes him an outcast. The girls who once showed interest now ignore him, drawn to boys in neater jackets. This highlights the pressure to conform to societal standards of appearance, reinforcing the idea that clothing can dictate one’s social acceptance and status among peers, further isolating the protagonist and intensifying his embarrassment.

Symbols and Metaphors

The jacket serves as a powerful symbol of shame and self-perception, while Soto’s use of vivid metaphors, like comparing girls to “loose flowers,” deepens emotional resonance and themes of isolation in the narrative.

The Jacket as a Symbol of Shame

The jacket embodies the protagonist’s deep-seated shame and humiliation. Its tattered appearance and ill fit reflect his internal struggle with self-worth. Soto uses the jacket to illustrate how societal perceptions and material possessions can profoundly impact one’s confidence and sense of belonging, making it a poignant symbol of adolescent vulnerability and the quest for acceptance in a judgmental world, highlighting the emotional weight of such struggles.

Transformation Through Clothing

Clothing in Soto’s narrative serves as a tool for transformation and self-expression. The jacket, initially a source of shame, undergoes a symbolic metamorphosis, reflecting the protagonist’s journey toward self-acceptance. Through its evolution, the jacket transitions from a burdensome reminder of inadequacy to a symbol of resilience, highlighting how clothing can both constrain and liberate, ultimately aiding in the protagonist’s growth and understanding of his identity and place within his world, conveying the power of personal transformation through attire.

Character Analysis

The protagonist’s emotional journey from shame to self-acceptance is central, driven by his feelings toward the jacket, with his mother’s support aiding his growth and transformation.

The Protagonist’s Journey

The protagonist’s journey in The Jacket revolves around his emotional struggle with a worn-out jacket, symbolizing his shame and low self-esteem. His embarrassment leads to poor academic performance and social isolation, as he feels judged by peers. Over time, he learns to accept himself, showing growth from self-consciousness to resilience, ultimately finding confidence despite external pressures and societal expectations.

The Role of the Mother

The mother plays a pivotal role in The Jacket, providing unwavering support to her son. Despite his reluctance, she insists on replacing his outdated jacket, highlighting her care and practicality. Her actions, though well-intentioned, initially cause her son discomfort, but ultimately, her love and encouragement help him navigate his emotional journey, emphasizing the theme of maternal influence and unconditional support in overcoming self-esteem challenges.

Peers and Social Interactions

In The Jacket, peers and social interactions significantly impact the protagonist’s self-perception. His outdated jacket makes him a target for mockery, causing him to feel isolated and humiliated. The story vividly portrays how the judgment of others, particularly classmates, affects his confidence and desire to belong, highlighting the profound influence of social dynamics on adolescent identity and self-esteem.

Literary Style and Devices

Gary Soto employs vivid similes and metaphors, such as comparing the jacket to an enemy, to convey deep emotions. His emotional language and relatable tone vividly capture adolescent struggles with identity and self-acceptance, making the narrative resonate with readers.

Use of Similes and Metaphors

Gary Soto vividly employs similes and metaphors to express emotions, such as comparing the jacket to an enemy, highlighting the protagonist’s deep embarrassment and frustration. These literary devices emphasize the jacket’s symbolic role in the narrative, showcasing how clothing can reflect self-perception and societal judgment. Soto’s use of comparisons, like “bitter as a penny” and “girls blew away like loose flowers,” creates vivid imagery, making the protagonist’s struggles with identity and self-esteem relatable and poignant.

Emotional Language and Tone

Gary Soto crafts a somber and reflective tone in The Jacket, using emotional language to convey the protagonist’s deep embarrassment and frustration. Phrases like “so embarrassed, so hurt” and “bitter as a penny” illustrate the narrator’s emotional turmoil. Soto’s vivid descriptions, such as comparing the jacket to an enemy, amplify the sense of shame and alienation, creating a poignant exploration of self-esteem and identity struggles.

Historical and Cultural Context

Gary Soto’s Mexican-American heritage influences The Jacket, set in Fresno, California, exploring identity and socioeconomic challenges. The story reflects universal themes of self-esteem and belonging, resonating across cultures.

Setting and Time Period

The Jacket by Gary Soto is set in Fresno, California, reflecting the author’s own upbringing in a Mexican-American community. The story, likely set in the mid-20th century, explores the protagonist’s experiences in a culturally rich yet economically challenging environment. The agricultural fields and small-town life serve as a backdrop, highlighting themes of identity and belonging in a specific time and place.

Cultural Influences on the Narrative

Gary Soto’s Mexican-American heritage deeply influences The Jacket, as the story reflects his experiences growing up in a culturally rich, economically challenging environment. The protagonist’s struggles with identity and belonging are shaped by his background, while the narrative’s focus on family, pride, and societal expectations resonates with themes common in Latino culture, adding authenticity and depth to the story.

Social and Educational Significance

The Jacket highlights themes of self-esteem and social acceptance, resonating with students’ experiences. It is widely used in schools to explore identity, belonging, and cultural challenges, fostering meaningful discussions and empathy among readers, making it a valuable educational resource for addressing adolescent struggles and promoting understanding of diverse backgrounds.

Reception and Reviews

The Jacket has received positive reviews for its relatable portrayal of adolescent struggles. With a 4.2 rating, educators praise its ability to spark discussions on identity and self-esteem. Students find the narrative engaging, resonating with its emotional depth. The story’s universal themes make it a valuable tool for fostering empathy and understanding in educational settings, highlighting Soto’s skill in addressing real-life challenges through Literature.

Use in Educational Settings

The Jacket is widely used in classrooms to explore themes of identity, self-esteem, and social challenges. Educators appreciate its relatable narrative, which helps students connect with the protagonist’s emotional journey. The story is often included in reading curricula to teach literary devices like similes and metaphors. Its concise format makes it ideal for sparking discussions and fostering empathy, while its universal themes resonate with diverse student experiences, enriching learning environments.

Study Questions and Discussions

Key questions include analyzing the jacket’s symbolism, the narrator’s emotional transformation, and the impact of social pressure. Discussions focus on personal experiences with self-esteem and belonging, encouraging deeper connections to the narrative and fostering empathy among students. These prompts help explore the story’s universal themes and their relevance to real-life situations.

Common Questions for Analysis

Common questions include: What does the jacket symbolize in the story? How does the narrator’s emotional state change throughout the narrative? What role does social status play in his struggles? How does the jacket affect his relationships with peers? What message does Soto convey about self-acceptance and identity? These questions encourage readers to explore the story’s themes, character development, and the broader implications of the narrator’s experiences. They also prompt personal reflections on similar challenges in their own lives.

Guided Discussion Topics

Guided discussions might focus on how the jacket symbolizes shame and self-consciousness, its impact on the narrator’s confidence, and the broader implications of social status. Students could explore how clothing influences identity and belonging, analyze the narrator’s emotional transformation, and reflect on personal experiences with self-acceptance. These topics encourage deeper analysis of the story’s themes and their relevance to real-life challenges.

The Jacket, once a symbol of shame, becomes a testament to resilience, teaching valuable lessons about identity, self-acceptance, and overcoming adversity through its profound narrative.

Gary Soto’s The Jacket centers on a boy’s struggle with an embarrassing jacket, symbolizing shame and self-doubt. The narrative explores themes of identity, social status, and resilience, highlighting the protagonist’s journey toward self-acceptance. Through vivid descriptions and emotional language, Soto conveys the profound impact of societal expectations and personal growth, making the story relatable and impactful for readers grappling with similar challenges.

Final Thoughts on the Story’s Impact

The Jacket by Gary Soto leaves a lasting impression by addressing universal themes of self-acceptance and resilience. The story resonates deeply with readers, especially young audiences, as it captures the emotional struggles of fitting in and overcoming insecurities. Soto’s vivid imagery and emotional language make the narrative memorable, emphasizing the importance of embracing one’s identity and finding strength in adversity. The story’s relatable message continues to inspire reflection and personal growth.

soundcore space a40 manual

Welcome to the Soundcore Space A40 Manual, your comprehensive guide to understanding and optimizing your earbuds. This manual covers features, setup, and troubleshooting for enhanced usability.

1.1 Overview of the Soundcore Space A40 Earbuds

The Soundcore Space A40 earbuds deliver a personalized listening experience with adaptive noise cancellation and crystal-clear sound. They feature multipoint connection, allowing seamless switching between devices, and intuitive touch controls for easy navigation; Designed for comfort and longevity, these earbuds offer impressive battery life and a sleek design. The manual provides detailed guidance on setup, features, and troubleshooting, ensuring optimal use. With a frequency range of 20Hz to 20kHz and 16Ω impedance, they promise high-quality audio performance.

1.2 Importance of Reading the Manual

Reading the Soundcore Space A40 manual is essential for optimizing your earbuds’ performance. It provides detailed insights into adaptive noise cancellation, multipoint connections, and touch controls. The manual ensures proper setup, helps troubleshoot common issues, and explains advanced features for a personalized listening experience. By following the guide, users can maximize functionality and enjoy seamless audio quality tailored to their preferences.

Key Features and Specifications

The Soundcore Space A40 offers adaptive noise cancellation, multipoint connections, and Hi-Res audio with LDAC support. Its frequency range is 20Hz–20kHz, with 16 Ohms impedance for clear sound.

2.1 Technical Specifications

The Soundcore Space A40 features a frequency range of 20Hz to 20kHz and an impedance of 16 Ohms. They utilize closed-back acoustic design for immersive sound and support Bluetooth for wireless connectivity. With LDAC technology, they ensure high-resolution audio streaming, making them ideal for both casual listeners and audiophiles seeking quality sound without compromising on convenience.

2.2 Adaptive Noise Cancellation

The Soundcore Space A40 offers Adaptive Noise Cancellation, automatically adjusting to reduce ambient noise for an immersive listening experience. It supports multiple noise cancellation modes, including Transparency Mode, allowing users to stay aware of their surroundings while enjoying high-quality audio; This feature enhances sound clarity and personalizes noise reduction based on the environment, ensuring optimal performance in various settings.

2.3 Multipoint Connection Capability

The Soundcore Space A40 supports Multipoint Connection, enabling seamless pairing with two devices simultaneously. Users can effortlessly switch between connected devices, ensuring uninterrupted audio playback. This feature is ideal for multitasking, allowing smooth transitions between calls, music, and other media sources without the need to reconnect manually, enhancing overall user convenience and efficiency.

Charging and Battery Life

The Soundcore Space A40 earbuds come with a charging case that provides extended playtime. The earbuds offer up to 10 hours of playtime on a single charge, with the case delivering an additional 3 charges, totaling 40 hours of battery life. The case supports fast charging, reaching full charge in approximately 2 hours.

3.1 How to Charge the Earbuds

To charge the Soundcore Space A40 earbuds, place them in the charging case, ensuring the contact points align properly. Connect the case to a power source using the provided USB-C cable. The LED indicator will flash while charging and turn off when fully charged, which typically takes about 2 hours. The case also supports wireless charging for added convenience.

3.2 Battery Life and Charging Time

The Soundcore Space A40 offers up to 10 hours of playtime on a single charge with noise cancellation enabled. The charging case provides an additional 3 charges, totaling 40 hours of use. Charging the earbuds takes approximately 2 hours via USB-C, while the case supports wireless charging for added convenience, ensuring your earbuds are always ready to use.

Pairing and Connectivity

The Soundcore Space A40 supports seamless Bluetooth 5.0 connectivity, enabling quick pairing with devices. It also features multipoint connection, allowing simultaneous pairing with two devices for effortless switching between them.

4.1 Automatic Pairing Process

Open the charging case to activate the automatic pairing mode. The LED indicator will flash, signaling the earbuds are ready to connect. Enable Bluetooth on your device, select “Soundcore Space A40” from the available options, and confirm the connection. The pairing process is complete once you hear a confirmation tone and the LED stops flashing.

4.2 Manual Pairing Mode Activation

To activate manual pairing mode, place the earbuds in the charging case and leave it open. Press and hold the button on the case for 10 seconds until the LED indicators flash. This signals that the earbuds are in pairing mode. Open your device’s Bluetooth settings, select “Soundcore Space A40”, and complete the connection. The LED will stop flashing once paired successfully.

Controls and Functions

The Soundcore Space A40 features intuitive touch controls for music playback, call management, and voice assistant activation. Tap or hold the touchpad to customize your listening experience seamlessly.

5.1 Touch Controls and Gestures

The Soundcore Space A40 earbuds feature responsive touch controls. Tap once to play/pause music or answer calls. Double-tap to skip tracks or activate noise cancellation. Touch and hold to adjust volume or switch modes. These gestures provide seamless control over your listening experience, ensuring intuitive operation without needing your device.

5.2 Voice Assistant Integration

The Soundcore Space A40 supports voice assistant integration, enabling hands-free control. Activate Siri, Google Assistant, or other supported assistants with a touch or voice command. This feature enhances convenience, allowing you to manage calls, music, and more seamlessly. Ensure your device is connected and settings are configured to enable this functionality for an improved user experience.

Noise Cancellation and Sound Quality

The Soundcore Space A40 offers adaptive noise cancellation for immersive sound. Its advanced technology minimizes external noise, delivering clear and balanced audio with deep bass and crisp highs.

6.1 Understanding Adaptive Noise Cancellation

Adaptive noise cancellation in the Soundcore Space A40 automatically adjusts to your environment, effectively reducing ambient noise. Using built-in microphones, it detects and cancels unwanted sounds, ensuring a more immersive listening experience. This feature is particularly useful in noisy settings, allowing you to focus on your music or calls with clarity and precision.

6.2 Transparency Mode for Awareness

Transparency Mode on the Soundcore Space A40 allows you to hear your surroundings while listening to audio. This feature is ideal for staying aware of your environment, such as during commutes or workouts. It balances external sounds with your music, ensuring safety and convenience without removing the earbuds.

Wearing the Earbuds Correctly

Properly fitting the Soundcore Space A40 earbuds ensures comfort and optimal sound quality. Choose the right earbud size and wear them securely for extended listening sessions.

7.1 Proper Fit and Comfort

Ensure a snug and comfortable fit by selecting the right earbud size. The Soundcore Space A40 comes with multiple ear tips to suit different ear shapes. For optimal comfort, wear the earbuds with the tip slightly rotated toward your ear canal. Avoid inserting them too deeply to prevent discomfort during extended use. Proper fit enhances sound quality and noise cancellation performance.

7.2 Adjusting the Earbud Size

To adjust the earbud size, start by selecting from the provided ear tips. Gently pull the existing tip and replace it with the desired size. Ensure a secure fit by rotating the earbuds slightly during insertion. Test the fit by listening for clear sound and comfort. A proper seal enhances bass response and noise cancellation efficiency. Experiment with sizes to find your perfect fit.

Resetting and Troubleshooting

Resetting the earbuds: Place them in the case, leave it open, and press the case button for 10 seconds until LEDs flash. This resolves connectivity issues.

8.1 Resetting the Earbuds

To reset the Soundcore Space A40 earbuds, place them in the charging case and leave it open. Press and hold the button on the case for 10 seconds until the LED indicators flash. This process restores the earbuds to their default settings and resolves connectivity or pairing issues. Use this method if the earbuds are not functioning properly or disconnect frequently.

8.2 Common Connectivity Issues and Fixes

Common issues include earbuds not connecting or dropping calls. To fix, ensure Bluetooth is enabled and devices are paired correctly. Reset the earbuds by placing them in the case and holding the button for 10 seconds. Check battery levels and ensure proper fit for stable connection. Restarting devices can also resolve pairing problems effectively.

Multipoint Connection Setup

Common issues include earbuds not connecting or dropping calls. To fix, ensure Bluetooth is enabled and devices are paired correctly. Reset the earbuds by placing them in the case and holding the button for 10 seconds. Check battery levels and ensure proper fit for stable connection. Restarting devices can also resolve pairing problems effectively.

9.1 Connecting to Multiple Devices

The Soundcore Space A40 supports multipoint connection, allowing simultaneous pairing with two devices. To activate this feature, place the earbuds in the charging case, leave it open, and press and hold the case button for 3 seconds. The LED indicators will flash, indicating pairing mode. Connect to the first device, then repeat the process for the second device. Once paired, you can seamlessly switch between devices.

9.2 Switching Between Connected Devices

To switch between connected devices with your Soundcore Space A40 earbuds, ensure both devices are paired. You can manually select the earbuds from the second device’s Bluetooth menu or use the touch controls for a seamless transition. Audio cues or LED indicators may confirm the switch. This feature enhances multitasking and ensures uninterrupted audio across multiple sources.

Soundcore Space A40 Sound Quality

The Soundcore Space A40 delivers high-fidelity audio with a frequency range of 20Hz to 20kHz and 16-ohm impedance. It supports Hi-Res audio and LDAC for crystal-clear sound reproduction.

10.1 Frequency Range and Impedance

The Soundcore Space A40 earbuds boast a frequency range of 20Hz to 20kHz and an impedance of 16 ohms, ensuring balanced sound reproduction. This range delivers clear highs and deep bass, providing an immersive listening experience. The earbuds also support Hi-Res audio and LDAC for high-quality sound transmission, making them ideal for audiophiles seeking detailed audio performance.

10.2 Hi-Res Audio and LDAC Support

The Soundcore Space A40 supports Hi-Res Audio and LDAC technology, enabling high-quality sound transmission with minimal loss. LDAC ensures stable connections and low latency, while Hi-Res Audio delivers detailed sound reproduction. This combination enhances your listening experience, making it ideal for streaming high-fidelity music and enjoying immersive audio content on your earbuds.

Downloading the Full Manual

To access the complete Soundcore Space A40 manual, visit the official Soundcore website or authorized retailers. The manual is available as a downloadable PDF, ensuring you have all the necessary guides and support information at your fingertips.

11.1 Sources for the PDF Manual

The official Soundcore Space A40 manual can be downloaded directly from the Soundcore website or trusted retailers like Amazon. Additionally, authorized sellers such as DNS provide access to the PDF manual. Ensure you download from verified sources to avoid unauthorized versions. Visit the official product page or support section for the most reliable and updated manual.

11.2 Additional Resources and Guides

Beyond the manual, explore supplementary guides and FAQs on the Soundcore website. Watch tutorial videos for setup and troubleshooting. Visit forums or support pages for user tips and solutions. Contact Soundcore customer service for personalized assistance. These resources enhance your understanding and maximize your earbuds’ performance, ensuring a seamless experience with your Space A40 earbuds.