Author: ernestine

disneyland packing list pdf

Plan your Disneyland adventure with ease using our Disneyland Packing List PDF, a comprehensive guide to essentials like clothing, tech, snacks, and park must-haves. Ensure a magical, stress-free experience at the Happiest Place on Earth!

Why a Packing List is Essential for Disneyland

A well-organized Disneyland packing list is crucial for ensuring a seamless and enjoyable experience at the park. It helps avoid missed essentials, saves time, and reduces stress. By planning ahead, you can tailor your list to weather forecasts, park rules, and family needs. A comprehensive list ensures you’re prepared for everything from clothing to tech, snacks, and documents, making your Disneyland adventure effortless and fun. It’s a must-have tool to maximize your time at the Happiest Place on Earth!

Clothing and Accessories

Pack versatile outfits, including breathable tops, lightweight layers, and moisture-wicking fabrics. Don’t forget accessories like hats, sunglasses, and scarves for comfort and style throughout your day.

Essential Clothing Items for Disneyland

Pack breathable tops, lightweight shorts, and moisture-wicking fabrics for comfort. Include versatile outfits suitable for varying weather conditions. Bring a light jacket or sweater for cooler mornings and evenings. Comfortable walking clothes are a must for long park days. Don’t forget undergarments, socks, and extra outfits for layering or unexpected changes. Consider themed apparel for photo ops, but prioritize practicality and ease of movement. Ensure all items are easy to mix-and-match to create multiple outfits during your stay.

Footwear for Comfort and Style

Choose footwear that balances comfort and style for your Disneyland adventure. Opt for supportive, cushioned shoes designed for long walks. Sneakers or walking shoes are ideal for exploring the parks. Consider moisture-wicking socks to keep feet dry and comfortable. If rain is forecasted, pack water-resistant shoes or sandals. Bring a pair of dress shoes or nicer sandals for evening events or dinners. Ensure shoes are broken in to avoid blisters. Pack extra socks for fresh changes throughout the day. Comfortable footwear will keep you energized for all the magic!

Weather-Appropriate Gear

Prepare for Disneyland’s varying weather conditions with essentials like sunscreen, hats, and sunglasses for sunny days. Bring lightweight rain jackets or ponchos in case of showers. Pack layers, such as sweaters or light jackets, for cooler mornings and evenings. Include scarves or gloves during winter visits. Don’t forget swimwear for water rides or pool time. Check the forecast before your trip and adapt your packing list accordingly. Weather gear ensures you stay comfortable and enjoy every moment of your adventure!

Technology and Accessories

Stay connected and capture memories with smartphones, portable chargers, and cameras. Bring memory cards and power banks to ensure your devices last all day at Disneyland. Use the Disneyland app for maps, wait times, and dining reservations. Don’t forget earbuds for immersive experiences and a reliable backpack to carry everything. A lanyard for park tickets and a compact umbrella are also smart additions. Keep your tech organized and accessible for a seamless adventure.

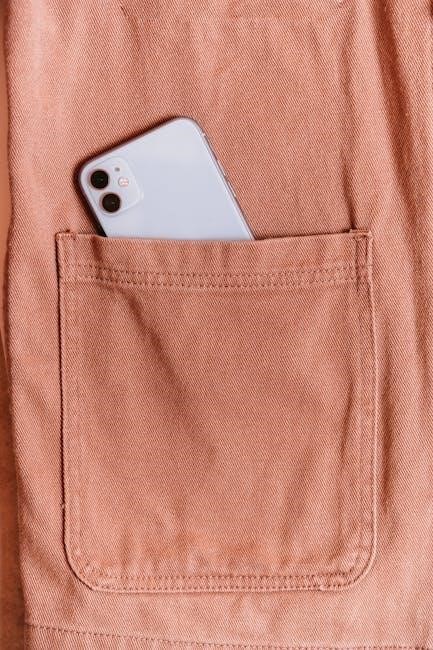
Smartphones and Portable Chargers

A smartphone is essential for capturing memories, using the Disneyland app, and navigating the parks. Bring a portable charger to keep your devices powered throughout the day. Consider a power bank with multiple USB ports to charge several items at once. Don’t forget extra charging cables and a backup battery for your camera. A reliable phone case and screen protector are also wise additions. Pack these tech essentials in an easily accessible part of your backpack to ensure you stay connected and entertained during your Disneyland adventure.

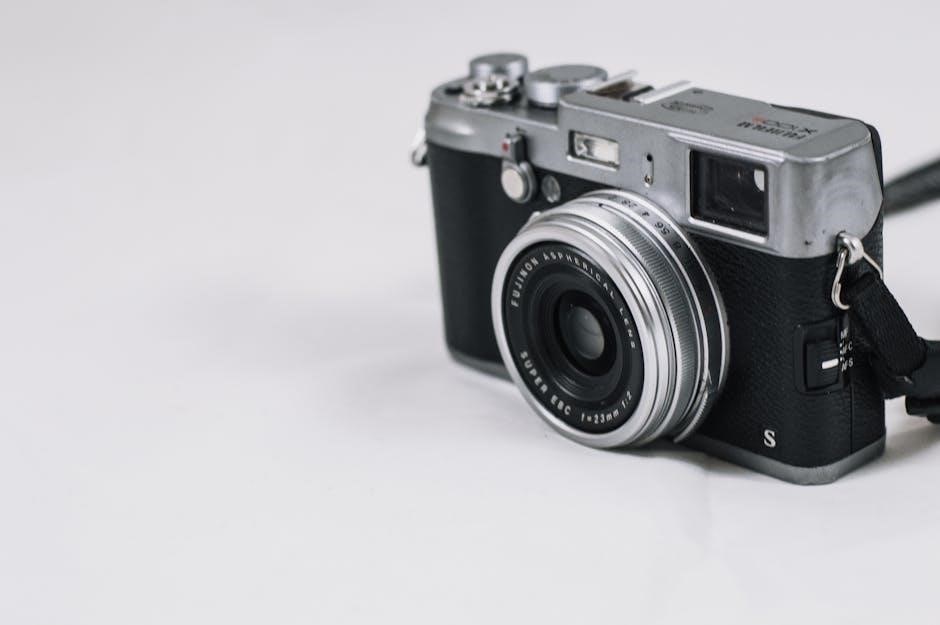
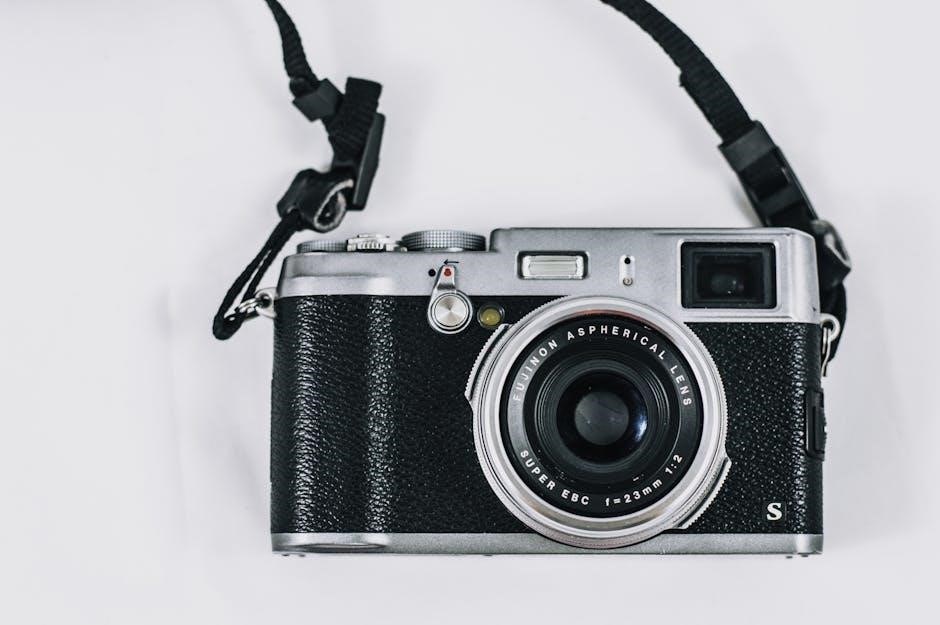
Cameras and Memory Cards

Capture every magical moment at Disneyland with a reliable camera and ample memory cards. Consider bringing a DSLR, mirrorless, or waterproof camera for high-quality photos. Pack multiple memory cards to ensure you never run out of storage. Don’t forget extra batteries, chargers, and a lens cleaning kit. A small tripod can help with group shots or low-light photography. Store your camera gear in a protective case or backpack for safekeeping. With these essentials, you’ll be ready to document your Disneyland adventure in stunning detail.

Portable Entertainment for Downtime

Keep everyone entertained during downtime with portable games, tablets, or handheld consoles. Pack lightweight electronics like smartphones, tablets, or Nintendo Switch for fun on-the-go. Don’t forget headphones or earbuds for immersive experiences. Include extra batteries or a portable charger to keep devices powered. A small notebook and pen can be great for autographs or creative moments. These items ensure relaxation and enjoyment during breaks, making your Disneyland experience even more delightful and stress-free for all ages.

Personal Care Items

Essential toiletries, medications, and first aid items are must-haves. Include toothbrushes, toothpaste, and hygiene products. Don’t forget beauty essentials and skincare items. Pack travel-sized versions and check Disneyland’s restrictions.

Toiletries and Hygiene Products

Include essential toiletries like toothbrushes, toothpaste, and dental floss. Don’t forget deodorant, shampoo, conditioner, and body wash. Pack travel-sized items to save space. Hygiene products such as hand sanitizer, wipes, and tissues are crucial. Consider biodegradable options for eco-friendly choices. Always check Disneyland’s restrictions on prohibited items. A small first aid kit with band-aids and antiseptics is also recommended. Keep these items easily accessible in your park bag for convenience. Ensure you have enough for the duration of your stay. Remember, packing light and smart is key to a stress-free day at the parks.

Medications and First Aid Kit

Pack essential medications, including prescription drugs and over-the-counter remedies like pain relievers and antihistamines. Don’t forget a small first aid kit with band-aids, antiseptic wipes, and any personal medical needs. Label medications clearly and ensure they’re easily accessible. Include motion sickness remedies if needed. Check Disneyland’s prohibited items list to avoid issues. A well-stocked kit helps handle minor mishaps, ensuring your day isn’t interrupted. Organize these items in a dedicated section of your bag for quick access during your visit.

Beauty and Skincare Essentials

Pack travel-sized beauty and skincare items to stay fresh and comfortable. Include sunscreen, lip balm with SPF, makeup remover wipes, and a lightweight moisturizer. Don’t forget hand sanitizer, blotting papers, and feminine hygiene products if needed. A small makeup kit with essentials like mascara, lip gloss, or tinted balm can keep you looking great. Bring a reusable facial spray for hydration and consider a travel-sized fragrance; Choose multi-use items to save space and ensure all products comply with Disneyland’s size restrictions for bags.

Food and Snacks

Pack non-perishable snacks like granola bars, fruit snacks, and trail mix to keep energy levels up. Don’t forget reusable water bottles and consider special dietary needs.

Non-Perishable Snacks and Drinks

Pack lightweight, non-perishable snacks like granola bars, trail mix, crackers, and dried fruits to keep everyone energized throughout the day. Include refillable water bottles to stay hydrated and reduce waste. Avoid messy or heavy items that might be inconvenient. Opt for snacks that are easy to eat while walking, such as jerky, pretzels, or fruit leather. Don’t forget to check Disneyland’s rules on outside food and drinks before your trip. These essentials will keep you fueled for all the magic and adventure!

Reusable Water Bottles

A refillable water bottle is a must-have for your Disneyland trip. It keeps you hydrated while exploring the parks and reduces plastic waste. Opt for a lightweight, BPA-free bottle that fits easily in your bag. Take advantage of water fountains located throughout the resort to refill your bottle. Staying hydrated is essential, especially during long days of walking and enjoying attractions. A reusable bottle is both practical and eco-friendly, making it a smart addition to your packing list.

Special Dietary Needs

If you or a family member has specific dietary requirements, packing appropriate snacks and meals is crucial. Consider bringing gluten-free, vegan, or kosher options, as these may be limited at the parks. Snacks like energy bars, nuts, or dried fruits are great for quick bites. Don’t forget to include any necessary supplements or medications. Check Disneyland’s food policies to ensure all items are allowed. A small cooler with ice packs can help keep perishable items fresh. This preparation ensures everyone stays satisfied and energized throughout the day.

Additional Tips and Tricks

Arrive early, stay hydrated, and plan breaks to avoid exhaustion. Consider security checks and bag size restrictions when packing essentials for a smoother park experience.

Utilizing the Disneyland App

The official Disneyland App is a must-have tool for maximizing your park experience. Use it to check real-time wait times, reserve dining, and even order food through Mobile Order. The app also provides interactive maps, show schedules, and access to Genie+ for skipping long lines. Additionally, it allows you to book Lightning Lane passes and manage your park tickets digitally. With features like virtual queues and notifications, the app ensures you make the most of your time at the resort. Download it before your trip to stay organized and enhance your magical adventure!

Packing for Kids and Babies

When traveling to Disneyland with little ones, it’s crucial to pack essentials that ensure comfort and convenience. Include diapers, wipes, formula, and baby food, along with bottles and pacifiers. Don’t forget a portable changing pad and a small first-aid kit. For kids, pack snacks, sippy cups, and extra clothing for unexpected spills or weather changes. A lightweight stroller and autograph books for character meet-and-greets are also must-haves. Keep everything organized in a backpack for easy access throughout the day. A well-prepared bag ensures a magical experience for the whole family!

Stroller and Backpack Essentials

A sturdy, lightweight stroller is a must for navigating Disneyland, while a comfortable backpack keeps everything within reach. Pack essentials like water bottles, snacks, and a portable charger. Don’t forget extra clothing, sunscreen, and a first-aid kit. Include entertainment for downtime, such as toys or tablets, and a small blanket for breaks. Organize items in compartments for easy access, and ensure the stroller has storage space. A well-prepared backpack and stroller make exploring the park effortless and enjoyable for the whole family, keeping everyone happy and energized throughout the day.

Documents and Identification

Ensure you pack park tickets, valid IDs, travel insurance, emergency contacts, and meal/hotel confirmations. Keep them safe and easily accessible for a smooth experience.

Park Tickets and IDs

Ensure your Disneyland adventure begins smoothly by packing valid park tickets, photo IDs, and travel insurance documents. Keep them organized in a dedicated section of your bag or wallet for easy access. Consider digitizing your tickets using the Disneyland app to avoid losing them. Additionally, bring a backup ID and ensure all documents are valid and not expired. A lanyard or clear pouch can help keep essentials visible and within reach, saving time at security and ticket checks throughout your visit.

Travel Insurance and Emergency Contacts

Packing travel insurance documents and emergency contacts is crucial for a stress-free Disneyland experience; Include a printed or digital copy of your insurance policy, noting hotline numbers for assistance. Carry a list of emergency contacts, such as family members or your embassy, and ensure they are easily accessible. Store these items in a waterproof pouch or a secure section of your backpack. Additionally, consider digitizing these documents via the Disneyland app for quick access. Organizing these essentials ensures peace of mind and preparedness during your visit.

Meal and Hotel Confirmations

Ensure a seamless experience by packing meal and hotel confirmations. Bring printed or digital copies of restaurant reservations, meal plans, and hotel bookings. Store these documents in a secure, easily accessible pouch or digitalize them via the Disneyland app for quick reference. Organize confirmations alphabetically or by date to avoid confusion. Having these details handy ensures smooth check-ins and reservations, allowing you to focus on enjoying your magical Disneyland adventure without unnecessary delays or stress.

pocket style manual

1.1 What is a Pocket Style Manual?

A Pocket Style Manual is a compact guide designed to help writers improve their grammar‚ style‚ and punctuation. It serves as a quick-reference tool for students and professionals‚ offering practical advice for various writing tasks. Widely used‚ it provides clear instructions and exercises to enhance writing skills effectively.

A Pocket Style Manual is a concise‚ accessible guide designed to aid writers in improving grammar‚ style‚ and punctuation. It offers practical‚ step-by-step advice for various writing tasks‚ serving as a quick-reference tool for students and professionals. Its flexible content addresses diverse writing needs across disciplines‚ making it an essential resource for clear and effective communication.

1.2 Importance of a Pocket Style Manual for Writers

The Pocket Style Manual is an indispensable tool for writers‚ offering guidance on grammar‚ style‚ and punctuation. It helps improve writing clarity‚ consistency‚ and effectiveness‚ addressing common challenges. Its practical advice enables writers to refine their work efficiently‚ making it an essential resource for producing polished and professional writing across various disciplines.

Key Elements of Grammar

Grammar forms the foundation of effective communication‚ comprising elements like parts of speech‚ verb tenses‚ and sentence structure. Understanding these basics is essential for clear and precise writing‚ helping writers convey their ideas accurately and confidently in various contexts.

2.1 Parts of Speech: Nouns‚ Pronouns‚ Verbs‚ and More

Nouns‚ pronouns‚ verbs‚ adjectives‚ adverbs‚ prepositions‚ conjunctions‚ and interjections form the core of language. Understanding each part of speech is crucial for constructing clear sentences. The Pocket Style Manual provides detailed explanations and exercises to help writers master these elements‚ ensuring precise and impactful communication in any writing context.

2.2 Understanding Verb Tenses and Agreement

The Pocket Style Manual clarifies verb tenses‚ from past to future‚ and explains subject-verb agreement. It highlights common mistakes and provides exercises to master these concepts. Clear examples and practical advice ensure writers maintain consistency and accuracy in their use of verbs‚ enhancing overall sentence clarity and effectiveness in communication.

2.3 Sentence Structure: Clauses‚ Phrases‚ and Fragments

The Pocket Style Manual explains sentence structure‚ focusing on clauses‚ phrases‚ and fragments. It distinguishes between independent and dependent clauses‚ describes phrases‚ and addresses sentence fragments. Clear examples and exercises help writers construct effective sentences‚ ensuring clarity and grammatical accuracy while avoiding common structural mistakes in their writing.

Effective Writing Style

The Pocket Style Manual offers practical advice for developing a clear and concise writing style. It emphasizes clarity‚ tone‚ and consistency‚ providing guidance on formal and informal voice to help writers communicate effectively and maintain a unified style in their work.

3.1 Clarity and Conciseness in Writing

The Pocket Style Manual emphasizes clarity and conciseness in writing‚ providing practical advice to help writers communicate effectively. It encourages avoiding wordiness and using precise language to convey ideas clearly; The guide offers strategies to identify and remove redundant phrases‚ ensuring writing remains focused and impactful across various disciplines.

3.2 Tone and Voice: Formal vs. Informal Writing

The Pocket Style Manual offers guidance on establishing the right tone and voice in writing. It helps writers distinguish between formal and informal styles‚ ensuring clarity and appropriateness for the audience. The manual provides tips for tailoring language to suit different contexts‚ balancing professionalism with approachability‚ and maintaining consistency in tone throughout a document.

3.3 Consistency in Style: Keeping Your Writing Unified

The Pocket Style Manual emphasizes the importance of maintaining consistency in writing style. It provides practical advice on uniform formatting‚ terminology‚ and punctuation to ensure coherence. This helps writers present their ideas clearly and professionally‚ avoiding confusion and enhancing readability across various academic and professional contexts.

Punctuation Guidelines

The Pocket Style Manual offers clear rules for using commas‚ periods‚ semicolons‚ and colons. It provides examples and exercises to help writers use punctuation effectively‚ ensuring clarity and precision in their work.

4.1 Commas: Uses and Misuses

The Pocket Style Manual explains comma rules clearly. Commas separate items in lists‚ set off nonessential clauses‚ and prevent sentence confusion. Common misuses include comma splices and unnecessary use. The manual provides examples and exercises to help writers use commas correctly‚ ensuring clear and effective communication in their writing.

4.2 Periods‚ Semicolons‚ and Colons: Proper Usage

The Pocket Style Manual clarifies the correct use of periods‚ semicolons‚ and colons. Periods end sentences‚ while semicolons link closely related independent clauses. Colons introduce lists or emphasize ideas. The manual highlights common mistakes‚ such as overusing semicolons or misplacing colons‚ and provides clear examples for proper punctuation in various contexts.

4.3 Quotation Marks and Parentheses: When to Use Them

Quotation marks are used to set off direct speech or quotations. They also highlight special terms or emphasize certain words. Parentheses add supplementary information without interrupting the flow. The Pocket Style Manual provides clear guidelines on proper placement and usage‚ helping writers avoid common mistakes and ensure clarity in their writing.

The Writing Process

The writing process involves brainstorming‚ outlining‚ drafting‚ and revising. The Pocket Style Manual guides writers through these stages‚ offering practical advice to enhance clarity and effectiveness in their work.

5.1 Brainstorming and Outlining Ideas

The Pocket Style Manual emphasizes the importance of brainstorming and outlining to organize ideas effectively. It guides writers through identifying main ideas‚ structuring content‚ and creating logical flow. These steps ensure clarity‚ focus‚ and coherence‚ making the writing process more efficient and productive for students and professionals alike.

5.2 Drafting: Turning Ideas into Coherent Text

The Pocket Style Manual offers practical techniques for drafting‚ helping writers transform ideas into clear‚ well-structured text. It emphasizes using strong‚ active voice‚ varied sentence structures‚ and precise language to convey meaning effectively. The guide also provides exercises to refine writing clarity and ensure logical flow in every paragraph.

5.3 Revising and Editing: Polishing Your Work

The Pocket Style Manual offers practical advice for revising and editing‚ ensuring clarity and coherence. It provides step-by-step guidance to refine grammar‚ punctuation‚ and style. Exercises help writers review sentence structure‚ word choice‚ and overall flow‚ making their work polished and professional. This section emphasizes attention to detail for a flawless final product.

Research and Citation

A Pocket Style Manual guides writers in conducting research and proper citation. It offers tips on finding reliable sources‚ formatting in-text citations‚ and creating comprehensive reference lists to maintain academic integrity and clarity in writing.

6.1 Conducting Research: Finding Reliable Sources

A Pocket Style Manual helps writers identify credible sources by evaluating author credibility‚ publication date‚ and peer-reviewed status. It emphasizes using academic databases and fact-checking to ensure reliability. Tips include avoiding biased sources and organizing research effectively for clear and accurate writing.

6.2 In-Text Citations: Proper Formatting

The Pocket Style Manual provides clear guidelines for in-text citations‚ emphasizing the use of parentheses for author names and page numbers. It ensures proper formatting to maintain academic integrity and clarity. Examples and exercises help writers master citation styles‚ such as MLA or APA‚ with ease and accuracy.

6.3 Reference Lists: Creating a Comprehensive Bibliography

The Pocket Style Manual offers detailed guidance on crafting reference lists‚ ensuring all sources are alphabetized and formatted correctly. It provides examples for books‚ articles‚ and online sources‚ emphasizing the inclusion of essential publication details. This section helps writers compile accurate and comprehensive bibliographies with ease and consistency.

Common Writing Challenges

Writers often face challenges like writer’s block‚ time management‚ and grammar mistakes. The Pocket Style Manual provides practical solutions to these issues‚ helping writers improve their skills and confidence effectively.

7.1 Overcoming Writer’s Block

Writer’s block can hinder creativity and productivity. The Pocket Style Manual offers practical strategies to overcome this challenge‚ such as brainstorming techniques and outlining ideas. Its organized structure helps writers regain focus and confidence‚ providing clear guidance to turn ideas into coherent text effectively.

7.2 Managing Time Effectively for Writing Projects

The Pocket Style Manual emphasizes the importance of time management for successful writing. It offers practical strategies like setting deadlines‚ prioritizing tasks‚ and creating schedules. By breaking projects into manageable steps‚ writers can maintain focus and efficiency‚ ensuring timely completion of their work.

7.3 Addressing Grammar and Style Mistakes

The Pocket Style Manual provides clear guidance on identifying and correcting grammar and style errors. It offers practical solutions for common mistakes‚ ensuring clarity and consistency in writing. With exercises and examples‚ it helps writers refine their skills and produce polished‚ professional work.

Visual Elements in Writing

Visual elements like headings‚ images‚ and charts enhance clarity and engagement. The Pocket Style Manual guides writers to use these tools effectively‚ ensuring content is organized and visually appealing.

8.1 Using Headings and Subheadings Effectively

Headings and subheadings structure content‚ guiding readers through documents. The Pocket Style Manual advises using clear‚ concise headings to break up text‚ enhance readability‚ and emphasize key points. Proper use ensures logical flow and helps readers navigate complex information effortlessly‚ making written work more organized and accessible.

8.2 Incorporating Images‚ Charts‚ and Graphs

Images‚ charts‚ and graphs enhance writing by making complex information accessible. The Pocket Style Manual guides proper placement and formatting‚ ensuring visuals support text without clutter. Captions and labels clarify their purpose‚ while alignment and sizing maintain a clean‚ professional appearance‚ making content engaging and easier to understand for readers.

8.3 Formatting Lists and Tables for Clarity

Formatting lists and tables in writing ensures clarity and readability. The Pocket Style Manual advises using bullet points for lists and properly aligning columns in tables. Clear headings and concise labels help readers understand data quickly. Consistent formatting enhances the overall presentation‚ making complex information accessible and visually appealing to the audience.

Using the Pocket Style Manual Effectively

The Pocket Style Manual offers straightforward guidance‚ enabling writers to navigate and apply its content effectively across various assignments. Its practical advice enhances writing efficiency and clarity.

9.1 Navigating the Manual: Finding What You Need

Navigating the Pocket Style Manual is straightforward‚ with clear sections and an index for quick access. Users can easily locate guidance on grammar‚ style‚ and punctuation‚ ensuring they find solutions efficiently. The manual’s organized structure makes it user-friendly‚ allowing writers to focus on improving their work without unnecessary delays.

9.2 Applying the Manual to Different Writing Assignments

The Pocket Style Manual is versatile‚ catering to various writing needs across disciplines. Whether for essays‚ reports‚ or technical writing‚ it offers tailored guidance. Its flexible content ensures writers can adapt its principles to suit specific assignments‚ making it an indispensable resource for diverse academic and professional tasks.

9.3 Maximizing the Manual’s Practical Advice

The Pocket Style Manual offers step-by-step guidance for enhancing writing skills. Its practical advice on grammar‚ style‚ and punctuation provides quick solutions for common challenges. By applying its tips‚ writers can refine their work‚ ensuring clarity and effectiveness in various writing tasks‚ making it an invaluable resource for continuous improvement.

Flexibility Across Disciplines

The Pocket Style Manual is adaptable across various academic fields‚ offering tailored guidance for humanities‚ social sciences‚ and STEM writing. Its practical advice ensures clarity and precision regardless of the discipline‚ making it a versatile tool for diverse writing needs.

10.1 Humanities: Special Considerations

The Pocket Style Manual offers tailored guidance for humanities writing‚ emphasizing narrative voice‚ tone‚ and historical context. It provides specific advice on citations‚ such as MLA format‚ and addresses stylistic nuances unique to humanities disciplines. This ensures writers can maintain clarity and academic integrity while adhering to field-specific standards.

10.2 Social Sciences: Specific Guidelines

The Pocket Style Manual provides tailored support for social sciences‚ focusing on research methods‚ data presentation‚ and citation formats like APA. It emphasizes clarity and precision in presenting findings‚ ensuring academic integrity. The manual helps writers navigate field-specific standards‚ making it an essential resource for students and professionals in disciplines like sociology and political science.

10.3 STEM Fields: Tailoring the Manual for Technical Writing

The Pocket Style Manual adapts to STEM fields‚ offering guidance for technical writing. It emphasizes clear and precise language‚ proper formatting of data‚ and adherence to style conventions. The manual supports the creation of structured reports‚ research papers‚ and presentations‚ making it a valuable tool for students and professionals in science‚ technology‚ engineering‚ and mathematics.

User Testimonials and Reviews

Students and educators praise the Pocket Style Manual for its clarity and practicality. Many find it an indispensable resource for improving writing skills and understanding style guidelines effectively.

11.1 Student Feedback: How the Manual Helps

Students praise the Pocket Style Manual for its accessibility and organization. Many appreciate its spiral binding and clear structure‚ which make it easy to navigate. The manual’s practical advice on grammar‚ style‚ and punctuation has proven invaluable for improving writing skills and completing assignments efficiently. Its concise format is particularly commended for quick reference.

11.2 Educator Perspectives: Teaching with the Manual

Educators value the Pocket Style Manual for its clear‚ flexible guidance‚ making it an essential tool for teaching writing across disciplines. It supports curriculum design and helps students apply grammar‚ style‚ and punctuation rules effectively. The manual’s comprehensive approach ensures consistency and clarity‚ fostering improved writing skills in diverse academic settings.

11.3 Common Praise for the Manual’s Simplicity

The Pocket Style Manual is widely praised for its simplicity and ease of use. Users appreciate its clear‚ concise instructions and well-organized structure‚ making it an invaluable resource for quick reference. Its affordability and practicality make it an essential tool for writers seeking to improve their skills without unnecessary complexity.

The Pocket Style Manual is an indispensable resource for writers‚ offering practical advice on grammar‚ style‚ and punctuation. Its simplicity and effectiveness make it a trusted tool for continuous improvement in writing skills.

12.1 The Pocket Style Manual as an Essential Tool

The Pocket Style Manual is an indispensable resource for writers‚ offering practical advice on grammar‚ style‚ and punctuation. Its simplicity and effectiveness make it a trusted tool for continuous improvement in writing skills‚ ensuring clarity‚ conciseness‚ and consistency in every project. Used by millions‚ it remains a cornerstone for effective communication.

12.2 Continuous Learning and Improvement in Writing

The Pocket Style Manual fosters continuous learning by providing practical advice and exercises to refine writing skills. It encourages writers to stay updated with evolving language trends‚ ensuring clarity and consistency in their work. This resource empowers writers to grow confidently‚ adapting to new challenges and enhancing their communication abilities over time.

12.3 Final Thoughts on Mastering Writing Skills

Mastering writing skills is a lifelong journey requiring practice‚ dedication‚ and continuous learning. The Pocket Style Manual provides essential guidance on grammar‚ style‚ and punctuation‚ aiding writers in refining their craft. By emphasizing clarity‚ conciseness‚ and precision‚ it helps create impactful work that effectively communicates ideas and resonates with diverse audiences.

visual work instructions

Visual work instructions are tools that use images, videos, or diagrams to guide users through complex processes, enhancing understanding and efficiency in various industries.

Definition and Purpose

Visual work instructions are step-by-step guides that use images, diagrams, or videos to communicate complex tasks clearly. Their primary purpose is to simplify processes, reduce ambiguity, and ensure consistency in execution across teams. By leveraging visual elements, these instructions enhance understanding, particularly for individuals with varying language proficiency or learning styles, making them invaluable in industries like manufacturing, healthcare, and education;

Historical Context and Evolution

Visual work instructions trace their roots to early human communication, where images and diagrams simplified complex tasks. Over time, they evolved from static visuals to dynamic, interactive formats. The integration of digital tools, AI, and AR has enhanced their effectiveness, making them more accessible and engaging. This evolution reflects the growing need for clear, efficient communication in diverse industries.

Key Benefits of Visual Work Instructions

Visual work instructions enhance clarity, improve efficiency, and reduce errors by providing clear, actionable guidance, making them invaluable in streamlining processes across various industries effectively.

Enhanced Clarity and Understanding

Visual work instructions use images, videos, and diagrams to break down complex tasks into easy-to-follow steps, reducing ambiguity and ensuring that employees grasp procedures quickly and accurately. By layering visual elements, these instructions minimize errors and enhance comprehension, making them particularly effective for diverse learning styles and languages, thus improving overall task execution and workplace efficiency significantly.

Improved Efficiency and Productivity

Visual work instructions streamline processes by providing clear, step-by-step guidance, reducing the time spent on training and task completion. Employees can quickly understand their roles, minimizing downtime and boosting output. These tools also reduce the need for frequent supervision, allowing teams to focus on high-priority tasks and achieve organizational goals more effectively, leading to measurable productivity gains across industries.

Reduced Errors and Mistakes

Visual work instructions reduce errors by providing clear, step-by-step guidance that minimizes misinterpretation. Diagrams, images, and videos enhance understanding of complex tasks. Layering visual elements ensures all necessary information is conveyed, reducing mistakes. Interactive features, like real-time feedback, further enhance accuracy. This consistency is crucial for maintaining high standards and minimizing operational errors across industries, ensuring tasks are completed accurately and efficiently.

Design Principles for Effective Visual Work Instructions

Effective design requires clarity, simplicity, and consistency, using color and contrast to enhance understanding while ensuring interactivity and engagement for optimal user experience and task completion.

Clarity and Simplicity

Achieving clarity and simplicity in visual work instructions involves using straightforward language, avoiding unnecessary complexity, and focusing on essential information. This ensures that users can quickly grasp the steps without confusion. By eliminating distractions and organizing content logically, instructions become more accessible and effective. Simplification enhances comprehension, making tasks easier to follow and complete accurately. This approach is crucial for ensuring efficiency and reducing errors in workflows.

Consistency in Formatting

Consistency in formatting ensures that visual work instructions are presented uniformly, making them easier to follow and understand. Standardizing fonts, colors, and layouts helps maintain a professional appearance and reduces confusion. Uniform design elements, such as icons and symbols, create a recognizable visual language. This coherence enables users to focus on the task at hand without being distracted by inconsistent styles or formats. Consistency also enhances readability and professionalism across all instructions.

Use of Color and Contrast

The strategic use of color and contrast in visual work instructions enhances readability and visual hierarchy. Color-coded elements can highlight critical steps, differentiate components, or indicate priorities. High contrast between text and backgrounds ensures legibility, especially in low-light environments. Consistent color schemes also aid in quick recognition of patterns and key information, making the instructions more intuitive and user-friendly for diverse audiences.

Interactivity and Engagement

Interactivity and engagement are crucial in visual work instructions, as they enable users to actively participate in the learning process. Features like clickable hotspots, animations, and quizzes enhance user involvement, making complex tasks more accessible. Interactive elements encourage active learning, improve knowledge retention, and allow users to explore concepts at their own pace, fostering a deeper understanding of the material. This approach also boosts motivation and focus, ensuring a more effective learning experience.

Tools and Software for Creating Visual Work Instructions

Popular tools include Figma, Adobe Illustrator, and specialized software like Inkscape or Lucidchart, offering features like drag-and-drop interfaces and templates to streamline visual instruction creation;

Popular Platforms and Applications

Popular platforms like Figma, Adobe Illustrator, and Inkscape are widely used for creating visual work instructions. These tools offer intuitive interfaces, drag-and-drop features, and extensive libraries of templates and design elements, making it easier to craft clear, engaging, and professional-looking instructions. They also support collaboration, enabling teams to work together in real-time, which enhances productivity and consistency in the design process.

Emerging Technologies in Visual Instruction Design

Emerging technologies like AI, machine learning, and augmented reality are revolutionizing visual instruction design. AI-powered tools can generate dynamic, adaptive instructions based on user behavior, while AR enhances training by overlaying digital guidance onto real-world tasks. These innovations enable more interactive, personalized, and accessible learning experiences, making complex processes easier to understand and follow for diverse audiences.

Real-World Applications of Visual Work Instructions

Visual work instructions are widely used in manufacturing, healthcare, and education to simplify complex tasks, reduce errors, and enhance training, making processes more efficient and accessible.

Manufacturing and Assembly Lines

In manufacturing, visual work instructions streamline assembly processes by breaking down tasks into clear, step-by-step guides. They use high-quality images, diagrams, and videos to ensure workers understand each step, reducing errors and improving efficiency. These tools are particularly effective in complex environments, where clarity is crucial for maintaining product quality and safety standards. They also enable faster onboarding of new employees, ensuring consistency across production lines.

Healthcare and Medical Training

Visual work instructions play a vital role in healthcare and medical training by providing clear, step-by-step guides for complex procedures. They enhance understanding, reduce errors, and improve compliance with safety protocols. These tools are particularly effective in training medical professionals, as they offer visual clarity and consistency, ensuring that procedures are performed accurately and safely. They also support continuous learning and skill improvement in high-stakes environments.

Education and E-Learning

Visual work instructions are transforming education and e-learning by providing interactive, engaging, and accessible content. They simplify complex concepts through visuals, making them easier to understand for diverse learners. These tools support self-paced learning, enhance retention, and cater to different learning styles. By integrating multimedia elements, they create immersive experiences, fostering deeper engagement and improved academic outcomes for students worldwide.

Measuring the Effectiveness of Visual Work Instructions

Effectiveness is assessed by tracking task completion rates, error reduction, and user satisfaction. KPIs and feedback loops ensure continuous improvement and alignment with intended goals.

Key Performance Indicators (KPIs)

KPIs for visual work instructions include task completion rates, error reduction, and user engagement. These metrics help quantify effectiveness, ensuring instructions are clear and actionable. By tracking these, organizations can identify areas for improvement, optimize content, and enhance overall performance. Regular analysis of KPIs ensures continuous refinement, aligning instructions with user needs and operational goals.

User Feedback and Iteration

User feedback is crucial for refining visual work instructions. By gathering input through surveys, usability testing, or direct observations, organizations can identify pain points and areas for improvement. Iterative design ensures instructions evolve based on real-user experiences, enhancing clarity and effectiveness. This continuous cycle of feedback and refinement guarantees instructions remain relevant, intuitive, and aligned with user needs, fostering better outcomes and engagement.

Challenges and Limitations

Visual work instructions face challenges like information overload, accessibility barriers, and the need for precise design to ensure clarity and inclusivity for all users.

Information Overload

Information overload occurs when visual work instructions include excessive details, overwhelming users. This can hinder comprehension and efficiency, making it crucial to balance detail with simplicity. Proper design, focusing on essential elements, helps mitigate this issue, ensuring clarity and effectiveness without overwhelming the audience. Simplifying complex processes is key to maintaining user engagement and understanding.

Accessibility and Inclusivity

Ensuring visual work instructions are accessible to all users is vital. This includes accommodating individuals with disabilities through features like screen reader compatibility, high-contrast colors, and scalable fonts. Inclusivity also involves translating instructions into multiple languages and considering cultural differences. By addressing these aspects, organizations can create universally effective and equitable visual guides that cater to diverse needs and promote inclusivity in the workplace.

Future Trends in Visual Work Instructions

Future trends include AI-driven instruction generation and augmented reality integration, enabling more dynamic, interactive, and personalized visual guides to enhance productivity and user engagement across industries.

AI-Driven Instruction Generation

AI-driven instruction generation leverages machine learning to automate the creation of visual work instructions. This technology analyzes data and generates step-by-step guides, adapting to specific tasks and user needs. By integrating AI, companies can reduce manual effort, improve accuracy, and produce scalable, real-time instructions. This innovation enhances efficiency and consistency, making it a transformative tool for industries seeking streamlined workflows and improved productivity.

Augmented Reality (AR) Integration

Augmented reality (AR) integration enhances visual work instructions by overlaying digital information onto real-world environments. This technology provides interactive, real-time guidance, enabling users to complete tasks with greater accuracy. AR improves spatial awareness and reduces reliance on physical manuals, making it ideal for industries like manufacturing, healthcare, and education. By blending virtual and physical elements, AR creates immersive experiences that simplify complex procedures and boost productivity.

Best Practices for Implementing Visual Work Instructions

Ensure clarity, consistency, and user testing. Use feedback loops to refine instructions and update them regularly based on performance and user needs for optimal effectiveness.

Training and Onboarding

Effective training begins with clear, visually guided tutorials that introduce core concepts. Onboarding should include interactive modules, allowing users to practice tasks step-by-step. Provide visual examples and demonstrations to reinforce understanding. Ensure accessibility by offering multilingual support and adjustable formats. Encourage hands-on experience and continuous feedback loops to refine skills. Regularly update materials to reflect process improvements and user insights, ensuring seamless adaptation to new procedures.

Continuous Improvement Strategies

Implement feedback loops to gather user insights and identify areas for refinement. Regularly update visual instructions to reflect process changes and advancements in technology. Use analytics to monitor effectiveness and pinpoint gaps in understanding. Encourage collaboration between teams to share best practices and innovations. Adapt strategies based on evolving user needs and industry trends to maintain relevance and optimal performance.

Visual work instructions have revolutionized how information is conveyed, enhancing clarity, efficiency, and accuracy across industries. By leveraging visual elements, organizations can streamline processes and empower users. As technology advances, integrating AI and AR promises even greater potential. Embracing these tools fosters innovation, ensuring that visual work instructions remain a cornerstone of effective communication and operational excellence in the modern world.

precious moments figurines value guide

This guide helps determine the value of Precious Moments figurines, which can range from $50 to $15,000. Factors like rarity, condition, and demand significantly influence their worth, making authentication crucial for collectors seeking accurate appraisals and fair market prices.

Overview of Precious Moments Figurines

Precious Moments figurines, created by artist Samuel J. Butcher, are beloved collectibles known for their teardrop-eyed characters. These figurines, often depicting religious, holiday, or occupational themes, were first introduced in the 1970s. They quickly gained popularity for their sentimental appeal and intricate designs. Many figurines are part of limited editions or special series, making them highly sought after by collectors. The brand has expanded to include various characters, from religious icons to popular culture figures like Winnie-the-Pooh, further diversifying their appeal. Their charm and emotional resonance have made them a staple in many collections worldwide.

Importance of Understanding Figurine Value

Understanding the value of Precious Moments figurines is essential for collectors, buyers, and sellers. It helps determine fair market prices, ensuring sellers receive appropriate compensation and buyers avoid overpaying. Knowing the worth of these collectibles also aids in making informed decisions about purchasing, trading, or preserving them. Factors like rarity, condition, and demand significantly impact value, making accurate appraisals crucial. This knowledge also helps collectors identify rare or limited-edition pieces, potentially increasing their collection’s worth. Whether for personal enjoyment or investment, understanding figurine value is key to making smart, informed decisions in the market.

Understanding the Value of Precious Moments Figurines

Precious Moments figurines can range in value from $50 to $15,000, depending on rarity, condition, and demand. Authentication is key to determining their true worth accurately.

Factors Influencing the Value of Figurines

The value of Precious Moments figurines is influenced by several factors, including rarity, condition, and demand. Figurines with all three original signatures (Sam Butcher, Gene Freedman, and Yasuhei Fujioka) can increase their worth by up to $100. Limited editions, special features, and unique designs also boost value. Availability in circulation and the duration they were produced play a role, with rarer pieces commanding higher prices. Additionally, figurines in mint condition with original packaging are more valuable than those without. These factors collectively determine the market price of each collectible.

Rarity and Demand in the Market

Rarity significantly impacts the value of Precious Moments figurines, with limited editions and discontinued designs commanding higher prices. Demand is driven by collector interest, nostalgia, and the exclusivity of certain pieces. Figurines like “He Leadeth Me” and “Come Let Us Adore Him” are highly sought after, often selling for hundreds of dollars. The availability of these collectibles in mint condition, especially with original packaging, further fuels demand. As rare pieces become harder to find, their value appreciates, making them highly desirable in the market for collectors and enthusiasts alike.

Identifying Rare and Limited Edition Figurines

Identify rare figurines by limited production runs, unique designs, or exclusive releases; Look for specific markings, signatures, or special editions, such as “He Leadeth Me,” to confirm authenticity and value.

Key Characteristics of Rare Figurines

Rare Precious Moments figurines often feature limited production runs, exclusive designs, or unique themes. Look for figurines like “He Leadeth Me” or “Jesus Is the Answer,” which are highly sought after. Special editions, such as those with original signatures from creators like Sam Butcher, can significantly increase value. Figurines in mint condition, with original packaging, are also rare and highly valuable. Unique designs or special features, like glow-in-the-dark details, further enhance rarity. These characteristics make certain figurines stand out and command higher prices among collectors.

How to Spot Limited Edition Collectibles

Limited edition Precious Moments figurines often feature unique numbering or production details on their bases. Look for figurines with original packaging or certificates of authenticity, as these indicate exclusivity. Rare themes, such as specific religious or seasonal designs, can also signal limited editions. Figurines like “Come Let Us Adore Him” or “God Loveth a Cheerful Giver” are highly sought after due to their scarcity. Additionally, limited editions may have special features, such as glow-in-the-dark details, making them easier to identify. Always research or consult experts to verify authenticity and rarity.

Current Market Trends and Prices

Precious Moments figurines range from $50 to $400, with rare pieces reaching up to $15,000. Current trends show increased demand for limited editions and mint-condition items.

Price Ranges for Common and Rare Figurines

Common Precious Moments figurines typically range from $50 to $150, while rare or limited editions can fetch between $300 and $15,000. Mint-condition pieces with original packaging often command higher prices, sometimes exceeding $400. The value significantly increases for figurines with unique features or signatures, such as those signed by Sam Butcher, Gene Freedman, or Yasuhei Fujioka. Rare editions like “Jesus Is the Answer” or “He Leadeth Me” are highly sought after, often selling for $100 to $175. Authentication and condition play crucial roles in determining their final market value.

Recent Sales Data and Auction Highlights

Recent auctions highlight strong demand for rare Precious Moments figurines, with “He Leadeth Me” selling for $145 and “Come Let Us Adore Him” fetching between $187.50 and $375. Limited editions like “God Loveth a Cheerful Giver” have sold for $299.97 to $399.99. Rare figurines, especially those with unique features or signatures, occasionally reach up to $15,000. Auction platforms like eBay showcase these sales, emphasizing the importance of authenticity and condition in achieving higher prices. Collectors are particularly drawn to figurines with original packaging and limited production runs.

Authentication and Appraisal Tips

Authentication involves expert verification of figurines. Ensure they have original signatures and proper markings. Appraisers can determine value based on condition and rarity. Provenance matters;

How to Authenticate Precious Moments Figurines

Authentication involves verifying the figurine’s legitimacy. Check for original signatures like Sam Butcher, Gene Freedman, and Yasuhei Fujioka. Look for backstamps or production marks. Examine the ceramic material and paint quality. Compare with official catalogs or consult appraisers. Packaging and documentation, like original boxes, can also confirm authenticity. Rare figurines may require expert verification to ensure they are genuine and not reproductions, which is crucial for determining their value accurately.

Role of Appraisers in Determining Value

Appraisers play a crucial role in determining the value of Precious Moments figurines by providing expert opinions based on condition, rarity, and market demand. They evaluate the figurine’s authenticity, checking for original signatures, backstamps, and production marks. Appraisers also research recent sales data and auction trends to estimate fair market value. Their expertise ensures accurate pricing, helping collectors and sellers set realistic expectations. For rare or high-value figurines, professional appraisals are essential for insurance, estate planning, or sale purposes, ensuring transparency and confidence in the valuation process.

Popular Figurines and Their Value

Precious Moments figurines like “Jesus Is the Answer” and “He Leadeth Me” are highly sought after, with values ranging between $100 and $175, depending on condition and rarity.

High-Value Figurines to Look Out For

Certain Precious Moments figurines, such as “Jesus Is the Answer” and “He Leadeth Me,” are highly valuable, ranging from $100 to $175. Rare pieces like “Come Let Us Adore Him” can fetch up to $375. Limited editions and those with original signatures from artists like Sam Butcher, Gene Freedman, and Yasuhei Fujioka significantly increase worth. Figurines in pristine condition with original packaging are sought after by collectors, often commanding premium prices in auctions and resale markets.

Special Editions with Unique Features

Precious Moments special editions, such as those commemorating birthdays or anniversaries, often feature unique designs or packaging, enhancing their value. Figurines with rare themes, like clowns or religious motifs, are highly sought after. Certain editions, such as “A Friend Is Someone Who Cares,” boast intricate details or limited production runs. Additionally, figurines signed by artists like Sam Butcher can command higher prices due to their exclusivity. These special features make certain pieces stand out, attracting serious collectors and driving up their market value significantly.

Buying and Selling Precious Moments Figurines

Precious Moments figurines can be bought and sold on platforms like eBay, with prices ranging from $100 to $150. Original packaging and condition significantly impact value.

Where to Buy and Sell Figurines

Popular platforms for buying and selling Precious Moments figurines include eBay, Etsy, and Facebook Marketplace. Specialized collector forums and local antique shops also offer opportunities. Many sellers list rare and limited editions online, while others prefer in-person transactions. Prices vary based on condition, rarity, and demand. Using official price guides or appraisals can help determine fair market values. Sellers often highlight original packaging and signatures to attract higher offers. Collectors are advised to research thoroughly before making purchases or sales to ensure authenticity and fair deals.

Tips for Getting the Best Price

To maximize value, ensure figurines are in excellent condition with original packaging. Highlight rare or limited editions, and consider authentication. Research similar items on platforms like eBay or Etsy to set competitive prices. Timing sales during peak collector interest can boost returns. Use high-quality photos and detailed descriptions to attract buyers. Bargain hunters may undervalue items, so set realistic expectations. For high-value pieces, consult appraisers or sell through reputable auction houses to ensure fair market prices and avoid lowball offers.

Precious Moments figurines offer lasting sentimental and monetary value. With proper authentication and research, collectors can unlock their full potential, ensuring informed decisions for future investments and sales.

Summarizing the Value Guide

This guide provides a comprehensive overview of Precious Moments figurines’ value, highlighting factors like rarity, condition, and demand. It emphasizes authentication and market trends, noting values range from $50 to $15,000. Collectors and sellers benefit from understanding these elements to make informed decisions. The guide also underscores the importance of official signatures and limited editions in determining worth. By focusing on realistic appraisals, it helps enthusiasts maximize their investments and enjoy their cherished collectibles.

Future Outlook for Collectors

The demand for Precious Moments figurines is expected to grow, driven by nostalgia and limited editions. Rare and authenticated pieces may see increased values, especially those with original signatures. Collectors should focus on condition and rarity to maximize future returns. While market trends can fluctuate, the enduring appeal of these figurines suggests a stable or rising market. Staying informed about trends and maintaining items in pristine condition will be key for long-term value appreciation.

real-time path guiding using bounding voxel sampling

Real-time path guiding enhances rendering efficiency by directing light transport paths intelligently. It is crucial for applications like gaming and virtual reality, where speed and quality are essential. Traditional methods often struggle with balancing visual fidelity and computational demands, driving the need for innovative techniques. Bounding Voxel Sampling emerges as a solution, offering efficient path guidance through spatial data structures. This approach streamlines path sampling, reducing noise and improving realism without additional computational overhead. This introduction sets the stage for exploring the technical foundations and applications of this groundbreaking method.

1.1 Overview of Path Guiding in Computer Graphics

Path guiding is a technique used to optimize light transport simulation by directing sample paths toward important regions. It balances efficiency and visual quality, crucial for real-time applications. Traditional methods often struggle with noisy results or high computational costs. Path guiding addresses this by intelligently steering paths, reducing redundant calculations. This approach is vital in ray tracing and path tracing, where accurate light distribution is essential. The emergence of bounding voxel sampling revolutionizes path guiding, offering efficient spatial data management for better rendering outcomes.

1.2 The Emergence of Bounding Voxel Sampling

Bounding voxel sampling has emerged as a powerful technique for efficient path guiding in real-time rendering. By leveraging spatial irradiance data within voxels, it enables intelligent light transport simulation. This method reduces computational overhead while maintaining high visual fidelity. Its scalability and adaptability to complex scenes make it ideal for modern graphics applications. The rise of bounding voxel sampling addresses the growing demand for faster, more accurate rendering solutions in industries like gaming and virtual reality.

Technical Foundations of Bounding Voxel Sampling

Bounding voxel sampling relies on spatial irradiance data structures to guide light transport efficiently. It integrates voxel-based techniques with real-time rendering pipelines for optimal performance.

2.1 Understanding Voxel Data Structures

Voxel data structures are three-dimensional grids used to represent and store spatial information efficiently. In real-time path guiding, voxels are employed to organize scene data, enabling quick access and queries. Each voxel contains geometric and radiometric details, facilitating accurate light transport simulations. By dividing the scene into manageable voxel cells, this approach reduces computational overhead and enhances rendering performance. Voxel structures are adaptable, allowing them to handle complex scenes dynamically while maintaining memory efficiency and scalability for real-time applications.

2.2 Spatial Irradiance Voxel Data Structure

The spatial irradiance voxel data structure is a 3D grid that stores irradiance information at discrete points within a scene. It enables efficient light transport simulations by providing precomputed radiance data for each voxel. This structure optimizes path guiding by reducing redundant calculations and ensuring accurate light propagation. By organizing irradiance data spatially, it facilitates quick lookups and adaptive sampling, making it a cornerstone for real-time path guiding techniques. Its efficiency is crucial for maintaining high-performance rendering in dynamic scenes.

Methodology of Voxel Path Guiding (VXPG)

The Voxel Path Guiding (VXPG) methodology leverages bounding voxels to guide light transport efficiently. By utilizing spatial irradiance data, it enables adaptive path sampling, enhancing rendering efficiency under limited budgets.

3.1 Constructing Bounding Voxels

Bounding voxels are constructed by partitioning the scene into a grid of 3D cells, each capturing irradiance data. This structure enables efficient path sampling by guiding light transport based on stored irradiance values. The voxels are built in real-time, allowing dynamic adaptation to scene changes. Each voxel’s irradiance is calculated and stored, facilitating quick lookups during path vertex sampling. This method ensures efficient and accurate guidance of light paths, reducing noise and improving rendering quality without additional computational overhead.

3.2 Sampling Strategy for Path Vertices

The sampling strategy for path vertices leverages the irradiance data stored in bounding voxels to guide light transport efficiently. For each shading point, the algorithm selects path vertices based on the stored irradiance values within the voxels. This probability-based sampling prioritizes regions with higher irradiance, ensuring paths are distributed optimally. The strategy reduces noise and improves convergence while maintaining real-time performance. By focusing on relevant areas, it enhances rendering quality without increasing computational overhead, making it ideal for dynamic scenes.

Advantages of Real-Time Path Guiding

Real-time path guiding offers improved efficiency, reduced noise, and faster convergence in rendering. It enhances visual fidelity while maintaining performance, making it ideal for dynamic applications.

4.1 Improved Fitting Efficiency

Bounding voxel sampling significantly enhances fitting efficiency by strategically guiding light paths. It reduces redundant samples and focuses on areas contributing most to image quality, optimizing resource allocation. This method ensures faster convergence and smoother rendering, even in complex scenes. By leveraging spatial irradiance data, it minimizes noise and artifacts, delivering cleaner visuals without computational overhead. This efficiency boost is crucial for real-time applications, enabling high-quality rendering in dynamic environments;

4.2 Enhanced Rendering Performance

Bounding voxel sampling drastically accelerates rendering by reducing noise and optimizing path distribution. It achieves faster convergence, enabling smoother and more detailed visuals in real-time. By focusing samples on high-impact areas, it minimizes rendering time while maintaining quality. This method is particularly beneficial for dynamic scenes, where traditional approaches often struggle. The result is improved frame rates and reduced latency, making it ideal for applications like gaming and virtual reality that demand high-performance rendering.

Applications in Real-Time Rendering

Real-time path guiding with bounding voxel sampling is transformative for gaming, virtual reality, and augmented reality. It enables faster, more accurate rendering, enhancing visual quality and immersion seamlessly.

5.1 Use in Ray Tracing and Path Tracing

Bounding voxel sampling excels in ray tracing and path tracing by guiding light paths efficiently. It reduces noise and accelerates convergence, especially in complex scenes. By leveraging spatial irradiance data, it directs rays to important areas, enhancing rendering accuracy. This method integrates seamlessly with modern ray-tracing pipelines, optimizing performance without compromising visual quality. Its efficiency makes it ideal for real-time applications, ensuring high-fidelity results even under strict computational constraints. This technique is pivotal for achieving realistic illumination in dynamic environments.

5.2 Integration with Modern Rendering Pipelines

Bounding voxel sampling seamlessly integrates with modern rendering pipelines, enhancing their efficiency and performance. By leveraging spatial irradiance data, it optimizes light transport simulation, reducing computational overhead. This technique complements existing rendering stages, such as rasterization and ray tracing, ensuring high-fidelity results. Its implementation within frameworks like Vulkan or DirectX accelerates rendering processes, making it suitable for real-time applications. This integration not only preserves visual quality but also aligns with industry standards, ensuring compatibility and adaptability across diverse rendering architectures.

Challenges and Limitations

Real-time path guiding with bounding voxel sampling faces challenges like handling complex scenes and balancing the sampling budget. These limitations can impact accuracy and performance.

6.1 Handling Complex Scenes

Handling complex scenes with numerous objects and intricate geometries poses significant challenges for real-time path guiding. The voxel grid may become overwhelmed, leading to reduced accuracy or increased computational demands. Scenes with high levels of detail can cause the sampling strategy to miss critical path vertices, potentially degrading visual quality. Additionally, maintaining efficient rendering performance while managing such complexity requires careful balancing of resources and optimization techniques to ensure smooth real-time operation.

6.2 Balancing Sampling Budget

Balancing the sampling budget is crucial for real-time path guiding, as it directly impacts both visual quality and performance. Allocating too few samples can lead to noise and artifacts, while excessive sampling wastes computational resources. Scenes with varying complexity require adaptive strategies to distribute samples effectively. Bounding voxel sampling helps manage this balance by prioritizing areas of high visual importance, ensuring efficient resource use without compromising rendering quality. This adaptive approach is vital for maintaining real-time performance in demanding environments.

Future Directions and Research Opportunities

Future research should focus on advancing voxel sampling techniques, integrating with machine learning, combining with other rendering paradigms, optimizing spatial data structures, and improving scalability for enhanced real-time performance.

7.1 Advancing Voxel Sampling Techniques

Future research should focus on enhancing voxel sampling techniques to improve efficiency and accuracy. Developing higher-dimensional voxel encodings and adaptive sampling strategies could reduce noise and artifacts. Integrating machine learning with voxel structures to predict optimal sampling locations shows promise. Additionally, optimizing voxel resolution and traversal algorithms can further accelerate real-time rendering. These advancements aim to achieve higher fidelity and performance in complex scenes, making path guiding more robust and scalable for next-generation applications.

7.2 Combining with Other Rendering Paradigms

Combining voxel path guiding with other rendering techniques, such as rasterization or machine learning-based methods, offers significant potential. Hybrid approaches can leverage the strengths of each paradigm, optimizing performance and visual quality. For instance, integrating voxel sampling with neural rendering could enable faster convergence and reduced noise. Additionally, combining with ray-tracing accelerators or denoising filters can enhance realism while maintaining real-time capabilities. Such synergies promise to unlock new possibilities for efficient and high-fidelity rendering in diverse applications.

Real-time path guiding using bounding voxel sampling significantly revolutionizes rendering by enhancing efficiency and visual fidelity, setting a new standard for future innovative rendering technologies.

8.1 Summary of Key Insights

Real-time path guiding using bounding voxel sampling offers significant advancements in rendering efficiency and visual fidelity. By leveraging spatial irradiance voxel data structures, it effectively reduces noise and accelerates convergence. This method optimizes light transport simulation, ensuring high-quality results within strict computational limits. Its ability to balance accuracy and performance makes it particularly suitable for real-time applications like ray tracing and virtual reality. The technique demonstrates remarkable potential in enhancing rendering pipelines, addressing both practical and theoretical challenges in computer graphics.

8.2 Impact on Future Rendering Technologies

Real-time path guiding using bounding voxel sampling is poised to revolutionize rendering technologies by enabling faster, more efficient light transport simulation. Its ability to balance accuracy and performance makes it a cornerstone for future advancements in ray tracing, virtual reality, and real-time graphics. By integrating with modern rendering pipelines, this method could drive the adoption of photorealistic rendering in interactive applications. Ongoing research into voxel sampling techniques promises even greater breakthroughs, ensuring its pivotal role in shaping the future of computer graphics.

periodic trends worksheet pdf answers

Periodic trends describe how elements’ properties change across the periodic table. Worksheets with answers provide structured practice, enhancing understanding of atomic radius, ionization energy, and electronegativity.

1.1 Overview of the Periodic Table

The periodic table is a tabular arrangement of elements, organized by atomic number, electron configuration, and recurring chemical properties. It is divided into rows (periods) and columns (groups), with elements exhibiting predictable trends in atomic radius, ionization energy, and electronegativity. Worksheets on periodic trends often focus on these patterns, enabling students to predict properties based on an element’s position. For instance, atomic radius generally decreases across a period and increases down a group, while ionization energy and electronegativity typically follow the opposite trend.

Understanding the periodic table’s structure is foundational for analyzing trends, as seen in resources like the Periodic Trends Worksheet with Answer Key. These tools guide learners in mapping and interpreting periodic relationships, fostering a deeper grasp of chemical behavior.

1.2 Importance of Periodic Trends in Chemistry

Periodic trends are fundamental to understanding chemistry, as they reveal predictable patterns in element properties. These trends, such as atomic radius, ionization energy, and electronegativity, help explain chemical reactivity and bonding. Worksheets with answers, like the Periodic Trends Worksheet with Answer Key, are essential tools for mastering these concepts. By analyzing trends, chemists can predict how elements behave in compounds and reactions, aiding in the development of materials and pharmaceuticals. Such knowledge also underpins advanced topics in modern chemistry, as highlighted in resources from the Central Bucks School District and Teachers Pay Teachers. These educational materials emphasize how periodic trends form the cornerstone of chemical studies, enabling students to solve complex problems and apply concepts in real-world scenarios.

Key Periodic Trends

Key periodic trends include atomic radius, ionization energy, and electronegativity. These trends help predict element properties and behavior, essential for solving periodic trends worksheet questions accurately.

2.1 Atomic Radius Trend

The atomic radius trend refers to the variation in atomic size across the periodic table. As you move from left to right within a period, atomic radius decreases due to increasing nuclear charge, which pulls electrons closer to the nucleus. Conversely, as you move down a group, atomic radius increases because each successive period adds a new energy level, resulting in electrons being farther from the nucleus. This trend is crucial for understanding chemical properties and behavior. Worksheets often include exercises where students rank elements by atomic radius, reinforcing their grasp of periodic patterns. These activities help learners visualize and apply trend concepts effectively.

2.2 Ionization Energy Trend

The ionization energy trend describes how the energy required to remove an electron from an atom changes across the periodic table. Generally, ionization energy increases as you move from left to right across a period due to increasing nuclear charge and greater attraction between the nucleus and electrons. Conversely, it decreases as you move down a group because the outermost electron is farther from the nucleus and experiences less attraction. Exceptions occur, such as with oxygen and nitrogen, due to differences in electron configuration stability. Worksheets often include questions that ask students to predict and explain ionization energy trends, helping them understand how atomic structure influences chemical properties. These exercises reinforce the relationship between periodic trends and electron behavior.

2.3 Electronegativity Trend

Electronegativity measures an atom’s ability to attract electrons in a chemical bond. Across the periodic table, electronegativity generally increases from left to right and decreases from top to bottom. This trend is due to increasing nuclear charge and decreasing atomic size, which enhance the atom’s pull on electrons. Fluorine is the most electronegative element, while cesium is the least. Exceptions, like oxygen being more electronegative than nitrogen, arise from differences in electron configuration stability. Worksheets often include questions asking students to rank elements by electronegativity and explain anomalies, reinforcing the relationship between periodic trends and chemical bonding. These exercises help students predict how elements behave in compounds and reactions, deepening their understanding of periodicity.

2.4 Electron Affinity Trend

Electron affinity refers to the energy change when an atom gains an electron, forming an anion. It generally increases across a period due to higher nuclear charge and decreased atomic size, making it easier for the atom to attract electrons. However, trends are less consistent down groups due to varying electron configurations. Chlorine, for example, has a higher electron affinity than fluorine because of its stable half-filled valence shell. Worksheets often include questions ranking elements by electron affinity and explaining exceptions, such as oxygen’s lower affinity compared to nitrogen. These exercises help students understand how electron affinity influences chemical reactivity and bonding, linking periodic trends to practical chemical behavior.

How to Answer Periodic Trends Worksheet Questions

Mastering periodic trends requires understanding the table’s structure and analyzing patterns. Practice worksheets help identify trends, rank elements, and explain exceptions using data and concepts effectively.

3.1 Understanding the Periodic Table Structure

Understanding the periodic table structure is essential for analyzing periodic trends. The table is organized into rows (periods) and columns (groups), with elements arranged by atomic number. Each period represents a new principal energy level, while groups share similar chemical properties due to the same number of valence electrons. Metals, nonmetals, and metalloids are clearly separated, with metals dominating the left and bottom. Recognizing this layout helps identify patterns in atomic radius, ionization energy, and electronegativity. Worksheets often include exercises that require students to visualize and map these trends. By mastering the table’s organization, learners can better predict and explain how properties change across periods and down groups, enhancing their ability to answer worksheet questions accurately.

3.2 Analyzing Trends for Accurate Answers

Analyzing periodic trends requires a systematic approach to ensure accurate worksheet answers. Start by identifying the specific trend in question, such as atomic radius or ionization energy. Next, determine the direction of the trend—increasing or decreasing—across a period or down a group. Compare elements based on their positions and periodic patterns. For instance, atomic radius decreases across a period due to increasing nuclear charge, while ionization energy generally increases. Electronegativity follows a similar pattern, rising from left to right and bottom to top. Using visual aids like trend maps or charts can help visualize these relationships. Always cross-check with the periodic table to confirm positions and apply logical reasoning to predict values. This methodical analysis enhances understanding and leads to precise answers on periodic trends worksheets.

Resources for Learning Periodic Trends

Online worksheets, answer keys, and educational platforms like Teachers Pay Teachers offer valuable resources. Downloadable PDFs, such as the “Periodic Trends Worksheet with Answer Key,” provide structured practice and feedback.

4.1 Online Worksheets and Answer Keys

Online worksheets and answer keys are essential tools for mastering periodic trends. Platforms like Teachers Pay Teachers offer a variety of downloadable resources, including PDF worksheets with detailed answer keys. These materials cover key concepts such as atomic radius, ionization energy, and electronegativity trends. Many worksheets are designed for specific chemistry courses and include interactive exercises to test knowledge. Additionally, websites like DocHub provide editable templates, allowing students to complete assignments digitally. Answer keys enable self-assessment, helping learners identify areas for improvement. Some resources also include explanations for incorrect answers, enhancing understanding. These online tools are convenient and accessible, making them ideal for both classroom use and independent study. They provide structured practice, ensuring a comprehensive grasp of periodic trends.

4.2 Teacher and Student Resources

Teachers and students benefit from a wide range of resources designed to enhance learning and teaching of periodic trends. Educational platforms and marketplaces, such as Teachers Pay Teachers, offer customizable worksheets, lesson plans, and activities tailored to various learning levels. These resources often include interactive elements like quizzes, puzzles, and graphical representations of the periodic table. Additionally, many websites provide study guides, flashcards, and cheat sheets to help students review key concepts. Teachers can also access classroom-ready materials, such as PowerPoint presentations and lab activities, to engage students. For advanced learners, resources like Scribd and educational blogs offer in-depth explanations and practice problems. These tools support both independent study and structured classroom learning, ensuring a comprehensive understanding of periodic trends. They also cater to different learning styles, making chemistry more accessible and engaging for everyone.

Advanced Topics in Periodic Trends

Exploring emerging trends and exceptions, as well as applications in modern chemistry, deepens understanding of periodic trends, revealing their role in cutting-edge research and industrial processes.

5.1 Emerging Trends and Exceptions

Emerging trends in periodic trends often challenge traditional patterns, revealing unexpected behavior in elements. Exceptions, such as fluorine’s higher electronegativity than oxygen, highlight complexities in periodicity. These anomalies arise from unique electron configurations or relativistic effects. Worksheets with answers help students identify and explain such deviations, fostering a deeper understanding of periodic trends. For instance, gold’s unusual color and mercury’s liquid state at room temperature are examples of exceptions that prompt further exploration. By analyzing these cases, learners gain insights into the intricate relationships between atomic structure and chemical properties. Advanced resources, including PDF answer keys, provide detailed explanations, enabling students to master these concepts effectively.

5.2 Applications in Modern Chemistry

Understanding periodic trends is crucial for advancing modern chemistry, as they guide the development of new materials, drugs, and technologies. For instance, trends in electronegativity and ionization energy help predict chemical reactivity, aiding in catalyst design. Similarly, atomic radius trends inform nanotechnology, enabling the creation of miniaturized devices. In drug discovery, periodic trends assist in designing molecules with specific properties, enhancing therapeutic efficacy. Environmental science also benefits, as trends in electron affinity and electronegativity help develop sustainable energy solutions. Worksheets with answers provide practical exercises, allowing chemists to apply these trends effectively. By mastering periodic trends, researchers can innovate across diverse fields, driving scientific progress and solving real-world challenges.

magic chef ice maker instructions

The Magic Chef Ice Maker is a compact, portable appliance designed to produce fresh ice cubes quickly and efficiently. Perfect for homes, offices, or RVs, it offers automatic operation, various ice size options, and a user-friendly interface. Its sleek design and efficient performance make it an ideal choice for everyday use or entertaining guests.

Overview of the Magic Chef Ice Maker

The Magic Chef Ice Maker is a compact, countertop appliance designed for convenient ice production. Models like the MCIM30TS and MCIM30TW produce up to 27 pounds of ice daily, offering three cube size options. Its portable design makes it ideal for homes, offices, or outdoor use. The unit features a water level indicator, automatic shut-off when the ice basket is full, and a removable ice basket for easy transfer. With a user-friendly interface and fast ice-making cycles, it ensures a steady supply of fresh ice. The Magic Chef Ice Maker is a practical solution for entertainment or daily needs, combining efficiency and simplicity in a sleek, modern design.

Benefits of Using a Magic Chef Ice Maker

Using a Magic Chef Ice Maker offers numerous benefits, including convenience, efficiency, and versatility. It provides a steady supply of fresh ice cubes, perfect for entertaining guests or daily use. The compact, portable design allows easy placement on countertops, making it ideal for homes, offices, or outdoor settings. With the ability to produce up to 27 pounds of ice daily and multiple cube size options, it caters to various needs. The automatic shut-off feature prevents overfilling, while the removable ice basket ensures easy ice transfer. Its user-friendly interface and fast ice-making cycles make it a practical and reliable appliance for any setting, enhancing your beverage preparation with fresh, high-quality ice.

Unpacking and Initial Setup

Unpack your Magic Chef Ice Maker carefully, ensuring all components are intact. Place it on a flat, stable surface in a well-ventilated area, following the manual’s setup guide.

Unpacking Your Magic Chef Ice Maker

When unpacking your Magic Chef Ice Maker, carefully remove it from the box and inspect for any visible damage. Ensure all components, such as the ice basket, lid, and water reservoir, are included. Gently wipe down the exterior and interior with a soft cloth to remove any packaging residue. Before first use, rinse the water reservoir and ice basket with clean water to ensure hygiene. Place the unit on a flat, stable surface, away from direct sunlight and heat sources. Refer to the manual for specific unpacking and placement guidelines to ensure optimal performance and safety.

Initial Cleaning and Preparation

Before using your Magic Chef Ice Maker, perform an initial cleaning to ensure hygiene and optimal performance. Fill the water reservoir with a mixture of water and white vinegar, then run a complete ice-making cycle to clean the internal components. Discard the first batch of ice produced. Next, rinse the reservoir and ice basket thoroughly with clean water. Dry all parts with a soft cloth to prevent water spots. This process removes any manufacturing residues and prepares the unit for safe, efficient ice production. Regular cleaning will maintain your ice maker’s functionality and ensure fresh, clean-tasting ice.

Placing the Ice Maker in Your Kitchen

Position your Magic Chef Ice Maker on a flat, stable, and level surface to ensure proper operation. Choose a location with good ventilation to avoid overheating. Place it away from direct sunlight and moisture sources to maintain efficiency. Ensure the unit is at least 4 inches away from any walls or adjacent appliances for optimal airflow. Keep it near a power outlet to avoid using extension cords. The countertop surface should be sturdy enough to support the ice maker’s weight when filled with water. Avoid placing it in areas prone to extreme temperatures or humidity, as this may affect performance. Proper placement ensures reliable ice production and extends the appliance’s lifespan.

Operating the Ice Maker

Simply clean the unit, fill the water tank below the marked level, plug it in, and press Start; The ice maker automatically produces cubes in minutes.

Adding Water to the Ice Maker

To begin, open the lid and remove the ice basket. Carefully pour fresh tap water into the reservoir, ensuring the water level stays below the marked line. Avoid overfilling, as this can cause spills or operational issues. Once the water is added, replace the ice basket and close the lid. The ice maker will automatically detect the water and prepare for the freezing cycle. Always use clean water for fresh-tasting ice. For best results, use a jug or cup to pour water precisely. This step ensures your ice maker operates efficiently and produces high-quality ice cubes.

Choosing the Right Ice Size

The Magic Chef Ice Maker offers multiple ice size options to suit your needs. Select from small, medium, or large cubes using the control panel. Smaller cubes are ideal for drinks, while larger cubes are better for cooling. The machine will automatically adjust the freezing time based on your selection. Ensure the ice basket is empty before changing size settings to avoid any issues. This feature allows you to customize your ice production, making it perfect for various occasions, from casual gatherings to everyday use. The intuitive controls make it easy to choose the right size every time, enhancing your overall experience with the appliance.

Starting the Ice Making Cycle

To start the ice making cycle, ensure the water tank is filled below the recommended level and the ice basket is empty. Plug in the unit and press the Power button on the control panel. The indicator light will illuminate, signaling the start of the cycle. Depending on the selected ice size, the machine will begin producing ice cubes in as little as 7 minutes. The Magic Chef Ice Maker will automatically stop once the ice basket is full or when the water level is low. This straightforward process ensures efficient and hassle-free ice production, making it easy to enjoy fresh ice whenever needed.

Maintenance and Cleaning

Regularly clean the Magic Chef Ice Maker to ensure optimal performance. Wipe surfaces with a damp cloth and descale every 3-6 months to prevent mineral buildup. Check for hard water stains and clean the water reservoir to maintain hygiene and efficiency.

Cleaning the Ice Maker

Cleaning the Magic Chef Ice Maker is essential for maintaining hygiene and performance. Begin by unplugging the unit and removing the ice basket. Wipe the interior with a soft cloth and mild detergent, paying attention to areas with visible buildup. For tougher stains, mix equal parts water and white vinegar and let it sit for 10 minutes before scrubbing. Rinse thoroughly with clean water to remove any residue. Regular cleaning prevents bacteria growth and ensures fresh-tasting ice. Always refer to the user manual for specific cleaning instructions to avoid damaging the unit.

Descaling Your Ice Maker

Descaling your Magic Chef Ice Maker is crucial to remove mineral buildup from hard water, which can affect performance and ice quality. Use a descaling solution or a mixture of water and white vinegar. Pour the solution into the water reservoir and run a few ice-making cycles to circulate it through the system. After completing the cycles, rinse the reservoir and interior thoroughly with clean water. Repeat if necessary to ensure all mineral deposits are removed. Regular descaling ensures optimal function and prevents damage from scale buildup, keeping your ice maker efficient and producing clear, fresh ice consistently.

Regular Maintenance Tips

Regular maintenance ensures your Magic Chef Ice Maker operates efficiently and lasts longer. Clean the interior and exterior regularly with a mild detergent to prevent dirt buildup. Check and replace the water filter if your model has one to improve ice quality. Ensure the unit is placed on a level surface to maintain proper water flow. After extended use, descale the ice maker to remove mineral deposits, especially in hard water areas. Always unplug the unit before cleaning or performing maintenance. Store the ice maker in a dry place when not in use to prevent mold growth. Following these tips will keep your ice maker in optimal condition and ensure consistent performance.

Troubleshooting Common Issues

The Magic Chef Ice Maker may occasionally face issues like ice not forming or the unit not turning on. Check water levels, ensure proper power connection, and verify ice basket placement. If problems persist, refer to the troubleshooting guide for specific solutions to restore functionality and ensure optimal performance.

Diagnosing Common Problems

Identifying issues with your Magic Chef Ice Maker starts with observing its behavior. Common problems include the unit not producing ice, the “Ice Full” light staying on, or the machine shutting down unexpectedly. Check if the water reservoir is empty or if the ice basket is improperly placed. Ensure the power button is functioning and the unit is properly plugged in. If the ice maker stops mid-cycle, it may indicate a sensor malfunction or a blockage in the water supply. Refer to the troubleshooting section of the manual for detailed guidance on diagnosing and resolving these issues effectively.

Solving Ice Making Issues

If your Magic Chef Ice Maker stops producing ice, first ensure the water reservoir is filled and the water level is below the recommended mark. Check for blockages in the water supply lines or the ice basket. If the issue persists, reset the unit by unplugging it for 30 seconds and plugging it back in. For models with a “Select” button, press and hold it for 5 seconds to reset. Descale the unit regularly to prevent mineral buildup. Always refer to the user manual for specific instructions tailored to your model, ensuring optimal performance and longevity of your ice maker.

Resetting the Ice Maker

To reset your Magic Chef Ice Maker, unplug the unit from the power source and wait for 30 seconds. This allows the internal components to reset. Plug the unit back in and ensure the ice basket is empty. For models with a “Select” button, press and hold it for 5 seconds to complete the reset. This process helps resolve minor operational issues without affecting pre-set preferences. After resetting, fill the water reservoir and restart the ice-making cycle. If problems persist, consult the user manual for model-specific instructions or perform additional troubleshooting steps to ensure optimal performance.

bread maker recipe book pdf

Bread maker recipe books offer a comprehensive guide to creating delicious homemade bread, providing step-by-step instructions and diverse recipes for all skill levels․ Easily accessible as PDFs online, these books cater to various dietary needs and preferences, ensuring everyone can enjoy freshly baked bread․

1․1 Overview of Bread Maker Recipe Books

Bread maker recipe books provide detailed guides for creating various types of bread using automated bread makers․ They typically include basic and specialty recipes, such as white, whole wheat, sourdough, and gluten-free options․ Many books are available as free PDF downloads, offering step-by-step instructions, ingredient lists, and tips for troubleshooting․ These resources cater to both beginners and experienced bakers, ensuring perfect results every time․

1․2 Benefits of Using a Bread Maker Recipe Book

Using a bread maker recipe book offers numerous benefits, including consistency in bread quality, access to diverse recipes, and simplified baking processes․ These books often include troubleshooting tips and customization options, allowing users to experiment with flavors and ingredients․ They also provide clear measurements and step-by-step instructions, ensuring perfect results․ Additionally, many recipe books are available as free PDF downloads, making them easily accessible for home bakers․

Basic Ingredients for Bread Maker Recipes

Common ingredients include water, flour, yeast, salt, and sometimes oil or sugar․ These are typically measured in specific ratios to ensure proper dough formation and baking results․

2․1 Common Ingredients Used in Bread Maker Recipes

The essential ingredients for bread maker recipes typically include water, flour, yeast, salt, and sometimes oil or sugar․ Optional additions like nuts, seeds, or dried fruits enhance flavor․ Measurements are precise to ensure proper dough formation․ These ingredients are widely available and form the foundation for various bread types, making them versatile for both classic and specialty recipes․

2․2 Importance of Room Temperature Ingredients

Room temperature ingredients are crucial for optimal bread maker performance․ Yeast activates best in warm environments, and cold ingredients can hinder its activity, affecting rise and texture․ Allowing ingredients to reach room temperature ensures even hydration, proper yeast fermentation, and consistent dough development, leading to better bread quality and texture in every loaf․

Basic White Bread Recipe

A simple Basic White Bread Recipe typically includes 4 cups of flour, 1 teaspoon of salt, 1 tablespoon of sugar, 1 packet of yeast, and 3 cups of water․

3․1 Step-by-Step Instructions for Basic White Bread

Measure 4 cups of flour, 1 teaspoon of salt, 1 tablespoon of sugar, and 1 packet of yeast․ Add 3 cups of warm water․ Load ingredients into the bread pan in the recommended order․ Select the basic white bread setting on your machine․ Choose loaf size and crust color․ Press Start․ Let the machine mix, knead, and bake․ Allow the bread to cool before slicing;

3․2 Tips for Perfecting the Basic White Bread Recipe

Ensure all ingredients are at room temperature for optimal yeast activation․ Measure ingredients accurately to avoid dense or misshapen loaves․ Use bread machine yeast for best results․ Avoid overmixing dough, as it can lead to tough bread․ Select the correct crust color setting for your preference․ Let the bread cool completely on a wire rack to prevent sogginess․ Experiment with crust settings for desired texture․

Whole Wheat Bread Recipes

Whole wheat bread recipes are ideal for health-conscious bakers, offering a nutty flavor and denser texture․ These recipes, detailed in PDF books, include variations with nuts or seeds for added texture and nutrition, perfect for those seeking a wholesome baking experience․

4․1 Ingredients and Instructions for Whole Wheat Bread

Whole wheat bread recipes typically require whole wheat flour, bread machine yeast, water, oil, salt, sugar, and sometimes nuts or seeds․ Ingredients are added to the bread pan in a specific order, with liquid ingredients first, followed by dry ingredients and yeast․ The machine is set to the whole wheat program, and crust color is selected; Some recipes include nuts or seeds for added texture and nutrition․ PDF books provide precise measurements and instructions for perfect results․

4․2 Differences Between White and Whole Wheat Bread Recipes

White and whole wheat bread recipes differ in ingredients and texture․ White bread uses all-purpose flour, while whole wheat bread uses coarser, nutrient-rich whole wheat flour․ Whole wheat recipes often include additional ingredients like nuts or seeds for texture and nutrition․ The baking process may vary slightly, with whole wheat bread sometimes requiring more liquid due to the denser flour; Both recipes use similar steps but yield distinct flavors and textures, with whole wheat offering a heartier, healthier option․

Specialty Breads for Bread Makers

Specialty breads offer creative twists, from sourdough and French variations to raisin, nut, and seed-infused loaves․ These recipes enhance flavor and texture, perfect for adventurous bakers․

5․1 Raisin, Nut, and Seed Bread Recipes

Raisin, nut, and seed bread recipes add creativity to traditional bread making․ These recipes often include dried fruits, nuts, or seeds for added texture and flavor․ Ingredients like raisins, walnuts, or sunflower seeds are typically added during the kneading phase․ Some recipes suggest toasting nuts for enhanced flavor․ Yeast measurements may vary slightly to accommodate the added ingredients․ These specialty breads are perfect for breakfast or as a snack, offering a delicious twist on classic loaves․

5․2 Sourdough and French Bread Variations

Sourdough and French bread variations bring authenticity and complexity to bread making․ Sourdough relies on a natural starter for fermentation, offering a tangy flavor․ French bread often requires a longer rise and specific temperature settings․ These recipes typically use minimal ingredients but demand precise techniques․ The result is a crusty exterior and chewy interior, perfect for bread enthusiasts seeking traditional European flavors and textures․

Troubleshooting Common Bread Maker Issues

Common issues like dense bread or uneven crust color can be resolved by adjusting yeast, ingredient ratios, or machine settings․ Proper maintenance and usage are key․

6․1 Solving Issues Like Dense Bread or Incorrect Crust Color

Dense bread often results from excess flour or insufficient yeast․ Ensure accurate measurements and use room-temperature ingredients․ For crust color issues, adjust the machine’s crust setting․ Overloaded pans can cause uneven baking․ Regularly cleaning the pan and checking yeast expiration dates also help maintain consistent results, ensuring your bread turns out light and perfectly baked every time․

6․2 Adjusting Recipes for Better Results

Adjusting recipes enhances bread quality․ Ensure accurate measurements and use room-temperature ingredients for consistency․ Optimize yeast amounts based on recipe size and flour type․ Adjust liquid content for flour absorption variability․ Monitor dough consistency during mixing; add flour or water as needed․ Experiment with settings like crust color and loaf size to tailor results․ Regularly clean and maintain your bread maker for optimal performance and reliable outcomes in every batch․

Gluten-Free and Low-Carb Bread Recipes

Gluten-Free and Low-Carb Bread Recipes offer alternatives for dietary restrictions․ Use rice flour, almond flour, or flaxseed for gluten-free options, and opt for low-carb ingredients like coconut flour for healthier choices․

7․1 Ingredients and Tips for Gluten-Free Bread

For gluten-free bread, use rice flour, almond flour, or flaxseed as substitutes․ Combine with xanthan gum for texture․ Ensure all ingredients are room temperature and use bread machine yeast for optimal rise․ Follow specific ratios and settings recommended in your bread maker recipe book to achieve the best results․ Experiment with recipes to find your perfect blend for delicious, gluten-free loaves․

7․2 Low-Carb Bread Options for Health-Conscious Bakers

Low-carb bread recipes are perfect for health-conscious bakers, using ingredients like almond flour, flaxseed, or coconut flour․ These alternatives reduce carb content while maintaining flavor․ Opt for sugar-free options and minimal yeast for a lighter loaf․ Ideal for keto or low-carb diets, these recipes offer a guilt-free baking experience․ Experiment with nuts or seeds for added texture and nutrition, ensuring a delicious and healthy outcome every time․

The Role of Yeast in Bread Making

Yeast is a fundamental ingredient in bread making, driving the fermentation process that gives bread its texture and flavor․ Proper measurement and activation ensure optimal results in recipes․

8․1 Understanding Different Types of Yeast

Yeast is a key ingredient in bread making, with active dry, instant, and bread machine yeast being common types․ Active dry yeast requires activation, while instant dissolves quickly, ideal for bread makers․ Bread machine yeast is tailored for automated processes, ensuring consistent fermentation․ Each type plays a crucial role in leavening, texture, and flavor development, making proper selection vital for perfect loaves every time․

8․2 Proper Measurement and Usage of Yeast in Bread Maker Recipes

Accurate yeast measurement is crucial for optimal bread making․ Use a digital scale or measuring spoons for precision․ Store yeast in a cool, dry place to maintain potency․ Typically, 1-2 teaspoons are used per recipe, depending on loaf size․ Always follow package instructions for specific types, like active dry or instant yeast․ Ensure yeast doesn’t come into direct contact with salt or extreme temperatures for proper activation and fermentation․

Bread Maker Maintenance and Care

Regularly clean the bread pan and kneader after use․ Wipe the machine with a damp cloth and avoid abrasive cleaners․ Store in a dry place․

9․1 Cleaning and Maintaining Your Bread Maker

Unplug your bread maker before cleaning․ Remove the bread pan and kneader, soaking them in warm water for 10 minutes․ Use a soft cloth to wipe the exterior․ Avoid abrasive cleaners or scourers to prevent damage․ Dry all parts thoroughly to prevent rust․ Regular maintenance ensures optimal performance and extends the life of your bread maker․

9․2 Extending the Life of Your Bread Maker

To extend your bread maker’s life, ensure proper care and usage․ Keep it on a stable surface and avoid placing flammable objects nearby․ Store it in a dry place when not in use․ Regularly clean and maintain the machine as instructed․ Follow manufacturer guidelines for operation and avoid overloading․ Proper care ensures longevity and consistent performance for years of delicious homemade bread․

Resources for Bread Maker Recipes

Discover free PDF recipe books online, such as the Hitachi HB-B102 booklet and Betty Crocker’s guide, offering diverse bread recipes for homemade baking enthusiasts․

10․1 Where to Find Free PDF Recipe Books

Free PDF recipe books for bread makers are readily available online․ Websites like archive․org and z-lib․org offer titles such as “The Bread Machine Book” and “The No-Fuss Bread Machine Cookbook․” These resources provide a variety of recipes, from basic white bread to specialty loaves, ensuring bakers of all levels can find inspiration and guidance for homemade bread making․

10․2 Online Communities and Forums for Bread Maker Enthusiasts

Online communities and forums, such as Reddit’s r/breadmaking and specialized bread maker groups, are vibrant spaces for enthusiasts to share recipes, troubleshoot issues, and exchange tips․ Websites like The Fresh Loaf and Bread Makers Forum offer extensive discussions and resources, fostering a sense of camaraderie among bakers and providing invaluable support for mastering bread maker techniques․

Bread maker recipe books provide comprehensive guides for crafting delicious bread at home․ Experiment with diverse recipes, maintain your machine, and bake with confidence for perfect results every time․

11․1 Encouragement to Experiment and Explore More Recipes

Embrace the joy of bread making by experimenting with diverse recipes and ingredients․ Try new flavors, variations, and techniques to enhance your creations; Attempting different recipes helps refine your skills and broadens your culinary horizons․ With countless options available in PDF recipe books, explore beyond basic bread to craft unique, delicious loaves that cater to your taste and dietary preferences․ Keep experimenting to discover your signature bread style!

11․2 Final Tips for Mastering Your Bread Maker

Mastering your bread maker requires consistent practice and attention to detail․ Always ensure ingredients are at room temperature and measure yeast accurately for optimal results․ Regularly clean and maintain your machine to extend its lifespan․ Experiment with diverse recipes from PDF guides to refine your skills․ Refer to your user manual for specific tips tailored to your model․ Happy baking!

polynomial long division worksheet pdf

Polynomial long division is a method for dividing one polynomial by another, yielding a quotient and remainder. It is a fundamental algebraic technique used to simplify expressions and solve equations. This process is essential for factoring higher-degree polynomials and understanding their roots. Practicing with worksheets, such as the polynomial long division worksheet PDF, helps master the steps involved in this crucial mathematical operation.

1.1 Understanding the Basics of Polynomial Division

Polynomial division involves dividing one polynomial by another to find a quotient and remainder. It is a fundamental concept in algebra, used to simplify expressions and solve equations. The process mirrors long division of numbers, requiring careful setup and term-by-term division. Understanding this basics is essential for mastering higher-level algebraic techniques and solving complex polynomial problems effectively.

Step-by-Step Guide to Polynomial Long Division

A step-by-step guide outlines the structured approach to polynomial long division, ensuring clarity and accuracy. Worksheets, like the polynomial long division worksheet PDF, provide practical exercises to master this process.

2.1 Setting Up the Division

Setting up polynomial long division involves arranging the dividend and divisor in descending order of degree. Ensure both polynomials are written with placeholders for missing degrees. The divisor is placed outside the division symbol, while the dividend is inside. This organized setup is crucial for accurate division, as demonstrated in many polynomial long division worksheet PDFs available online.

2.2 Performing the Division

Performing polynomial long division involves dividing the leading term of the dividend by the leading term of the divisor to find the first term of the quotient. Multiply the entire divisor by this term and subtract the result from the dividend. Repeat the process with the new polynomial until the degree of the remainder is less than the divisor’s degree. This iterative process ensures accuracy, as outlined in many polynomial long division worksheet PDFs.

2.3 Finding the Quotient and Remainder

After performing polynomial long division, the quotient is the result obtained from the division process, while the remainder is the leftover polynomial that cannot be divided further. The degree of the remainder must be less than the degree of the divisor. This final step ensures the division is complete, with the quotient and remainder accurately representing the division outcome, as detailed in polynomial long division worksheet PDFs.

Practice Problems for Polynomial Long Division

Practice problems are essential for mastering polynomial long division. Worksheets, like the polynomial long division worksheet PDF, offer diverse exercises, from basic to advanced, ensuring comprehensive understanding and skill development.

3.1 Basic Problems

Basic problems in polynomial long division involve simple polynomials with minimal terms. Worksheets often include exercises like dividing binomials by binomials or trinomials by binomials. For example, dividing (x^2 ― 1) by (x ― 1) or (x^2 + 2x ⸺ 3) by (x + 1). These problems help build foundational skills and ensure understanding of the division process. They are ideal for beginners to practice and reinforce concepts before moving to more complex problems. The polynomial long division worksheet PDF provides numerous such exercises for effective learning and mastery.

3.2 Intermediate Problems

Intermediate problems involve polynomials with more terms and higher degrees, such as dividing a cubic polynomial by a quadratic one. Worksheets often feature exercises like (2x^3 + 4x^2 ― 6x ⸺ 8) ÷ (x^2 + 2x + 4). These problems test the ability to apply polynomial long division accurately and efficiently. They introduce scenarios where the remainder is non-zero, helping learners understand how to express results as a quotient plus a remainder. The polynomial long division worksheet PDF offers a variety of these problems to enhance problem-solving skills and prepare for advanced topics.

3.3 Advanced Problems

Advanced problems involve complex polynomial divisions, such as dividing higher-degree polynomials or those with multiple variables. Examples include (3x^4 + 2x^3 ― 5x^2 + 7x ― 9) ÷ (x^2 + 4x ― 3). These challenges require precise application of long division steps, handling non-zero remainders, and expressing results in the form of a quotient plus a remainder. The polynomial long division worksheet PDF provides advanced exercises to refine mastery and prepare for real-world applications in fields like engineering and computer science.

The Importance of Practice in Mastering Polynomial Division

Consistent practice is crucial for mastering polynomial division, as it solidifies understanding of each step and reduces calculation errors. Regular practice builds confidence and fluency in handling complex problems. The polynomial long division worksheet PDF provides structured exercises to ensure effective learning and retention of this essential skill.

4.1 Tips for Effective Practice

To master polynomial division, start with basic problems and gradually move to more complex ones. Break down each problem into clear steps and verify your work. Regular practice helps reduce errors and builds speed. Review mistakes to understand common pitfalls. Use structured resources like the polynomial long division worksheet PDF for guided exercises. Consistent practice ensures long-term proficiency and confidence in handling polynomials effectively.

Polynomial Long Division Worksheets

Polynomial long division worksheets offer structured practice, with problems ranging from basic to advanced levels. They include step-by-step guides and answers for self-assessment, ensuring mastery of the technique. Printable worksheets like the polynomial long division worksheet PDF provide a variety of exercises to reinforce learning and improve problem-solving skills in polynomial division.

5.1 Finding the Right Worksheets

Finding the right polynomial long division worksheets is crucial for effective practice. Look for resources that offer a variety of problems, from basic to advanced levels. Websites like Kuta Software provide printable worksheets with step-by-step solutions. Ensure the worksheets include answers for self-assessment and are organized by difficulty to build skills progressively. This helps in mastering polynomial division efficiently.

5.2 Creating Your Own Worksheets

Creating custom polynomial long division worksheets allows tailored practice. Use tools like Infinite Algebra to generate problems specific to your needs. Start with simple problems and gradually include more complex polynomials. Ensure each problem set includes a mix of monic and non-monic divisors. Adding answer keys helps in self-assessment. This personalized approach enhances learning and reinforces understanding of polynomial division concepts effectively.

5.3 Benefits of Using Worksheets

Worksheets provide structured practice, helping students master polynomial long division. They offer a clear format for problems, making it easier to follow steps systematically. Regular use improves problem-solving speed and accuracy. Worksheets also allow identification of weak areas, enabling focused review. Resources like Kuta Software offer customizable options, ensuring varied and relevant practice for all skill levels.

Common Mistakes to Avoid in Polynomial Long Division

Common errors include improper setup, incorrect term alignment, and miscalculations during division. Regular practice with resources like Kuta Software worksheets helps minimize these mistakes and improve accuracy.

6.1 Avoiding Errors in Setup

Proper setup is crucial in polynomial long division. Ensure the divisor is written outside the long division symbol and the dividend inside. Align like terms by degree, descending. Mixed numbers and improper fractions should be converted. Always double-check the arrangement of terms to avoid misalignment, which can lead to incorrect results. Practice with worksheets to build confidence and accuracy.

6;2 Common Calculation Mistakes

Real-World Applications of Polynomial Division

7.1 Engineering and Physics

7.2 Computer Science

7.3 Other Fields

Resources for Further Learning

Explore recommended books, online tutorials, and interactive tools for mastering polynomial long division. Utilize resources like Khan Academy and Kuta Software for comprehensive learning materials and practice worksheets.

8.1 Recommended Books

For in-depth learning, consider “Elementary and Intermediate Algebra” by Harold R. Jacobs and “Algebra for Dummies” by Mary Jane Sterling. These books provide comprehensive coverage of polynomial long division with step-by-step examples and practice exercises. Additionally, “Precalculus: A Unit Circle Approach” by J.S. Ratti offers detailed explanations and practice problems. Find these books on Amazon or local bookstores.

8.2 Online Tutorials

Visit Khan Academy for free step-by-step guides on polynomial long division. Coursera and edX offer courses with detailed explanations. Additionally, Mathway provides interactive tools to practice and understand the process. These resources are perfect for supplementing your learning with polynomial long division worksheet PDFs.

8.3 Interactive Tools

Utilize GeoGebra for interactive polynomial division simulations. Wolfram Alpha offers step-by-step solutions and visualizations. Desmos provides interactive graphs to explore polynomial behavior. These tools enhance understanding and practice, complementing your polynomial long division worksheet PDF exercises with dynamic learning experiences.

Mastering polynomial long division is vital for algebraic problem-solving. Regular practice with worksheets, like the polynomial long division worksheet PDF, ensures proficiency and confidence in handling complex polynomials.

9.1 Final Thoughts

Polynomial long division is a cornerstone of algebra, enabling the simplification of complex expressions. Worksheets like the polynomial long division worksheet PDF provide essential practice, helping to build fluency and understanding. Consistent practice not only reinforces mathematical concepts but also enhances problem-solving skills, preparing learners for advanced topics in mathematics and related fields. Mastery of this technique is invaluable for academic and real-world applications.

delta shower faucet manual pdf

Welcome to the Delta Shower Faucet Manual. This guide provides comprehensive instructions for installation, maintenance, and troubleshooting, ensuring safe and optimal use of your faucet system. Designed for both professionals and homeowners, it helps maximize performance and longevity.

1.1 Importance of the Manual for Installation and Maintenance

This manual is essential for proper installation, ensuring compliance with safety standards and optimal performance. It provides detailed steps, troubleshooting tips, and maintenance advice to prolong the faucet’s lifespan. Adhering to the guidelines helps prevent leaks, ensures temperature control, and maintains warranty coverage, guaranteeing a safe and efficient shower experience.

1.2 Overview of Delta Shower Faucet Features

Delta shower faucets feature pressure-balanced technology for consistent water temperature and a backflow protection system, ensuring compliance with safety standards. They include durable components, user-friendly controls, and a wide range of styles. These features enhance performance, safety, and aesthetic appeal, making Delta faucets a reliable choice for modern bathrooms. Regular maintenance ensures optimal functionality.

Key Features of the Delta Shower Faucet

Advanced pressure-balanced technology ensures consistent water temperature. The backflow protection system meets safety standards, while the comprehensive warranty covers parts and labor for reliable performance and peace of mind.

2.1 Pressure-Balanced Technology for Temperature Control

Delta’s pressure-balanced technology ensures consistent water temperature by minimizing fluctuations caused by changes in water pressure from appliances like dishwashers or toilets. This advanced system provides stable comfort and safety, though it doesn’t protect against failures in other temperature-controlling devices in the plumbing system.

2.2 Backflow Protection System Compliance

The Delta shower faucet incorporates a backflow protection system, compliant with ASME A112.18.3 and CSA B125.1 standards. It features two certified check valves in series, ensuring safe water flow. These integral, non-serviceable components prevent contamination, adhering to regulatory requirements for reliable performance and user safety.

2.3 Warranty Information and Coverage

Delta Faucet warrants all parts and finishes to be free from defects in material and workmanship for five years. This warranty covers repairs or replacements for defective components, ensuring long-term reliability. Proper installation and maintenance are essential to uphold warranty validity.

Installation Instructions for Delta Shower Faucet

This section provides step-by-step guidance for installing your Delta shower faucet, including shutting off water supply, preparing tools, and following manufacturer guidelines for a secure setup.

3.1 Tools and Materials Required

To install your Delta shower faucet, you’ll need tools like an adjustable wrench, pliers, screwdrivers, and Teflon tape. Materials include PEX tubing, mounting screws, and a bucket for water drainage. Ensure all parts are Delta-approved for compatibility and longevity. Refer to the manual for specific requirements to avoid installation issues.

3.2 Step-by-Step Installation Process

Shut off water supply and turn on faucet to release pressure. Remove existing faucet and clean area. Install new cartridge and bonnet nut, ensuring proper alignment. Connect water lines securely, then attach handle. Tighten all connections without over-tightening. Test faucet for leaks and proper function before finalizing installation.

3.3 Specific Considerations for Tub/Shower Valves

Ensure proper water supply connections and check for leaks. Install the valve cartridge correctly, aligning it with the faucet body. Use PEX tubing for flexibility, but avoid it for tub spout drops. Secure the bonnet nut firmly but avoid over-tightening. Ensure the valve fits your existing tub/shower configuration for seamless operation and optimal performance.

Adjusting Water Flow and Temperature

Adjust the temperature control knob to achieve desired water warmth. Switch between showerhead and handshower by rotating the knob. Balance water pressure for consistent flow and optimal performance.

4.1 Understanding the Temperature Control Knob

The temperature control knob regulates water temperature and flow. Rotate it clockwise for warmer water and counterclockwise for cooler. The knob also switches between showerhead and handshower modes. Ensure the mixed position aligns for balanced output. Adjust the limit stop screw to set maximum temperature for safety and comfort during use.

4.2 Switching Between Showerhead and Handshower

To switch between showerhead and handshower, turn the control knob to the desired mode. Choose showerhead only, combined, or handshower only. Align the mode indicator with your preference. Ensure proper connection and check for leaks after switching. This feature enhances your showering experience with versatile water flow options and convenience.

4.3 Balancing Water Pressure for Optimal Performance

Balance water pressure by ensuring proper installation and adjusting the valve. Delta’s pressure-balanced technology minimizes temperature changes caused by external factors. Regularly inspect and clean aerators to maintain even flow. This ensures consistent performance, prevents sudden temperature shifts, and enhances overall showering comfort and safety for users.

Maintenance and Cleaning Tips

Regular cleaning of faucet components prevents mineral buildup and ensures optimal flow. Check for leaks promptly and follow a recommended maintenance schedule for longevity.

5.1 Regular Cleaning of Faucet Components

Use mild soap and water to clean faucet surfaces, avoiding abrasive materials. Regularly inspect and descale components to prevent mineral buildup. Ensure all parts are dry after cleaning to maintain their finish and functionality.

5.2 Checking for Leaks and Addressing Them

Turn off water supply and inspect faucet components for visible leaks. Check internal parts for wear or damage. Tighten connections securely and replace worn-out seals or gaskets. Use genuine Delta parts for repairs to ensure compatibility. For persistent issues, refer to the warranty or contact Delta Faucet customer support.

5.3 Recommended Maintenance Schedule

Regular maintenance ensures optimal performance. Clean faucet components monthly to prevent mineral buildup. Inspect seals and gaskets annually for wear. Replace worn parts promptly and check water pressure. Follow the manual’s guidelines for periodic checks and adjustments. Address any issues early to prevent major repairs and ensure long-term durability and reliability.

Troubleshooting Common Issues

This section helps identify and resolve common problems like leaks, temperature fluctuations, or low water flow. Follow step-by-step solutions to address issues effectively and maintain your faucet’s performance.

6.1 Diagnosing Leaks in the Faucet System

Leaks often occur at connections, cartridges, or O-rings. Turn off water supply, then inspect these areas. Check for worn or damaged parts. Tighten loose connections and replace faulty components to resolve the issue effectively, ensuring proper function and preventing further damage to your Delta shower faucet system.

6.2 Resolving Temperature Fluctuation Problems

Temperature fluctuations may occur due to pressure changes or improper cartridge installation. Adjust the temperature control knob to stabilize output. Ensure the faucet system is correctly calibrated and inspect for blockages. Refer to the manual for specific guidance or contact Delta support for further assistance if issues persist.

6.3 Fixing Low Water Flow Issues

Low water flow may result from debris in the cartridge or aerator. Clean or replace these components as needed. Check for kinked supply lines and ensure proper installation. If issues persist, inspect the backflow protection system or consult the manual for detailed troubleshooting steps to restore optimal water flow.

Understanding the Warranty and Support

Your Delta faucet is backed by a 5-year warranty covering defects in material and workmanship. For support, consult the manual or contact Delta’s customer service team for assistance with claims and repairs.

7.1 Coverage Details for Faucet Parts and Labor

The Delta warranty covers faucet parts and labor for five years from purchase. All components, including finishes, are protected against defects. Labor costs for repairs are also included during the warranty period, ensuring comprehensive coverage for your shower faucet system.

7.2 How to File a Warranty Claim

To file a warranty claim, contact Delta Faucet Customer Support with proof of purchase and a detailed description of the issue. Provide product model and serial numbers for verification. If approved, Delta will repair, replace, or refund the defective part, ensuring your faucet system is restored to optimal functionality promptly;

7.4 Contacting Delta Faucet Customer Support

Delta Faucet Customer Support is available to assist with questions and concerns. Visit their official website for contact details, including phone numbers, email, and live chat options. They also provide access to FAQs, troubleshooting guides, and warranty information to ensure a seamless experience for all customers.

Additional Resources and Documentation

Access the Delta Shower Faucet Manual PDF, supplementary guides, and technical specifications online. Visit Delta’s official website for detailed documentation, FAQs, and additional support materials to enhance your installation and maintenance experience.

8.1 Accessing the Delta Shower Faucet Manual PDF

Download the Delta Shower Faucet Manual PDF directly from Delta’s official website. Visit the support section, select your model, and follow the prompts to download the PDF. Ensure you verify the document’s authenticity for accurate installation and maintenance instructions. Additional resources, like supplementary guides, are also available for comprehensive support.

8.2 Supplementary Guides and Technical Specifications

Delta offers supplementary guides and detailed technical specifications to complement the manual. These resources provide exploded diagrams, part lists, and installation schematics. Available on Delta’s official website, they support advanced troubleshooting and maintenance. Use these guides to ensure compliance with manufacturer recommendations and optimize your faucet’s performance. They are essential for DIY enthusiasts and professionals alike.

8.3 Online Support and FAQ Sections

Delta Faucet provides extensive online support and FAQ sections on their official website. Users can access troubleshooting guides, installation tips, and answers to common questions. The FAQ section covers topics like warranty claims, maintenance, and technical specifications, ensuring quick solutions for any issue. Visit Delta’s website for comprehensive support resources.

Your Delta Shower Faucet Manual provides essential guidance for installation, maintenance, and troubleshooting. Proper usage ensures optimal performance, longevity, and safety. Refer to this guide regularly for best results.

9.1 Summary of Key Takeaways

The Delta Shower Faucet Manual emphasizes proper installation, regular maintenance, and adherence to safety guidelines. Understanding features like pressure-balanced technology and backflow protection ensures optimal performance. Regular inspections and timely repairs prevent leaks and extend faucet longevity, while genuine parts guarantee reliability. Follow all instructions for a flawless showering experience.

9.2 Encouragement for Proper Usage and Maintenance

Proper usage and maintenance are crucial for ensuring your Delta shower faucet performs optimally. Regular cleaning, prompt leak repairs, and adherence to manufacturer guidelines enhance safety, efficiency, and longevity. By following the manual, you promote longevity, maintain warranty coverage, and enjoy a superior showering experience for years to come;

Tips for Optimal Performance

For optimal performance, use genuine Delta parts, inspect connections regularly, and follow manufacturer guidelines. These practices ensure longevity, maintain warranty coverage, and provide a superior showering experience consistently.

10.1 Using Genuine Delta Parts for Repairs

Using genuine Delta parts ensures optimal performance and maintains warranty coverage. These parts are specifically designed for compatibility and durability. Non-recommended components may void the warranty or lead to subpar functionality and potential leaks or damage to the faucet system over time.

10.2 Regular Inspections for Longevity

Regular inspections are crucial for maintaining your Delta shower faucet’s longevity. Check for leaks, mineral buildup, and wear on O-rings or gaskets. Addressing these issues promptly prevents water damage and ensures consistent performance, extending the lifespan of your faucet and maintaining its optimal functionality over time.

10.3 Adhering to Manufacturer Recommendations

Always follow Delta’s guidelines for installation, maintenance, and repair. Use genuine Delta parts to ensure compatibility and performance. Adhere to recommended torque specifications and cleaning methods to prevent damage. Compliance with these recommendations guarantees safety, optimal functionality, and warranty validity, ensuring your faucet operates at its best for years to come.

Common Mistakes to Avoid

Avoid improper installation, ignoring maintenance, and using non-recommended tools or parts. Ensure water supply is shut off before repairs and follow Delta’s guidelines for optimal performance and longevity of your faucet system.

11.1 Incorrect Installation Practices

Incorrect installation practices include not following Delta’s guidelines, such as failing to shut off water supplies or using non-recommended tools; Improper alignment of components or overtightening can damage the faucet. Ignoring manufacturer instructions may lead to leaks, reduced performance, or void the warranty. Always use genuine Delta parts for compatibility and longevity.

11.2 Ignoring Maintenance and Cleaning

Ignoring regular maintenance and cleaning can lead to mineral buildup, leaks, and reduced faucet performance. Failing to inspect and clean components like the aerator or cartridge can cause water flow issues. Always follow Delta’s maintenance schedule to ensure optimal functionality and extend the lifespan of your shower faucet system.

11.3 Using Non-Recommended Tools and Materials

Using non-recommended tools and materials can damage faucet components, void the warranty, and lead to safety hazards. Always use genuine Delta parts and follow the manual’s guidelines for installation and repairs to ensure optimal performance and maintain warranty coverage. Avoid substitutions that could compromise your faucet’s quality and longevity.

Future Upgrades and Enhancements

Explore additional Delta faucet accessories, upgrade to smart technology, and stay updated with new features and models for enhanced functionality and improved user experience over time;

12.1 Exploring Additional Delta Faucet Accessories

Enhance your Delta shower faucet with accessories like hand showers, showerheads, and handles. These additions offer improved functionality and style, ensuring compatibility with your existing system. Refer to the Delta Shower Faucet Manual PDF for compatibility guides and installation tips to upgrade your setup seamlessly.

12.2 Upgrading to Smart Faucet Technology

Upgrading to smart faucet technology offers touchless operation, voice control, and app integration for precise temperature and flow adjustments. It aligns with smart home systems for real-time monitoring and water conservation. Refer to the Delta Shower Faucet Manual PDF for compatible upgrades and installation steps. This ensures a seamless integration with your existing setup, enhancing both convenience and efficiency.

12.3 Staying Updated with New Features and Models

Stay informed about the latest Delta faucet innovations by visiting their official website or subscribing to their newsletter. Regularly check for firmware updates and new models offering advanced features like smart sensors or improved water efficiency. This ensures your faucet system remains cutting-edge and performs optimally over time.