Motorcraft Lacquer Touch-Up Paint is a high-quality, precise color-matched solution for repairing minor scratches and chips on Ford, Lincoln, and Mercury vehicles.
Overview of Motorcraft Lacquer Touch-Up Paint
Motorcraft Lacquer Touch-Up Paint is a precise, factory-matched solution for repairing minor scratches and chips on Ford vehicles. It is designed to blend seamlessly with the original paint, ensuring a professional finish. Available in various colors and finishes, including metallic and pearl, it is easy to apply and ideal for small touch-ups. The paint is formulated to adhere well to primed or bare metal surfaces, making it a reliable choice for maintaining your vehicle’s appearance. It comes in convenient applicators for accurate, mess-free repairs.
Importance of Using Genuine Motorcraft Products
Genuine Motorcraft products ensure exact color matching and durability, maintaining your vehicle’s original appearance. They are formulated to Ford’s specifications, offering superior adhesion and resistance to fading. Using Motorcraft products guarantees a professional finish, preventing further damage and costly repairs. Their reliability and quality make them the best choice for touch-ups, ensuring your vehicle looks its best and retains its value. Always choose Motorcraft for consistent, long-lasting results.
Preparing for the Touch-Up Process
Clean the surface with soap and water, removing wax and grease. Prime bare metal if necessary. Ensure the area is dry for proper paint adhesion.
How to Find Your Vehicle’s Paint Code
Your vehicle’s paint code is typically located on the door jamb label or under the hood. It may also be found in the glovebox or on the driver’s side door. This code is essential for matching your Motorcraft touch-up paint exactly. Ensure the code is a mix of letters and numbers, then cross-reference it with your manufacturer’s chart to confirm accuracy before ordering paint.
Cleaning and Priming the Surface
Start by washing the damaged area with soap and water to remove dirt and wax. Use a wax remover if necessary. Dry thoroughly. If the scratch exposes bare metal, apply Motorcraft lacquer primer and let it dry for 30 minutes. This ensures proper paint adhesion and a smooth finish. Sand lightly after priming for an even surface, then wipe away dust with a tack cloth before painting.

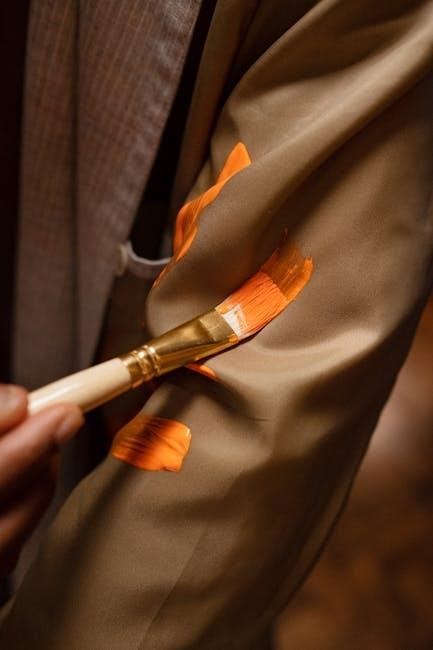
Application Instructions for Motorcraft Lacquer Touch-Up Paint
Shake the paint can thoroughly, apply thin coats, and allow 30 minutes between base and top coats; Avoid over-application to ensure a smooth, even finish.
Base Coat Application
Start by cleaning the surface with soap and water, removing wax or grease. If needed, prime bare metal areas with Motorcraft primer and let it dry for 30 minutes. Shake the paint can thoroughly for one minute. Using the fine brush, apply a thin base coat, feathering it out to blend with the surrounding paint. Avoid over-application to prevent unevenness. Allow the base coat to dry completely according to the instructions before proceeding to the top coat.
Top Coat Application
After the base coat is dry, apply the Motorcraft Lacquer Touch-Up Paint top coat using the applicator pen. Gently dab the paint into the chipped area, feathering the edges to blend seamlessly with the surrounding finish. Avoid over-application to prevent drips. Allow the top coat to dry for about 60 minutes, or as instructed, to achieve a glossy, durable finish. Repeat if necessary for full coverage, ensuring a professional-looking repair.
Tools and Materials Needed
Essential tools include a fine-tip paintbrush, sanding pen, and microfiber cloth. Materials needed are Motorcraft Lacquer Touch-Up Paint, primer, and wax remover for optimal results.
Essential Tools for a Professional Finish
A fine-tip paintbrush ensures precise application, while a sanding pen smooths edges. A microfiber cloth prevents lint and streaks. These tools, available at Ford dealerships or online, help achieve a seamless blend, making repairs nearly invisible for a professional-looking finish.
Recommended Materials for Best Results
Use Motorcraft Lacquer Touch-Up Paint with a fine-tip brush or applicator for precision. Clean the area with dish soap and a wax remover to ensure proper adhesion. Apply primer to exposed metal for lasting protection. Allow 30 minutes between coats for optimal results. A microfiber cloth helps prevent lint and streaks, ensuring a smooth finish. These materials, available at Ford dealerships or online, ensure professional-quality repairs.
Best Practices for Touch-Up Painting
Always clean the surface thoroughly before painting. Apply thin coats and allow proper drying time. Blend edges gently for a seamless finish and avoid over-application for professional results.
Tips for Blending the Paint Seamlessly
Use a small, fine-tip brush to apply paint directly to the damaged area, feathering edges for a smooth transition. Allow each thin coat to dry completely before blending. Gently sand the area with a low-grit sandpaper after the final coat to create an invisible repair. Work in natural light to ensure the color matches perfectly. Avoid over-application, as this can lead to noticeable overlaps. Lightly buff the area with a clean cloth to blend seamlessly with the surrounding paint.
Avoiding Common Mistakes
- Avoid rushing the process; ensure each coat dries completely before applying the next.
- Don’t skip surface preparation; clean and prime as needed for proper adhesion.
- Over-application can lead to visible drips or unevenness; use thin, controlled coats.
- Ignore the recommended drying times at your own risk; premature touch-up can ruin the finish.
- Never use household items like cotton swabs, as they can leave texture marks.
Where to Purchase Motorcraft Touch-Up Paint
Motorcraft Touch-Up Paint is available at Ford dealerships, the Ford Parts website, and authorized online retailers like OEMFordPartsDirect.com. Returns can be handled through dealers.
Authorized Dealers and Online Retailers
Motorcraft Lacquer Touch-Up Paint can be purchased from authorized Ford dealerships, ensuring genuine product quality. Online retailers like Amazon and OEMFordPartsDirect.com also offer convenient options. For authenticity, always buy from trusted sources. Check the Ford Parts website for part numbers and availability. Local dealerships may also provide guidance and support for touch-up paint needs, ensuring the correct color match for your vehicle. Verify your vehicle’s paint code before ordering for an exact match.
Understanding Return and Exchange Policies
Motorcraft products, including touch-up paint, can be returned or exchanged within 30 days of receipt. Items must be in their original packaging, unused, and in resalable condition. Returns should be made through the dealership or via shipping at your expense unless the error was on the dealer’s part. Refunds are processed within 30 days of receiving the returned item. Ensure all original instructions and materials are included for a smooth process. This policy applies to Motorcraft, Ford Parts, and Ford Accessories purchased from authorized dealers or online retailers.
Troubleshooting Common Issues
Common issues include uneven paint application or excess paint drips. Use a small brush to smooth out uneven areas and lightly sand excess paint after drying.
Addressing Uneven Paint Application
If the paint appears uneven, allow it to dry completely before addressing the issue. Lightly sand the area with fine-grit sandpaper to smooth out the surface. Feather the edges to blend seamlessly with the surrounding paint. Apply additional thin coats as needed, ensuring proper drying time between layers. Avoid over-application, as this can exacerbate the problem. For minor unevenness, a touch-up pen can help refine the area for a professional finish.
Fixing Excess Paint or Drips
If excess paint or drips occur, act promptly while the paint is still wet. Gently wipe the area with a clean, damp cloth or a solvent-dampened rag to remove the excess. Allow the surface to dry completely before lightly sanding with fine-grit sandpaper to smooth out the area. Once sanded, apply additional touch-up paint if needed, feathering the edges to blend seamlessly with the surrounding finish. Avoid over-sanding to prevent damaging the clear coat or nearby paint.
Warranty and Product Support
Motorcraft products are backed by a 2-year warranty, offering coverage for parts and labor. Dedicated customer service provides assistance with inquiries and support for repairs.
Understanding the Motorcraft Warranty
Motorcraft products, including lacquer touch-up paint, are covered by a 2-year warranty with unlimited mileage. This warranty ensures protection for both parts and labor, providing customers with peace of mind. The warranty applies to defects in materials and workmanship, offering reliable coverage for repairs. With a focus on customer satisfaction, Motorcraft stands behind the quality of its products, ensuring durability and performance.
Customer Service and Assistance
Motorcraft offers dedicated customer service to assist with any inquiries or issues related to their lacquer touch-up paint. Their support team provides guidance on application techniques, troubleshooting, and warranty claims. Additionally, online resources such as tutorials and FAQs are available to help users achieve professional results. Whether you’re addressing minor scratches or more complex paint repairs, Motorcraft ensures comprehensive support to meet your needs effectively.
Safety Precautions
Always wear protective gear, including gloves and safety glasses, when handling Motorcraft Lacquer Touch-Up Paint. Ensure good ventilation and avoid skin contact with paint or chemicals.
Handling Paint and Chemicals Safely
When using Motorcraft Lacquer Touch-Up Paint, always wear protective gloves and safety glasses. Work in a well-ventilated area to avoid inhaling fumes. Avoid direct skin contact with paint or chemicals, as they may cause irritation. Keep the products away from heat, sparks, or open flames. Follow all safety instructions on the label and dispose of materials responsibly. In case of accidental exposure, seek medical attention immediately.
Protective Gear and Workspace Preparation
Ensure your workspace is clean and dust-free. Lay down a drop cloth or old sheets to protect surfaces from paint spills. Always wear protective gear, including gloves, safety glasses, and a dust mask. Proper ventilation is crucial, so work in a well-ventilated area or use a fan to prevent inhaling paint fumes. Keep all materials within reach to avoid distractions while painting. This setup ensures a safe and efficient touch-up process. Always follow safety guidelines for optimal results.

Additional Resources
Explore online tutorials, guides, and community forums for detailed instructions and expert advice. Visit the Motorcraft website for official resources and support materials.
- Online tutorials and repair guides
- Community forums for peer support
- Official Motorcraft website resources

Online Tutorials and Guides
Online tutorials and guides provide step-by-step instructions for using Motorcraft Lacquer Touch-Up Paint effectively. Websites like CJ Pony Parts offer detailed videos and written guides. These resources cover surface preparation, paint application, and blending techniques. Tutorials often include tips for achieving professional results, such as proper drying times and layering coats. They also address common mistakes and troubleshooting. These guides are ideal for DIY enthusiasts seeking to restore their vehicle’s appearance with confidence and precision.
- Step-by-step application videos
- Detailed written instructions
- Tips for blending and finishing
Community Forums and Expert Advice
Community forums and expert advice offer valuable insights for using Motorcraft Lacquer Touch-Up Paint. Many Ford enthusiasts share their experiences and tips online, providing practical advice for achieving seamless results. Experts often discuss common challenges, such as color matching and blending, and offer solutions. These forums are a great resource for troubleshooting and learning advanced techniques from experienced users and professionals in the automotive industry.
- Real-world tips from experienced users
- Expert troubleshooting advice
- Collaborative problem-solving