United Kingdom

candy smart washing machine user manual

Welcome to the Candy Smart Washing Machine user manual! This guide helps you understand your appliance’s features, ensuring safe and efficient use for optimal performance.

Welcome and Safety Precautions

Welcome to your Candy Smart Washing Machine user manual! This guide provides essential information for safe and efficient use. Always read this manual carefully before operating the machine to ensure proper functionality and safety. Ensure the machine is installed correctly and levelled to avoid vibration. Keep children away from the appliance and do not overload it. Use only recommended detergents and avoid leaving the machine unattended during operation. Follow all safety guidelines to prevent accidents and maintain optimal performance.

Key Features of the Candy Smart Washing Machine

The Candy Smart Washing Machine offers advanced features like Smart Touch Technology, enabling app connectivity and voice control. It features multiple washing programs, including Fast Wash for quick cleaning and specialized cycles for delicate fabrics. Energy efficiency is optimized with adaptive sensors and eco modes. The machine also includes a child safety lock and anti-flood protection for added safety. With customizable settings and a user-friendly interface, it provides a seamless laundry experience tailored to your needs.

Installation and Delivery

Ensure your Candy Smart Washing Machine is delivered with all necessary items, including the machine, user manual, and installation fittings. Follow installation guidelines carefully for proper setup and functionality.

Items Included in the Delivery

Upon delivery, your Candy Smart Washing Machine package should include the machine itself, a detailed user manual, power cord, water inlet hoses, and installation fittings. Ensure all items are present and undamaged. The user manual provides essential instructions for setup, operation, and maintenance. Keep it in a safe place for future reference. If any items are missing or damaged, contact customer support immediately for assistance. Proper installation is crucial for optimal performance and safety.

Installation Requirements and Guidelines

Ensure the floor is level and stable to prevent vibration. Leave at least 10 cm of space around the machine for proper ventilation. Connect the water supply hoses to the correct hot and cold water taps. Plug the machine into a grounded electrical outlet, avoiding extension cords. Avoid exposing the machine to direct sunlight or extreme temperatures. Follow the installation instructions in the user manual carefully. If unsure, contact a qualified technician. Proper installation ensures optimal performance and safety. Refer to the manual for detailed guidelines or contact customer support for assistance.

Control Panel and Basic Features

The Candy Smart Washing Machine’s control panel features an intuitive display with buttons for selecting programs, adjusting settings, and monitoring cycle progress. It includes a time-to-end indicator for easy tracking.

Understanding the Control Panel Layout

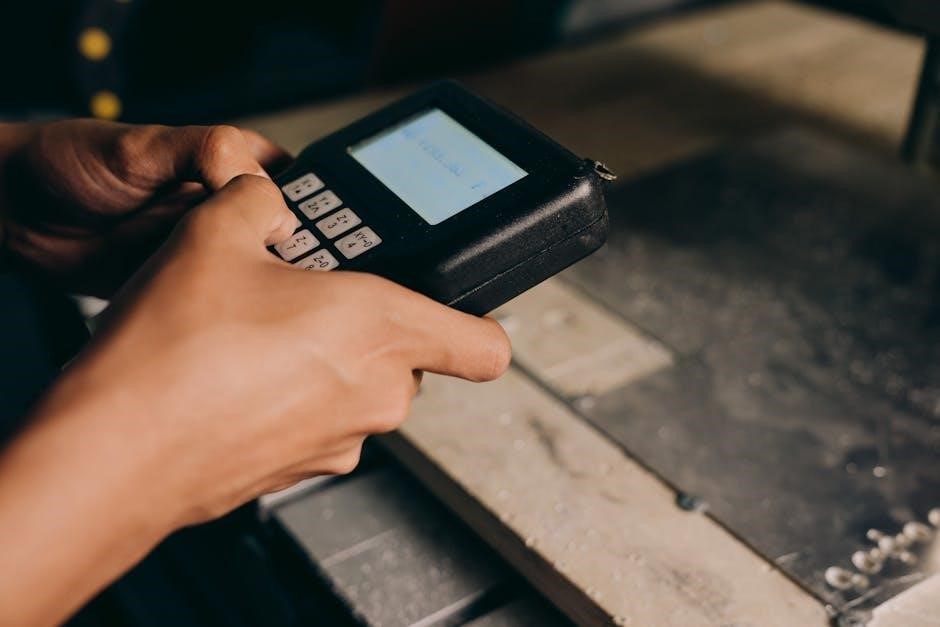
The Candy Smart Washing Machine’s control panel is designed for ease of use, featuring a clear display and intuitive buttons. The layout includes a central dial for program selection, buttons for adjusting settings like temperature and spin speed, and a digital display showing cycle progress. A dedicated button for the time-to-end indicator ensures you can track washing time effortlessly. The panel also includes a touchscreen interface for smart features, allowing seamless navigation through options and settings. This user-friendly design ensures efficient operation and personalized laundry care.

Indicator Lights and Time-to-End Display

The Candy Smart Washing Machine features indicator lights that provide clear visual feedback on cycle progress. The time-to-end display shows the remaining duration of the selected program, helping you plan your schedule efficiently. These indicators ensure you stay informed about the wash cycle’s status, from pre-wash to spin, and alert you when the cycle is complete. This intuitive system enhances user experience, making laundry management straightforward and stress-free. The display also updates in real-time, ensuring accuracy and convenience for optimal laundry care.

Washing Cycles and Options

The Candy Smart Washing Machine offers diverse washing programs, including Fast Wash, Auto-Clean, and customizable settings, ensuring efficient and tailored care for various fabric types and soil levels.

Standard Washing Programs

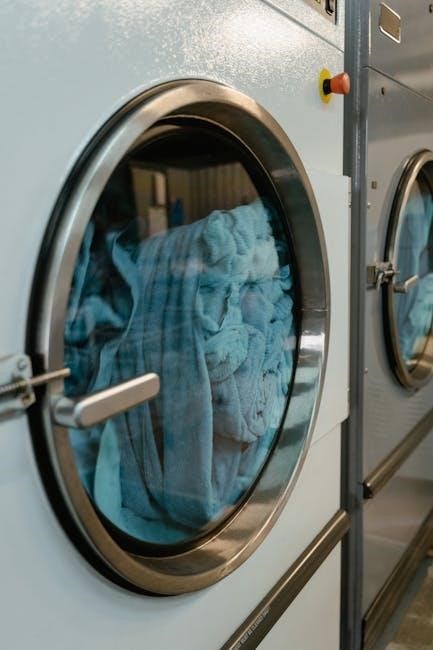
The Candy Smart Washing Machine offers a variety of standard programs tailored to different fabric types and soil levels. These include Cotton, Synthetic, Delicate, and Wool cycles, ensuring gentle yet effective cleaning. Each program is designed to optimize water temperature, spin speed, and wash duration for specific fabrics. Additionally, the machine features a Fast Wash option for quick cleaning of smaller loads, reducing cycle time without compromising on cleanliness. These programs ensure that your laundry is treated with care, maintaining fabric integrity while delivering excellent results.

Specialized Washing Cycles (e.g., Fast Wash, Auto-Clean)

The Candy Smart Washing Machine includes specialized cycles like Fast Wash and Auto-Clean for added convenience. The Fast Wash program quickly cleans smaller loads of up to 6 kg, ideal for urgent needs. The Auto-Clean cycle maintains the machine’s hygiene by removing detergent residue and odors. These features enhance efficiency and ensure your washer remains in optimal condition, providing superior cleaning results while extending the machine’s lifespan and performance quality over time.

Customizable Wash Options and Settings

The Candy Smart Washing Machine offers customizable wash options to tailor cycles to your needs. Adjust spin speed, temperature, and soil level for precise fabric care. Use the Smart Touch app to create personalized programs, ensuring optimal cleaning and fabric protection. These settings allow you to adapt wash cycles to different load types, enhancing efficiency and extending garment life. With customizable options, you can achieve perfect results for any laundry load, making the machine versatile for all household requirements and preferences.

Smart Touch Technology

Experience convenience with Candy Smart Touch Technology, enabling seamless app connectivity for remote control, cycle monitoring, and access to additional programs, enhancing efficiency and smart solutions.

Connecting the Washing Machine to the Candy simply-Fi App

To connect your Candy Smart Washing Machine to the simply-Fi App, download and install the app on your smartphone. Ensure your device and washing machine are on the same Wi-Fi network. Open the app and follow the registration process. Pair your machine by selecting it from the app’s list of available devices. For Bluetooth models, enable Bluetooth on your phone and complete the pairing process. Once connected, you can remotely monitor cycles, adjust settings, and access additional features for enhanced convenience. Regular app updates ensure optimal performance.

Remote Control and Smart Features

Experience the convenience of remote control with the Candy simply-Fi App. Start or pause wash cycles, adjust settings, and monitor progress from your smartphone. Smart features include scheduling washes, receiving cycle completion notifications, and accessing advanced diagnostic tools. The app also offers customizable programs to suit your laundry needs, ensuring efficient and tailored cleaning. Additionally, smart sensors optimize water and energy use, enhancing performance while reducing consumption. These features make the Candy Smart Washing Machine a modern, user-friendly solution for your laundry tasks. Discover the ease of intelligent laundry management with Candy’s smart technology.

Additional Programmes and Maintenance Advice via the App

The Candy simply-Fi App offers additional programmes and maintenance advice to enhance your washing experience. Download specialized cycles, such as deep clean or eco modes, directly to your machine. Receive alerts for filter cleaning and drum maintenance to ensure optimal performance. The app also provides tips for detergent use, fabric care, and energy efficiency. Regular software updates keep your machine up-to-date with the latest features. Use these tools to maintain your Candy Smart Washing Machine and extend its lifespan while enjoying superior laundry results.

Maintenance and Care

Regular maintenance ensures optimal performance. Clean filters and gasket monthly. Use the Candy simply-Fi app for maintenance tips. Follow energy-efficient practices for longevity.

Regular Cleaning and Filter Maintenance

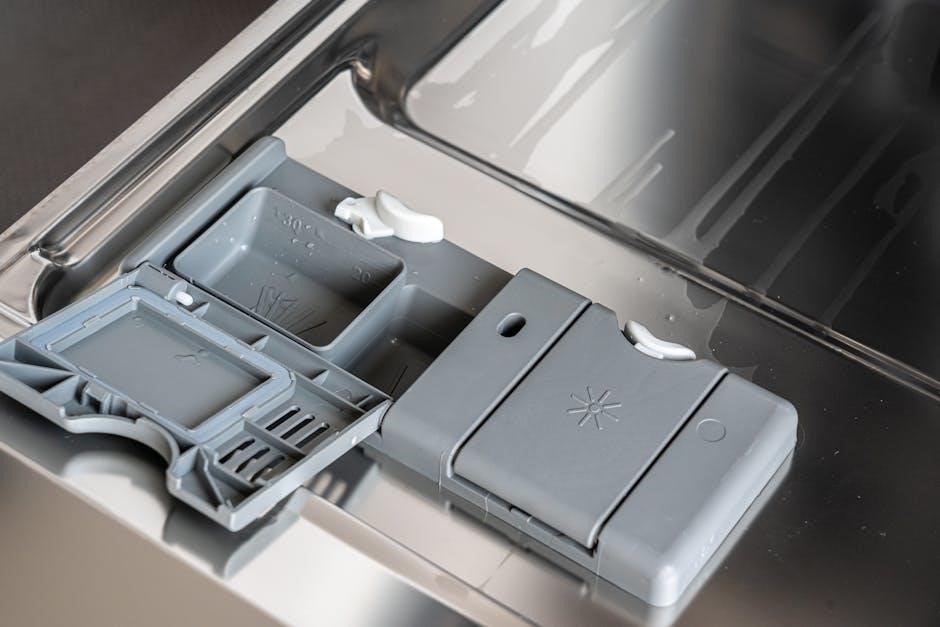
Regular cleaning and filter maintenance are essential for optimal performance. Clean the detergent drawer and gasket monthly to prevent residue buildup. Check and clean the filters regularly to ensure proper drainage. Run the Auto-Clean cycle periodically to maintain hygiene. Use the Candy simply-Fi app for maintenance reminders and tips. Proper care extends the machine’s longevity and efficiency, ensuring your Candy Smart Washing Machine continues to deliver exceptional results.

Tips for Efficient Energy Use and Longevity

Optimize energy use by selecting eco modes and lower temperature settings for lighter loads. Regularly clean filters and check for blockages to maintain efficiency. Ensure proper ventilation to prevent moisture buildup. Use the Candy simply-Fi app to monitor and adjust settings for energy-saving performance. Avoid overloading the machine, as this can reduce efficiency and longevity. Following these tips helps extend the lifespan of your Candy Smart Washing Machine while minimizing energy consumption.

Troubleshooting Common Issues

Identify and resolve issues quickly using error codes and solutions provided in the manual. Refer to the Candy simply-Fi app for additional troubleshooting guidance and support.

Understanding Error Codes and Solutions

The Candy Smart Washing Machine displays error codes like E01, E02, or E03 to indicate specific issues. These codes help identify problems such as drainage errors or door issues. Refer to the user manual or the Candy simply-Fi app for detailed explanations and solutions. Common issues often relate to improper loading, blocked filters, or connectivity problems. Regularly cleaning the filter and ensuring proper installation can prevent many errors. For unresolved issues, contact customer support for professional assistance. Always follow the troubleshooting guide for optimal machine performance and longevity;

Resolving Common Operational Problems

Address common issues like the machine not starting or not draining by checking power supply and ensuring the door is properly closed. If the washer stops mid-cycle, restart it. For drainage issues, clean the filter regularly. Use the Candy simply-Fi app for diagnostic help. Check for blockages in hoses and ensure balanced loads. Refer to the user manual for troubleshooting guides. If problems persist, contact Candy’s customer support for professional assistance. Regular maintenance can prevent many operational issues, ensuring smooth performance and longevity of your Candy Smart Washing Machine.

Energy Efficiency and Eco-Friendliness

The Candy Smart Washing Machine features an eco mode, water-saving technology, and high-speed spinning to minimize energy and water consumption, promoting sustainable laundry practices.

Energy Consumption and Efficiency Ratings

The Candy Smart Washing Machine is designed with energy efficiency in mind, offering an A++ energy rating. It features an eco mode that reduces water and detergent consumption while maintaining performance. The machine’s high-speed spinning cycle minimizes drying time, lowering energy use. Smart sensor technology adjusts water levels and temperature based on load size, ensuring optimal efficiency. With a focus on eco-friendly operation, this washing machine helps reduce utility bills and environmental impact, making it a sustainable choice for modern households.

Eco Modes and Water-Saving Features

The Candy Smart Washing Machine offers advanced eco modes designed to minimize water and energy usage. The eco mode reduces water consumption by up to 30% while maintaining superior cleaning results. Additionally, the machine features water-saving technology that automatically adjusts water levels based on load size. Smart sensors optimize detergent use, further enhancing efficiency. The Candy simply-Fi app provides insights into eco-friendly cycles, helping you make sustainable choices. These features ensure eco-conscious operation without compromising performance, making it ideal for environmentally aware users.

Detergent and Fabric Care

Use recommended detergents for optimal performance. Choose cycles based on fabric types, such as delicates or heavy-duty, to protect clothes and ensure efficient cleaning.

Recommended Detergents for Optimal Performance

For optimal results, use detergents compatible with your Candy Smart Washing Machine. Liquid or single-dose detergents are recommended for precise dosing and minimal residue. Avoid using additives like fabric softeners in the wash cycle unless specified. Eco-friendly detergents are ideal for energy-saving modes. Always follow the manufacturer’s guidelines for dosage to ensure efficient cleaning and prevent damage to fabrics or the machine. Refer to the user manual for specific detergent recommendations tailored to your model.

Fabric Types and Appropriate Wash Settings

Fabric Types and Appropriate Wash Settings

Select the right wash program based on fabric type for optimal results. Cotton and synthetic fabrics can use standard or fast wash cycles. Delicates, wool, or silk require gentle settings with low spin speeds. Heavily soiled items benefit from intense wash modes. Always check fabric care labels for specific instructions. Adjust water temperature and cycle intensity according to fabric sensitivity. This ensures longevity and prevents damage, while maintaining cleanliness and texture.

User Manual and Documentation

Download the Candy Smart Washing Machine user manual in PDF format for detailed instructions, safety guidelines, and troubleshooting tips to ensure optimal appliance performance and longevity.

Downloading the User Manual in PDF Format

To access the Candy Smart Washing Machine user manual, visit the official Candy website or trusted platforms like ManualsLib. Select your specific model, such as the Candy Smart CS 14102DE/1-88, and download the PDF. This manual provides detailed instructions, safety guidelines, and troubleshooting tips. If unavailable, contact customer support for assistance. Ensure you have the correct model number for a seamless download experience. This resource is essential for optimal appliance use and maintenance.

Navigating the Manual for Quick Reference

The Candy Smart Washing Machine user manual is designed for easy navigation. Start with the table of contents to locate specific sections quickly. Use the index to find keywords or topics. The manual is divided into clear chapters, such as installation, features, and troubleshooting. Visual aids like diagrams and charts simplify complex instructions. For quick tips, refer to the “Tips for Efficient Use” section. This guide ensures you can find the information you need swiftly, making your experience with the Candy Smart Washing Machine seamless and efficient.

Additional Features

  • Fast Wash Option: Quickly wash smaller loads in just 30 minutes.
  • Silent Operation: Reduces noise during cycles, ideal for night use.
  • Child Safety Lock: Prevents accidental changes to settings.
  • Anti-Flood Protection: Detects and prevents water overflow.

Fast Wash Option for Quick Cleaning

The Fast Wash option on your Candy Smart Washing Machine allows you to clean smaller loads efficiently in just 30 minutes. Ideal for when you need fresh clothes quickly, this feature is perfect for busy schedules. It works best with cotton and synthetic fabrics. Simply select the Fast Wash program on the control panel or via the Candy simply-Fi app for a quick and effective clean. This feature ensures convenience without compromising on washing quality, making it a great time-saving solution for everyday laundry needs.

Silent Operation and Night Wash Mode

Silent Operation and Night Wash Mode

The Candy Smart Washing Machine features a silent operation mode, designed to minimize noise during cycles, making it ideal for nighttime use. The Night Wash Mode ensures quieter operation, allowing you to run cycles without disturbing others. This feature is perfect for busy households that need flexibility in their laundry schedule. The machine’s advanced inverter motor reduces noise levels significantly, providing a peaceful environment while maintaining efficient performance. This mode is energy-efficient and ensures your laundry is clean without any disruption, making it a convenient option for modern lifestyles.

Child Safety Lock and Anti-Flood Protection

The Candy Smart Washing Machine includes a child safety lock, ensuring settings remain unchanged during operation, preventing accidental interruptions. This feature is ideal for households with children, providing peace of mind while maintaining safety.

The anti-flood protection system detects and prevents water overflow, safeguarding your home from potential damage. This advanced feature ensures secure operation, offering added protection and reliability for users.

Registration and Support

Register your Candy Smart Washing Machine via the Candy simply-Fi App for warranty and support. The app offers maintenance advice, troubleshooting, and additional features for optimal performance.

Registering Your Candy Smart Washing Machine

To register your Candy Smart Washing Machine, download and install the Candy simply-Fi App. Open the app, create an account, and follow the in-app instructions to link your appliance. Registration ensures warranty activation, access to exclusive features, and personalized support. Once registered, you can manage your machine remotely, receive software updates, and enjoy enhanced functionality for improved laundry care and efficiency.

Customer Support and Service Options

For assistance with your Candy Smart Washing Machine, visit the official Candy website or use the simply-Fi App for troubleshooting guides and maintenance advice. You can also contact customer support via phone or email for personalized help. Additionally, online resources, such as manuals and FAQs, are available to address common issues. If needed, certified technicians can be scheduled for on-site repairs, ensuring your machine operates at its best. Candy’s support team is dedicated to providing reliable and efficient solutions for optimal appliance performance.

Maximize your Candy Smart Washing Machine experience with efficient performance, smart features, and user-friendly design. Optimize laundry care while enjoying energy savings and advanced functionality for a superior cleaning experience.

Maximizing Your Candy Smart Washing Machine Experience

Enhance your laundry routine with the Candy Smart Washing Machine by utilizing its advanced features. The Fast Wash option saves time, while the Auto-Clean cycle maintains performance. Use the Candy simply-Fi App for remote control and personalized settings; Regularly clean filters and use recommended detergents to ensure efficiency. Explore eco modes for energy savings and rely on silent operation for convenience. By following these tips, you can optimize your appliance’s longevity and enjoy superior cleaning results with minimal effort.

number 39 bus timetable dundee to arbroath pdf

Overview of the Number 39 Bus Service

The number 39 bus service operates regularly‚ connecting Dundee and Arbroath with multiple stops‚ including Ninewells and Kingoodie. Operated by Stagecoach‚ it offers a reliable timetable‚ available as a downloadable PDF for easy journey planning.

1.1 Route Details

The number 39 bus route connects Dundee City Centre to Arbroath Bus Station‚ passing through key stops like Ninewells Hospital‚ Invergowrie‚ Inchture‚ Errol‚ St Madoes‚ and Kingoodie. The service operates with frequent departures‚ ensuring convenient travel between these destinations. Buses run regularly throughout the day‚ with specific timings available in the downloadable PDF timetable. The route spans from early morning to evening‚ catering to both commuters and leisure travelers.

1.2 Key Features of the Service

The number 39 bus service offers frequent departures‚ reliable schedules‚ and key stops like Dundee City Centre‚ Ninewells Hospital‚ and Arbroath Bus Station. The timetable is available as a downloadable PDF‚ enabling easy planning. Real-time tracking via the Stagecoach app adds convenience. The service runs throughout the day‚ including weekends‚ with adjusted schedules for holidays. Clean‚ comfortable buses and accessible seating accommodate all passengers‚ making it a practical choice for daily commutes and leisure trips between Dundee and Arbroath.

1.3 Importance of the Timetable

The number 39 bus timetable is crucial for efficient travel planning between Dundee and Arbroath. It provides precise departure and arrival times‚ ensuring passengers can coordinate their journeys seamlessly. The PDF format allows offline access‚ useful for areas with limited internet connectivity. Regular updates reflect service changes‚ while real-time tracking through the Stagecoach app complements the static schedule. This combination ensures reliability and flexibility for commuters and occasional travelers alike‚ making the timetable an essential resource for navigating the route effectively.

Downloading the Timetable

The number 39 bus timetable is available as a downloadable PDF from the Stagecoach website‚ ensuring easy access for planning journeys between Dundee and Arbroath offline.

2.1 Availability of the PDF

The number 39 bus timetable PDF is readily available on the Stagecoach website and via the Moovit app. It provides detailed departure times‚ route maps‚ and service updates‚ ensuring easy access for passengers. The PDF is valid from October 2022 and is frequently updated to reflect any service changes. Downloading the PDF allows users to plan their journeys offline‚ making it a convenient option for travelers between Dundee and Arbroath.

2.2 Steps to Download the Timetable

To download the number 39 bus timetable PDF‚ visit the Stagecoach website or use the Moovit app. Navigate to the “Timetables” section‚ select the route‚ and choose the “Download PDF” option. The PDF includes detailed schedules and route maps. Alternatively‚ search for “39 bus timetable Dundee to Arbroath” on the Stagecoach website to access the file directly. Ensure your device has sufficient storage for the download.

2.3 Offline Access and Usage

The downloaded PDF timetable for the number 39 bus service allows offline access‚ ensuring users can view schedules and route maps without internet. This feature is ideal for planning journeys in advance or in areas with limited connectivity. The offline PDF includes detailed timetables‚ stop information‚ and route visuals‚ enabling seamless navigation between Dundee and Arbroath. It is compatible with most devices and can be easily shared or printed for convenience.

Main Stops and Destinations

The number 39 bus service connects Dundee City Centre‚ Arbroath Bus Station‚ and key stops like Ninewells‚ Invergowrie‚ and Errol‚ providing essential travel links across the region.

3;1 Dundee City Centre Stops

The number 39 bus service includes key stops in Dundee City Centre‚ such as High Street‚ Seagate‚ and Souter’s Lane. These stops provide convenient access to the city’s central areas‚ with frequent departures throughout the day. The service also connects to major interchanges‚ ensuring seamless travel to destinations like Arbroath and Ninewells. Regular timetabling makes it an essential link for both commuters and visitors.

3.2 Arbroath Bus Station and Key Interchanges

Arbroath Bus Station serves as a primary interchange for the number 39 service‚ connecting passengers to destinations like Dundee and Ninewells. The station offers regular departures‚ with the PDF timetable providing detailed schedules. Key interchanges include links to other routes‚ ensuring smooth transfers. The station is well-served‚ making it a vital transport hub for both local and regional travel‚ with easy access to connecting services like the 73 and 226 routes.

3.3 Intermediate Stops and Connections

The number 39 bus service includes key intermediate stops such as Ninewells‚ Invergowrie‚ Inchture‚ Errol‚ and St Madoes. These stops provide essential connections to local communities and other transport links. Passengers can transfer to other Stagecoach services at these points‚ enhancing travel flexibility. The service operates regularly‚ ensuring reliable connections between Dundee and Arbroath‚ with intermediate stops supporting both commuter and leisure travel needs effectively.

Service Frequency and Schedule

The number 39 bus service operates frequently‚ with departures every 30 minutes during the day and every 60 minutes in the evening. Weekend schedules are slightly reduced but consistent‚ ensuring reliable travel options for commuters and leisure travelers alike.

4.1 Weekday Timetable Highlights

The number 39 bus operates frequently on weekdays‚ with multiple departures from early morning to evening. Services run every 30 minutes during peak times and every 60 minutes during off-peak hours. Key stops include Dundee City Centre‚ Arbroath Bus Station‚ and intermediate points like Ninewells and Kingoodie. The first departure is at 5:00 AM from Arbroath‚ and the last at 7:50 PM‚ ensuring convenient travel options for commuters and leisure travelers alike.

4.2 Weekend and Holiday Schedules

On weekends and holidays‚ the number 39 bus service operates on a reduced schedule‚ with departures every 60 minutes. Key stops‚ including Dundee City Centre and Arbroath Bus Station‚ are still served‚ but with fewer frequencies compared to weekdays. Services typically start later in the morning and end earlier in the evening. No buses run on Christmas Day‚ Boxing Day‚ or New Year’s Day‚ as noted in the timetable.

4.3 Special Notes on Service Variations

The number 39 bus service may experience variations‚ including route diversions due to roadworks or events. Additional stops are sometimes added during peak travel seasons to accommodate increased demand. Notably‚ services 39A and 39B operate on slightly altered routes‚ with 39A extending to Ninewells Hospital and 39B serving Kingoodie. Passengers should check the latest PDF timetable for specific updates and plan their journeys accordingly.

Operators and Contact Information

The number 39 bus service is operated by Stagecoach Bus. For enquiries‚ call 0871 200 22 33 (calls cost 12p per minute plus your phone company’s access charge).

5.1 Stagecoach Bus Service Details

Stagecoach operates the number 39 bus service‚ connecting Dundee and Arbroath with key stops including Ninewells Hospital and Kingoodie. The service runs frequently‚ with buses departing from Arbroath Bus Station and Dundee City Centre; Passengers can access real-time information via the Stagecoach Bus app or website. The timetable is available as a PDF download‚ making it easy to plan journeys in advance. Stagecoach ensures reliable and punctual service throughout the day‚ catering to both commuters and leisure travelers.

5.2 Customer Support and Enquiries

For enquiries about the number 39 bus service‚ passengers can contact Stagecoach customer support via phone or through their website. The Stagecoach Bus app also offers live chat and real-time updates‚ assisting with journey planning and timetable queries. Additional support is available at major stops like Arbroath Bus Station and Dundee City Centre‚ ensuring travelers receive timely assistance for a seamless travel experience.

5;3 Real-Time Tracking Options

Passengers can track the number 39 bus in real-time using the Stagecoach Bus app or the Moovit app‚ which provide live updates and push notifications. The Stagecoach website also offers a journey planner with real-time tracking‚ ensuring travelers can monitor their bus’s progress. Additionally‚ digital displays at key stops like Arbroath Bus Station and Dundee City Centre show live departure times‚ helping commuters plan their journeys efficiently and reduce waiting time.

Planning Your Journey

Use the PDF timetable to plan your trip‚ check service frequency‚ and identify key stops. Integrate with travel apps for real-time updates and seamless journey coordination.

6.1 Using the PDF Timetable Effectively

Download and review the PDF timetable to check departure times‚ plan your route‚ and identify key stops. Use the timetable to avoid peak-hour delays and ensure timely arrivals. Familiarize yourself with the route map to recognize intermediate stops and connections. Note any service variations for weekends or holidays. For real-time updates‚ integrate the PDF with the Stagecoach app or Moovit for accurate journey planning and adjustments on travel day.

6.2 Integrating with Other Travel Apps

Combine the PDF timetable with apps like Moovit or Stagecoach for enhanced journey planning. These apps offer real-time updates‚ live tracking‚ and route suggestions; Sync your PDF schedule with app data to receive alerts for delays or changes. Use the apps to plan connections with other transport modes‚ ensuring a seamless travel experience. Offline access in both the PDF and apps ensures you stay informed even without internet connectivity.

6.3 Tips for First-Time Users

For first-time users‚ download the PDF timetable in advance and familiarize yourself with key stops and arrival times. Use the Stagecoach app for real-time updates and plan your journey with the Moovit app. Consider arriving early at the bus stop to account for any delays. Carry a copy of the PDF or have it saved on your device for easy access during your trip between Dundee and Arbroath.

bt decor 2200 user guide

The BT Decor 2200 is a sleek, functional corded phone designed for home and office use, offering simplicity, a clear display, and hands-free functionality for effortless communication․

Key Features of the BT Decor 2200

The BT Decor 2200 offers a range of practical features, including a clear 3-line display for easy caller ID and time/date viewing․ It supports hands-free functionality, a 100-name and number directory, and 10 two-touch memories for quick dialing․ The phone is compatible with hearing aids and includes an inductive coupler․ It operates on 4 x AA batteries, ensuring reliable performance without the need for a power supply․ With a sleek, contemporary design, this corded phone is both durable and stylish, making it suitable for home or office environments․ Its intuitive interface and essential features make it a user-friendly choice for seamless communication․

Benefits of Using the BT Decor 2200

The BT Decor 2200 provides reliable, high-quality communication with essential features that enhance usability․ Its hands-free function allows for convenient conversations without holding the handset․ The 100-name directory and caller ID streamline call management, while the hearing aid compatibility ensures accessibility for all users․ The phone’s corded design eliminates battery life concerns, offering uninterrupted service․ With its clear display and user-friendly interface, the BT Decor 2200 is ideal for both home and office settings, delivering simplicity and functionality in a stylish package․

Setting Up Your BT Decor 2200

Setting up your BT Decor 2200 is straightforward․ Unbox, connect the line cord, insert batteries, and follow the user guide for a quick start․

Unboxing and Initial Setup

Begin by carefully unboxing your BT Decor 2200 phone․ The package includes the telephone, a pre-installed telephone line cord, 4 AA batteries, and the user guide․ Ensure all items are included and undamaged․ Place the phone on a flat, stable surface․ The sleek design fits seamlessly into any home or office decor․ Insert the batteries into the handset to power it up․ Connect the telephone line cord to the appropriate socket․ Follow the user guide for step-by-step instructions to complete the initial setup, ensuring your phone is ready for making and receiving calls effortlessly․ This setup process is quick and straightforward, requiring minimal technical knowledge․

Activating the Batteries

The BT Decor 2200 is battery-powered, requiring 4 x AA batteries, which are pre-installed in the handset․ To activate the batteries, ensure they are correctly positioned in the battery compartment․ No additional setup is required, as the batteries are designed to power the phone automatically․ Once the batteries are activated, the phone will be ready for use․ Note that the phone does not have a power button, so it will turn on as soon as the batteries are properly installed․ For optimal performance, use high-quality batteries and avoid mixing old and new ones․ This ensures reliable operation and clear communication․

Connecting the Telephone Line Cord

To connect the BT Decor 2200, locate the telephone line cord, which is pre-installed in the phone․ Plug one end of the cord into the phone’s dedicated port, ensuring it is securely fitted․ Next, insert the other end into a nearby telephone socket․ Make sure the connection is tight to avoid any signal issues․ The phone is ready for use once the line cord is properly connected․ Note that only the supplied telephone line cord should be used, as other cords may not be compatible․ If your phone will be connected to a switchboard, ensure the correct external line access code is configured․ Proper connection ensures reliable functionality․

Using the BT Decor 2200

The BT Decor 2200 offers a user-friendly design, allowing seamless call management, directory access, and hands-free functionality․ Its clear display and intuitive controls make communication simple and efficient․

Making and Receiving Calls

Making and receiving calls with the BT Decor 2200 is straightforward․ To make a call, simply lift the handset and dial the desired number using the keypad․ The phone features a clear display that shows caller ID, allowing you to identify incoming calls․ For hands-free conversations, use the built-in speakerphone․ When receiving a call, the phone rings, and the caller’s information appears on the screen if available․ The BT Decor 2200 also supports quick dialing from the directory, making it easy to connect with frequently called numbers․ Its intuitive design ensures seamless communication, whether you’re making or receiving calls․

Using the Directory and Caller ID

The BT Decor 2200 allows you to store up to 100 names and numbers in its directory, making it easy to dial frequently called contacts․ To store a number, navigate to the directory menu, enter the name and number, and save․ Caller ID displays the caller’s name or number on the screen, helping you identify incoming calls․ The phone also keeps a calls list, showing recent missed, answered, and dialed calls․ This feature enables you to quickly return calls or add new contacts to your directory․ Managing your contacts and call history is intuitive, ensuring efficient communication and organization․

Enabling Hands-Free Functionality

To enable hands-free functionality on the BT Decor 2200, press the hands-free button located on the base unit․ This feature allows you to answer calls without lifting the handset, making it ideal for multitasking or group conversations․ The phone is equipped with a built-in speaker and microphone, ensuring clear audio quality․ For optimal performance, ensure the phone is placed on a flat surface and the volume is adjusted to your preference․ If you encounter issues, check that the phone is properly connected and the hands-free feature is activated․ This convenient function enhances your calling experience, offering flexibility and comfort during calls․

Maintenance and Troubleshooting

Regularly clean the handset and base with a soft cloth to prevent dust buildup․ Check connections and restart the phone if issues arise․ Consult the manual for troubleshooting guides or contact BT support for assistance․

Cleaning the Phone

To maintain your BT Decor 2200’s performance and appearance, clean it regularly using a soft, dry cloth․ Gently wipe the handset, base, and display to remove dust and dirt․ Avoid using harsh chemicals, abrasive materials, or excessive moisture, as they may damage the phone’s finish or internal components․

  • Avoid submerging the phone in water or exposing it to liquids․
  • For stubborn marks, dampen a cloth with water, but ensure it is not soaking wet before wiping․
  • Allow the phone to dry completely before reuse to prevent any damage․

Regular cleaning ensures optimal functionality and preserves the phone’s sleek design․

Resolving Common Issues

If you encounter issues with your BT Decor 2200, start by checking the telephone line cord and ensuring it is securely connected․ For problems like message retrieval, try having someone call and leave a message, then retrieve and delete it to clear the issue․ If the phone is not compatible with your switchboard, consult your system administrator․ Avoid using damaged or non-supplied cords, as they may cause malfunction․ For hearing aid compatibility, ensure the phone is correctly set up․ If problems persist, refer to the user guide or contact BT customer support at 0800 145 6789 for assistance;

BT Services and Support

BT provides comprehensive support for the Decor 2200, including online resources at www․bt․com/producthelp and customer assistance via phone at 0800 145 6789․

Accessing BT Services

Accessing BT services for your Decor 2200 is straightforward, ensuring you get the most out of your phone․ Visit www․bt․com/producthelp for troubleshooting guides, user manuals, and interactive resources․ For personalized assistance, contact BT’s customer support at 0800 145 6789․ This service provides help with setup, resolving issues, and maximizing your phone’s features․ BT also offers online tutorials and FAQs to address common queries․ With these resources, you can effortlessly navigate and enhance your BT Decor 2200 experience, ensuring optimal performance and functionality․

Contacting Customer Support

If you need assistance with your BT Decor 2200, BT’s customer support is available to help․ You can reach them by calling 0800 145 6789, where a team of experts will guide you through troubleshooting, setup, or any queries you may have․ Additionally, you can visit www․bt․com/producthelp for comprehensive resources, including user manuals, FAQs, and interactive guides․ Customer support is accessible during standard working hours and can assist with issues like directory setup, caller ID, or hands-free functionality․ For further convenience, online support is also available to address your concerns efficiently․

read write inc flashcards pdf

Read Write Inc. Phonics Flashcards, created by Ruth Miskin, are a key component of the program. They provide systematic phonics practice, helping children decode words effectively. Available in sets 1, 2, and 3, these flashcards support early reading skills through green words, red words, and alien words. Resources like the Phonics Overview Chart and sound mats enhance learning. Parents and teachers can access PDF downloads for home practice, ensuring consistent phonics development. These tools are designed to make learning engaging and accessible for young readers.

1.1. Overview of Read Write Inc. Program

Read Write Inc. is a phonics-based literacy program designed by Ruth Miskin to teach reading and writing systematically. It emphasizes phonemic awareness and decoding skills through structured lessons. The program is widely used in schools and homes, offering resources like flashcards, sound mats, and storybooks. It progresses from basic to complex phonics, ensuring a strong foundation for early readers. The program’s interactive approach makes learning engaging, with materials that support teachers and parents. Regular practice with tools like flashcards and charts helps build fluency. Read Write Inc. is research-supported, aiming to improve reading outcomes effectively.

1.2. Importance of Flashcards in Phonics Learning

Flashcards play a vital role in phonics learning within the Read Write Inc. program. They provide a visual and interactive way for children to practice phonics skills, reinforcing sound recognition and word decoding. The flashcards are divided into sets, each progressively introducing new sounds and words. Green words focus on decodable text, while red words highlight irregular patterns. Alien words, which are nonsense words, test phonics knowledge. Regular use of flashcards builds fluency and confidence in reading. Parents and teachers can access PDF versions of these flashcards, making home practice convenient. Supplementary resources like sound mats and charts further enhance learning. Consistent practice with flashcards ensures a strong foundation in phonics, preparing children for more complex reading materials. They are an essential tool in the Read Write Inc. approach to literacy.

Structure of Read Write Inc. Flashcards

Read Write Inc. flashcards are organized into three sets, each introducing new sounds and words. They include green words, red words, and alien words, available as PDFs for home practice.

2.1. Set 1 Flashcards

Set 1 flashcards in the Read Write Inc. program introduce the most basic sounds and simple words. These flashcards are designed for early learners, focusing on foundational phonics skills. They include green words, which are decodable and build confidence in young readers. Set 1 also introduces some high-frequency red words that do not follow phonetic rules. These flashcards are available as PDF downloads, making them accessible for home practice. Parents and educators can use them alongside sound mats and other teaching resources to reinforce learning. The structured approach ensures children progress steadily, mastering essential reading skills from the outset.

2.2. Set 2 Flashcards

Set 2 flashcards in the Read Write Inc. program build on the foundational skills introduced in Set 1. These flashcards focus on more complex phonics patterns, including vowel sounds and initial blends. They are designed to consolidate and extend decoding skills, preparing children for more challenging texts. Set 2 flashcards include green words for phonics practice and red words for sight recognition. Alien words are also introduced to reinforce phonics rules. Available as PDF downloads, these flashcards are ideal for home practice and classroom use. They align with sound mats and other teaching resources, ensuring a cohesive learning experience. Regular practice with Set 2 flashcards helps children progress confidently in their reading journey.

2.3. Set 3 Flashcards

Set 3 flashcards are the final stage in the Read Write Inc. Phonics Flashcards series. They focus on advanced phonics patterns, including complex blends, vowel digraphs, and trigraphs. These flashcards help children refine their decoding skills, ensuring they can tackle more sophisticated texts with confidence. Set 3 includes green words for phonics practice, red words for sight recognition, and alien words to reinforce phonics rules. Available as PDF downloads, they are easily accessible for home practice or classroom use. They complement sound mats and other teaching resources, providing a comprehensive learning tool. Regular use of Set 3 flashcards helps children master phonics and transition smoothly to independent reading.

Types of Words in Read Write Inc. Flashcards

Read Write Inc. flashcards feature green words for phonics practice, red words for sight recognition, and alien words to test phonics knowledge. Available as PDFs online.

3.1. Green Words

Green Words in Read Write Inc. flashcards are phonetically decodable, focusing on sounds taught in the program. They help children practice blending sounds into words effectively. These words are structured to build confidence and fluency in reading. Available in PDF formats, they are organized into sets that align with the curriculum. Green Words are essential for reinforcing phonics skills and are used extensively in home practice activities. Their systematic approach ensures that children can apply their knowledge of sounds to read unfamiliar words accurately. This methodical practice is key to mastering early reading skills and laying a strong foundation for future literacy.

3.2. Red Words

Red Words in Read Write Inc. flashcards are high-frequency words that do not follow phonetic patterns. These words are essential for early reading fluency and are often encountered in texts. Unlike Green Words, Red Words cannot be sounded out and must be learned by sight. They are included in sets 1, 2, and 3 of the flashcards, available in PDF format. Regular practice with Red Words helps children recognize them instantly, improving reading confidence and speed. These words are crucial for building a strong foundation in reading, as they frequently appear in everyday writing. Mastery of Red Words complements phonics skills, enabling children to read more complex texts with ease and accuracy.

3.3. Alien Words

Alien Words in Read Write Inc. flashcards are non-English words designed to test phonics skills. These pseudo-words, found in sets 2 and 3, help children practice decoding without relying on sight recognition. They ensure learners focus on blending sounds rather than memorizing. Alien Words, available in PDF formats, reinforce phonics mastery by challenging students to apply skills to unfamiliar words. This practice builds confidence and fluency, preparing children for more complex reading. Regular use of Alien Words in the flashcards complements Green and Red Words, providing a comprehensive approach to phonics learning. They are a unique and effective tool for developing decoding abilities in young readers.

Home Practice with Read Write Inc. Flashcards

Home practice with Read Write Inc. flashcards is essential for reinforcing phonics skills. Parents can use PDF downloads, such as Set 1, 2, and 3 flashcards, to support learning. Activities like daily flashcard review and sound practice help maintain consistency. Additional resources, such as sound mats and handwriting guides, are available to enhance home practice. Regular practice ensures children stay confident and fluent in their phonics journey, making it a valuable supplement to classroom instruction.

4.1. Parent Support Resources

Read Write Inc. provides extensive parent support resources to enhance home practice. These include downloadable PDF flashcards for Sets 1, 2, and 3, allowing parents to reinforce phonics skills. Additional resources like rhyme lists and word cards are available to support interactive learning. Parents can access sound mats and handwriting guides to help children practice sounds and letter formation. The program also offers certificates, such as the Fred Frog Star Certificate, to celebrate progress and motivate learners. These resources ensure parents are equipped to support their child’s phonics journey effectively, aligning home practice with classroom instruction.

4.2. Activities for Reinforcement

Read Write Inc. flashcards are complemented by a variety of engaging activities to reinforce phonics learning. Parents and teachers can use sound mats and charts to practice sounds and blends. Interactive games, such as matching green and red words, enhance fluency and recognition. Activities like word building and scavenger hunts encourage active participation. Additionally, handwriting practice worksheets integrate phonics with motor skills development. These activities, supported by downloadable PDF resources, create a multisensory approach to learning. They help children apply phonics skills in fun and meaningful ways, reinforcing their understanding and confidence in reading and writing.

Teaching Resources and Supplements

Read Write Inc. offers supplementary resources like sound mats, charts, and handwriting practice sheets. These tools enhance phonics instruction, providing structured support for teachers and learners alike.

5.1. Sound Mats and Charts

Sound mats and charts are essential teaching tools in the Read Write Inc. program. They provide a visual and interactive way to introduce and reinforce phonics sounds. Organized by sets, these resources align with the flashcards, offering a structured approach to learning. Sound mats display sounds in groups, while charts often include pictures and keywords; Teachers use these to model blending and segmentation skills, helping students connect sounds to letters. Available as PDF downloads, they are easily accessible for classroom use. These resources also support handwriting practice, as students learn to form letters correctly. Sound mats and charts are invaluable for making phonics lessons engaging and effective, ensuring students build a strong foundation in reading and writing.

5.2. Handwriting Practice

Handwriting practice is a fundamental part of the Read Write Inc. program, reinforcing phonics skills through letter formation. Activities guide students to trace and write letters correctly, focusing on size, shape, and spacing. For example, instructions like “Round his bottom, up his tall neck, down to his feet” help students form letters accurately. These exercises are often paired with sound practice, ensuring a strong link between phonics and writing. Resources such as handwriting worksheets and PDF downloads provide structured practice, making it easy for teachers and parents to support learning. Handwriting practice also improves fine motor skills and builds confidence in young writers, laying the foundation for fluent writing. Regular practice ensures consistency and progress in developing this essential skill.

national landlords association tenancy agreement pdf

The National Landlords Association (NLA) is the UK’s leading independent organization for private residential landlords, offering resources like tenancy agreements to ensure legal compliance and professionalism.

1.1 Overview of the NLA and Its Role in the UK Rental Market

The National Landlords Association (NLA) is the UK’s leading independent organization for private residential landlords, supporting over 100,000 members. It provides essential resources, including tenancy agreements, to ensure compliance with UK housing laws. The NLA plays a crucial role in educating landlords, advocating for their rights, and promoting professionalism in the rental market.

1.2 Importance of Using NLA-Approved Tenancy Agreements

NLA-approved tenancy agreements are essential for ensuring legal compliance and clarity in rental arrangements. They protect both landlords and tenants by outlining clear terms, responsibilities, and expectations. Using these agreements helps avoid disputes and ensures all parties understand their obligations. The NLA regularly updates its documents to reflect current housing laws, providing comprehensive coverage of tenant-landlord responsibilities.

Key Components of the NLA Assured Shorthold Tenancy Agreement

The NLA Assured Shorthold Tenancy Agreement outlines rental amount, payment terms, tenancy duration, permitted occupants, and responsibilities of both landlords and tenants, ensuring clarity and compliance.

2.1 Rental Amount and Payment Schedule

The NLA Assured Shorthold Tenancy Agreement specifies the rental amount, payment frequency, and due dates. It outlines acceptable payment methods and late payment terms, ensuring transparency and compliance with UK housing laws. This section protects both landlords and tenants by clearly defining financial obligations and expectations, preventing disputes over rent payments and schedules;

2.2 Term of Tenancy and Permitted Occupants

The NLA Assured Shorthold Tenancy Agreement clearly stipulates the tenancy duration, whether fixed-term or periodic, and outlines permitted occupants. It ensures compliance with UK housing laws, defining legal rights and responsibilities for both parties. This section prevents disputes by specifying who can live in the property and the terms under which the tenancy can be extended or terminated.

2.3 Responsibilities of Landlords and Tenants

The NLA tenancy agreement outlines landlords’ duties, such as maintaining the property and ensuring compliance with safety regulations. Tenants are responsible for paying rent, maintaining the property, and adhering to the agreement terms. This section ensures clarity on legal obligations, fostering a fair and respectful relationship between both parties throughout the tenancy.

Benefits of Using the NLA Tenancy Agreement

Using the NLA tenancy agreement ensures legal compliance, protects landlords’ rights, and provides clarity for tenants, fostering a transparent and professional rental relationship.

3.1 Legal Compliance and Protection for Landlords

The NLA tenancy agreement ensures landlords comply with UK housing laws, protecting their rights and interests. It aligns with legal frameworks like the Housing Act 1988, providing clear eviction procedures and terms, while safeguarding against disputes and ensuring lawful possession recovery, making it a reliable choice for landlords seeking legal security.

3.2 Clarity and Transparency for Tenants

The NLA tenancy agreement ensures transparency for tenants by outlining clear terms, including rental amount, tenancy duration, and responsibilities. This clarity helps tenants understand their commitments and rights, reducing potential disputes and providing peace of mind with a legally binding document.

How to Obtain the NLA Tenancy Agreement PDF

The NLA tenancy agreement PDF is accessible to members online, ensuring legal compliance and ease of use for landlords and tenants as a trusted resource.

4.1 Membership Benefits of the National Residential Landlords Association

Membership with the National Residential Landlords Association (NRLA) provides access to a wide range of resources, including the NLA tenancy agreement PDF. Members benefit from legal advice, tenancy templates, and updates on housing laws, ensuring they remain compliant and well-informed. Joining the NRLA also offers networking opportunities and tools to help landlords manage their properties efficiently and reduce potential disputes with tenants.

4.2 Downloading and Editing the Agreement Online

The NLA tenancy agreement PDF can be easily downloaded from the National Landlords Association website. Members can access and edit the document online using platforms like PrintFriendly.com, which allows for seamless modifications. The agreement can be customized to suit specific rental terms, ensuring it meets individual landlord and tenant needs while maintaining compliance with UK housing laws.

Understanding the Tenancy Agreement Terms

Understanding the terms of the NLA tenancy agreement is crucial for both landlords and tenants. It outlines rental details, responsibilities, and legal obligations, ensuring clarity and compliance with UK housing laws to avoid disputes.

5.1 Fixed-Term and Periodic Tenancies

The NLA tenancy agreement distinguishes between fixed-term and periodic tenancies. A fixed-term tenancy has a defined start and end date, while a periodic tenancy automatically renews. The agreement ensures clarity on rental periods, with periodic tenancies aligning with the last rent payment structure. Both types are legally binding under the Housing Act 1988, providing a clear framework for landlords and tenants.

5.2 Notice Periods and Termination Clauses

The NLA tenancy agreement outlines specific notice periods for terminating the tenancy. For weekly rentals, tenants must provide at least 28 days’ notice, while monthly rentals require one full calendar month. Termination clauses are clearly defined, ensuring both parties understand their rights and obligations under the agreement, which complies with Section 19A of the Housing Act 1988 for assured shorthold tenancies.

The Role of the NLA in Dispute Resolution

The NLA offers mediation services to help landlords and tenants resolve disputes amicably. Their resources include guidance on resolving tenancy-related issues, ensuring fair and lawful outcomes for all parties involved.

6.1 Mediation Services for Landlords and Tenants

The NLA provides mediation services to help landlords and tenants resolve disputes amicably. These services aim to address issues before they escalate, ensuring fair outcomes for both parties. Mediation is conducted by experienced professionals who understand housing laws and can guide discussions to reach mutually acceptable solutions, fostering positive landlord-tenant relationships and avoiding costly legal battles;

6.2 Resources for Resolving Tenancy Disputes

The NLA offers comprehensive resources to help landlords and tenants resolve disputes. These include guides on dispute resolution, template letters, and access to legal advice. The NLA also provides training and webinars on managing conflicts effectively. Additionally, members can access a dedicated helpline for personalized support, ensuring they are well-equipped to handle tenancy-related issues confidently and efficiently.

Additional Resources from the NLA

The NLA provides a variety of resources, including tenancy application forms, referencing guides, and detailed instructions for ending tenancies. These tools help landlords manage properties effectively and stay compliant with legal requirements, ensuring smooth tenant-landlord relationships and minimizing potential disputes.

7.1 Tenancy Application Forms and Referencing

The NLA offers comprehensive tenancy application forms and referencing tools to help landlords assess potential tenants. These resources ensure thorough background checks, enabling landlords to make informed decisions. The forms include sections for personal details, employment verification, and rental history, while referencing guides provide step-by-step instructions to evaluate tenant suitability effectively and minimize risks.

7.2 Guides for Ending a Tenancy

The NLA provides detailed guides for ending a tenancy, covering legal processes, notice periods, and termination clauses. These resources help landlords understand their rights and responsibilities when ending a tenancy, ensuring compliance with UK housing laws. The guides also offer practical steps for serving notices and handling post-tenancy procedures, providing landlords with clear and actionable advice to manage the end of a tenancy effectively.

Frequently Asked Questions About the NLA Tenancy Agreement

Common questions include whether the agreement can be edited, what happens after the tenancy period ends, and the importance of having a written agreement in place.

8.1 Can the Agreement Be Edited?

The NLA tenancy agreement can be edited to suit specific needs, but changes must comply with UK housing laws. Landlords can use platforms like PrintFriendly to modify the PDF online, ensuring all terms remain legally binding and fair for both parties. It’s crucial to review and customize clauses carefully before finalizing the agreement.

8.2 What Happens After the Tenancy Period Ends?

After the fixed-term tenancy ends, the agreement can transition to a periodic tenancy or be terminated. If terminated, landlords must follow legal procedures, such as serving proper notice. The NLA agreement outlines termination clauses, ensuring both parties understand their rights and obligations, including the landlord’s entitlement to regain possession as specified in the contract.

The Importance of a Written Tenancy Agreement

A written tenancy agreement safeguards both landlords and tenants by outlining responsibilities, rent details, and terms, ensuring clarity and mutual understanding from the start.

9.1 Avoiding Disputes Through Clear Terms

A written tenancy agreement minimizes disputes by clearly outlining rent, responsibilities, and property use. It ensures both landlords and tenants understand their obligations, reducing misunderstandings. The NLA agreement specifies terms like payment schedules and maintenance duties, providing a legal framework that protects both parties. Clarity in the agreement helps prevent conflicts and ensures compliance with UK housing laws, promoting a harmonious tenancy relationship from the start.

9.2 Ensuring Compliance with UK Housing Laws

The NLA tenancy agreement ensures compliance with UK housing laws by adhering to legal standards, such as the Housing Act 1988. It incorporates essential clauses, including Section 21 notices and assured shorthold tenancy requirements. This ensures landlords and tenants operate within the legal framework, protecting both parties’ rights and avoiding potential disputes or penalties. Compliance is maintained through clear, legally binding terms.

How to Properly Execute the Tenancy Agreement

Proper execution involves signing and dating the agreement by both the landlord and tenant. Ensure all parties receive a copy, adhering to legal requirements for validity and transparency.

10.1 Signing and Dating the Agreement

Both the landlord and tenant must sign and date the agreement to ensure its validity. This step confirms mutual acceptance of the terms, creating a legally binding document. All parties should receive a signed copy for their records. Proper execution helps prevent disputes and ensures clarity in the tenancy arrangement. Use platforms like PrintFriendly to sign electronically.

10.2 Providing a Copy to the Tenant

Once signed, the tenant must receive a complete copy of the tenancy agreement. This ensures transparency and confirms their understanding of the terms. Both parties should retain a copy for their records. The NLA agreement can be downloaded as a PDF and shared digitally, making it easy to distribute and store. This step is crucial for maintaining clear communication and legal compliance.

The NLA tenancy agreement is a vital resource, ensuring legal compliance and clear terms for landlords and tenants. It remains a cornerstone of responsible property management in the UK.

11.1 Summary of the NLA Tenancy Agreement

The NLA tenancy agreement is a comprehensive legal document outlining the rental terms, rights, and responsibilities of landlords and tenants. It covers key aspects such as rent, payment schedules, tenancy duration, and termination clauses, ensuring compliance with UK housing laws. This agreement is crucial for establishing a clear and professional rental relationship, protecting both parties’ interests effectively.

11.2 Final Thoughts on Using NLA Resources

Utilizing NLA resources, such as their tenancy agreement, ensures legal compliance and clarity, fostering professional landlord-tenant relationships. These tools are invaluable for navigating the UK rental market with confidence and minimizing potential disputes.

Landlords are encouraged to leverage the NLA’s comprehensive resources, including tenancy agreements, application forms, and guides, to streamline their rental operations and maintain adherence to UK housing laws for a smooth tenancy experience.

References and Further Reading

For more information, visit the National Landlords Association website at www.landlords.org.uk or contact them at 020 7840 8900. Additional UK landlord-tenant resources are also available online.

12.1 NLA Website and Contact Information

The National Landlords Association can be accessed via their official website at www.landlords.org.uk. For direct inquiries, landlords and tenants can contact the NLA at 020 7840 8900. The website provides comprehensive resources, including tenancy agreements, guides, and legal advice, making it an essential hub for landlords seeking professional support and compliance with UK housing laws.

12.2 Additional UK Landlord-Tenant Resources

Beyond the NLA, landlords and tenants can access resources from the Residential Landlords Association (RLA) and Shelter. The UK Government’s website provides legal guides, while platforms like PrintFriendly.com offer tools for editing and downloading tenancy agreements. Citizens Advice also provides tenant support, ensuring both parties are informed and protected under UK housing laws.

light for warning or guiding crossword clue

The crossword clue “light for warning or guiding” is a popular puzzle phrase. It often points to words like beacon or strobes, commonly associated with both functions. Light-based clues are versatile and frequently appear in crosswords due to their multiple interpretations.

1.1 Understanding the Clue’s Context

The crossword clue “light for warning or guiding” suggests a word that serves dual purposes: illumination and direction. Common interpretations include beacons or signals, often used in navigation or safety contexts. The clue’s versatility allows it to fit various scenarios, from maritime to roadside settings. Crossword constructors favor such clues due to their rich interpretative potential, making them both challenging and engaging for solvers. Understanding the context helps narrow down the answer, as the word must inherently imply both functions of light.

1.2 Importance of Light in Crossword Puzzles

Light-themed clues, such as “light for warning or guiding,” are common in crosswords due to their versatility. Light can symbolize guidance, safety, or even metaphorical enlightenment, making it a rich theme for clues. Its dual function—both literal and figurative—allows constructors to craft clues that are both challenging and engaging; Solvers often find these clues rewarding, as they require connecting abstract concepts to practical applications. The prevalence of light-related words ensures they appear frequently across various puzzle difficulty levels, making them a staple in crossword design.

Common Crossword Clues Related to Light

Clues related to light often include “warning light,” “guiding light,” or “signal.” Words like beacon and flare are popular answers, as they fit multiple clue contexts.

2.1 “Warning Light” Clues

“Warning light” clues are common in crosswords, often seeking words like beacon or flare. These clues hint at light sources used to alert or signal, such as traffic lights or emergency strobes. LED is another frequent answer, referencing modern warning systems. Clues may also point to nautical or aviation terms, like buoy lights, adding variety to the puzzle. The versatility of “warning light” clues makes them a staple in many crossword puzzles, appealing to solvers of all levels.

2.2 “Guiding Light” Clues

“Guiding light” crossword clues often lead to words like torch or beacon, emphasizing light’s role in direction or navigation. Terms like lighthouse or pharos are also common, reflecting historical and modern uses of light for guidance. These clues frequently appear in puzzles related to travel, maritime themes, or mythology. The versatility of “guiding light” allows for both literal and metaphorical interpretations, making it a popular clue in various crossword categories. Solvers often find these clues rewarding due to their clear yet diverse answer possibilities.

2.3 Variations of the Clue

The clue “light for warning or guiding” can appear in various forms, such as “caution signal” or “directional beam.” These variations often hint at similar answers but with slightly different contexts. For example, “warning light” might suggest amber or strobes, while “guiding light” could point to beacon or pharos. Additionally, clues like “indicator flash” or “navigational aid” expand the range of possible answers. These variations keep the puzzle engaging and challenge solvers to think creatively about light’s dual purpose.

Possible Answers to the Clue

Possible answers include beacon, flare, or pharos. These words are commonly associated with both warning and guiding functions of light.

3.1 Common Words Associated with Light

Common words linked to light for warning or guiding include beacon, flare, and pharos. A beacon often refers to a light source like a lighthouse, serving both warning and navigational purposes. Flares are used for signaling in emergencies, emitting bright, guiding light. Pharos, historically, refers to the ancient Lighthouse of Alexandria, symbolizing guidance. These terms frequently appear in crosswords due to their dual functionality, making them popular answers for such clues.

3.2 Less Common but Relevant Answers

Beyond common terms like beacon or flare, less frequently used words can also fit the “light for warning or guiding” crossword clue. Consider buoy, which marks waterways with reflective surfaces. Lantern and lamp are versatile, serving as both portable lights and fixed beacons. Strobe and glow describe types of light emissions, useful in specific contexts. These alternatives provide variety for crossword constructors seeking unique solutions, ensuring puzzles remain engaging and challenging for solvers.

Strategies for Solving the Clue

Strategies include analyzing the clue’s wording, considering common crossword conventions, and utilizing online solvers for quick solutions. These methods help narrow down possible answers efficiently.

4.1 Analyzing the Clue’s Wording

Analyzing the clue’s wording is crucial. Look for keywords like “warning” or “guiding” to identify the context. Determine if the clue refers to a noun, verb, or adjective. Consider word lengths and possible synonyms. For “light,” common answers might be “beacon” or “signal.” Check for patterns like plural forms or past tenses. Pay attention to any hints embedded in the clue’s phrasing. This method helps narrow down potential answers effectively, making solving easier and more systematic.

4.2 Using Online Crossword Solvers

Online crossword solvers are invaluable tools for tackling clues like “light for warning or guiding.” Enter the clue or partial answer into the search bar. Many solvers allow you to input the clue directly, while others require letter patterns. Use wildcards like “?” or “.” for unknown letters. The solver will generate a list of possible matches, such as “beacon” or “signal,” based on the input. This method saves time and reduces guesswork, making it a efficient way to find the right answer quickly and accurately.

4.3 Considering Crossword Conventions

Crossword conventions play a crucial role in solving clues like “light for warning or guiding.” Common conventions include word lengths, prefixes, and suffixes. For light-related clues, words like “beacon” or “signal” are frequent answers. Pay attention to whether the clue is phrased as a definition or a pun. Many crossword clues follow standard patterns, making them predictable once familiar with these norms. Recognizing these conventions can significantly narrow down potential answers, saving time and reducing confusion. Always consider the clue’s structure and typical answer formats.

Common Mistakes When Solving the Clue

Common mistakes include ignoring subtle hints in the clue, overcomplicating the answer, or not utilizing online resources. These errors can delay solving the crossword effectively.

5.1 Ignoring Subtle Hints in the Clue

One common mistake is overlooking the subtle hints within the clue. For example, the phrase “light for warning or guiding” might contain specific keywords like “warning” or “guiding” that hint at the answer. Ignoring these can lead to incorrect guesses. Crossword clues often rely on such subtleties to guide solvers to the correct word. Missing these hints can result in frustration and wasted time. Paying close attention to every word in the clue is crucial for efficient solving.

5.2 Overcomplicating the Answer

Another common error is overcomplicating the answer. Solvers might assume the clue requires an obscure or technical term. However, crossword clues often favor simplicity. For “light for warning or guiding,” the answer is likely a common word like beacon or flare. Overthinking can lead to wasted time and incorrect guesses. It’s important to start with straightforward possibilities before exploring more complex options. This approach reduces frustration and improves solving efficiency. Simplicity often holds the key in crossword puzzles.

5.3 Not Utilizing Online Resources

One of the biggest mistakes solvers make is not using online resources; Crossword clues like “light for warning or guiding” can often be quickly solved with tools like crossword dictionaries or solvers. These resources provide lists of possible answers based on the clue and letter count. By not utilizing them, solvers risk spending excessive time guessing or missing obvious solutions like beacon or flare. Online tools are invaluable for speeding up the solving process and reducing frustration, especially for tricky or ambiguous clues. They are a modern solver’s best ally.

Tips for Improving Crossword Solving Skills

Enhance your crossword skills by learning word patterns and common clues. Expand your vocabulary to recognize synonyms and related terms. Regular practice improves speed and accuracy. Stay updated with crossword trends and utilize online tools for quick solutions. Consistent effort leads to mastery of crossword puzzles.

6.1 Learning from Past Mistakes

Learning from past mistakes is crucial for improving crossword-solving skills. Reviewing incorrect answers helps identify common errors and gaps in knowledge. Reflect on clues that stumped you, such as “light for warning or guiding,” and explore why certain answers fit. Analyze patterns and themes from previous puzzles to avoid repeating mistakes. Keeping a journal of challenging clues and their solutions can reinforce learning and build expertise over time. This reflective approach enhances problem-solving abilities and boosts confidence in tackling future crosswords.

6.2 Expanding Vocabulary

Expanding your vocabulary is essential for mastering crossword puzzles. Learning new words like beacon or strobes can help you quickly identify clues related to “light for warning or guiding.” Regular reading and exploring word lists tailored to crosswords can broaden your knowledge. Additionally, using crossword dictionaries or online solvers can introduce you to less common terms. Over time, this practice enhances your ability to recognize patterns and solve clues more efficiently, making crossword solving a more enjoyable and rewarding experience.

6.3 Practicing Regularly

Regular practice is key to improving crossword-solving skills. By solving puzzles daily, you become familiar with common clue patterns and word associations. Start with easier crosswords and gradually move to more challenging ones. Use online solvers to check answers and learn from mistakes. Consistent practice helps build confidence and speeds up your problem-solving abilities. Over time, this routine enhances your ability to quickly recognize clues like “light for warning or guiding,” making you a proficient crossword enthusiast.

Resources for Crossword Enthusiasts

Online solvers, crossword dictionaries, and mobile apps are essential tools for enthusiasts. Websites like Crossword Solver and Crossword Dictionary offer pattern matching and clue searches. Mobile apps provide real-time assistance and puzzle databases for quick solutions, helping you master clues like “light for warning or guiding” efficiently.

7.1 Recommended Websites

For solving crossword clues like “light for warning or guiding,” recommended websites include Crossword Solver, Crossword Dictionary, and One Across. These platforms offer comprehensive databases and tools like pattern matching and clue searches; Crossword Solver allows you to input partial answers or clues, while Crossword Dictionary provides definitions and word lists. One Across is mobile-friendly and ideal for on-the-go solving. These resources are invaluable for crossword enthusiasts, helping you quickly find answers and improve your solving skills.

7.2 Crossword Dictionaries

Crossword dictionaries are indispensable tools for solvers, offering alphabetical listings of words with definitions and example clues. For the “light for warning or guiding” clue, dictionaries often highlight words like beacon or flare. Many dictionaries now include online versions, such as Crossword Dictionary and WordLists, which allow users to search by clue or pattern. These resources are especially helpful for identifying less common terms and understanding context-specific meanings, making them a must-have for crossword enthusiasts aiming to master tricky clues.

7.3 Mobile Apps for Solving Crosswords

Mobile apps like Crossword Solver and Crossword Clue Solver are essential for on-the-go puzzle enthusiasts. These apps allow users to input clues or partial answers and provide instant solutions. Features like wildcard searches (using ? or *) help when letters are unknown. Apps such as Crossword Puzzle Free also offer offline access, making them ideal for solving puzzles anywhere. Many apps cater specifically to the “light for warning or guiding” clue, suggesting words like beacon or flare with detailed explanations, enhancing the solving experience.

duronic air fryer af34 manual

Welcome to the Duronic Air Fryer AF34 manual, your comprehensive guide to mastering this dual-zone cooking appliance. Designed for versatile kitchen use, it offers a temperature range of 130°C to 190°C and a removable frying basket for effortless cooking. This manual ensures safe and effective operation, perfect for both beginners and experienced users.

Overview of the AF34 Model

The Duronic AF34 is a sleek and versatile air fryer designed for modern kitchens. It belongs to the Duronic dual-zone air fryer series, offering advanced features like temperature control and a spacious cooking capacity. The AF34 is known for its dual-zone cooking mode, allowing users to cook different foods simultaneously at varying temperatures. With a temperature range of 130°C to 190°C, it ensures even cooking and crispy results. The removable frying basket and dishwasher-safe components make maintenance easy. This model is ideal for home use, providing a healthy alternative to deep-frying while delivering flavorful meals. Its compact design and user-friendly interface make it a practical choice for everyday cooking needs.

Importance of Reading the Manual

Reading the Duronic AF34 manual is essential for optimal performance and safety. It provides detailed instructions for first-time use, dual-zone cooking, and troubleshooting common issues. Understanding the temperature settings, cooking times, and maintenance tips ensures delicious results and prolongs the appliance’s lifespan. The manual also highlights safety precautions, such as avoiding water contact with the main unit and proper cleaning methods. By following the guide, users can maximize their cooking experience, explore advanced features like dual-zone mode, and maintain the air fryer’s efficiency. It’s a key resource for both beginners and experienced users, ensuring safe and effective operation of the Duronic AF34.

Key Features and Specifications of the Duronic AF34

The Duronic AF34 features dual-zone cooking, a temperature range of 130°C to 190°C, and a non-stick removable frying basket for easy food preparation and cleaning. It combines advanced cooking technology with energy-efficient operation, making it ideal for versatile and healthy meal options. The appliance is designed for user convenience, offering precise temperature control and a spacious cooking capacity to accommodate various recipes. Its sleek design and durable construction ensure long-lasting performance, while the dual-zone functionality allows for simultaneous cooking of different foods at varying temperatures, enhancing cooking versatility and efficiency.

Temperature Range and Cooking Capabilities

The Duronic AF34 offers a versatile temperature range of 130°C to 190°C, allowing for precise control over various cooking tasks. This range is ideal for frying, baking, grilling, and roasting, ensuring that dishes are cooked evenly and thoroughly. The dual-zone functionality further enhances its capabilities, enabling users to cook different foods simultaneously at different temperatures. Whether it’s crispy fries, tender chicken, or perfectly cooked vegetables, the AF34’s temperature control ensures optimal results. This feature-rich design makes it a versatile addition to any kitchen, catering to a wide range of culinary needs and preferences with ease and efficiency.

Components and Accessories Included

The Duronic AF34 comes with a range of essential components to enhance your cooking experience. It includes a removable frying basket, perfect for easy food preparation and cleanup. Additionally, the air fryer features a non-stick coating on the basket to prevent food from sticking and promote healthier cooking with less oil. The package also includes a comprehensive user manual, detailing setup, operation, and maintenance instructions. Dual-zone functionality is supported by separate controls for each zone, allowing for precise temperature adjustments. These components are designed to make cooking efficient, convenient, and enjoyable, ensuring you get the most out of your air fryer.

Technical Specifications of the Duronic AF34

The Duronic AF34 operates with a temperature range of 130°C to 190°C, utilizing rapid air circulation technology for even cooking. It requires 230V power and is energy-efficient.

Dimensions and Weight

The Duronic AF34 air fryer features compact dimensions, making it suitable for various kitchen countertops. Its sleek design ensures it fits seamlessly into modern kitchens without occupying excess space. Weighing approximately [insert weight here], it is lightweight enough for easy relocation yet sturdy for stable operation. The dimensions and weight are designed to balance portability and durability, ensuring hassle-free usage and storage. This section provides precise measurements to help users plan their kitchen layout effectively.

Power Requirements and Energy Efficiency

The Duronic AF34 air fryer operates on standard household electricity, requiring a power input of [insert specific wattage here] at 220-240V. Designed with energy efficiency in mind, it uses advanced technology to cook food evenly while consuming less power compared to traditional deep fryers. The air fryer’s dual-zone functionality allows for simultaneous cooking at different temperatures, optimizing energy use. It is recommended to use the appliance with a suitable power supply to ensure optimal performance and safety. For precise energy consumption details, refer to the product specifications in the manual. This ensures eco-friendly and cost-effective cooking solutions for everyday use.

How to Operate the Duronic AF34 Air Fryer

Press the Power Button to turn on the air fryer. Adjust temperature and timer as needed. Use the Sync Cook button for dual-zone cooking. Follow preset settings for optimal results.

Step-by-Step Guide to First-Time Use

Before first use, unpack and wash the removable frying basket with warm water and soap. Dry thoroughly. Plug in the air fryer and press the Power Button to turn it on. Set the temperature and timer according to your recipe. For dual-zone cooking, press the Sync Cook button to activate; Place food in the basket, ensuring it is evenly spread. Start cooking and monitor progress. Once done, unplug the unit and let it cool before cleaning. Always refer to the manual for specific settings and safety precautions to ensure optimal performance and longevity of your Duronic AF34 air fryer.

Using Dual Zone Cooking Mode

The Duronic AF34 features a dual-zone cooking mode, allowing you to cook different foods simultaneously with independent temperature and timing settings. To activate this mode, press the Sync Cook button. Use the Zone 1 and Zone 2 buttons to set specific temperatures and timers for each section of the frying basket. This function is ideal for preparing varied dishes, such as crispy fries and tender chicken, at the same time. Ensure food is evenly distributed in each zone for consistent results. Monitor cooking progress and adjust settings as needed for optimal outcomes. Dual-zone cooking enhances versatility, making meal preparation efficient and convenient.

Cleaning and Maintenance Tips

Regular cleaning is essential for maintaining your Duronic AF34. Wipe the main unit with a damp cloth, avoiding submersion. Removable parts should be washed with soap and water, then dried thoroughly. Regular maintenance ensures optimal performance and longevity of your air fryer.

Proper Cleaning of the Main Unit

To maintain your Duronic AF34’s performance, clean the main unit regularly. Always unplug the air fryer before cleaning. Use a soft, well-wrung cloth to wipe down the exterior and interior, avoiding harsh chemicals or abrasive materials. Never submerge the main unit in water or expose it to excessive moisture. For stubborn stains, a mild detergent diluted in water can be used, but ensure the unit is thoroughly dried afterward. Regular cleaning prevents food residue buildup and ensures optimal functionality. Avoid using metal scourers or sharp objects, as they may damage the surface. Proper care extends the lifespan of your air fryer and maintains hygiene standards.

Cleaning the Removable Frying Basket

Regularly cleaning the removable frying basket ensures optimal performance and hygiene. After each use, allow the basket to cool slightly, then wash it with warm soapy water using a soft sponge or cloth. Avoid using abrasive materials or metal scourers, as they may damage the non-stick coating. Rinse thoroughly and dry with a clean towel. For tougher food residue, soak the basket in warm soapy water for about 30 minutes before scrubbing gently. Never put the basket in a dishwasher or submerge it in water for extended periods. Proper drying is essential to prevent moisture buildup. Cleaning the basket after every use maintains its non-stick surface and ensures longevity.

Troubleshooting Common Issues

If the air fryer doesn’t turn on, check the power cord and outlet. For uneven cooking, ensure the basket is properly aligned and food is evenly spread;

Resolving Heating or Power Issues

If the Duronic AF34 air fryer fails to turn on, ensure the power cord is securely plugged into a functioning outlet. Check for any visible damage to the cord or plug. Reset the unit by unplugging it for 5 minutes and replugging it. If the issue persists, consult the manual or contact customer support. For heating problems, verify that the temperature is set correctly and the air inlet is not blocked. Avoid submerging the main unit in water, as this can damage electrical components. Regularly cleaning the air fryer and ensuring proper airflow can prevent heating issues. If problems continue, refer to the troubleshooting section in the manual for further guidance.

Addressing Non-Stick Basket Damage

To prevent damage to the non-stick basket of your Duronic AF34, avoid using metal utensils or abrasive cleaners, as they can scratch the surface. For minor scratches, continue using the basket, but avoid cooking acidic foods. For more severe damage, replace the basket to maintain non-stick performance. Clean the basket with warm water and mild soap, avoiding submerging it in water for extended periods. Dry thoroughly after cleaning to prevent rust. If the non-stick coating is worn, lightly sand the area with fine sandpaper and re-season it. Regular maintenance ensures the basket remains durable and effective for cooking.

horstmann electronic 7 instruction manual

The Horstmann Electronic 7 is an advanced digital water heater controller designed to optimize energy usage with off-peak electricity, offering eco-friendly and cost-effective hot water solutions.

Overview of the Device

The Horstmann Electronic 7 is a cutting-edge digital water heater controller designed to maximize energy efficiency and convenience. It is specifically developed to control immersion heaters, ensuring hot water availability while minimizing electricity costs. The device features an automatic clock with pre-set summer and winter modes, eliminating the need for manual adjustments. Its intuitive interface allows users to program off-peak and boost modes seamlessly. The Electronic 7 is compatible with Economy 7 and other off-peak tariffs, making it an eco-friendly solution for water heating. With its compact design and user-friendly navigation, it is ideal for modern households seeking to optimize their energy usage. The controller is also equipped with both manual and timed boost functions, providing flexibility for varying hot water needs. Its advanced technology ensures reliable performance while keeping energy bills in check.

Key Features and Benefits

The Horstmann Electronic 7 offers a range of innovative features designed to enhance energy efficiency and user convenience. Its automatic clock with pre-set summer and winter modes eliminates the need for manual adjustments, while the off-peak electricity utilization ensures cost-effective water heating. The device supports up to two 3kW immersion heaters, providing ample hot water capacity for various household needs. The manual and timed boost functions allow for flexible hot water availability, even outside scheduled heating periods. This controller is specifically designed for Economy 7 and similar off-peak tariffs, making it an eco-friendly choice. Its user-friendly interface and reliable performance ensure a seamless experience. With these features, the Horstmann Electronic 7 stands out as a versatile and efficient solution for modern water heating needs, combining convenience, efficiency, and affordability.

Installation and Setup

The Electronic 7 is installed by removing it from the mounting box and attaching it using either of the two provided methods, ensuring compliance with safety guidelines.

Mounting Instructions

The Horstmann Electronic 7 must be installed by a qualified electrician to ensure safety and compliance with local regulations. Begin by removing the unit from its mounting box using the provided screws. There are two methods for attaching the controller: one directly to the wall and another using a mounting bracket. Ensure all connections are secure and follow the wiring diagram provided in the manual. Before mounting, switch off the power supply to avoid any electrical hazards. Once installed, the device should be level and accessible for future adjustments. The mounting process should not be attempted by unqualified individuals, as improper installation can lead to malfunctions or safety risks. Always refer to the manual for specific mounting guidelines tailored to your setup.

Initial Setup and Configuration

After mounting the Horstmann Electronic 7, power it on and ensure the display lights up; The device is pre-programmed with default settings, but some configurations may be necessary. Check that the clock is set correctly, as it is essential for off-peak and boost timing. The summer/winter mode is automatically selected, but you can manually adjust it if needed. Your installer typically sets the off-peak switching times to align with your electricity tariff. Review these settings to ensure they match your usage patterns. If adjustments are required, use the clock buttons to modify the on/off times. The manual boost function can also be activated if additional hot water is needed outside the programmed schedule. Refer to the manual for detailed instructions on adjusting these settings to optimize performance and energy efficiency.

Programming the Horstmann Electronic 7

Program the device by setting the clock and boost timer, leveraging off-peak electricity for cost-effective hot water. The automatic clock simplifies scheduling, while manual overrides offer flexibility when needed.

Setting the Clock and Boost Timer

The Horstmann Electronic 7 features an automatic clock that is pre-set at manufacture but can be manually adjusted if needed. Users can set the clock to align with their schedules, ensuring optimal use of off-peak electricity. The boost timer allows for temporary overrides, providing additional heating when required. To set the clock, press the clock buttons to adjust the time display. For the boost timer, select the desired duration using the control buttons. The device automatically switches between summer and winter modes, indicated on the screen. The installer typically sets the off-peak times, but users can modify them if necessary. Proper setup ensures efficient energy use and consistent hot water supply. Always refer to the manual for detailed instructions to avoid errors during configuration.

Understanding Off-Peak and Boost Modes

The Horstmann Electronic 7 operates using Off-Peak and Boost modes to optimize energy efficiency. Off-Peak mode utilizes cheaper night-rate electricity to heat water, ensuring a full tank by morning. Boost mode provides temporary additional heating during the day when needed. The device automatically switches between these modes based on pre-set tariffs. Users can manually activate Boost mode for extra hot water, with options for timed or immediate heating. The automatic clock ensures seamless transitions between summer and winter settings. This dual-mode functionality allows homeowners to save on energy costs while maintaining consistent hot water availability. Proper use of these modes is key to maximizing efficiency and convenience, as outlined in the manual. Understanding these features helps users make the most of their energy tariffs and hot water needs.

Troubleshooting and Maintenance

Regularly check for error codes and ensure proper installation. The Horstmann Electronic 7 is not user-serviceable; contact a professional for repairs. Routine maintenance ensures optimal performance and longevity.

Common Issues and Solutions

Users may encounter issues such as the clock not updating or the device not switching modes. Ensure the clock is set correctly and check for loose connections. If the boost timer doesn’t activate, verify the settings. The device is not user-serviceable, so any internal faults require professional assistance. For display errors, restart the unit or consult the manual. Regularly inspect the wiring to prevent malfunctions. If the water isn’t heating, confirm off-peak times are set accurately. Maintain the unit by cleaning dust from vents and ensuring proper installation. Always refer to the manual for specific troubleshooting steps, and contact customer support if unresolved. Proper maintenance ensures reliable performance and longevity of the Horstmann Electronic 7.

Maintenance Tips

Regular maintenance ensures optimal performance of the Horstmann Electronic 7. Clean the unit periodically to remove dust and debris, which can affect functionality. Check all electrical connections to ensure they are secure and free from corrosion. Inspect the wiring and immersion heater for damage or wear. If the device is mounted, verify its stability to prevent movement. Update the software if new versions are available. Avoid exposing the controller to excessive moisture or direct sunlight. For internal issues, contact a professional, as the unit is not user-serviceable. Refer to the manual for specific care instructions. Proper upkeep extends the lifespan of the Horstmann Electronic 7 and ensures reliable operation. Regular checks help prevent unexpected issues and maintain energy efficiency.

Accessing the Instruction Manual

The Horstmann Electronic 7 instruction manual is available online as a free PDF download. Visit the manufacturer’s website or authorized portals to access and print it.

Downloading the PDF Manual

The Horstmann Electronic 7 instruction manual is readily available for download as a PDF from the official Horstmann website or authorized online databases. To access it, visit the manufacturer’s official webpage or platforms like ManualsLib, which host user manuals for various devices. Simply search for “Horstmann Electronic 7 manual” and select the appropriate PDF file. The manual is free to download and includes detailed instructions for installation, programming, and troubleshooting. Ensure you download the correct version corresponding to your device. Once downloaded, you can save it for future reference or print it for easy access. This digital format allows for convenient navigation and searching within the document. By downloading the manual, you can explore all features and optimize your use of the Horstmann Electronic 7 controller effectively.

Video Tutorials and Guides

Video tutorials and guides for the Horstmann Electronic 7 are available online to help users understand and operate the device effectively. These videos are accessible on platforms like YouTube and the official Horstmann website, providing step-by-step instructions for installation, programming, and troubleshooting. They cover topics such as setting the clock, configuring off-peak and boost modes, and resolving common issues. Many tutorials are created by experts or experienced users, offering practical insights and tips. Some videos also demonstrate how to integrate the controller with other systems or optimize energy usage. Users can search for specific topics, such as “Horstmann Electronic 7 programming tutorial” or “how to set boost timer,” to find relevant content. These resources are particularly useful for visual learners or those who prefer hands-on guidance. Always ensure the videos are from trusted sources to avoid incorrect information.

The Horstmann Electronic 7 is a sophisticated water heater controller designed to optimize energy efficiency and convenience. With its advanced features, such as automatic clock settings and off-peak/boost modes, it ensures cost-effective hot water solutions. The device is user-friendly, allowing homeowners to manage their water heating needs effortlessly; By leveraging cheap night-rate electricity, it helps reduce energy costs while maintaining a reliable supply of hot water. The availability of comprehensive instruction manuals and video tutorials further enhances the user experience, providing clear guidance for installation, programming, and troubleshooting. Whether you’re a new or experienced user, the Horstmann Electronic 7 is a valuable addition to your home, offering both functionality and eco-friendly benefits. For optimal use, always refer to the official manual or trusted video guides to unlock its full potential.

maxi-cosi pebble 360 pro instructions

The Maxi-Cosi Pebble 360 Pro is a premium infant car seat designed for newborns to toddlers, offering a 360-degree swivel for easy access and enhanced safety features.

1.1 Key Features

The Maxi-Cosi Pebble 360 Pro offers a 360-degree swivel, enabling easy access to secure your child. It features three reclining positions for comfort and is i-Size certified for enhanced safety. Designed for Group 0 (0-13 kg), it supports newborns up to 15 months. The seat is compatible with the FamilyFix 360 Pro base for ISOFIX installation and part of the 2-way family system, allowing use with strollers. Its lightweight design and soft padding ensure comfort, while the universal belt routing provides flexibility. The Pebble 360 Pro is approved under UN Regulation No. 129, ensuring compliance with safety standards. These features make it a versatile and reliable choice for parents seeking convenience and security.

1.2 Importance of Instructions

Following the Maxi-Cosi Pebble 360 Pro instructions is crucial for ensuring your child’s safety and comfort. The manual provides detailed guidance on installation, usage, and maintenance, which are essential for proper functionality. Incorrect installation can compromise safety, making it vital to adhere to the steps outlined. The instructions also cover how to use the 360-degree swivel and reclining features correctly, optimizing convenience and comfort. Regular checks and maintenance, as specified, prevent potential issues and extend the product’s lifespan. Reading and understanding the manual thoroughly ensures you can utilize all features effectively, guaranteeing maximum protection and comfort for your child. Compliance with the instructions is non-negotiable for the optimal performance of the Pebble 360 Pro car seat.

Unboxing and Initial Setup

Unboxing the Maxi-Cosi Pebble 360 Pro reveals the car seat, ISOFIX base, and harness. Ensure all components are included and free from damage before proceeding with installation.

2.1 What’s Included

The Maxi-Cosi Pebble 360 Pro typically includes the car seat, an ISOFIX base, a newborn insert, and a user manual. The car seat features a 360-degree swivel, while the base ensures secure installation. The newborn insert provides additional support for smaller infants, and the manual offers detailed instructions for proper use. Ensure all components are present and undamaged upon unboxing. The package may also include a harness and padding for optimal comfort and safety. Always verify the contents against the manual’s list before proceeding with installation.

2.2 Initial Checks

Before using the Maxi-Cosi Pebble 360 Pro, perform a thorough inspection. Check for damage, frayed straps, or loose parts. Ensure the seat and base are compatible with your vehicle. Verify that all labels and certifications are present, confirming compliance with safety standards. Test the 360-degree swivel mechanism to ensure smooth operation. Inspect the harness for proper function and adjustability. Review the expiration date on the seat, as car seats have a limited lifespan. Finally, ensure the user manual is included and readable, as it contains essential installation and usage guidelines. Address any issues immediately to guarantee your child’s safety.

The Maxi-Cosi Pebble 360 Pro is a versatile and safe car seat designed for infants, offering a 360-degree swivel for easy access and enhanced comfort.

Key Features

The Maxi-Cosi Pebble 360 Pro boasts a 360-degree swivel, allowing effortless access to secure your child. Designed for infants from birth to 15 months, it offers three reclining positions for comfort. The seat is part of the i-Size regulation, ensuring enhanced safety and compatibility with most vehicles. It features a universal belted design and can be paired with the FamilyFix 360 Pro base for ISOFIX installation. Weighing up to 13 kg, it provides a snug fit for growing babies. The Pebble 360 Pro also integrates with Maxi-Cosi strollers, making it a versatile travel system. Its compact design and premium materials ensure durability and ease of use, making it a top choice for parents seeking convenience and safety.

Importance of Instructions

Following the instructions for the Maxi-Cosi Pebble 360 Pro is crucial for ensuring your child’s safety and comfort. The manual provides detailed guidance on installation, usage, and maintenance, which are essential for proper functionality. Incorrect installation can compromise safety, so adhering to the steps is vital. The instructions also cover how to use the 360-degree swivel feature and recline positions correctly. Additionally, they outline the importance of regular checks and updates to ensure compliance with safety standards. Reading the manual thoroughly helps parents understand how to secure their child properly, adjust the seat as they grow, and use compatible accessories like the FamilyFix 360 Pro base. Proper adherence ensures maximum protection and peace of mind for parents.

Unboxing

Unboxing the Maxi-Cosi Pebble 360 Pro reveals a sleek, high-quality design with essential components for safe and convenient installation, ensuring a smooth start for parents.

What’s Included

Upon unboxing the Maxi-Cosi Pebble 360 Pro, you’ll find the car seat itself, designed for infants from birth up to 15 months. The package includes the seat, a removable cushion for newborns, and an adjustable headrest for growing children. A user manual is provided, detailing installation, safety features, and maintenance tips. Additionally, the FamilyFix 360 Pro base is available separately for secure ISOFIX installation. Optional accessories like a summer cover and adapters for stroller compatibility may also be purchased. Ensure all components are inspected for damage before use. The Pebble 360 Pro is designed to offer convenience, safety, and comfort, making it a reliable choice for parents seeking a high-quality infant car seat.

Initial Checks

Before using the Maxi-Cosi Pebble 360 Pro, perform a thorough inspection. Ensure the car seat is free from damage, such as cracks or frayed straps. Verify the expiration date on the seat, as car seats have a limited lifespan. Check the ISOFIX base indicators to confirm proper installation. Test the 360-degree swivel mechanism to ensure smooth rotation. Inspect the harness for correct tightness and adjustability. Review the user manual to understand all safety features and functions. Ensure all accessories, like the newborn cushion, are securely attached. Familiarize yourself with the recline positions and headrest adjustment. Always check for any recalls or updates from the manufacturer. Proper preparation ensures optimal safety and comfort for your child.

Installation

Install the Maxi-Cosi Pebble 360 Pro using the ISOFIX base for secure anchorage. Ensure the base is correctly attached to the vehicle’s ISOFIX points, and the seat is properly secured to the base. Always refer to the user manual for detailed instructions and safety guidelines.

With Base

Installing the Maxi-Cosi Pebble 360 Pro with the FamilyFix 360 Pro base ensures a secure and stable fit in your vehicle. Begin by attaching the ISOFIX base to your car’s ISOFIX points, ensuring the indicators turn green to confirm proper anchorage. Next, place the Pebble 360 Pro onto the base, aligning the connectors until it clicks securely into place. Tighten the base’s leg or arm if necessary to achieve a firm fit. Always check the base’s stability and ensure the seat is level. For added safety, use the 360-degree rotation feature to easily position your child. Refer to the user manual for detailed instructions and ensure all steps are followed to guarantee optimal safety and comfort for your child. Proper installation is crucial for maximum protection. Always double-check the installation before use.

Without Base

When using the Maxi-Cosi Pebble 360 Pro without the base, secure it using your vehicle’s seat belt. Thread the belt through the designated guides on the car seat, ensuring it is tight and properly positioned. For vehicles equipped with ISOFIX points, you can also connect the seat directly to these anchors for added stability. The 360-degree rotation feature allows for easy placement of your child, but always ensure the seat is level and securely fastened. After installation, double-check the seat’s stability by gently rocking it back and forth. Refer to the user manual for specific belt routing instructions and safety guidelines. Proper installation without the base is crucial for your child’s safety and comfort during travel.

The Maxi-Cosi Pebble 360 Pro offers enhanced safety, comfort, and convenience for your child. Its 360-degree swivel feature and i-Size certification ensure optimal protection and ease of use. Proper installation, whether with or without the base, is crucial for your child’s safety. Always follow the user manual guidelines to ensure the seat is securely fastened and level. Regularly check the seat’s positioning and tighten the harness as needed. By adhering to the instructions, you can provide your child with a safe and comfortable travel experience. Remember, the Pebble 360 Pro grows with your child, offering long-lasting protection and versatility for years to come. Always prioritize your child’s safety by following the manufacturer’s recommendations.

the silent patient filetype:pdf

“The Silent Patient” by Alex Michaelides is a gripping psychological thriller about Alicia Berenson‚ a famous painter who shoots her husband and remains silent afterward. The novel explores themes of trauma‚ silence‚ and truth through a dual narrative‚ blending past and present. Michaelides’ background as a psychotherapist adds depth to the story‚ making it a compelling read.

1.1 Overview of the Novel

“The Silent Patient” is a psychological thriller by Alex Michaelides‚ centered on Alicia Berenson‚ a renowned painter who shoots her husband and remains eerily silent. The story unfolds through Theo Faber‚ a psychotherapist determined to uncover her secrets. Blending past and present narratives‚ the novel explores themes of trauma‚ silence‚ and truth‚ creating a suspenseful journey into Alicia’s psyche and the events leading to her silence.

1.2 Author Background: Alex Michaelides

Alex Michaelides is a British author‚ psychotherapist‚ and lecturer. Born in Cyprus‚ he holds a MA in English Literature from Cambridge University and a PhD in Psychotherapy from Essex University. His professional experience as a psychotherapist deeply influences his writing‚ particularly in crafting complex psychological narratives. “The Silent Patient” is his debut novel‚ showcasing his ability to weave gripping stories with profound psychological insight.

1.3 The Silent Patient’s Plot Summary

Alicia Berenson‚ a famous painter‚ shoots her husband‚ Gabriel‚ and remains eerily silent afterward. The novel follows Theo Faber‚ a determined psychotherapist‚ as he uncovers the truth behind Alicia’s silence. Through a dual narrative of past and present‚ the story reveals Alicia’s diary entries‚ exposing the dark secrets leading to the shooting. The plot unfolds with psychological tension‚ culminating in a shocking twist that explains Alicia’s silence and her ultimate escape from despair.

Main Characters and Their Roles

Alicia Berenson‚ a renowned painter‚ is the silent patient at the center of the story. Theo Faber‚ a psychotherapist‚ is determined to uncover her secrets‚ driving the narrative’s psychological exploration.

2.1 Alicia Berenson: The Silent Patient

Alicia Berenson is a renowned painter and the central figure of the novel. Her life unravels after she shoots her husband‚ Gabriel‚ and remains eerily silent. This silence becomes a mystery‚ driving the plot. Alicia’s character represents the depths of psychological trauma and the power of unspoken truths.

2.2 Theo Faber: The Psychotherapist

Theo Faber‚ a determined psychotherapist‚ is tasked with unraveling Alicia’s silence. His obsession with her case stems from personal struggles‚ blurring professional boundaries. Theo’s narrative reveals his own flaws and insecurities‚ making him a complex‚ relatable character. His dual role as healer and seeker of truth drives the story‚ intertwining his fate with Alicia’s enigmatic presence.

2.3 Key Supporting Characters

Key supporting characters include Alicia’s husband‚ Gabriel Berenson‚ whose mysterious role in her silence is central to the plot. Kathy‚ Alicia’s friend‚ provides insight into her past‚ while Professor Julian Styles offers a deeper understanding of Alicia’s psyche. Theo’s wife‚ Helen‚ adds emotional complexity‚ highlighting the personal stakes of Theo’s obsession with Alicia’s case.

Themes Explored in the Novel

Trauma‚ silence‚ and truth are central themes‚ as Alicia’s silence hides dark secrets. The novel explores how trauma shapes identity and how truth can both heal and destroy. The interplay of past and present reveals the psychological depth of its characters‚ making it a thought-provoking read.

3.1 Trauma and Its Impact

Trauma is a pervasive theme in “The Silent Patient”‚ as Alicia’s shocking act of violence and subsequent silence stem from unresolved psychological wounds. Her paintings reveal glimpses of her inner turmoil‚ while Theo’s therapeutic efforts uncover layers of repressed memories. The novel highlights how trauma can lead to emotional paralysis and the struggle to confront the past‚ ultimately shaping the characters’ identities and relationships.

3.2 The Power of Silence

Alicia’s silence becomes a powerful narrative tool‚ heightening the mystery and emotional depth of the story. Her refusal to speak after the tragic event creates a barrier that Theo Faber is determined to break. Silence‚ in this context‚ is not just the absence of speech but a form of resistance and control‚ reflecting Alicia’s inner turmoil and the secrets she harbors‚ making her silence as impactful as any spoken word.

3.3 Truth and Deception

The novel masterfully explores the interplay between truth and deception‚ as Alicia’s silence hides a web of lies and unspoken secrets. Theo’s determination to uncover the truth reveals the complexity of human behavior‚ where outward appearances often mask inner turmoil. Michaelides’ use of dual narratives highlights the fluidity of truth‚ showing how deception can both protect and destroy‚ keeping readers captivated until the final revelation.

Symbolism in “The Silent Patient”

The novel uses symbolism to deepen its psychological layers. Alicia’s paintings symbolize her inner turmoil‚ while the house represents her entrapment. These elements enhance the narrative’s complexity.

4.1 The Significance of Alicia’s Paintings

Alicia’s paintings serve as a window into her psyche‚ revealing her emotions and experiences. They are symbolic expressions of her inner world‚ reflecting her trauma and emotional state. The artwork becomes a crucial element in understanding her silence and the events leading to her husband’s murder. Each painting holds hidden meanings‚ offering clues to her past and inner struggles‚ making them vital to the story’s unraveling.

4.2 The Role of the House in the Story

The house in “The Silent Patient” is a central symbol‚ representing both Alicia’s isolation and the oppressive silence surrounding her life. It serves as the setting for the tragic event and becomes a prison for Alicia‚ both physically and emotionally. The house’s grandeur and emptiness mirror Alicia’s inner turmoil‚ while its walls hold the secrets of her past‚ contributing to the story’s tension and mystery.

Writing Style and Narrative Structure

Alex Michaelides’ writing style in “The Silent Patient” is characterized by sharp psychological insights and a tightly wound narrative‚ reflecting his psychotherapy background and enhancing the suspense.

5.1 Dual Perspectives: Past and Present

The novel alternates between Theo Faber’s present-day narrative and Alicia Berenson’s past diary entries‚ creating a suspenseful and layered story. This dual perspective gradually reveals the mystery‚ with Theo’s investigations contrasting with Alicia’s inner thoughts before her silence. The structure builds intrigue‚ allowing readers to piece together the truth alongside Theo‚ while Alicia’s diaries provide psychological depth and context to her tragic transformation.

5.2 The Use of Flashbacks

Alicia Berenson’s diary entries serve as flashbacks‚ revealing her inner world before the tragic incident. These segments contrast with Theo’s present-day narrative‚ building suspense and psychological depth. The flashbacks gradually uncover clues about Alicia’s mindset and marriage‚ allowing readers to connect past events with her silence. This narrative technique enhances the mystery‚ engaging readers in unraveling the truth alongside Theo.

5.3 Psychological Thriller Elements

“The Silent Patient” masterfully employs psychological thriller elements‚ maintaining suspense through Alicia’s silence and Theo’s obsessive investigation. The novel’s tense atmosphere‚ unexpected twists‚ and deep exploration of human psyche keep readers engaged. Michaelides skillfully builds tension‚ leveraging Alicia’s unspoken secrets and Theo’s unraveling of her past‚ culminating in a shocking revelation that underscores the complexity of truth and human behavior.

Reception and Impact

The Silent Patient became a huge bestseller‚ selling millions of copies worldwide. It received critical acclaim for its psychological depth and influenced the thriller genre.

6.1 Critical Acclaim and Reviews

The Silent Patient received widespread critical acclaim for its gripping narrative and psychological depth. Reviewers praised Alex Michaelides’ ability to craft complex characters and maintain suspense. The novel’s unique structure and exploration of trauma resonated with readers‚ making it a standout in the thriller genre. Its success was further bolstered by its relatable themes and surprising plot twists.

6.2 Commercial Success and Sales

The Silent Patient achieved remarkable commercial success‚ debuting at number one on the New York Times bestseller list and remaining there for weeks. It sold millions of copies worldwide‚ becoming a global phenomenon. The novel’s popularity was fueled by its gripping storyline and psychological depth‚ making it a favorite among readers and solidifying its place as a modern bestseller.

6.3 Adaptations and Future Plans

The Silent Patient has been optioned for film‚ with Brad Pitt’s Plan B Entertainment set to produce. Additionally‚ Annapurna Television is adapting the novel into a TV series‚ further expanding its reach. These adaptations highlight the novel’s enduring appeal and promise to bring its gripping story to new audiences‚ ensuring its legacy in popular culture for years to come.

Psychological Insights

The Silent Patient explores the psychological effects of trauma‚ delving into mental health stigma and the complexities of the therapeutic relationship‚ offering profound insights into human psychology.

7.1 The Portrayal of Mental Health

The Silent Patient vividly portrays mental health through Alicia’s trauma-induced silence and Theo’s psychological struggles. The novel highlights the stigma surrounding mental illness and the challenges of therapy‚ offering a nuanced exploration of the human psyche while fostering empathy and understanding for those grappling with inner turmoil and recovery.

7.2 The Therapist-Patient Dynamic

The therapist-patient dynamic in “The Silent Patient” is complex‚ with Theo Faber’s determination to uncover Alicia’s secrets creating a power imbalance and ethical challenges. As Theo delves deeper‚ his own psyche is revealed‚ showing how the relationship affects both parties deeply‚ exploring themes of trust‚ manipulation‚ and the blurring of professional boundaries.

7.3 The Psychology of Trauma and Recovery

Alicia’s silence is a profound manifestation of her trauma‚ representing a psychological defense mechanism to cope with unbearable pain. The novel explores how traumatic events can lead to emotional paralysis and memory repression‚ while Theo’s efforts to unravel her silence highlight the complex journey of recovery‚ emphasizing the role of therapeutic intervention and self-reflection in healing.

Comparisons with Other Works

“The Silent Patient” is often likened to works by Gillian Flynn and Stieg Larsson‚ blending psychological depth with suspense. Its unique narrative structure and shocking twists set it apart in the thriller genre‚ drawing parallels to classic mysteries while maintaining a modern‚ gripping storytelling style.

8.1 Similarities to Other Psychological Thrillers

“The Silent Patient” shares similarities with works by Gillian Flynn and Stieg Larsson‚ featuring complex characters‚ twists‚ and psychological depth. Like Gone Girl‚ it explores deception and unreliable narrators‚ while its dual timeline mirrors The Girl with the Dragon Tattoo. The novel’s gripping suspense and shocking revelations align with the thriller genre‚ making it a modern classic in psychological storytelling.

8.2 Influence of Classic Thriller Novels

“The Silent Patient” draws inspiration from classic thrillers‚ echoing the suspenseful narrative of Agatha Christie and the psychological depth of Alfred Hitchcock. The novel’s twist-heavy plot and exploration of human psyche mirror the storytelling techniques of earlier masters‚ blending timeless themes with modern style. Michaelides’ work reflects a lineage of thrillers that captivate readers with intrigue and emotional complexity.

“The Silent Patient” is a masterful blend of psychological intrigue and emotional depth‚ leaving readers reflective about trauma‚ silence‚ and redemption. Its lasting impact ensures its place among modern thrillers.

9.1 Final Thoughts on the Novel

“The Silent Patient” captivates readers with its intricate plot and profound exploration of human psychology. Alicia’s silence serves as a metaphor for unspoken truths‚ while Theo’s journey highlights the complexities of healing. The novel’s ability to weave suspense with emotional depth makes it a standout in the psychological thriller genre‚ leaving a lasting impression on its audience.

9.2 The Lasting Legacy of “The Silent Patient”

“The Silent Patient” has left an indelible mark on the literary world‚ praised for its masterful storytelling and psychological depth. Its exploration of trauma and silence resonates deeply‚ making it a modern classic in the thriller genre. The novel’s success has solidified Alex Michaelides’ reputation as a compelling storyteller‚ ensuring its legacy as a gripping and thought-provoking read for years to come.