
The old Singer sewing machine instruction manual is a vital resource for enthusiasts and collectors, offering detailed guidance on operation, maintenance, and troubleshooting for vintage models. It provides essential information on threading, stitching, and using attachments, ensuring the machine’s longevity and optimal performance. This manual is a bridge between the past and present, preserving the legacy of Singer’s iconic sewing machines while empowering users to master traditional sewing techniques. Its clear instructions and historical context make it indispensable for both beginners and seasoned sewists.
Overview of the Singer Sewing Machine History
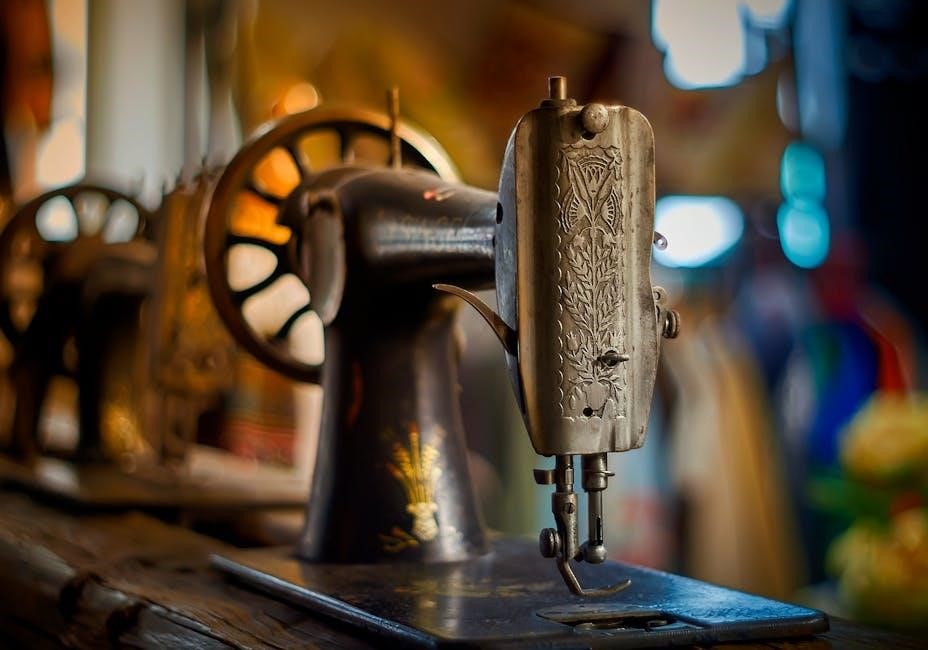
The Singer Sewing Machine Company, founded in 1851 by Isaac Merritt Singer, revolutionized the sewing industry with its innovative machines. Singer’s early models, such as the Singer 15 and Featherweight, became iconic for their durability and user-friendly design. The company’s contributions to sewing technology were groundbreaking, making sewing accessible to both households and industries worldwide. Singer’s machines were known for their versatility, catering to diverse needs, from basic stitching to intricate embroidery. Over the years, Singer expanded its product line, introducing attachments and accessories that enhanced sewing capabilities. The company’s commitment to quality and innovation solidified its reputation as a leader in the sewing machine market. Vintage Singer machines remain highly sought after by collectors and sewists, highlighting the enduring legacy of the brand. Singer’s history is a testament to how a single invention can transform everyday life and leave a lasting impact on global industries.
Importance of the Instruction Manual for Vintage Models
The instruction manual for vintage Singer sewing machines is crucial for understanding and maintaining these classic devices. It provides detailed guidance on threading, operating, and troubleshooting, ensuring users can maximize the machine’s potential. Vintage manuals often include diagrams and step-by-step instructions, which are essential for repairing and maintaining older models. They also offer insights into historical sewing techniques and the evolution of sewing technology. Without these manuals, users might struggle to identify parts or perform routine maintenance, potentially leading to machine damage. For collectors, the manual adds significant value, serving as a historical document that complements the machine’s heritage. Additionally, manuals help preserve the legacy of Singer’s engineering by making these vintage machines accessible to new generations of sewists and enthusiasts. Overall, the instruction manual is an indispensable resource for anyone working with or collecting vintage Singer sewing machines.

Understanding the Structure of the Manual
The old Singer sewing machine instruction manual is a comprehensive guide, organized into clear sections covering setup, operation, troubleshooting, and maintenance. It ensures users can master their vintage machine’s functions effectively.
Key Components of the Instruction Manual
The old Singer sewing machine instruction manual includes detailed sections on threading, stitching, and maintenance. It features diagrams for proper thread guidance and stitch selection. Troubleshooting guides help resolve common issues, while maintenance tips ensure longevity. The manual also lists compatible attachments and accessories, enhancing the machine’s versatility. Clear instructions for basic and advanced techniques make it suitable for all skill levels. Historical context and model-specific information add value for collectors. The manual’s structured format ensures easy navigation, making it an indispensable resource for vintage Singer sewing machine enthusiasts.
- Threading and setup instructions
- Stitch diagrams and techniques
- Troubleshooting and repair tips
- Maintenance schedules
- Parts and accessories lists
- Historical and model-specific details
These components ensure the manual remains a vital tool for preserving and operating vintage Singer sewing machines effectively.
How to Navigate the Manual for Specific Tasks
Navigating the old Singer sewing machine instruction manual is straightforward due to its organized structure. Users can quickly locate specific tasks using the table of contents or index. The manual is divided into clear sections, such as threading, stitching, and maintenance, making it easy to find relevant information. Each section includes detailed step-by-step instructions, often accompanied by diagrams or illustrations. For troubleshooting, the manual provides a dedicated section with common issues and solutions. To find parts or accessories, refer to the appendices, which list compatible items. Bold headings and subheadings guide the reader, while bullet points highlight key steps. Users can also search for specific tasks using the index, which cross-references page numbers. Whether you’re a beginner or experienced sewer, the manual’s logical layout ensures efficient navigation.
- Use the table of contents to locate main sections.
- Refer to the index for quick access to specific tasks.
- Follow Bold headings to identify key topics.
- Utilize diagrams and illustrations for visual guidance.
This structured approach makes the manual user-friendly and efficient for addressing specific needs.
Operating the Vintage Singer Sewing Machine
Operating the vintage Singer sewing machine requires understanding its mechanical setup. Begin with proper threading, then select the desired stitch type. Use attachments for specialized tasks, ensuring smooth fabric flow. Always refer to the manual for optimal performance.
Threading and Setting Up the Machine
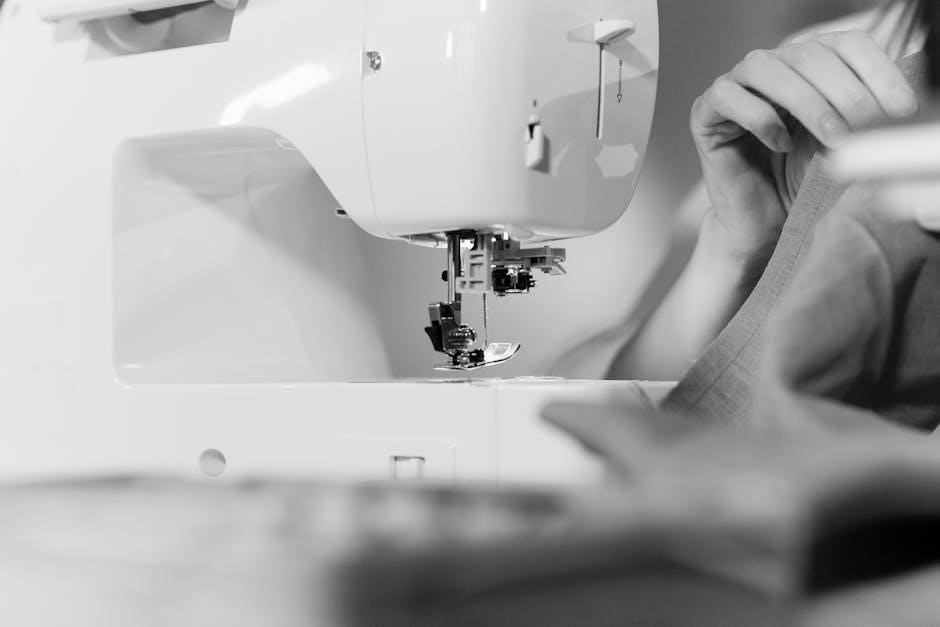
Threading and setting up the vintage Singer sewing machine is a meticulous process that requires attention to detail. Start by locating the spool pin and ensure the machine is turned off. Gently pull the thread through the tension discs, guiding it through the take-up lever and the needle. Proper tension is crucial to avoid uneven stitches. Next, prepare the bobbin by winding thread around it evenly, ensuring it is securely placed in the bobbin case. Attach the bobbin to the machine according to the manual’s instructions, making sure it rotates smoothly. Once threaded, test the machine by sewing a few stitches on scrap fabric to check for tangles or inconsistencies. Always refer to the manual for specific guidance, as improper threading can lead to poor stitch quality or machine malfunction. This setup ensures the machine is ready for efficient and precise sewing. Proper initial setup is key to achieving professional results.
Basic Sewing Techniques and Stitches
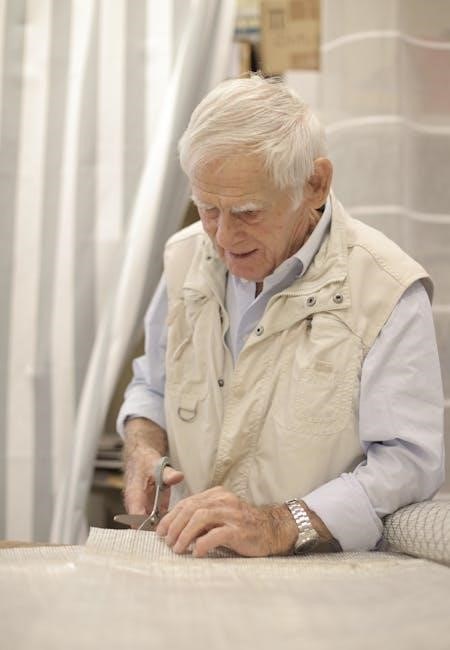
Mastering basic sewing techniques and stitches is essential for achieving professional results with your vintage Singer sewing machine. The manual provides clear instructions for straight stitching, backstitching, and running stitches, which are fundamental for sewing seams, repairing fabric, and creating decorative edges. For beginners, the straight stitch is the starting point, ideal for simple seams and piecing fabric together. The backstitch is recommended for reinforcing seams at the beginning and end of a row, ensuring durability. Additionally, the running stitch is a versatile option for basting or gathering fabric. The manual also covers how to adjust stitch length and tension to suit different fabrics, from delicate cotton to heavier materials like denim. Practicing these stitches on scrap fabric before working on a project is highly recommended. By following the manual’s guidance, users can confidently execute a variety of stitches, laying a solid foundation for more complex sewing projects. This section is a cornerstone for building sewing skills.
Using Attachments and Accessories
Understanding how to use attachments and accessories is crucial for maximizing the potential of your vintage Singer sewing machine. The manual provides detailed instructions on installing and operating various attachments, such as buttonholers, rufflers, and quilting feet, which expand the machine’s capabilities. These accessories allow for specialized tasks like creating perfect buttonholes, gathering fabric, or stitching intricate patterns. The Singer Featherweight and other models often come with interchangeable parts, enabling users to adapt their machine for specific projects. The manual also offers guidance on attaching and adjusting these components correctly to ensure optimal performance. By mastering the use of these attachments, sewists can achieve professional-quality results and explore a wider range of creative possibilities. Proper care and storage of these accessories are also emphasized to maintain their functionality and longevity. This section is a valuable resource for both enthusiasts and collectors seeking to unlock their machine’s full potential.
Troubleshooting and Maintenance
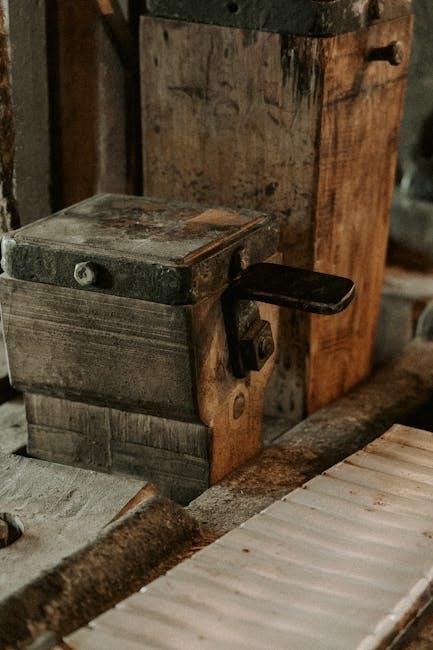
Troubleshooting and maintenance are essential for preserving the functionality of your old Singer sewing machine. Regular oil replacement, thorough cleaning, and checking for loose parts ensure smooth operation and prevent damage. Addressing thread jams, uneven stitching, or unusual noises promptly can extend the machine’s lifespan. The manual provides step-by-step solutions for common issues, guiding users to identify and resolve problems effectively. Proper maintenance not only restores performance but also retains the machine’s vintage charm for future generations of sewists.
Common Issues and Solutions

Old Singer sewing machines, like any vintage appliance, may encounter specific issues that require attention. One common problem is thread jamming, often caused by incorrect threading or tension. To resolve this, refer to the manual’s threading guide and ensure all tension discs are properly adjusted. Another issue is uneven stitching, which can result from a dull needle, incorrect stitch length, or improperly wound bobbins. Regularly cleaning lint and debris from the machine’s interior can prevent such problems. Additionally, mechanical noises may indicate loose parts or lack of lubrication. The manual advises oiling moving components periodically to maintain smooth operation. For persistent issues, consulting the troubleshooting section or seeking professional assistance is recommended. By addressing these common challenges, users can ensure their vintage Singer machine continues to function efficiently and reliably, preserving its operational integrity for years to come.
Regular Maintenance Tips for Longevity
Regular maintenance is crucial to extending the life of your old Singer sewing machine. Start by cleaning the machine thoroughly, removing lint and debris from the bobbin area, tension discs, and stitch plate. Use a soft brush or compressed air for this purpose. Next, lubricate moving parts with high-quality sewing machine oil to ensure smooth operation. Check the needle regularly and replace it if it shows signs of wear, as a dull needle can damage fabric or cause stitching issues. Additionally, inspect the belt and motor for wear and tear, replacing them if necessary. Store the machine in a dry, cool place to prevent rust and corrosion. Refer to the manual for specific maintenance schedules and guidelines tailored to your model. By following these steps, you can preserve the functionality and longevity of your vintage Singer sewing machine, keeping it in excellent working condition for years to come.