Blog

affordable guided elk hunts

Affordable guided elk hunts offer an accessible way for hunters of all levels to experience the thrill of elk hunting with expert guidance, providing essential insights into planning a successful and memorable adventure.

1.1 What Are Affordable Guided Elk Hunts?

Affordable guided elk hunts are cost-effective hunting experiences led by experienced guides, offering hunters access to prime elk habitats and expert strategies. These hunts are designed to balance quality and affordability, catering to hunters with varying budgets. Guides handle logistics, from scouting to equipment, ensuring a structured and successful outing. Whether on public or private land, these hunts provide opportunities to harvest elk while learning from seasoned professionals. They are ideal for both novice and experienced hunters seeking a memorable adventure without excessive costs.

1.2 Why Choose a Guided Elk Hunt?

Guided elk hunts offer unparalleled benefits, including expert knowledge of habitats, proven strategies, and access to prime locations. Guides handle logistics, from scouting to equipment, allowing hunters to focus on the experience. Their expertise increases the likelihood of success, especially for novices. Additionally, guided hunts provide opportunities to learn new skills and gain insights into elk behavior. They also ensure compliance with regulations and promote ethical hunting practices. Whether you’re a seasoned hunter or a first-timer, guided elk hunts enhance the overall adventure and create lasting memories.

1.3 Budget-Friendly Options for Hunters

Budget-friendly options for elk hunters include public land hunts in states like Wyoming and Montana, which offer affordable access to prime elk habitats. DIY hunts can be cost-effective, requiring minimal investment in tags and transportation. Guided hunts, while pricier, often include logistics support and expert guidance, increasing success rates. Seasonal discounts and package deals in Colorado and Idaho further reduce costs. These options cater to hunters of all budgets, ensuring a memorable experience without breaking the bank. Planning ahead and researching cost-effective packages can make elk hunting accessible to everyone.

Top Destinations for Affordable Elk Hunts

Wyoming, Montana, Colorado, and Idaho offer prime elk hunting opportunities with public land access, seasonal discounts, and budget-friendly packages, making them top choices for affordable guided hunts.

2.1 Wyoming: Public Land Opportunities

Wyoming stands out as a prime destination for affordable guided elk hunts due to its vast public lands and abundant elk population. The state offers cost-effective hunting opportunities, particularly for those seeking budget-friendly options. Public land access ensures that hunters can experience high-quality elk hunting without the expense of private land fees. With numerous guided outfitters operating in Wyoming, hunters can choose from a variety of packages tailored to different skill levels and preferences. This makes Wyoming an ideal choice for both novice and experienced hunters looking for an unforgettable elk hunting adventure.

2.2 Montana: Private and Public Land Hunts

Montana offers a mix of private and public land elk hunting opportunities, catering to diverse preferences and budgets. Public lands provide cost-effective options for hunters, while private lands offer exclusive access to prime elk habitats. Guided hunts in Montana are flexible, accommodating both rifle and bow hunters, as well as horseback or backpacking adventures. With its abundant elk population and scenic landscapes, Montana remains a top choice for hunters seeking a balance between affordability and quality. This versatility makes it an ideal destination for both budget-conscious and discerning hunters alike.

2.3 Colorado: Affordable Seasonal Hunts

Colorado is renowned for its abundant elk herds and offers a variety of affordable guided hunts, particularly during the seasonal periods. The state’s public lands provide accessible and cost-effective opportunities for hunters, while private land options ensure a more personalized experience. With a range of packages available, hunters can choose from archery, muzzleloader, or rifle hunts, tailored to their skill level and budget. Colorado’s elk hunting seasons are structured to maximize success rates, making it a prime destination for those seeking a memorable and affordable elk hunting adventure.

2.4 Idaho: Budget-Friendly Elk Hunting

Idaho offers some of the most budget-friendly elk hunting opportunities in the West, with its vast public lands and abundant elk herds. The state provides affordable guided hunts that cater to all skill levels, from novice to experienced hunters. With a variety of terrain, including dense forests and mountainous regions, Idaho ensures a challenging yet rewarding experience. Public land access and flexible season dates make it an ideal choice for those seeking cost-effective elk hunting adventures without sacrificing quality or excitement.

Understanding the Costs

Affordable guided elk hunts vary in price, depending on location, services, and duration. Understanding these costs helps hunters plan effectively and make informed decisions.

3.1 Breaking Down the Expenses

Affordable guided elk hunts involve various costs, including tags, transportation, and guide fees. Prices often range from $1,000 to $5,000, depending on location and services. DIY hunts may seem cheaper but require significant upfront investment in gear and planning; Guided hunts, while costing more, offer expertise, pre-scouted locations, and equipment, making them a budget-friendly option for many. Understanding these expenses helps hunters allocate resources effectively and choose the best option for their needs and budget.

3.2 Comparing DIY vs. Guided Hunts

When considering affordable guided elk hunts, hunters often weigh DIY against guided options. DIY hunts require significant planning, gear investment, and knowledge of elk behavior and habitats, making them challenging for newcomers. Guided hunts offer expert guidance, pre-scouted locations, and shared equipment costs, enhancing success rates and reducing stress. While DIY can be cost-effective for experienced hunters, guided hunts provide value through convenience and increased odds of success, making them a worthwhile investment for many, especially those new to elk hunting or unfamiliar with the terrain.

3.3 The Value of Guided Hunts

Affordable guided elk hunts provide exceptional value by combining expert knowledge, pre-scouted locations, and shared resources. Experienced guides enhance success rates and offer insights into elk behavior and habitats, making the hunt more efficient. These hunts minimize the need for personal gear investment and logistical planning, allowing hunters to focus on the experience. The convenience and higher likelihood of success make guided hunts a cost-effective and enjoyable option for those seeking a memorable elk hunting adventure without the hassle of DIY arrangements.

Choosing the Right Outfitter

Researching reputable outfitters involves checking reviews, ensuring proper licensing, and comparing package inclusions to align with your budget and hunting goals effectively.

4.1 Research and Reviews

Researching and reading reviews is crucial when selecting an outfitter for your elk hunt. Start by checking online reviews and testimonials from previous clients to gauge satisfaction levels. Look for outfitters with consistent positive feedback regarding guide expertise, camp conditions, and overall experience. Additionally, ask for references and contact past hunters to gain firsthand insights. Ensure the outfitter is properly licensed and insured, as this ensures legitimacy and safety. Comparing packages and services from multiple outfitters can also help you find the best fit for your budget and hunting style. Clear communication with the outfitter about your expectations is key to a successful hunt.

4.2 What to Look for in a Guided Hunt Package

When selecting a guided elk hunt package, look for clear descriptions of services, including meals, lodging, and gear. Ensure the package aligns with your budget and hunting style. Check if the outfitter offers options for rifle or archery hunts and whether they cater to different skill levels. Verify if the package includes transportation to and from hunting locations. Additionally, inquire about the guide-to-hunter ratio, as smaller groups often enhance the hunting experience. Transparent pricing and a detailed itinerary are essential to avoid surprises. Finally, confirm that the package meets all legal requirements and includes necessary permits.

4.3 Ensuring a Reputable Guide Service

To ensure a reputable guide service, research thoroughly by reading reviews and asking for references. Verify that the outfitter is licensed and insured, with experienced guides familiar with the terrain. Check their success rates and ask about their hunting philosophy. Transparent communication about the hunt’s details, including gear, meals, and accommodations, is crucial. Ensure the service adheres to ethical hunting practices and local regulations. A clear contract outlining expectations and costs will help avoid misunderstandings. Prioritize outfitters with a proven track record of customer satisfaction and adherence to safety standards.

Preparing for Your Hunt

Preparing for your elk hunt involves physical conditioning, gathering essential gear, understanding elk behavior, and ensuring all legal requirements are met for a safe and successful experience.

5.1 Physical Conditioning and Gear

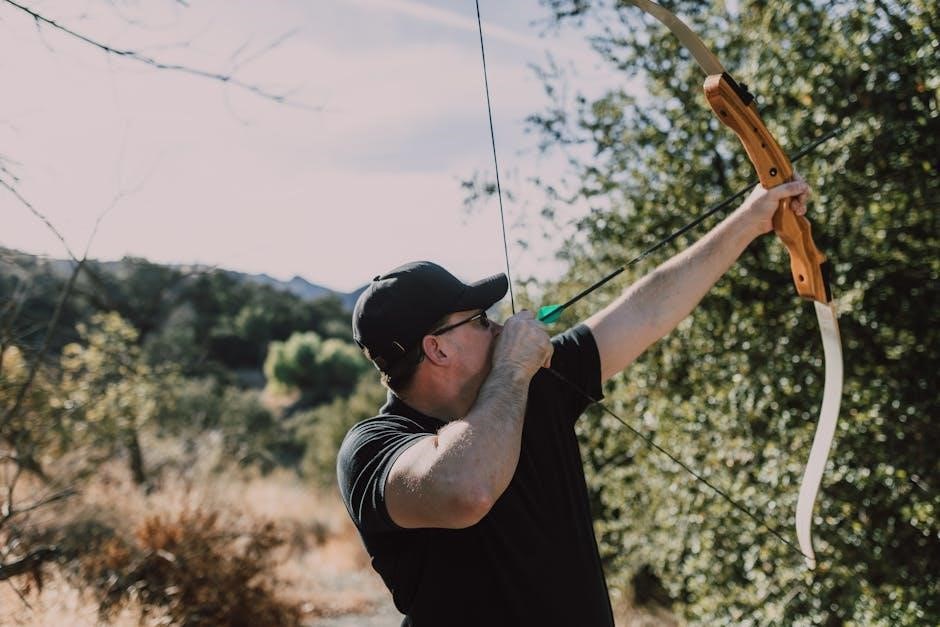
Physical conditioning is crucial for elk hunting, as it often involves hiking long distances in rugged terrain. Start training months in advance to build endurance and strength. Essential gear includes sturdy, waterproof boots, layered clothing for varying temperatures, and a reliable backpack. Opt for high-quality optics like binoculars and a spotting scope to locate elk effectively. Ensure your firearm or archery equipment is in excellent condition and practice marksmanship. While some outfitters provide gear, it’s wise to bring personal items like a first-aid kit and navigation tools. Proper preparation enhances both safety and success.

5.2 Understanding Elk Behavior and Habitat

Elk are active during early mornings and late evenings, often resting in shaded areas during the day. They thrive in mountainous regions with dense forests and open meadows. Understanding their habitat and seasonal movements is key to tracking them effectively. Elk typically prefer areas with abundant food sources, such as grasses and shrubs, and access to water. Recognizing signs like rubs, tracks, and wallows can help locate elk. This knowledge enhances hunting strategies and increases the likelihood of a successful hunt, especially in vast wilderness areas.

5.3 Legal Requirements and Licenses

Elk hunting requires specific licenses and permits, which vary by state and residency. DIY hunts often involve lower costs, with Wyoming’s DIY elk license priced around $1,000, while guided hunts may incur additional fees. Applications for elk tags typically open in early spring, with deadlines in February or March. Some states use a limited-entry system, requiring hunters to apply for permits through a lottery. Understanding state-specific regulations is crucial to ensure compliance. Always verify requirements before planning your hunt, as penalties for non-compliance can be severe. Consulting with an outfitter can also help streamline the licensing process.

Tips for a Successful Hunt

Effective communication with guides, staying adaptable to changing conditions, and practicing ethical hunting ensure a rewarding and memorable elk hunting experience while respecting wildlife and nature.

6.1 Communication with Your Guide

Clear communication with your guide is crucial for a successful elk hunt. Discuss your goals, physical limitations, and preferences beforehand to ensure a tailored experience. Be honest about your shooting skills and hunting knowledge to help the guide adapt strategies. Ask questions about terrain, elk behavior, and equipment to stay informed. Open dialogue fosters trust and ensures both parties are aligned, maximizing the chances of a safe and rewarding hunt. Effective communication enhances the overall experience and helps achieve your hunting objectives.

6.2 Staying Flexible and Adaptable

Elk hunting conditions can change rapidly, making flexibility essential for success. Weather, terrain, and elk behavior are unpredictable, so hunters must remain adaptable. Be prepared to adjust strategies based on the guide’s expertise and evolving circumstances. Trusting your guide’s instincts and staying open to plan changes can lead to better outcomes. Flexibility also means being ready to hike longer distances or shift hunting locations. A positive attitude and willingness to adapt will enhance your overall experience and increase chances of a successful hunt.

6.3 Ethical Hunting Practices

Ethical hunting practices are crucial for maintaining the integrity of elk hunting. Hunters should prioritize fair chase, ensuring elk have a reasonable chance to escape. Respect the animal by making clean, humane shots and minimizing waste. Follow all local regulations and obtain necessary permits to ensure sustainable hunting practices. Avoid actions that disrupt elk habitats or other wildlife. Ethical hunting fosters respect for nature, promotes conservation, and preserves the sport for future generations. Always adhere to safety guidelines and treat the environment with care to uphold hunting’s reputation as a responsible activity.

Affordable guided elk hunts offer a memorable experience, combining expert guidance with budget-friendly options, ensuring a successful and enjoyable adventure for hunters of all skill levels.

7.1 Final Thoughts on Affordable Guided Elk Hunts

Affordable guided elk hunts provide a cost-effective way to immerse yourself in the thrilling world of elk hunting, offering expert guidance and unforgettable experiences. Whether you’re a novice or an experienced hunter, these hunts ensure access to prime locations and skilled outfitters. They strike a balance between affordability and quality, making elk hunting accessible without compromising on the adventure. With proper planning and research, hunters can enjoy a memorable and successful elk hunt, creating lifelong memories in stunning natural landscapes.

7.2 Encouragement to Plan Your Hunt

Planning your affordable guided elk hunt is a crucial step toward a successful and enjoyable experience. Start by researching reputable outfitters, comparing packages, and understanding the costs involved. Ensure you meet all legal requirements and obtain necessary licenses. Physical conditioning and gear preparation are essential for the challenging terrain and unpredictable weather. Staying flexible and adaptable during the hunt increases your chances of success. Embrace ethical hunting practices and communicate openly with your guide to maximize your adventure. With dedication and the right preparation, your elk hunt will be a memorable and rewarding journey.

feel the fear do it anyway pdf

“Feel the Fear and Do It Anyway” by Susan Jeffers is a transformative guide empowering readers to confront and overcome fear. Published in the 1980s, it has inspired millions to embrace uncertainty and take bold action, offering practical advice and mindset shifts to achieve personal growth and success.

Overview of the Book and Its Significance

“Feel the Fear and Do It Anyway” by Susan Jeffers is a self-help classic that has empowered millions since its publication in the 1980s. The book addresses the universal challenge of fear, offering practical advice and mindset shifts to help readers overcome it. Its significance lies in its ability to resonate with people from all walks of life, providing tools to transform fear into action. With over two million copies sold, it remains a cornerstone of personal development literature, helping individuals break free from fear’s grip and embrace uncertainty with confidence.

The Core Premise: Facing Fear to Achieve Success

At its heart, “Feel the Fear and Do It Anyway” advocates for confronting fear head-on as a pathway to success. Susan Jeffers argues that fear is a natural and inevitable part of life but should not paralyze individuals from taking action. The book emphasizes that acknowledging and accepting fear, rather than avoiding it, is the first step toward overcoming it. By gradually exposing oneself to feared situations and building self-trust, readers can diminish anxiety and unlock their potential. This premise has resonated widely, making the book a timeless resource for personal and professional growth.

Understanding Fear and Its Impact

Fear is a natural emotion that often prevents individuals from taking action, creating barriers to personal and professional growth. It stems from perceived threats or uncertainties.

What We Fear and Why

Fear often stems from the unknown, loss, or failure, creating barriers to growth. People commonly fear losing health, relationships, or jobs, as well as making key decisions or being judged publicly. These fears are deeply rooted in the desire for security and control, often amplifying perceived threats. By understanding the sources of fear, individuals can begin to address and overcome them, fostering personal and professional development.

The Psychological and Emotional Toll of Fear

Fear can create profound psychological and emotional challenges, often leading to anxiety, self-doubt, and a sense of being stuck. It fosters feelings of isolation and prevents individuals from pursuing their goals, causing frustration and dissatisfaction. Fear can also trigger procrastination and avoidance behaviors, further exacerbating emotional distress. By understanding the emotional toll of fear, readers can begin to address these patterns and move toward a more empowered mindset. The book emphasizes that acknowledging fear is the first step to breaking free from its limiting effects.

Key Concepts from the Book

The book emphasizes acknowledging and embracing fear, then taking action despite it, promoting mindset shifts to overcome fear and achieve personal growth effectively.

The Power of Acknowledging and Embracing Fear

Acknowledging and embracing fear is a cornerstone of Susan Jeffers’ approach, empowering individuals to accept fear as a natural emotion rather than resisting it. By confronting fear directly, readers learn to diminish its impact and build confidence. The book teaches that avoidance perpetuates fear, while facing it head-on leads to personal growth. Jeffers emphasizes that fear is not an enemy but a signal to take action, fostering a mindset of resilience and self-trust. This concept is central to overcoming obstacles and achieving success in both personal and professional realms, as highlighted in the book.

Mindset Shifts for Overcoming Fear

Susan Jeffers introduces powerful mindset shifts to help readers reframe fear as a catalyst for growth. By embracing uncertainty and shifting focus from fear to action, individuals can build self-trust and confidence. The book encourages readers to adopt a proactive approach, viewing fear as a natural emotion rather than a barrier. Jeffers emphasizes the importance of changing one’s perspective, moving from a fear-based mindset to one of empowerment and resilience. These mindset shifts enable readers to take control of their lives, turning fear into a motivator for achieving their goals and living more fulfilling lives.

Practical Techniques to Overcome Fear

The book offers actionable strategies like gradual exposure and building familiarity to reduce fear. Techniques focus on taking consistent action despite fear, empowering readers to manage anxiety effectively.

Practical Strategies for Taking Action Despite Fear

“Feel the Fear and Do It Anyway” provides actionable steps to move past fear, emphasizing gradual exposure and mindset shifts. Susan Jeffers suggests creating an “action plan” to tackle fears systematically, encouraging small, manageable steps. She also advocates for building self-trust by focusing on past successes and recognizing personal resilience. Techniques include reframing fear as excitement and developing a growth mindset. By taking consistent action, individuals can diminish anxiety and build confidence, proving that fear does not have to be a barrier to progress. These strategies empower readers to embrace uncertainty and pursue their goals fearlessly.

Building Self-Trust and Confidence

Building self-trust and confidence is a cornerstone of overcoming fear, as emphasized in “Feel the Fear and Do It Anyway.” Susan Jeffers encourages readers to focus on their past successes, no matter how small, to foster a sense of self-reliance. By acknowledging and celebrating these achievements, individuals can strengthen their belief in their ability to handle challenges. Self-trust grows through consistent action, even in the face of fear, allowing confidence to flourish naturally. This process empowers readers to view uncertainty as an opportunity for growth rather than a source of paralysis, leading to a more fulfilling life.

Real-Life Applications of the Book’s Principles

The book’s principles inspire readers to apply fearless attitudes in daily life, fostering confidence in personal and professional decisions, and encouraging bold action despite uncertainty or challenges.

Overcoming Fears in Personal Relationships

Susan Jeffers’ book helps individuals confront fears in personal relationships, such as fear of rejection or losing loved ones. By embracing fear and taking action, readers can express emotions openly, address conflicts, and build trust. The principles encourage vulnerability and honest communication, fostering deeper connections. Overcoming these fears leads to stronger, more authentic relationships, empowering individuals to navigate challenges with confidence and emotional resilience. The book’s strategies provide a roadmap to transform fear into opportunities for growth and intimacy.

Applying the Concepts in Professional Settings

Susan Jeffers’ principles can be effectively applied in professional environments to overcome fears such as public speaking, leadership challenges, or decision-making anxieties. By acknowledging and embracing fear, individuals can take bold steps to pursue career goals, improve communication, and build confidence. The book encourages professionals to reframe fear as a natural part of growth, fostering resilience and adaptability. These strategies help individuals navigate workplace uncertainties, leading to greater success and personal fulfillment. Applying these concepts can transform professional relationships and opportunities, empowering individuals to thrive in their careers.

The Role of Exposure in Reducing Fear

Exposure plays a crucial role in diminishing fear by gradually familiarizing individuals with the source of their anxiety, helping them build confidence and mastery over time effectively.

How Gradual Exposure Helps in Overcoming Phobias

Gradual exposure is a powerful technique that helps individuals overcome phobias by incrementally confronting the source of fear in a controlled and manageable way. By slowly introducing the feared object or situation, the brain becomes desensitized to the associated anxiety, reducing the intensity of the fear response over time. This approach, championed by Susan Jeffers, fosters confidence and mastery, enabling individuals to handle previously daunting challenges with greater ease. The process emphasizes building familiarity and trust, which are essential for long-term emotional resilience and personal growth.

Building Familiarity to Diminish Anxiety

Building familiarity is a cornerstone of overcoming anxiety, as repeated exposure to feared situations gradually reduces their intimidating nature. By engaging with the source of fear in a structured and positive way, individuals create a sense of comfort and normalcy. This process, emphasized in “Feel the Fear and Do It Anyway,” helps diminish anxiety by replacing uncertainty with confidence. Over time, the brain associates the once-feared stimulus with safety, fostering emotional resilience and empowering individuals to navigate challenges with greater ease and self-assuredness.

Success Stories and Testimonials

Success Stories and Testimonials highlight how readers have transformed their lives by applying the book’s principles. Many share inspiring journeys of overcoming fear, achieving personal growth, and gaining confidence to pursue their goals, proving the book’s timeless impact on empowerment and self-improvement.

Real-Life Examples of People Who Have Benefited

Many individuals have shared transformative experiences after applying the principles from “Feel the Fear and Do It Anyway.” One reader overcame a deep fear of public speaking, becoming a confident presenter. Another left a stagnant career to pursue a passion, finding fulfillment. The book’s techniques helped a entrepreneur tackle fear of failure, launching a successful business. Countless testimonials highlight how embracing fear and taking action led to profound personal and professional growth, proving the book’s timeless relevance and powerful impact on lives worldwide.

Transformative Outcomes from Applying the Book’s Teachings

Readers of “Feel the Fear and Do It Anyway” often report profound shifts in mindset and behavior. By embracing fear and taking consistent action, many have achieved significant personal and professional breakthroughs. The book’s teachings have empowered individuals to pursue long-held dreams, build resilience, and cultivate self-trust. Whether it’s starting a new business, improving relationships, or overcoming phobias, the principles guide readers toward transformative outcomes. Susan Jeffers’ approach has inspired countless individuals to move beyond fear and live more fulfilling lives, proving the book’s enduring impact.

“Feel the Fear and Do It Anyway” remains a cornerstone of self-help, inspiring resilience and bold action. Its timeless message continues to transform lives globally, proving its lasting, profound impact on personal development and empowerment.

The Impact of “Feel the Fear and Do It Anyway” on Self-Help Literature

“Feel the Fear and Do It Anyway” has left an indelible mark on self-help literature, empowering millions since its publication in the 1980s. By emphasizing actionable strategies and mindset shifts, it revolutionized the approach to overcoming fear and achieving success. Its practical advice and empathetic tone have made it a cornerstone of personal development, influencing countless authors and readers alike. The book’s enduring popularity underscores its transformative power, solidifying its place as a timeless classic in the self-help genre.

Encouraging Readers to Take Action and Embrace Uncertainty

“Feel the Fear and Do It Anyway” motivates readers to step beyond their comfort zones, even when fear is present. By emphasizing self-trust and confidence, the book inspires individuals to act despite uncertainty. Its message of empowerment encourages readers to view challenges as opportunities for growth, fostering resilience and a proactive mindset. This approach has resonated with millions, helping them overcome paralysis and embrace life’s possibilities with courage and determination. The book’s call to action remains a powerful catalyst for personal transformation and lasting change.

meat buyers guide

Understanding Different Types of Meat

Exploring the variety of meats, including beef, pork, poultry, lamb, and veal, helps buyers make informed decisions based on cuts, quality, and nutritional value.

Beef: Cuts and Grades

Beef is categorized into primal cuts, such as chuck, rib, loin, and round, each offering unique qualities for various cooking methods. The USDA grading system evaluates beef based on marbling, maturity, and muscling, with grades like Prime, Choice, and Select. Prime beef, known for its abundant marbling, is tender and flavorful, while Choice and Select are leaner. Popular cuts include ribeye, sirloin, and brisket. Understanding these distinctions helps buyers choose the right cut for their needs, ensuring optimal taste and texture in dishes.

Pork: Popular Cuts and Quality Standards

Pork offers a wide variety of cuts, including pork loin, ribs, bacon, and ham, each suited for different cooking techniques. Quality standards focus on marbling, tenderness, and juiciness. The USDA grades pork as USDA Prime, Choice, or Standard, ensuring lean and flavorful meat. Popular cuts like tenderloin and shoulder are versatile for roasting or slow-cooking. Buyers can rely on these standards to select the best pork for their culinary needs, ensuring delicious and satisfying meals.

Poultry: Chicken, Turkey, and Duck Varieties

Poultry offers a diverse range of options, with chicken being the most popular for its versatility in cooking. Turkey is favored for its lean meat and is often roasted whole. Duck, known for its rich flavor, is ideal for roasting or making confit. Buyers can choose from a variety of cuts, such as chicken breasts, thighs, or wings, and turkey slices or ground meat. Quality standards ensure freshness and safety, with labels like “free-range” or “organic” guiding ethical choices. Understanding these varieties helps consumers select the best poultry for their recipes and preferences.

Lamb and Veal: Unique Characteristics and Cuts

Lamb and veal offer distinct flavors and textures, making them popular choices for special occasions. Lamb is known for its robust, gamey taste and tender cuts like rack of lamb and leg; Veal, from young calves, is prized for its delicate flavor and soft texture, with popular cuts such as veal chops and scallopini. Both meats are versatile, suitable for roasting, grilling, or sautéing. Buyers should consider ethical sourcing and quality grades, ensuring they choose products from humanely raised animals. These meats add sophistication and variety to any meal, making them a great addition to a meat buyer’s guide.

Key Factors to Consider When Buying Meat

When purchasing meat, focus on origin, feed type, and certifications to ensure quality and ethical standards, while also considering personal preferences and budget constraints effectively.

Grass-Fed vs; Grain-Fed: What’s the Difference?

Grass-fed meats come from animals raised on pasture, offering leaner cuts with higher omega-3s and antioxidants. Grain-fed meats, often from feedlots, tend to be fattier and more tender, with higher marbling. Grass-fed options are typically more expensive and may have a stronger, earthier flavor, while grain-fed meats are milder and richer. Certifications like “USDA Grass Fed” ensure adherence to feeding standards, helping buyers make informed choices based on taste preferences, nutritional goals, and ethical considerations.

Organic vs. Conventional: Understanding Labels

Organic meats are produced without antibiotics, hormones, or pesticides, adhering to strict USDA standards. Conventional meats may use these additives, offering more affordable options. Labels like “Organic” ensure animals have access to pasture and organic feed, while “Conventional” has no such requirements. Buyer preferences often hinge on health concerns, environmental impact, and budget. Understanding these labels helps consumers align choices with their values and priorities, ensuring transparency in meat production and purchasing decisions.

Wagyu Beef: Why It’s Special and How to Choose

Wagyu beef is renowned for its exceptional marbling, which creates a tender, juicy texture and rich, umami flavor. The unique genetics of Wagyu cattle result in higher intramuscular fat, enhancing taste and tenderness. When selecting, look for certifications like “100% Wagyu” or “Wagyu Cross” to ensure authenticity. Marbling score (e.g., BMS 6-12) indicates fat quality; higher scores mean richer flavor. Origin matters too, with Japanese Wagyu being the most sought after. For the best value, opt for cuts like ribeye or striploin, and ensure the seller provides transparency about the beef’s sourcing and grading. This luxury meat is worth the investment for its unparalleled quality;

Meat Cutting and Aging Techniques

Meat cutting involves precision to enhance flavor and texture, while aging processes like dry-aging concentrate flavors and tenderize the meat, improving overall quality and dining experience.

Popular Cuts of Beef: Ribeye, Sirloin, and More

Beef offers a wide variety of cuts, each with unique qualities. Ribeye, known for its rich marbling, delivers tender, flavorful steaks. Sirloin cuts, such as top sirloin, are lean yet juicy, offering robust beef flavor. Filet mignon, from the tenderloin, is prized for its buttery texture and mild taste. Brisket, often slow-cooked, becomes tender and flavorful. Understanding these cuts helps buyers choose the right option for their cooking needs, ensuring optimal taste and texture in every dish.

Dry-Aged vs. Wet-Aged Beef: Taste and Texture

Dry-aged beef undergoes a natural dehydration process, concentrating flavors and developing a robust, umami taste with a tender yet firm texture. Wet-aged beef, stored in vacuum-sealed bags, retains moisture, resulting in a milder flavor and softer texture. Dry-aging enhances marbling, creating a more complex profile, while wet-aging preserves juiciness. Buyers choose based on desired taste: dry-aged for richness and wet-aged for versatility in cooking, ensuring the best culinary experience tailored to their preferences.

Labeling and Certifications

Understanding labels like “grass-fed” and “organic” helps buyers make informed choices, ensuring meat aligns with quality, safety, and ethical standards, while certifications verify production practices and authenticity.

Decoding Labels: Free-Range, Cage-Free, and Hormone-Free

Free-range, cage-free, and hormone-free labels provide insight into animal rearing practices. Free-range indicates animals have outdoor access, while cage-free means they aren’t confined to cages. Hormone-free suggests no added hormones were used during raising. These labels, often verified by certifications like USDA or third-party organizations, help consumers align purchases with ethical and health preferences. Understanding these terms aids in making informed decisions about meat quality, animal welfare, and environmental impact, ensuring transparency in the production process.

USDA Ratings and Certifications: What They Mean

USDA ratings and certifications provide standards for meat quality and production practices. Prime, Choice, and Standard grades indicate marbling, tenderness, and flavor. Certifications like USDA Organic ensure no synthetic additives or hormones are used. These labels guide consumers in selecting products that meet specific quality and ethical standards, ensuring transparency and consistency in the meat industry. Understanding these ratings helps buyers make informed choices aligned with their preferences and dietary needs.

Ethical and Sustainable Meat Buying

Ethical and sustainable meat buying focuses on animal welfare, eco-friendly practices, and fair labor standards, ensuring responsible sourcing and reducing environmental impact for conscious consumers.

Animal Welfare: Choosing Ethically Raised Meat

Choosing ethically raised meat involves selecting products from farms that prioritize animal welfare, ensuring animals are treated humanely and raised in better living conditions. Certifications like “Certified Humane” or “Animal Welfare Approved” help identify such products. Ethical practices include access to pasture, no confinement, and avoidance of antibiotics or hormones. Supporting these farms promotes better treatment of animals, reduces environmental impact, and often results in higher-quality meat. Consumers can check labels, research farms, and buy from transparent sources to make informed, ethical choices. This approach aligns with sustainable and responsible meat production practices.

Sustainable Practices: Eco-Friendly Meat Production

Sustainable meat production focuses on eco-friendly farming methods that minimize environmental impact. Practices like rotational grazing and regenerative agriculture improve soil health and reduce greenhouse gas emissions. Producers prioritize water conservation and feed efficiency, ensuring resources are used responsibly. Certifications like “Certified Sustainable” or “Regenerative Farming” help buyers identify eco-friendly products. Sustainable practices also promote biodiversity and reduce reliance on chemical inputs. By supporting these methods, consumers contribute to healthier ecosystems and a more resilient food system. Eco-conscious meat production ensures long-term environmental benefits while maintaining high-quality meat standards. This approach aligns with global efforts to combat climate change and promote sustainable agriculture.

Price and Value

Understanding meat pricing helps buyers make informed decisions. Factors like quality, cut, and origin impact cost. Tips include comparing prices, buying in bulk, and seeking value-added options to maximize savings without sacrificing quality.

Understanding Meat Pricing: What Affects Cost?

Meat pricing is influenced by several factors, including quality grades, cuts, and production methods. Grass-fed and organic options tend to be more expensive due to higher production costs. Market demand, supply chain efficiency, and certifications like USDA ratings also play a role. Additionally, the origin and breed of the animal can impact price. Understanding these factors helps buyers make informed decisions and identify value for money. By considering these elements, consumers can balance cost and quality effectively when purchasing meat.

Getting the Best Value: Tips for Buyers

To maximize value, buyers should understand the relationship between quality and cost. Purchasing in bulk or opting for larger cuts can often reduce the price per pound. Considering value-added products, like pre-marinated meats, can also enhance convenience without significant cost increases. Additionally, exploring less popular cuts or seasonal specials can offer savings while maintaining quality. Using resources like the Meat Buyers Guide helps identify optimal choices, ensuring buyers get the best value for their money while meeting their needs.

Storage and Handling

Proper storage and handling are crucial for maintaining meat quality. Always refrigerate at 40°F or below, store in airtight containers, and freeze if not using within a few days.

How to Store Meat for Maximum Freshness

To maintain meat freshness, store it in the refrigerator at 40°F or below. Use airtight containers or zip-top bags to prevent moisture and contamination. For ground meats, store up to 1-2 days in the fridge or 3-4 months in the freezer. Steaks and roasts can be refrigerated for 3-5 days or frozen for 6-12 months. Always check packaging for tears or leaks before storing. Freezing preserves quality longer, but ensure proper wrapping to avoid freezer burn. Thaw frozen meat slowly in the fridge or under cold running water for food safety.

Proper Handling to Maintain Quality

Proper handling is crucial for maintaining meat quality. Always wear clean gloves and use sanitized utensils when handling raw meat to prevent cross-contamination. Separate raw meats from ready-to-eat foods to avoid bacterial spread. Pat meat dry with paper towels before cooking to ensure even searing. Never rinse raw meat under water, as this can splash bacteria. Store meats in sealed containers at appropriate temperatures to maintain freshness. Handle ground meats gently to avoid compacting, which can affect texture. By following these steps, you preserve flavor, texture, and safety of your meats during preparation and cooking.

instructions for orbit water timer

The Orbit Water Timer is an innovative irrigation solution designed to simplify watering schedules for lawns and gardens. Its digital display and intuitive navigation make programming easy, ensuring optimal watering times and durations. With features like multiple outlet programming and manual override, it offers flexibility and efficiency, helping conserve water while maintaining healthy plants. This timer is a practical tool for homeowners seeking to automate their watering systems effectively.

Overview of the Orbit Water Timer

The Orbit Water Timer is a digital irrigation controller designed to manage and automate watering schedules for lawns and gardens efficiently. It features an easy-to-read LCD display and intuitive navigation, allowing users to set specific watering times and durations. This device is ideal for homeowners and gardeners who want to ensure their plants receive the right amount of water without constant supervision. By automating the watering process, it helps conserve water and promotes healthy plant growth. The timer’s flexible programming options, including multiple outlet controls and manual override capabilities, make it adaptable to different watering needs, ensuring optimal care for various types of plants and soil conditions.

Importance of Proper Watering Schedules

Proper watering schedules are essential for maintaining healthy plants and optimizing water usage. Overwatering can lead to root rot, nutrient depletion, and wasted resources, while underwatering may cause plant stress and stunted growth. A well-planned schedule ensures plants receive the right amount of moisture at the optimal time, promoting robust growth and reducing the risk of disease. Additionally, consistent watering helps maintain soil structure and prevents erosion. By automating these schedules with tools like the Orbit Water Timer, homeowners can achieve a balanced watering routine without constant manual intervention. This not only saves time but also contributes to water conservation, making it a sustainable and practical solution for garden and lawn care.

Understanding the Orbit Water Timer Features

Proper watering schedules are crucial for plant health and water conservation. Overwatering can lead to root rot and nutrient loss, while underwatering causes stress. Timely watering promotes growth, prevents disease, and maintains soil quality. The Orbit Water Timer helps create balanced schedules, ensuring plants thrive without waste.

Digital Display and Navigation

The Orbit Water Timer features a user-friendly digital display and intuitive navigation system. Its LCD screen is easy to read, ensuring that your watering schedule is clear and accessible. The

Multiple Outlet Programming Options

The Orbit Water Timer offers multiple outlet programming options, allowing users to manage different zones or areas of their garden independently. This feature ensures that each section of your lawn or plants receives the exact amount of water needed, optimizing efficiency. You can program each outlet with specific start times, duration, and frequency, tailoring the watering schedule to the unique requirements of each area. This flexibility is particularly useful for larger gardens or yards with varying soil types and plant needs. By customizing each outlet, you can avoid overwatering or underwatering, promoting healthier growth and conserving water. This feature makes the Orbit Water Timer a versatile and practical solution for homeowners seeking precise control over their irrigation system.

Watering Duration and Frequency Settings

The Orbit Water Timer allows users to set precise watering duration and frequency settings, ensuring plants receive the right amount of water at the right time. This feature helps prevent overwatering or underwatering, promoting healthy plant growth. You can customize the watering duration from minutes to hours and set the frequency to water daily, every few days, or according to seasonal needs. This flexibility is ideal for accommodating different soil types, plant species, and weather conditions. By adjusting these settings, you can optimize water usage and maintain a lush, thriving garden. The timer’s intuitive interface makes it easy to fine-tune these settings, ensuring your irrigation system works efficiently and effectively throughout the year.

Installation and Setup

Installing the Orbit Water Timer involves connecting it to your watering system and mounting the timer box securely. Power it on and complete basic configuration for initial setup.

Connecting the Timer to Your Watering System

Connecting the Orbit Water Timer to your irrigation system is straightforward. Begin by ensuring the main water supply is turned off to avoid any leaks or damage. Locate the appropriate connection points on your existing watering system, typically near the solenoid valves. Attach the timer’s inlet and outlet hoses securely, making sure they are compatible in size and thread type. Tighten all connections firmly but avoid overtightening, which could damage the threads. Once connected, turn the water supply back on slowly to check for leaks around the connections. If everything is secure, the timer is ready to be mounted and programmed according to your watering schedule needs.

Mounting the Timer Box

Mounting the Orbit Water Timer box securely is essential for reliable operation. Choose a flat, level surface near your watering system, ensuring easy access for programming. Use the included screws or compatible fasteners to attach the timer box to a wall or sturdy post. Make sure the surface is clean and dry to prevent any damage or slipping. If mounting outdoors, select a weather-resistant location to protect the timer from direct sunlight, rain, or extreme temperatures. Double-check that the timer is level and firmly secured to avoid vibrations or movement during operation. Proper mounting ensures the timer functions accurately and remains durable over time, providing consistent watering schedules for your lawn or garden.

Initial Power-On and Basic Configuration

Upon initial power-on, the Orbit Water Timer will prompt you to set the clock and date. Use the navigation buttons to adjust these settings accurately. Next, configure the basic watering parameters, such as the time zone and unit of measurement (e.g., gallons or liters). Refer to the manual or quick start guide for specific instructions tailored to your model. Ensure the timer is properly connected to your watering system before proceeding. Once the basic configuration is complete, test the system by running a manual cycle to verify all outlets are functioning correctly. This initial setup ensures smooth operation and prepares the timer to handle more complex scheduling tasks. Proper configuration is crucial for reliable performance and water efficiency.

Programming the Orbit Water Timer

Program the timer by setting the clock, creating custom schedules, and adjusting watering duration and frequency. Use the digital display to navigate and confirm settings easily. Manual override is also available for quick adjustments. This ensures precise control over watering cycles, optimizing water usage and plant care. The intuitive interface makes scheduling straightforward and efficient. Proper programming is essential for maintaining healthy plants and conserving water. Follow the on-screen instructions or refer to the manual for detailed guidance. The timer’s flexibility allows customization to meet specific lawn and garden needs. Ensure all settings are saved to maintain consistent watering schedules. Regular updates may be needed to adapt to seasonal changes. The Orbit Water Timer is designed to simplify and enhance your watering routine. By programming it correctly, you can achieve optimal results with minimal effort. The system’s reliability ensures consistent performance, making it a valuable tool for homeowners. Adjustments can be made at any time to accommodate changing conditions. The timer’s advanced features provide a seamless user experience. Programming the Orbit Water Timer is a key step in managing your irrigation system effectively. It allows for precise control over when and how much water is used. Custom schedules can be tailored to specific plants or zones. The timer’s programming capabilities ensure efficient water distribution. This feature-rich device is designed to make watering easier and more efficient. By following the programming steps, you can create a schedule that works best for your garden. The Orbit Water Timer’s programming options are user-friendly and adaptable to various needs. Proper programming ensures that your plants receive the right amount of water at the right time. The timer’s scheduling system is both flexible and reliable. Programming the Orbit Water Timer is a straightforward process that enhances your watering routine. It offers a balance of convenience and control, making it an ideal solution for home irrigation. The timer’s programming features are designed to optimize water usage and promote healthy plant growth. By investing time in proper programming, you can enjoy a well-maintained lawn and garden with minimal effort. The Orbit Water Timer’s programming capabilities make it a versatile tool for modern gardening needs. With its advanced scheduling options, it adapts to different watering requirements. Programming the timer is a simple yet effective way to manage your irrigation system. It ensures that your plants receive consistent care, even when you’re not available. The Orbit Water Timer’s programming features are designed to simplify your watering routine while providing optimal results. By following the programming guidelines, you can maximize the timer’s potential and enjoy a lush, healthy garden. The timer’s programming options are both practical and efficient, making it a valuable addition to any irrigation system. Programming the Orbit Water Timer is an essential step in achieving a perfectly watered lawn and garden. It offers the flexibility to customize watering schedules based on specific needs. The timer’s programming capabilities ensure that your plants receive the right amount of water at the optimal time. By programming the Orbit Water Timer correctly, you can enjoy a well-maintained garden with minimal effort. The timer’s scheduling system is both intuitive and reliable, making it easy to manage your irrigation needs. Programming the Orbit Water Timer is a key part of setting up an efficient and effective watering system. It allows for precise control over watering cycles, ensuring that your plants thrive. The timer’s programming features are designed to optimize water usage and promote healthy plant growth. By taking the time to program the timer correctly, you can enjoy a lush, vibrant garden. The Orbit Water Timer’s programming capabilities make it a versatile and practical tool for modern gardening. With its advanced scheduling options, it adapts to different watering requirements. Programming the timer is a simple yet effective way to manage your irrigation system. It ensures that your plants receive consistent care, even when you’re not available. The Orbit Water Timer’s programming features are designed to simplify your watering routine while providing optimal results. By following the programming guidelines, you can maximize the timer’s potential and enjoy a lush, healthy garden. The timer’s programming options are both practical and efficient, making it a valuable addition to any irrigation system. Programming the Orbit Water Timer is an essential step in achieving a perfectly watered lawn and garden. It offers the flexibility to customize watering schedules based on specific needs. The timer’s programming capabilities ensure that your plants receive the right amount of water at the optimal time. By programming the Orbit Water Timer correctly, you can enjoy a well-maintained garden with minimal effort. The timer’s scheduling system is both intuitive and reliable, making it easy to manage your irrigation needs. Programming the Orbit Water Timer is a key part of setting up an efficient and effective watering system. It allows for precise control over watering cycles, ensuring that your plants thrive. The timer’s programming features are designed to optimize water usage and promote healthy plant growth. By taking the time to program the timer correctly, you can enjoy a lush, vibrant garden. The Orbit Water Timer’s programming capabilities make it a versatile and practical tool for modern gardening. With its advanced scheduling options, it adapts to different watering requirements. Programming the timer is a simple yet effective way to manage your irrigation system. It ensures that your plants receive consistent care, even when you’re not available. The Orbit Water Timer’s programming features are designed to simplify your watering routine while providing optimal results. By following the programming guidelines, you can maximize the timer’s potential and enjoy a lush, healthy garden. The timer’s programming options are both practical and efficient, making it a valuable addition to any irrigation system. Programming the Orbit Water Timer is an essential step in achieving a perfectly watered lawn and garden. It offers the flexibility to customize watering schedules based on specific needs. The timer’s programming capabilities ensure that your plants receive the right amount of water at the optimal time. By programming the Orbit Water Timer correctly, you can enjoy a well-maintained garden with minimal effort. The timer’s scheduling system is both intuitive and reliable, making it easy to manage your irrigation needs. Programming the Orbit Water Timer is a key part of setting up an efficient and effective watering system. It allows for precise control over watering cycles, ensuring that your plants thrive. The timer’s programming features are designed to optimize water usage and promote healthy plant growth. By taking the time to program the timer correctly, you can enjoy a lush, vibrant garden; The Orbit Water Timer’s programming capabilities make it a versatile and practical tool for modern gardening. With its advanced scheduling options, it adapts to different watering requirements. Programming the timer is a simple yet effective way to manage your irrigation system. It ensures that your plants receive consistent care, even when you’re not available. The Orbit Water Timer’s programming features are designed to simplify your watering routine while providing optimal results. By following the programming guidelines, you can maximize the timer’s potential and enjoy a lush, healthy garden. The timer’s programming options are both practical and efficient, making it a valuable addition to any irrigation system. Programming the Orbit Water Timer is an essential step in achieving a perfectly watered lawn and garden. It offers the flexibility to customize watering schedules based on specific needs. The timer’s programming capabilities ensure that your plants receive the right amount of water at the optimal time. By programming the Orbit Water Timer correctly, you can enjoy a well-maintained garden with minimal effort. The timer’s scheduling system is both intuitive and reliable, making it easy to manage your irrigation needs. Programming the Orbit Water Timer is a key part of setting up an efficient and effective watering system. It allows for precise control over watering cycles, ensuring that your plants thrive. The timer’s programming features are designed to optimize water usage and promote healthy plant growth. By taking the time to program the timer correctly, you can enjoy a lush, vibrant garden. The Orbit Water Timer’s programming capabilities make it a versatile and practical tool for modern gardening. With its advanced scheduling options, it adapts to different watering requirements. Programming the timer is a simple yet effective way to manage your irrigation system. It ensures that your plants receive consistent care, even when you’re not available. The Orbit Water Timer’s programming features are designed to simplify your watering routine while providing optimal results. By following the programming guidelines, you can maximize the timer’s potential and enjoy a lush, healthy garden. The timer’s programming options are both practical and efficient, making it a valuable addition to any irrigation system. Programming the Orbit Water Timer is an essential step in achieving a perfectly watered lawn and garden. It offers the flexibility to customize watering schedules based on specific needs. The timer’s programming capabilities ensure that your plants receive the right amount of water at the optimal time. By programming the Orbit Water Timer correctly, you can enjoy a well-m

Setting the Clock and Date

Setting the clock and date on the Orbit Water Timer is essential for accurate scheduling. Use the arrow keys to navigate and adjust the time and date. Ensure the correct time format (MM/DD/YYYY) and AM/PM setting. Press the confirm button to save. Accurate time settings ensure your watering schedule runs correctly. Regularly check and update the clock during daylight saving changes. This ensures consistent watering cycles. The timer’s clock must be set correctly for all programmed schedules to function properly. Use the manual or online guides for detailed instructions. Proper time and date settings are crucial for reliable operation. Adjustments are quick and straightforward, ensuring your timer remains synchronized with your schedule. This step is fundamental for maintaining precise control over your irrigation system. Always verify the clock and date after power outages or battery replacements.

how to uncheck a box in pdf

Unchecking a box in a PDF is essential when correcting errors or changing selections. This guide provides step-by-step methods using tools like Adobe Acrobat, online editors, and more.

Why Uncheck a Box in a PDF?

Unchecking a box in a PDF is often necessary to correct accidental selections, modify form responses, or update preferences. Users may need to deselect options in interactive forms, especially when filling out digital documents like surveys, applications, or contracts. Sometimes, checkboxes are mistakenly marked, and unchecking them ensures the accuracy of the submitted data. Additionally, unchecking boxes can be part of revising or customizing PDF templates for professional or personal use. This function is particularly useful in scenarios where users want to change their initial choices without redoing the entire form. For non-interactive PDFs, unchecking boxes may involve editing tools to remove or modify checkboxes. Overall, the ability to uncheck boxes in PDFs enhances flexibility and precision when working with digital forms.

Method 1: Using Adobe Acrobat

Adobe Acrobat offers a straightforward way to uncheck boxes in PDFs. Open the PDF, select the checkbox, and press Delete or use the Clear Button to remove the checkmark instantly.

Steps to Uncheck a Box in Adobe Acrobat

To uncheck a box in Adobe Acrobat, follow these simple steps:

  1. Open the PDF file in Adobe Acrobat DC Pro.
  2. Click on the Tools tab and select Prepare Form under the Forms & Signature section.
  3. Locate the checkbox you wish to uncheck and click on it to deselect it.
  4. Press the Delete key or right-click the checkbox and select Clear to remove the checkmark.
  5. Once done, go to File > Save to save your changes.

This method ensures the checkbox is unchecked and the PDF remains editable for further adjustments.

Troubleshooting Common Issues in Adobe Acrobat

When attempting to uncheck a box in Adobe Acrobat, you may encounter issues such as the checkbox being unresponsive or the PDF not saving changes. Here’s how to resolve these problems:

  1. If the checkbox is part of a scanned image, use the Edit Text & Images tool to manually remove the checkmark.
  2. Ensure the PDF is editable and not password-protected. If locked, enter the password to enable editing.
  3. Right-click the checkbox and select Clear if the checkmark doesn’t disappear when clicked.
  4. If the checkbox is a form field, ensure it’s interactive. Non-interactive checkboxes cannot be edited directly.
  5. Save changes frequently to avoid losing edits. If issues persist, restart Adobe Acrobat or update to the latest version.

By addressing these common issues, you can successfully uncheck boxes and maintain control over your PDF documents.

Best Practices for Editing PDFs with Adobe Acrobat

When editing PDFs, especially to uncheck boxes, follow these best practices for seamless results:

  • Save frequently to prevent losing unsaved changes, especially after making significant edits.
  • Use the Select Tool for basic interactions and the Edit Text & Images Tool for advanced modifications.
  • Ensure the PDF is editable and not password-protected before making changes.
  • Test form fields to confirm they are interactive if you plan to edit checkboxes or radio buttons.
  • Proofread your document after editing to ensure accuracy and consistency.
  • Export the PDF in the correct format to maintain compatibility with other software.

By adhering to these guidelines, you can ensure professional and error-free PDF editing with Adobe Acrobat.

Method 2: Using Online Tools

Online tools like PDFescape and Google Chrome offer quick solutions to uncheck boxes in PDFs without installing software. Simply upload, edit, and download your file with ease and convenience.

Steps to Uncheck a Box with PDFescape

To uncheck a box using PDFescape, follow these simple steps:

  • Visit PDFescape and upload your PDF file from your computer.
  • Once the file is loaded, click the Edit icon to enter editing mode.
  • Locate the checkbox you wish to uncheck and click on it to select it.
  • Press the Delete key on your keyboard or click the Recycle Bin icon to remove the checkmark.
  • After making your changes, click the Save & Download button to save the edited PDF to your device.

This method is ideal for quick edits without needing to install software, offering a user-friendly alternative to desktop applications like Adobe Acrobat.

Steps to Uncheck a Box Using Google Chrome

Unchecking a box in a PDF using Google Chrome is a straightforward process:

  • Right-click the PDF file and select Open with > Google Chrome.
  • The PDF will open in Chrome, allowing you to interact with form fields.
  • Click on the checkbox you want to uncheck to toggle its state.
  • Once the box is unchecked, click the Download button to save your changes.
  • Alternatively, press Ctrl + S (or Cmd + S on macOS) to save the updated PDF directly.

This method is convenient for users who prefer not to install additional software, offering a quick solution for simple PDF edits directly within the browser.

Method 3: Using the Select Tool and Edit Text & Images Tool

Use the Select Tool to highlight the checkbox, then press Delete to remove the checkmark. Alternatively, use the Edit Text & Images Tool to edit or delete checkboxes directly.

How to Utilize These Tools Effectively

To effectively use the Select Tool and Edit Text & Images Tool for unchecking boxes, start by opening your PDF in a compatible editor. Use the Select Tool to highlight the checkbox by clicking on it. Press the Delete key to remove the checkmark or modify its appearance. For more advanced edits, switch to the Edit Text & Images Tool, which allows precise adjustments to checkboxes and surrounding content. This tool is ideal for non-interactive checkboxes embedded as images. Always save your document after making changes to ensure your edits are preserved. These tools offer flexibility for both simple and complex PDF modifications, making them indispensable for accurate and efficient document editing.

Prevention of Common Errors

When unchecking boxes in PDFs, common errors include selecting the wrong tool, attempting edits on non-interactive forms, or losing unsaved changes. To prevent these issues, always ensure the PDF is editable and use the correct tools like Adobe Acrobat or online editors. Regularly save your work to avoid data loss. If checkboxes are part of an image, use the Edit Text & Images Tool to manually remove checkmarks. Be cautious with online tools to protect sensitive information. Testing checkboxes in multiple PDF viewers can help identify compatibility issues. By following these tips, you can avoid common pitfalls and ensure smooth PDF editing experiences.

Advanced Tips for PDF Editing

For advanced users, mastering PDF editing involves leveraging tools like JavaScript to automate repetitive tasks, such as unchecking multiple boxes at once. Use batch processing in Adobe Acrobat to apply edits across several forms simultaneously, saving time and effort. When dealing with complex PDF layouts, utilize the Select Tool to precisely target checkboxes embedded within images or scanned documents. To maintain consistency, create custom scripts that automatically uncheck predefined boxes during PDF processing. Additionally, explore the Prepare Form tool in Adobe Acrobat to manage interactive elements effectively. For enhanced security, use digital signatures to lock forms after editing, preventing accidental changes. Finally, consider using third-party tools like MiniTool PDF Editor for advanced features such as form data export and batch unchecking, streamlining your workflow for complex PDF tasks.

Unchecking a box in a PDF is a straightforward process when using the right tools and techniques. Whether you prefer Adobe Acrobat, online editors like PDFescape, or browser-based solutions like Google Chrome, there are multiple methods to achieve your goal. For interactive forms, directly toggling the checkbox is often the simplest solution. For scanned or non-interactive PDFs, the Select Tool and manual editing options are effective. Always ensure your PDF editor supports form fields to avoid common issues. By following the steps outlined in this guide, you can efficiently uncheck boxes and maintain the integrity of your PDF documents. Remember to save your changes and explore advanced features like batch processing or scripting for more complex tasks. With practice, editing PDFs becomes a seamless part of your workflow.

c wright mills the sociological imagination pdf

C. Wright Mills was a prominent American sociologist known for his work The Sociological Imagination, which explores the connection between personal experiences and broader societal structures.

Biography and Early Life

C. Wright Mills was born on August 28, 1916, in Waco, Texas, and grew up in a middle-class family. His father was an insurance agent, and the family moved frequently during his childhood. Mills developed a strong interest in philosophy and sociology, which led him to pursue higher education. He studied at the University of Texas and later earned his Ph.D. in sociology from the University of Wisconsin in 1941. Mills’ academic career began as a professor at the University of Maryland and later at Columbia University, where he became a prominent figure in American sociology. His early life shaped his critical perspective on society, influencing his groundbreaking work.

Mills’ intellectual journey was marked by a rebellious spirit and a commitment to understanding power dynamics in society. His early death in 1962 at the age of 45 cut short a promising career, but his contributions remain influential.

Key Contributions to Sociology

C. Wright Mills made significant contributions to sociology through his critique of social structures and power dynamics. His book The Sociological Imagination introduced the concept of connecting individual experiences with broader societal issues, emphasizing the importance of understanding how personal lives are shaped by historical and social contexts. Mills also critiqued the American power structure in The Power Elite, arguing that a small group of individuals held disproportionate influence over politics, economy, and military. His work challenged traditional sociological methods, advocating for a more engaged and critical approach. Mills’ ideas remain foundational in sociology, influencing contemporary studies on inequality, power, and social change.

His contributions bridged theory and practice, inspiring sociologists to adopt a more reflexive and socially conscious perspective in their research.

The Concept of the Sociological Imagination

C. Wright Mills’ concept of the sociological imagination connects personal experiences with broader social structures, enabling individuals to understand how societal forces shape their lives.

Definition and Core Ideas

C. Wright Mills defined the sociological imagination as the ability to connect personal experiences with broader social structures and historical contexts. This concept emphasizes understanding how individual lives are shaped by societal forces, such as economic systems, political power, and cultural norms. Mills argued that people often feel trapped in their private troubles, unaware of how these issues are rooted in public structures. The sociological imagination enables individuals to transcend personal biases and see the interplay between biography and history. It critiques the notion of society as a mere collection of individuals, instead highlighting the importance of systemic analysis. By fostering this perspective, Mills aimed to empower people to question and challenge the social arrangements that shape their lives, emphasizing the need for critical awareness and collective action. His work remains a cornerstone of sociological thought, urging scholars and citizens alike to think beyond individual experiences and engage with the larger social world.

The Intersection of Biography and History

Mills emphasized the interplay between personal biography and historical context, arguing that individual experiences cannot be divorced from the broader social and historical backdrop. He contended that people’s lives are shaped by the convergence of personal circumstances and the structural forces of their time. Mills criticized the tendency to view individuals in isolation, asserting that understanding societal transformations requires examining how historical events influence personal biographies. This intersection, he believed, allows sociologists to uncover the underlying patterns of power and inequality that define societies. By linking biography and history, Mills provided a framework for analyzing how macro-level changes, such as industrialization or political shifts, impact micro-level experiences, thus offering a comprehensive view of social dynamics. This approach remains central to sociological inquiry, enabling deeper insights into the human condition and societal evolution.

Critique of American Society

Mills challenged the notion of equal opportunity in America, arguing that a small, powerful class dominated society, undermining democracy and perpetuating inequality.

The Power Elite and Social Inequality

C. Wright Mills famously introduced the concept of the “power elite,” arguing that a small, interconnected group of individuals—comprising corporate, political, and military leaders—dominated American society. He contended that this elite controlled the major institutions and decisions, often at the expense of the general population. Mills criticized the illusion of democracy, suggesting that power was concentrated in the hands of a few, rather than being widely distributed. This concentration of power perpetuated social inequality, as the interests of the elite often took precedence over those of the majority. Mills’ critique highlighted the ways in which this structure undermined genuine democratic participation and reinforced systemic disparities. His work remains a critical analysis of power dynamics in modern societies.

Democracy and Meritocracy in Question

C. Wright Mills challenged the notion of American democracy, arguing that it was an illusion perpetuated by the power elite. He questioned the idea of meritocracy, asserting that social mobility was limited and that opportunities were often determined by one’s position within the power structure rather than individual talent or effort. Mills contended that the concentration of power in the hands of a few undermined the principles of democracy and equality. He emphasized that the interlocking interests of corporations, political leaders, and military figures created a system where the elite maintained their dominance, while the majority were left disillusioned and disconnected from the decision-making process. This critique remains relevant, highlighting the tension between idealized democratic values and the realities of power distribution in society.

The Role of the Sociologist

C. Wright Mills believed sociologists should act as both researchers and public intellectuals, critically examining society and engaging with broader social issues to foster understanding and change.

Intellectual Craftsmanship in Research

C. Wright Mills emphasized the importance of intellectual craftsmanship in sociological research, advocating for a meticulous and creative approach to understanding society. He believed sociologists should avoid abstract theories and focus on empirical data, connecting personal experiences to broader social structures. Mills criticized grand theory and abstract empiricism, urging researchers to adopt a balanced approach. In his appendix On Intellectual Craftsmanship, he outlined methods for rigorous and reflective inquiry, encouraging sociologists to be adaptable and avoid rigid frameworks. Mills saw sociologists as craftsmen, tasked with uncovering the complexities of social life while maintaining a critical and engaged perspective. His vision for research remains influential, emphasizing clarity, relevance, and the pursuit of meaningful insights into human society.

The Sociologist as a Public Intellectual

C. Wright Mills was a prominent public intellectual who believed sociologists should engage with broader society, addressing pressing social issues. He argued that sociologists had a responsibility to challenge power structures and promote democratic values. Mills’ work, particularly The Sociological Imagination and The Power Elite, critically examined social inequality, bureaucracy, and the concentration of power in American society. By bridging academic insights with public discourse, he sought to empower individuals to understand their role within larger historical and social contexts. Mills’ writings were accessible and provocative, making him a controversial yet influential figure both within and outside academia. His commitment to public engagement underscored his belief that sociology should serve as a tool for social change and critical awareness.

Legacy and Influence

C. Wright Mills’ work remains influential in sociology, inspiring critical perspectives on power, inequality, and social structures. His ideas continue to shape contemporary sociological thought and research.

The Sociological Imagination’s Impact

The sociological imagination, as introduced by C. Wright Mills, has profoundly influenced sociological thought and research. By linking personal experiences to broader societal structures, it has empowered individuals to critically analyze their roles within society. This concept has been instrumental in shaping public discourse, encouraging scholars and laypeople alike to question power dynamics and social inequalities. Mills’ work has also inspired new methodologies in sociological research, emphasizing the importance of understanding historical contexts and their impact on individual lives. The sociological imagination remains a vital tool for fostering social awareness and promoting transformative change, ensuring its enduring relevance in both academic and public spheres.

Mills’ Influence on Contemporary Sociology

C. Wright Mills’ work, particularly The Sociological Imagination, has had a lasting impact on contemporary sociology. His critiques of social inequality, power structures, and the limitations of traditional sociological methods continue to inspire scholars. Mills’ emphasis on connecting personal experiences to broader societal issues has influenced critical sociology, encouraging researchers to adopt a more reflexive and politically engaged approach. His ideas have also shaped public discourse, fostering a deeper understanding of how individuals are shaped by historical and social contexts. Mills’ legacy endures as a foundational figure, inspiring new generations to critically examine power, inequality, and the role of sociology in addressing societal challenges. His work remains a cornerstone of sociological thought and practice.

C. Wright Mills’ work remains profoundly relevant, offering insights into the interplay of individual lives and societal structures. His ideas continue to inspire critical sociological thought and analysis.

The Enduring Relevance of Mills’ Work

C. Wright Mills’ work continues to resonate in contemporary sociology, offering a framework to understand the interplay between personal biographies and historical contexts. His concept of the sociological imagination remains a powerful tool for analyzing social structures and power dynamics. Mills’ critique of inequality and the power elite is particularly relevant today, as discussions around social justice and democracy persist. His emphasis on intellectual craftsmanship and the role of sociologists as public intellectuals has inspired generations of researchers to engage critically with society. Mills’ legacy underscores the importance of connecting theory with practice, ensuring his ideas remain vital in addressing modern societal challenges.

pioneer avh 2550nex manual

Welcome to the Pioneer AVH-2550NEX manual, your comprehensive guide to mastering this advanced multimedia DVD receiver. Designed to enhance your in-car entertainment experience, this manual provides detailed instructions for installation, operation, and troubleshooting. Explore its robust features, including Apple CarPlay and Android Auto compatibility, a vibrant 6.8-inch display, and seamless connectivity options. Whether you’re setting up the system or optimizing its performance, this guide ensures you unlock the full potential of your Pioneer AVH-2550NEX.

1.1 Overview of the Pioneer AVH-2550NEX

The Pioneer AVH-2550NEX is a state-of-the-art multimedia DVD receiver designed for an enhanced in-car entertainment experience. Featuring a vibrant 6.8-inch touchscreen display, it supports Apple CarPlay and Android Auto for seamless smartphone integration. With Bluetooth connectivity, USB playback, and compatibility with various digital media formats, this system offers versatile entertainment options. Its sleek design and user-friendly interface make it a perfect upgrade for modern vehicles.

1.2 Purpose of the Manual

This manual serves as a detailed guide to help users understand and utilize the Pioneer AVH-2550NEX multimedia DVD receiver effectively. It provides step-by-step instructions for installation, operation, and troubleshooting, ensuring optimal performance. The manual also highlights safety precautions and customization options, empowering users to make the most of their in-car entertainment experience with clarity and confidence.

Key Features of the Pioneer AVH-2550NEX

This manual is designed to guide users through the safe installation, operation, and troubleshooting of the Pioneer AVH-2550NEX. It provides detailed instructions and helpful tips to ensure optimal performance and customization, enabling users to fully utilize the device’s features and enhance their in-car entertainment experience with confidence and ease.

2.1 Design and Display

The Pioneer AVH-2550NEX features a sleek, modern design with a 6.8-inch high-resolution WVGA touchscreen display. Its vibrant interface offers crisp visuals and intuitive navigation. The display supports customizable home screens, allowing users to personalize their experience. With a fixed monitor mechanism, it ensures stability and clarity. The design combines functionality with elegance, making it a stylish addition to any vehicle’s interior. The screen’s responsiveness and brightness ensure optimal visibility, enhancing the overall user experience.

2.2 Multimedia Capabilities

The Pioneer AVH-2550NEX supports a wide range of multimedia formats, including DVDs, CDs, and digital media via USB. It features Apple CarPlay and Android Auto compatibility, enabling seamless smartphone integration. Users can access apps, music, and navigation directly from the touchscreen. The receiver also supports Siri Eyes Free and Google Voice Assistant for hands-free voice commands, enhancing convenience and safety while driving.

2.3 Connectivity Options

The Pioneer AVH-2550NEX offers versatile connectivity options, including Bluetooth and USB interfaces, ensuring seamless integration with your devices. It supports Apple CarPlay and Android Auto, enabling smartphone app control via the touchscreen. Voice command functionality through Siri Eyes Free and Google Assistant enhances hands-free operation, while compatibility with various audio and video formats guarantees extensive multimedia playback capabilities.

Installation Guide

Install the Pioneer AVH-2550NEX securely in your vehicle, ensuring proper mounting and wiring connections. Follow the manual’s step-by-step instructions for a safe and correct setup.

3.1 System Requirements

Ensure your vehicle meets the Pioneer AVH-2550NEX installation requirements. A compatible dashboard size, stable power supply, and proper wiring connections are essential. The system supports Apple CarPlay and Android Auto, requiring a smartphone with iOS or Android OS. A USB port and Bluetooth capability are necessary for seamless connectivity. Verify all specifications before proceeding with installation to ensure compatibility and optimal performance.

3.2 Step-by-Step Installation Process

Begin by disconnecting the battery to ensure safety. Carefully remove the factory radio trim and mounting brackets. Connect the wiring harness to the Pioneer AVH-2550NEX, matching each cable to the correct terminal. Mount the unit securely in the dashboard, ensuring proper alignment. Reconnect the battery and test all functions, including Bluetooth, USB, and audio outputs. Refer to the provided diagrams for precise connections and consult a professional if unsure.

Operation Manual

This section provides detailed instructions for operating the Pioneer AVH-2550NEX, including navigating the touch screen, adjusting settings, and using multimedia features like CarPlay and Android Auto. Learn how to customize the display, manage audio settings, and safely operate the system while driving to ensure an optimal experience.

4.1 Basic Functions and Controls

The AVH-2550NEX features intuitive controls, including a responsive touchscreen, volume knob, and playback buttons. Users can easily navigate menus, adjust settings, and access media sources. The interface allows for seamless switching between music, video, and navigation modes. Dedicated buttons for functions like eject, play/pause, and track skip ensure straightforward operation. This design ensures a user-friendly experience, making it easy to manage entertainment and connectivity on the go.

4.2 Navigating the User Interface

The AVH-2550NEX offers a user-friendly interface with a responsive 6.8-inch touchscreen. Menus are organized intuitively, allowing easy access to media, settings, and connected devices. Swipe gestures enable quick navigation between screens, while customizable home screens let you prioritize frequently used features. Voice command integration further enhances control, making it simple to manage functions like Siri Eyes Free or Google Assistant without distractions.

4.3 Customization Options

The AVH-2550NEX offers extensive customization options to tailor your experience. Personalize the home screen by rearranging icons or adding shortcuts for frequently used features. Adjust display settings, including brightness, color, and wallpaper, to match your preferences. Customize audio settings with a 13-band graphic equalizer and preset options; Additionally, voice command integration allows for hands-free control, enhancing convenience and safety while driving.

Troubleshooting Common Issues

Address common issues like connectivity problems, display malfunctions, or audio glitches. Refer to the manual for diagnostic steps, reset options, and firmware update guidance to resolve issues effectively.

5.1 Frequently Encountered Problems

Users of the Pioneer AVH-2550NEX often report issues such as connectivity problems with Apple CarPlay or Android Auto, display malfunctions, and audio glitches. Common complaints include frozen screens, USB port incompatibility, and Bluetooth pairing difficulties. Additionally, some users experience firmware update failures or loss of sound output after installation. These issues can typically be resolved with proper troubleshooting techniques outlined in the manual.

5.2 Diagnostic and Repair Solutions

To resolve common issues with the Pioneer AVH-2550NEX, start by checking all connections and ensuring proper installation. Perform a soft reset by disconnecting the battery for 10 seconds. Update the firmware to the latest version, as outdated software often causes malfunctions. For persistent problems, consult the troubleshooting section or contact Pioneer support for professional assistance. Regular maintenance ensures optimal performance.

Firmware Updates

Firmware updates enhance performance, fix bugs, and add new features to your Pioneer AVH-2550NEX. Regularly check Pioneer’s official website for the latest updates. Download the update file to a USB drive and follow on-screen instructions to install. Ensure a stable power connection during the update process to avoid system corruption.

6.1 Importance of Updates

Firmware updates are crucial for enhancing the Pioneer AVH-2550NEX’s functionality. They fix bugs, improve performance, and add new features like compatibility with the latest smartphones or software. Regular updates ensure your system remains secure and operates smoothly. Failing to update may result in compatibility issues or compromised security, so staying current is essential for optimal performance and user experience.

6.2 How to Perform a Firmware Update

To update the Pioneer AVH-2550NEX firmware, visit Pioneer’s official website and download the latest firmware ZIP file. Transfer the file to a USB drive, ensuring it’s properly formatted. Insert the USB into the AVH-2550NEX, and follow the on-screen prompts to install the update. Do not disconnect the USB or power off during the process. After completion, the system will restart, confirming the update was successful.

Remote Control Functions

The Pioneer AVH-2550NEX remote control offers intuitive control over media playback, navigation, and volume adjustments. It also supports customizable settings for a personalized experience. Compatible with both iOS and Android devices via Pioneer’s dedicated app, the remote ensures seamless operation of your in-car entertainment system.

7.1 Remote Control Features

The Pioneer AVH-2550NEX remote control offers a range of convenient features, including play/pause, track skip, and volume adjustment; It also supports voice command functionality and customizable buttons for personalized control. The remote enables wireless operation, allowing seamless interaction with the receiver’s interface. Designed for ease of use, it ensures intuitive navigation of multimedia functions and settings, enhancing your overall driving experience.

7.2 Pairing and Using the Remote

To pair the remote, press and hold the “PAIR” button until the LED flashes. Follow on-screen instructions to complete pairing. Once connected, use the remote to control playback, adjust settings, and navigate menus. Ensure the remote has a clear line of sight to the receiver for optimal performance. Replace batteries when low, and refer to the manual for troubleshooting connectivity issues or weak signals.

Safety Precautions

Handle the Pioneer AVH-2550NEX with care to avoid damage. Avoid overloading connections and ensure proper ventilation. Do not open the unit or expose it to water. Follow all electrical safety guidelines to prevent hazards and ensure reliable performance.

8.1 Handling the Device Safely

Handle the Pioneer AVH-2550NEX with care to prevent damage. Avoid exposure to moisture, extreme temperatures, or physical stress. Clean only with a soft, dry cloth. Never insert foreign objects into ports or openings. Ensure proper ventilation to avoid overheating. Mount the device securely to prevent movement during operation. Follow all safety guidelines to maintain performance and longevity of the unit.

8.2 Electrical Safety Guidelines

Ensure the Pioneer AVH-2550NEX is used with approved power sources to prevent electrical hazards. Avoid exposing the device to moisture or water. Do not modify the unit or use unauthorized accessories. Keep vents clear for proper cooling. Never attempt self-repair or internal adjustments. If issues arise, consult a certified professional. Always follow electrical safety standards to protect both the device and user.

Warranty and Support

The Pioneer AVH-2550NEX is backed by a limited warranty. For details on warranty coverage and support options, visit Pioneer’s official website or contact their support team. More information is available in the manual.

9.1 Warranty Information

The Pioneer AVH-2550NEX is covered by a limited warranty, typically one year from the date of purchase, protecting against manufacturing defects. For full terms and conditions, refer to the official Pioneer website or the provided manual. Warranty details ensure your product is protected and supported for optimal performance and longevity.

9.2 Contacting Pioneer Support

For assistance with your Pioneer AVH-2550NEX, contact Pioneer Support through their official website, phone, or email. Visit the Pioneer website for regional contact details, troubleshooting guides, and downloadable resources. The support team is available to address inquiries, provide technical assistance, and guide you through firmware updates or warranty claims. Reach out directly for professional help with your device.

Mastering the Pioneer AVH-2550NEX enhances your driving experience. Refer to this manual for optimal use and explore additional resources for further assistance and troubleshooting.

10.1 Final Tips for Optimal Use

For optimal performance, ensure regular firmware updates and explore customization options to tailor the AVH-2550NEX to your preferences. Organize media files for easy access and adjust volume settings safely to protect your hearing. Refer to the manual for troubleshooting common issues and maintain the device with care to ensure longevity and reliability. These practices will enhance your overall experience. Always handle the device with caution and consult the manual for any uncertainties.

10.2 Resources for Further Assistance

For additional support, visit the official Pioneer website for downloadable manuals, firmware updates, and FAQs. Contact Pioneer’s customer support team for personalized assistance. Online forums and communities also offer valuable insights and troubleshooting tips from experienced users. Ensure to consult authorized service centers for any advanced repairs or installations to maintain your device’s warranty and optimal performance.

danby premiere air conditioner user manual

The Danby Premiere Air Conditioner offers a comprehensive user manual, providing detailed installation, operation, and maintenance guidance. Models like DPAC11010 and DPAC13009 are covered, ensuring optimal performance.

1.1 Overview of the Danby Premiere Series

The Danby Premiere Series offers portable air conditioners designed for efficiency and convenience. Models like DPAC11010 and DPAC13009 combine cooling, dehumidifying, and fan modes. They feature oscillating air direction, multiple fan speeds, and eco-friendly refrigerants. These units are ideal for single-room use, ensuring quiet operation and energy-saving performance, while being easy to move and install.

1.2 Importance of Reading the User Manual

Reading the Danby Premiere user manual is crucial for understanding installation, operation, and maintenance. It provides safety guidelines, troubleshooting tips, and energy-saving advice. The manual ensures optimal performance and longevity of the unit, helping users avoid common issues and make informed decisions for efficient cooling and proper care of their air conditioner.

Key Features of the Danby Premiere Air Conditioner

The Danby Premiere Air Conditioner features a portable design, multi-functionality with cooling, dehumidifying, and fan modes, oscillating air direction, and three fan speeds for customizable comfort and efficiency.

2.1 Portable Design and Multi-Functionality

The Danby Premiere Air Conditioner features a sleek, portable design with casters for easy mobility, allowing seamless room-to-room use. Its multi-functionality offers cooling, dehumidifying, and fan modes, making it an all-in-one solution for year-round comfort and versatility in any space.

2.2 Cooling, Dehumidifying, and Fan Modes

The Danby Premiere Air Conditioner offers three essential modes: cooling for reducing room temperature, dehumidifying to remove excess moisture, and fan mode for air circulation. These modes ensure year-round comfort, adapting to various weather conditions and user preferences, while maintaining efficient performance and energy use.

2.3 Oscillating Air Direction and Fan Speeds

The Danby Premiere Air Conditioner features oscillating air direction, ensuring even air distribution across the room. With multiple fan speeds, users can adjust airflow to their comfort level. This versatility, combined with quiet operation, enhances the overall cooling experience, making it ideal for maintaining a consistent and comfortable environment in any setting.

Installation and Setup

Installation involves unboxing, inventorying parts, and selecting a suitable location. Proper venting is crucial for efficiency and safety, as outlined in the Danby Premiere user manual.

3.1 Unboxing and Inventory of Parts

Carefully unbox the Danby Premiere Air Conditioner and verify all components, including the unit, remote control, batteries, drain hose, window kit, and casters. Inspect for damage and ensure all parts are included. Familiarize yourself with each item to ensure proper assembly and installation, as outlined in the user manual.

3.2 Choosing the Right Location for Installation

Position the Danby Premiere Air Conditioner in a well-ventilated area away from direct sunlight and heat sources. Ensure the location is level and stable to prevent vibration. Avoid placing near walls or doors that could obstruct airflow, as this may reduce efficiency. Refer to the manual for optimal placement guidelines to maximize cooling performance.

3.3 Venting Requirements and Options

Proper venting is essential for the Danby Premiere Air Conditioner. Use the provided window kit for standard installation or opt for external venting solutions. Ensure the vent hose is securely connected to prevent leaks. Refer to the manual for detailed instructions on venting options and accessories to maintain efficiency and safety during operation.

Operating the Danby Premiere Air Conditioner

Operate your Danby Premiere with ease using the control panel or remote. Set timers, adjust fan speeds, and enable sleep mode for efficient, quiet cooling performance;

4.1 Understanding the Control Panel

The control panel features buttons for mode selection, fan speed, and temperature adjustment. Key buttons include power, mode, fan speed, and temperature controls. The LED display shows settings. Refer to the manual for guidance on using each function effectively to ensure optimal performance and customize your cooling experience.

4.2 Using the Remote Control

The remote control allows easy operation of the Danby Premiere Air Conditioner. It includes buttons for power, mode selection, fan speed, and temperature adjustment. The remote operates within a clear line of sight to the unit. Replace batteries as needed to ensure proper functionality. Refer to the manual for troubleshooting remote control issues.

4.3 Setting Up the Timer and Sleep Mode

To set up the timer, press the timer button on the remote or control panel. Use the navigation buttons to select the desired start and stop times. For sleep mode, enable it to automatically adjust temperature and reduce noise during nighttime. Save settings to ensure energy efficiency and uninterrupted operation.

Maintenance and Care

Regular maintenance is crucial for optimal performance. Clean the air filter, check drainage, and ensure proper ventilation. Refer to the manual for detailed care instructions and tips.

5.1 Cleaning the Air Filter

Cleaning the air filter regularly ensures efficient operation and improved air quality. Turn off the unit, remove the filter, and wash it with warm water. Allow it to dry completely before reinstalling. A clean filter prevents dust buildup and maintains optimal cooling performance. Refer to the manual for specific cleaning instructions.

5.2 Drainage and Water Management

Proper drainage is essential for efficient operation. Use the provided drain hose to direct water flow. Regularly inspect and clean the drain system to prevent blockages. For continuous operation, consider a direct drain setup. Always follow manual guidelines to avoid water accumulation, ensuring optimal performance and preventing mold growth.

5.3 Regular Maintenance Tips

Regular maintenance ensures optimal performance. Clean the air filter monthly and inspect coils for dust buildup. Check drain hoses for blockages and ensure proper water flow; Inspect all components for wear and tear. Schedule professional servicing annually. Follow manual guidelines for cleaning and replacing parts to maintain efficiency and extend appliance lifespan effectively.

Troubleshooting Common Issues

Identify error codes, address cooling inefficiencies, and resolve noise or vibration problems. Refer to the manual for detailed solutions to ensure optimal performance and quick issue resolution.

6.1 Identifying Error Codes

Danby Premiere error codes are listed in the user manual, indicating issues like temperature sensor malfunctions or compressor problems. These codes help users diagnose and address specific faults efficiently, ensuring quick resolution and maintaining optimal performance. Always consult the manual for accurate code interpretation and solutions.

6.2 Resolving Cooling Issues

Common cooling issues with the Danby Premiere Air Conditioner often stem from improper installation or blocked air flow. Ensure the unit is correctly vented and the room size matches the BTU rating. Check for obstructions in vents and verify the thermostat settings. Refer to the user manual for troubleshooting guides to restore optimal cooling performance quickly.

6.3 Addressing Noise and Vibration Problems

Noise and vibration issues with the Danby Premiere Air Conditioner can often be resolved by ensuring proper installation and leveling. Check for loose parts or debris near the unit. Verify that the floor is even and consider using anti-vibration pads. Refer to the user manual for specific troubleshooting steps to minimize operational noise effectively.

Energy Efficiency and Eco-Friendliness

The Danby Premiere Air Conditioner features Energy Star certification, ensuring efficient energy use. It uses eco-friendly refrigerants and offers energy-saving modes to reduce environmental impact and lower utility bills.

7.1 Energy Star Certification

The Danby Premiere Air Conditioner is Energy Star certified, ensuring superior energy efficiency. By meeting strict EPA guidelines, it reduces energy consumption, lowering utility bills and environmental impact. This certification is a testament to Danby’s commitment to eco-friendly and sustainable cooling solutions for modern homes and offices.

7.2 Eco-Friendly Refrigerant

Danby Premiere Air Conditioners utilize eco-friendly refrigerants, designed to minimize environmental impact. These refrigerants are ozone-safe and comply with global regulations, reducing harmful emissions. This sustainable approach aligns with Danby’s commitment to protecting the environment while maintaining high performance and energy efficiency for users.

7.3 Tips for Energy-Saving Operation

Optimize energy usage by using the timer and sleep mode to regulate operation. Maintain clean air filters and ensure proper unit installation. Set moderate temperatures and utilize the eco-friendly refrigerant’s efficiency. Regularly cleaning the condenser and proper ventilation also enhance energy savings, ensuring the Danby Premiere runs efficiently while reducing energy consumption.

Accessories and Replacement Parts

The Danby Premiere air conditioner comes with essential accessories like drain hoses and window kits; Genuine replacement parts, including remote controls, are available for purchase online.

8.1 Remote Control and Batteries

The Danby Premiere air conditioner includes a remote control for convenient operation. Use two AAA batteries to power it. Ensure proper function by replacing batteries when power weakens, as indicated in the user manual. Genuine remote controls are available for purchase if the original is lost or damaged over time.

8.2 Drain Hose and Window Kit

The Danby Premiere air conditioner includes a drain hose for efficient water management and a window kit for proper venting. Ensure the hose is securely connected to prevent leaks. The window kit must be installed correctly to maintain airflow. Refer to the user manual for detailed installation instructions to ensure optimal performance and safety;

8.3 Where to Find Genuine Parts

Genuine Danby Premiere air conditioner parts can be found through Danby’s official website or authorized retailers. Visit the Danby customer support page or use the product manual lookup tool to locate specific components. Ensure to cross-reference your model number (e.g., DPAC11010 or DPAC13009) for compatibility and authenticity when purchasing replacement parts or accessories.

Technical Specifications

The Danby Premiere Air Conditioner features BTU ratings from 10,000 to 14,000, covering areas up to 700 square feet. It operates quietly with noise levels between 38-45 dBA, ensuring efficient and silent performance.

9.1 BTU Ratings and Coverage Area

Danby Premiere air conditioners are available with BTU ratings ranging from 10,000 to 14,000, suitable for spaces from 300 to 700 square feet. This ensures efficient cooling for various room sizes, making them ideal for single-room use. Proper BTU matching is crucial for optimal performance and energy efficiency, as specified in the user manual.

9.2 Noise Levels and Operational Modes

Danby Premiere air conditioners operate at noise levels between 38-50 dB, ensuring quiet performance. They feature multiple operational modes, including cooling, dehumidifying, and fan-only, with oscillating air direction for even airflow distribution. These modes enhance comfort and efficiency, allowing users to customize their experience based on specific needs and room conditions.

9;3 Dimensions and Weight

Danby Premiere air conditioners are compact and portable, with dimensions typically measuring around 30 inches in height, 12 inches in width, and 16 inches in depth. They weigh between 60-70 pounds, making them easy to move. The lightweight design and caster wheels enhance portability, ensuring effortless placement in any room while maintaining optimal cooling performance.

Warranty and Support

Danby Premiere air conditioners come with a one-year limited warranty on parts and labor, plus a five-year warranty on the compressor. Visit Danby’s official website for support and online resources.

10.1 Warranty Coverage and Duration

The Danby Premiere Air Conditioner is backed by a one-year limited warranty on parts and labor, ensuring coverage for manufacturing defects. Additionally, the compressor is covered under a five-year warranty for enhanced durability. For detailed terms and conditions, refer to the user manual or visit Danby’s official website.

10.2 Contacting Danby Customer Support

Danby Customer Support can be contacted through their official website, where you can access product manuals, troubleshooting guides, and repair services. Visit the support section, enter your model number, and find detailed assistance. The website also uses cookies to enhance user experience and collect analytics, ensuring efficient service delivery always.

10.3 Online Resources and Manuals

Danby provides comprehensive online resources, including downloadable PDF manuals for Premiere models like DPAC11010. These resources are accessible via their official website and platforms like ManualsLib. Users can search by model number to find specific guides, ensuring easy access to installation, operation, and troubleshooting information for optimal appliance performance and maintenance.

Safety Precautions

Adhere to safety guidelines in the manual, including proper installation and supervision. Ensure the power cord is used correctly to avoid electrical hazards and current leakage risks.

11.1 Electrical Safety Guidelines

Follow electrical safety guidelines to ensure safe operation. Use the provided power cord and avoid extensions. The cord is rated for 60°C. Proper installation by a qualified technician is essential. Ensure compliance with local electrical codes and standards to prevent hazards. Regularly inspect the cord and plug for damage.

11.2 Proper Ventilation and Usage

Ensure proper ventilation by installing both exhaust hoses outdoors during cooling mode. Maintain a single-room setup, as walls or doors can obstruct airflow. Regularly clean filters and inspect for blockages. Proper usage includes following the user manual’s installation and maintenance instructions to optimize performance and prevent operational issues. Always vent the unit correctly.

11.4 Child Safety Tips

Keep children away from moving parts and ensure they do not insert objects into the unit. Use the child lock feature if available. Supervise children near the air conditioner to prevent accidents. Ensure the unit is stable and secure to avoid tipping. Follow all safety guidelines in the user manual for safe operation.

The Danby Premiere Air Conditioner is a reliable, efficient, and user-friendly cooling solution. Always refer to the manual for optimal performance and maintenance tips.

12;1 Summary of Key Features

The Danby Premiere Air Conditioner combines portability with multi-functionality, offering cooling, dehumidifying, and fan modes. It features oscillating air direction, three fan speeds, and a direct drain option. Models like the DPAC11010 and DPAC13009 provide efficient cooling with BTU ratings suited for various room sizes, ensuring energy efficiency and ease of use.

12.2 Final Tips for Optimal Performance

Ensure proper installation and leveling for efficient operation. Clean the air filter regularly to maintain airflow and energy efficiency. Use the timer and sleep mode to optimize energy consumption. Properly vent the unit to avoid condensation issues. Refer to the user manual for model-specific settings and maintenance routines to ensure long-lasting performance and reliability.

bible recap reading plan pdf

The Bible Recap Reading Plan PDF is a structured guide designed to help readers navigate the entire Bible in one year through daily readings.

Overview of the Plan

The Bible Recap Reading Plan PDF offers a structured 1-Year program, dividing the entire Bible into daily readings. It balances Old and New Testament passages, ensuring a comprehensive understanding; The plan is designed to be simple, with clear sections and dates, making it easy to stay on track and engage deeply with Scripture throughout the year.

Key Features of the Bible Recap Reading Plan

The plan offers a 1-Year structured reading schedule, flexibility, and accessibility. It incorporates multiple biblical genres, ensuring a well-rounded understanding of Scripture throughout the year.

Daily Reading Schedule

The Bible Recap Reading Plan PDF provides a detailed daily reading schedule, dividing the entire Bible into manageable portions for each day of the year. This structured approach ensures consistent progress, with readings organized chronologically and thematically to enhance understanding and engagement. Users can easily follow along, staying on track with their spiritual journey.

Flexibility and Accessibility

The Bible Recap Reading Plan PDF offers flexibility, allowing users to adjust the pace according to their schedule. It is accessible in both digital and print formats, making it easy to use anywhere. The plan is designed to accommodate different reading styles, ensuring everyone can stay engaged and consistent in their Bible study journey. Community support is also available for encouragement.

Incorporation of Multiple Biblical Genres

The Bible Recap Reading Plan PDF seamlessly integrates various biblical genres, such as history, poetry, epistles, and prophecy, ensuring a well-rounded understanding of Scripture. By balancing these genres, the plan provides readers with a comprehensive view of God’s message, enriching their spiritual journey and fostering deeper engagement with the text. This diverse approach keeps the study dynamic and engaging.

Types of Bible Reading Plans

The Bible Recap Reading Plan PDF offers various structured approaches, including chronological, Old and New Testament together, and thematic plans, to suit different reading preferences and goals.

1-Year Chronological Plan

The 1-Year Chronological Plan organizes daily readings to follow the historical timeline of the Bible, blending Old and New Testament passages for context. This structured approach ensures a comprehensive understanding of God’s message, guiding readers through the entire Bible in 365 days with clear, manageable portions each day.

Old and New Testament Together Plan

This plan uniquely interweaves daily readings from both the Old and New Testaments, providing a balanced study experience. It helps readers connect thematic and historical links between the two, fostering a deeper understanding of God’s unified message throughout Scripture. Each day’s reading includes portions from both testaments, enhancing spiritual growth and biblical context.

Thematic and Epic Plans

Thematic plans focus on specific biblical themes, such as grace or redemption, while epic plans explore overarching narratives. These structured approaches allow readers to delve deeply into key topics, tracing how they unfold throughout Scripture. This method enhances understanding and application, making the Bible’s teachings more relatable and impactful in daily life and spiritual growth.

Benefits of Using the Bible Recap Reading Plan

Encourages spiritual growth, fosters consistency in Bible reading, and provides a structured approach to understanding God’s Word throughout the year effectively.

Spiritual Growth and Consistency

The Bible Recap Reading Plan PDF promotes spiritual growth by providing a structured daily schedule, helping readers stay consistent in their study. It encourages deeper understanding of God’s message and its application in daily life, fostering a stronger connection with Scripture and enhancing spiritual discipline and consistency over time.

Community Engagement

The Bible Recap Reading Plan PDF fosters community engagement by offering a shared structure for discussion and accountability. Readers can connect with others, share insights, and support one another. This collective approach enhances understanding and motivation, making the journey through Scripture more enriching and inspiring. Additionally, online communities and forums provide spaces for participants to engage, ask questions, and learn from each other’s perspectives, further enriching their spiritual journey.

Personalized Study Options

The Bible Recap Reading Plan PDF offers flexibility to tailor your study experience. You can adjust reading schedules, focus on specific genres, or incorporate reflection and prayer. This customization allows for a deeper connection with the text, making your study more meaningful and aligned with personal spiritual goals and interests.

How to Choose the Right Bible Reading Plan

Selecting the right plan involves considering your reading style, time commitment, and desired depth of study to align with your spiritual goals and preferences effectively.

Consider Your Reading Style

Understanding your reading style is crucial. Some prefer structured, chronological plans, while others enjoy flexible or thematic approaches. Assess whether you thrive with a mix of genres daily or focused deep dives into specific books. Aligning your plan with your style ensures consistency and engagement, making the Bible Recap Reading Plan adaptable to your unique preferences and habits for a meaningful experience.

Time Commitment

Evaluating your daily time commitment is essential. Most plans require 15-30 minutes of reading per day to cover the entire Bible in a year. Consistency is key, but flexibility allows adjustments if needed. Whether you prefer shorter or longer sessions, the Bible Recap Reading Plan is designed to fit into your schedule, ensuring manageable and sustainable progress throughout the year.

Depth of Study

Choosing a plan that matches your desired depth of study is crucial. The Bible Recap Reading Plan offers options for both surface-level reading and deeper theological exploration. Whether you prefer detailed commentary, historical context, or reflective questions, this plan accommodates various study styles, ensuring a meaningful and enriching experience tailored to your spiritual goals and interests throughout the year.

Customizing Your Bible Reading Plan

Customizing your Bible reading plan allows you to tailor the experience to your needs, whether adjusting the pace, focusing on specific books, or adding reflection and prayer.

Adjusting the Pace

Adjusting the pace of your reading plan ensures flexibility, allowing you to manage busy schedules or delve deeper into complex passages. This customization helps maintain consistency and prevents overwhelm, keeping your study engaging and sustainable over time while accommodating personal preferences and spiritual goals effectively.

Adding Reflection and Prayer

Incorporating reflection and prayer enhances your Bible study experience, fostering a deeper connection with the text. Pause after each reading to journal insights, pray for understanding, and apply truths to your life, transforming mere reading into meaningful spiritual practice and personal growth through intentional engagement with God’s Word daily.

Focusing on Specific Books

Focusing on specific books allows for a deeper exploration of key themes, historical contexts, and theological insights. This approach complements the structured plan by enabling readers to concentrate on areas of personal interest or spiritual need, fostering a more meaningful and tailored study experience rooted in God’s Word.

How to Stay on Track with Your Reading Plan

Consistency is key. Set a daily routine, use reminders, and track progress to maintain momentum. This structured approach ensures steady engagement with the Word of God.

Set a Consistent Schedule

Establishing a daily routine is crucial for staying on track. Choose a specific time each day, such as first thing in the morning or before bed, to dedicate to reading. Consistency helps build a habit, making it easier to stick to your plan and ensure progress throughout the year.

Use Reminders and Tools

Utilize digital apps, calendars, or printable plans to stay organized. Set daily reminders on your phone or place sticky notes in visible spots. Tools like YouVersion or Bible Gateway offer customizable reading plans and notifications. Additionally, printable PDF schedules can be posted on your fridge or saved as wallpapers for easy access, ensuring you never miss a day.

Engage with a Community

Joining a Bible study group or online community enhances accountability and deepens understanding. Participate in discussions, share insights, and learn from others. Many plans integrate with apps like YouVersion, offering forums for reflection and encouragement. Regular virtual meetings or in-person gatherings can also help maintain consistency and foster spiritual growth.

Additional Resources for Bible Study

Explore downloadable PDF templates, study guides, and commentaries to enhance your journey. Utilize online tools, apps, and join communities for deeper engagement and support.

Study Guides and Commentaries

Study guides and commentaries provide in-depth insights, historical context, and theological explanations. They complement the Bible Recap Reading Plan by offering detailed analysis of scripture, aiding readers in understanding complex passages and themes. These resources are available in both digital and print formats, making them accessible for various learning preferences and study styles.

Online Tools and Apps

Online tools and apps like YouVersion and Blue Letter Bible offer customizable reading plans, reminders, and interactive features. These platforms enhance the Bible Recap Reading Plan by providing digital access, note-taking capabilities, and sharing options. They cater to diverse learning styles, making Bible study convenient and engaging for users worldwide.

Prayer and Reflection Aids

The Bible Recap Reading Plan PDF often includes prayer and reflection aids to deepen study. Features like daily devotionals, prayer journals, and quiet time guides help users apply biblical teachings. These tools encourage meaningful engagement, fostering a deeper spiritual connection and personal growth, while offering customization options to suit individual preferences and study goals effectively.

Troubleshooting Common Challenges

Falling behind schedule and losing motivation are common challenges. Resetting your pace, setting realistic goals, and seeking accountability can help. Reflecting on spiritual growth reinforces commitment and purpose, ensuring consistent progress in your Bible reading journey.

Falling Behind Schedule

Falling behind schedule is common, but resetting your plan can help. Prioritize catching up by adjusting your pace or focusing on key passages. Use tools like reminders and tracking apps to stay on track. Break readings into smaller chunks and incorporate them into your daily routine to avoid feeling overwhelmed. Consistency is key to long-term success. Focus on progress, not perfection.

Losing Motivation

Losing motivation can happen, but reconnecting with your purpose helps. Reflect on how the scriptures apply to your life and pray for renewed passion. Engage with a community or accountability partner to stay inspired. Celebrate small milestones and remind yourself of the transformative power of God’s Word. Stay persistent and trust in the journey.

How to Create Your Own Bible Reading Plan PDF

Design a structured plan with daily readings, ensuring coverage of all 66 books. Format it clearly, organize by dates, and include notes for reflection. Save as a PDF for easy sharing and personal use.

Designing the Layout

Use a clean, organized structure with clear headings and sections. Incorporate tables or grids for daily readings, ensuring readability. Add sections for notes or reflections to enhance personal engagement. Choose a visually appealing format with proper spacing and fonts for accessibility. Ensure the layout is user-friendly and adaptable for digital or print use, making it easy to follow daily readings and stay organized throughout the year.

Formatting for Readability

Use clear headings, bold or italic text for emphasis, and bullet points for lists. Ensure proper spacing between sections and avoid clutter. Choose readable fonts and font sizes. Highlight key verses or themes to draw attention. Use margins and alignment to make the text visually appealing. Ensure consistency in formatting throughout the document for a professional and distraction-free reading experience.

The Bible Recap Reading Plan PDF offers a comprehensive and organized approach to reading the Bible in one year. By providing structured daily readings, flexibility, and resources for reflection, it empowers individuals to deepen their faith and stay consistent. Whether you’re seeking spiritual growth or community connection, this plan is a valuable tool for enriching your biblical journey.

Additional Resources for Further Study

Explore downloadable PDF templates, online communities, and Bible study apps for enhanced learning. These tools offer guided plans, interactive features, and supportive forums to deepen your study.

Downloadable PDF Templates

Downloadable PDF templates offer structured layouts for Bible reading plans, including daily schedules and customizable options. These templates are printable and easily sharable, providing a clear and organized way to track progress. Many templates are available for free, featuring options to highlight passages, add notes, and personalize your study experience for deeper engagement and focus.

Online Communities and Forums

Online communities and forums provide spaces to discuss Bible reading plans, share insights, and connect with fellow believers. These platforms foster accountability, offer study tips, and enable users to ask questions or share progress. Many communities host discussion threads, Q&A sessions, and resource exchanges, making them invaluable for enhancing your Bible study journey and staying motivated year-round.

Bible Study Apps and Websites

Bible study apps and websites offer convenient tools to enhance your reading plan experience. Popular platforms like YouVersion provide customizable reading plans, interactive devotionals, and access to multiple Bible versions. Websites such as BlueLetterBible and Ligonier.org offer additional resources, including study guides and commentary, to deepen your understanding. These tools are accessible on various devices, making Bible study flexible and engaging for everyone.

monkey whizz instructions

Monkey Whizz is a popular synthetic urine product designed to help individuals pass drug tests. It is known for its ease of use and high success rate.

What is Monkey Whizz?

Monkey Whizz is a synthetic urine product designed to mimic real human urine in appearance, consistency, and chemical composition. It is primarily used to help individuals pass drug tests, but it can also be used for other purposes such as pranks or scientific research. The product comes as a complete kit, including a heat pad to maintain the correct temperature, ensuring it resembles fresh urine. Monkey Whizz is known for its convenience and effectiveness, making it a popular choice among those seeking a reliable solution for drug testing scenarios. Its formulation includes uric acid, creatinine, and other natural compounds found in human urine, enhancing its authenticity. The product is easy to use and requires minimal preparation, making it a discreet and practical option for its intended purposes.

Purpose of Monkey Whizz Instructions

The primary purpose of Monkey Whizz instructions is to guide users through the proper preparation and application of the synthetic urine kit. These instructions ensure that the product is used effectively, maximizing its success in drug tests. The detailed steps outline how to activate the heat pad, maintain the correct temperature, and simulate a natural urine sample. The instructions also emphasize the importance of following each step carefully to achieve accurate results. By adhering to the guidelines, users can minimize the risk of detection and ensure a smooth testing experience. The instructions are designed to be clear and concise, making the process straightforward even for first-time users. Proper adherence to the instructions is crucial for achieving the desired outcome.

Overview of Monkey Whizz

Monkey Whizz is a synthetic urine kit designed to mimic real urine, helping users pass drug tests effectively. It is a popular and reliable solution for privacy and convenience.

Components of Monkey Whizz Kit

The Monkey Whizz kit includes synthetic urine, a heat pad, temperature strips, and an instruction manual. The synthetic urine is toxin-free and mimics real urine properties. The heat pad ensures the sample stays at body temperature for up to six hours. Temperature strips provide visual confirmation of the correct temperature. The manual offers step-by-step guidance for proper use. These components work together to ensure a realistic and reliable sample for drug testing situations. The kit is designed for ease of use and effectiveness, making it a popular choice for those seeking privacy and convenience in drug testing scenarios. The components are carefully crafted to meet the highest standards of quality and performance.

Why Use Monkey Whizz?

Monkey Whizz is chosen for its reliability, convenience, and effectiveness in passing drug tests. Its synthetic urine closely mimics real urine, ensuring accurate test results. The kit includes a heat pad and temperature strip, maintaining the correct temperature for up to six hours. This eliminates the need for frequent adjustments, making the process stress-free. Many users appreciate its ease of use and discreet design, allowing for confidence during testing. Monkey Whizz is a preferred option for those seeking a private and efficient solution to drug testing challenges. Its popularity stems from consistent positive feedback and proven success in helping individuals achieve their desired outcomes in sensitive situations.

Step-by-Step Instructions

Monkey Whizz instructions guide users through preparation, applying the heat pad, and simulating a natural urine sample. Follow each step carefully for optimal results and reliability.

Preparation Steps

Begin by reading the Monkey Whizz instructions thoroughly. Ensure all components are included in the kit. Activate the heat pad by peeling the adhesive backing and attaching it to the urine pouch. Allow the pad to warm the synthetic urine to the desired temperature (between 90°F and 100°F) for at least one hour. Avoid overheating, as this can damage the sample. Once the temperature is within range, secure the pouch to your body using the provided belt or strap. Practice proper handling to maintain the sample’s temperature and authenticity. Proper preparation is crucial for a successful test outcome.

Applying Heat Pad

To apply the heat pad, peel off the backing and attach it directly to the synthetic urine pouch. Ensure it’s centered for even heat distribution. The pad typically warms the sample to a natural body temperature of 90°F to 100°F. Allow it to heat for at least one hour before use. Avoid overheating, as this can compromise the sample’s integrity. Once warmed, secure the pouch to your body using the provided adjustable belt or strap. This step ensures the sample remains at the correct temperature during transport to the testing location. Proper application of the heat pad is essential for maintaining the sample’s authenticity and achieving accurate results. Follow the instructions carefully to avoid any issues during the test.

Simulating the Urine Sample

Simulating the urine sample involves ensuring it mimics natural conditions. Attach the heat pad to the pouch and let it warm for about an hour. Once warmed, secure the pouch to your body using the provided belt or strap to maintain natural body temperature. The synthetic urine flows through a realistic delivery system, creating an authentic experience. Ensure the sample is at the correct temperature (90°F–100°F) before submission. Practice the process beforehand to avoid delays or errors during the test. The goal is to present a sample that appears as natural as possible, increasing the chances of passing the drug test. Proper simulation is key to achieving accurate and reliable results.

Effectiveness and Reliability

Monkey Whizz is highly effective and reliable for passing drug tests, with a proven success rate and lab-tested quality to ensure accurate and consistent results.

Success Rate of Monkey Whizz

Monkey Whizz boasts a high success rate, with many users reporting positive results in passing drug tests. Its synthetic urine formula mimics real urine closely, ensuring accurate lab results. The inclusion of a heat pad ensures the sample remains at body temperature, a key factor in test authenticity. Proper preparation and adherence to instructions further enhance its effectiveness. While individual experiences may vary, Monkey Whizz is widely regarded as a reliable option for those seeking to pass drug screenings. Its reputation is supported by numerous user testimonials and lab testing data, making it a popular choice in the market.

Lab Testing and Results

Monkey Whizz synthetic urine undergoes rigorous lab testing to ensure it meets the standards of real human urine. The product contains essential components such as creatinine, urea, and uric acid, which are critical for passing modern drug tests. Lab results consistently show that Monkey Whizz effectively mimics the chemical and physical properties of authentic urine, including pH levels and specific gravity. These tests are conducted to verify that the product can withstand advanced screening methods used in laboratories. The consistent positive outcomes from these tests reinforce the product’s reliability and effectiveness, making it a trusted choice for individuals seeking to pass drug screenings.

Legal Considerations

Using synthetic urine like Monkey Whizz for drug tests is illegal in many states. Laws vary, and misuse can lead to severe legal consequences, including fines and penalties.

State Laws and Regulations

Monkey Whizz and similar synthetic urine products are subject to varying state laws and regulations. In some states, such as Ohio, legislation has been proposed to ban the use of synthetic urine for fraudulent purposes. Many states consider it illegal to use synthetic urine to circumvent drug tests, leading to potential legal consequences. Penalties can include fines, probation, or other legal actions depending on the jurisdiction. It is crucial to understand local laws before using such products to avoid legal repercussions. Always ensure compliance with state regulations to mitigate risks associated with synthetic urine use.

Risk of Detection

The risk of detection when using Monkey Whizz is a significant concern. Modern drug testing technology is highly advanced, capable of identifying synthetic urine. Tests often check for uric acid, pH levels, and temperature to verify authenticity. If discrepancies are detected, the sample may be flagged as invalid or fraudulent. Additionally, some states have implemented stricter regulations to combat the use of synthetic urine, increasing the likelihood of legal consequences. While Monkey Whizz is designed to mimic real urine closely, there is still a chance of detection, especially in observed tests. Proper preparation and adherence to instructions can minimize risks but do not eliminate them entirely.