Blog

freeing the natural voice pdf

Freeing the Natural Voice by Kristin Linklater is a seminal work that explores the mechanics of vocal expression, addressing obstacles to authentic speech and offering practical exercises․

Overview of the Concept

Freeing the Natural Voice is a comprehensive approach to vocal liberation, focusing on unlocking the voice’s full potential by addressing physical, emotional, and psychological barriers․ Kristin Linklater’s method emphasizes the importance of understanding vocal mechanics and breaking down social inhibitions that restrict spontaneous expression․ The concept centers on fostering a natural, authentic voice, unencumbered by societal norms or personal anxieties․ By integrating breath, relaxation, and imagery, the approach encourages individuals to reconnect with their innate vocal abilities․ This holistic methodology is designed to empower both actors and non-actors, promoting self-expression and confidence․ The ultimate goal is to create a voice that resonates truthfully, reflecting the individual’s unique identity and emotional depth․

Importance of Vocal Expression

Vocal expression is a fundamental aspect of human communication, serving as a bridge between inner thoughts and outward connection․ Freeing the Natural Voice highlights the significance of vocal expression in conveying emotions, ideas, and authenticity․ A liberated voice fosters confidence and clarity, enabling individuals to communicate effectively in personal and professional settings․ Linklater’s approach underscores the voice as a powerful tool for self-expression and emotional resonance, essential for actors, public speakers, and everyday interactions; By overcoming vocal constraints, individuals can unlock their full communicative potential, fostering deeper connections and more impactful interactions․ The ability to express oneself authentically is transformative, enhancing both personal growth and professional success․

The Book “Freeing the Natural Voice”

Freeing the Natural Voice, written by Kristin Linklater, is a revised and expanded guide for actors, teachers, and anyone seeking to unlock their vocal potential naturally․

Author and Publication Details

Kristin Linklater, a renowned voice teacher, actor, and director, authored Freeing the Natural Voice, first published in 2006 by Drama Pub․ The book has gained widespread acclaim, selling over 100,000 copies worldwide․ It is now available in a revised and expanded edition, further solidifying its status as a foundational text in voice training․ Linklater’s approach emphasizes liberating the natural voice rather than imposing external techniques, making it accessible to actors, teachers, and anyone interested in vocal expression․ The book is available for purchase on platforms like Amazon US and UK, while a free PDF version can be downloaded online, offering universal access to its valuable insights and exercises;

Key Themes and Objectives

Freeing the Natural Voice focuses on empowering individuals to unlock their authentic vocal potential by overcoming social and psychological barriers․ The book delves into the mechanics of the human voice, detailing how breath, relaxation, and imagery can enhance vocal expression․ A core objective is to help readers develop a voice that is spontaneous, expressive, and free from inhibition․ Through a series of exercises, the text guides users in strengthening their vocal technique and fostering a deeper connection between their voice and emotions․ By addressing both the physical and emotional aspects of vocal production, Linklater aims to liberate the voice, enabling authentic communication in personal and professional settings․

Reception and Impact

Freeing the Natural Voice has received widespread acclaim as a foundational text in voice training, praised for its holistic approach to vocal liberation․ The book has sold over 100,000 copies worldwide, with its revised edition further solidifying its influence․ It is widely adopted in actor training programs, voice workshops, and academic curricula, becoming a cornerstone for voice teachers and practitioners․ The text’s emphasis on natural expression and emotional authenticity has resonated with diverse audiences, from actors and public speakers to therapists and educators․ Its impact extends beyond performance, offering tools for personal growth and self-expression, making it a seminal work in the field of vocal development and communication․

Core Concepts of the Natural Voice

The natural voice emphasizes authentic expression, unhindered by social constraints, focusing on breath, relaxation, and alignment to unlock full vocal potential and emotional resonance․

Understanding Vocal Mechanics

Understanding vocal mechanics is fundamental to freeing the natural voice․ It involves analyzing the physical processes that produce sound, including breath, alignment, and resonance․ The voice is a complex instrument, requiring coordination between the diaphragm, vocal cords, and articulators․ Linklater’s approach emphasizes the importance of relaxation and release to avoid tension, which can hinder vocal expression․ By understanding how the voice functions mechanically, individuals can address obstacles that prevent spontaneous and effective communication․ This knowledge enables the development of techniques to strengthen and refine the voice, making it a powerful tool for both personal and professional use․

Breaking Down Social Inhibitions

Social inhibitions often suppress natural vocal expression, stemming from fear, anxiety, or societal expectations․ Kristin Linklater’s methodology emphasizes overcoming these barriers through self-awareness and acceptance․ By identifying and releasing psychological constraints, individuals can reclaim their authentic voice․ Exercises in the book encourage vulnerability and trust, fostering an environment where the voice can flourish without judgment․ Linklater’s approach advocates for liberation from external pressures, allowing the voice to reflect true emotions and thoughts․ This process not only enhances vocal technique but also empowers personal expression, enabling individuals to communicate more freely and authentically in both personal and professional settings․

The Role of Breath in Vocal Technique

Breath is the foundation of vocal production, serving as the energy source for sound․ Kristin Linklater’s approach highlights the importance of natural breathing to unlock authentic vocal expression․ By cultivating awareness of breath patterns, individuals can release tension and allow the voice to flow freely․ Proper breathing connects the voice to emotional expression, enabling resonance and clarity․ Linklater’s exercises focus on aligning breath with speech, emphasizing relaxation and spontaneity․ This natural breathing technique not only enhances vocal quality but also fosters a deeper connection between the voice and the self, allowing for more expressive and heartfelt communication in both personal and professional contexts․

Kristin Linklater’s Methodology

Kristin Linklater’s approach focuses on liberating the natural voice through relaxation, imagery, and spontaneous expression, emphasizing the release of physical and emotional tensions to unlock authentic vocal potential․

Philosophy Behind the Approach

Kristin Linklater’s philosophy centers on the belief that every individual possesses a unique, natural voice that should be liberated rather than shaped by external techniques․ She emphasizes the importance of understanding the voice as an instrument deeply connected to the body and emotions․ By addressing social and psychological inhibitions, Linklater’s method encourages authenticity and spontaneity in vocal expression․ Her approach is holistic, integrating breath, relaxation, and imagery to create a seamless connection between the voice and the self․ This philosophy empowers individuals to embrace their true vocal potential, fostering confidence and freedom in communication and performance․

Exercises for Vocal Development

Kristin Linklater’s approach includes a series of transformative exercises designed to awaken and strengthen the natural voice․ These exercises focus on relaxation, breath awareness, and the release of physical and emotional tensions․ Techniques such as “The Sound and the Fury” and “The River of Life” guide practitioners in exploring their vocal range and resonance․ By engaging in these practices, individuals can overcome social and psychological inhibitions, fostering spontaneity and authenticity in their expression․ The exercises emphasize the connection between voice, body, and imagination, allowing for a deeper liberation of the voice and its full potential in both personal and professional contexts․

Emphasis on Relaxation and release

Kristin Linklater’s methodology places a strong emphasis on relaxation and release as foundational to vocal freedom․ Tension, whether physical or emotional, restricts the voice, hindering authentic expression․ Through specific exercises, individuals learn to release stored tensions, allowing the voice to flow naturally without constraint․ This approach fosters a deeper connection to the breath, which is essential for powerful and expressive vocals․ By letting go of inhibitions, the voice is liberated, enabling unencumbered communication and emotional resonance․ This practice is vital for both personal and professional growth, ensuring the voice reaches its full potential in clarity and impact․

Applications of the Natural Voice

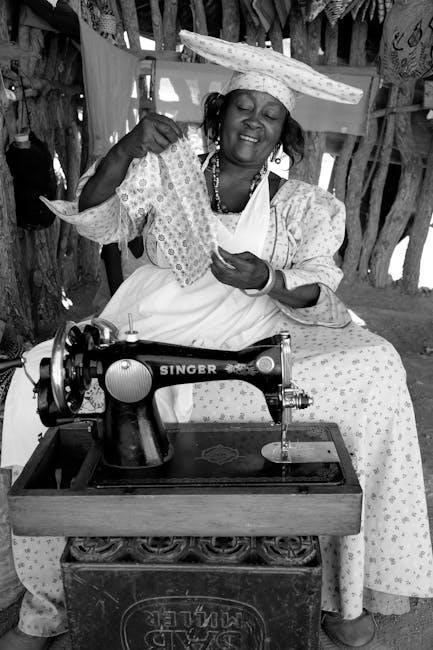
The natural voice technique enhances actor training, public speaking, and therapeutic practices, fostering authenticity and emotional resonance in communication and performance, benefiting professionals and individuals alike universally․

In Actor Training and Performance

Kristin Linklater’s approach is widely embraced in actor training, empowering performers to overcome social and psychological inhibitions․ Her methods emphasize aligning the voice with emotional truth, fostering authenticity․ By freeing the natural voice, actors achieve greater expressiveness and connection with their roles․ The book provides practical exercises to develop vocal clarity, resonance, and flexibility, essential for captivating performances․ Linklater’s techniques are particularly valued in theater and film, helping actors transcend technical limitations and embody characters fully․ This holistic approach not only enhances artistic expression but also supports long-term vocal health, making it indispensable for performers seeking to unlock their full potential and deliver compelling, emotionally resonant performances consistently․

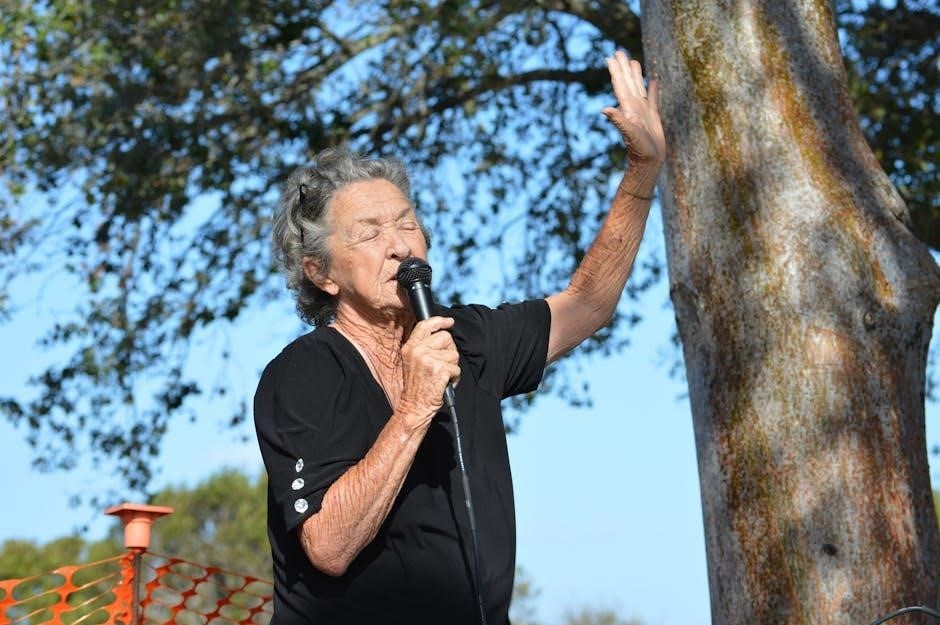
Benefits for Public Speaking

Kristin Linklater’s methods offer transformative benefits for public speaking, enabling individuals to communicate with confidence and clarity․ By liberating the natural voice, speakers overcome nervousness and hesitation, projecting their message with authenticity and authority․ The techniques foster a deeper connection between the speaker, their words, and the audience, enhancing engagement and impact․ Linklater’s exercises help develop vocal resonance, tone, and expressiveness, allowing speakers to convey emotions effectively without strain․ This approach not only improves public speaking skills but also empowers individuals to express their ideas with conviction, making it invaluable for professionals, educators, and anyone seeking to communicate more persuasively and authentically in personal or professional settings․

Therapeutic Uses of Vocal Liberation

Vocal liberation, as explored in Freeing the Natural Voice, holds profound therapeutic potential, offering emotional and physical release․ By addressing social and psychological constraints, individuals can uncover their authentic voice, fostering self-expression and empowerment․ The techniques help alleviate vocal strain and tension, promoting relaxation and emotional well-being․ Linklater’s approach is particularly beneficial for those dealing with trauma or anxiety, as it encourages the release of suppressed emotions through sound․ This therapeutic process not only enhances vocal health but also cultivates confidence and resilience, making it a transformative tool for personal healing and growth․ Its applications extend beyond performance, supporting overall mental and physical harmony․

Additional Resources and References

Find Freeing the Natural Voice as a PDF online, along with courses and tutorials offering practical vocal exercises․ Join forums and communities for further discussion and support․

Recommended Reading

The revised edition of Freeing the Natural Voice by Kristin Linklater is a must-read for actors, voice teachers, and anyone seeking to enhance vocal expression․ This essential guide details vocal mechanics, exercises, and techniques to overcome social and physical barriers to authentic speech․ Available in paperback and as a PDF, it is widely praised for its practical and artistic approach․ Additional resources include online tutorials, workshops, and communities dedicated to Linklater’s methodology․ For deeper exploration, the book is complemented by filmed exercises and reflective journals․ Its expanded edition ensures comprehensive coverage of vocal liberation, making it a cornerstone for both professionals and enthusiasts․

Online Courses and Tutorials

Online platforms offer a variety of courses and tutorials inspired by Kristin Linklater’s methodology, providing practical guidance on vocal liberation․ Websites like Udemy and Coursera feature classes that explore the mechanics of the voice, relaxation techniques, and breathwork․ These resources often include downloadable materials, such as PDF guides and video demonstrations, to enhance learning․ Additionally, virtual workshops and webinars led by certified instructors allow participants to engage in real-time exercises․ These digital tools make Linklater’s approach accessible to a global audience, enabling individuals to practice and refine their vocal skills from the comfort of their own spaces․ They complement the book’s teachings perfectly․

Communities and Forums

Active online communities and forums dedicated to vocal liberation provide spaces for sharing insights, experiences, and resources․ Platforms like Facebook groups and Reddit forums connect practitioners, offering discussions on techniques, challenges, and successes․ Many communities share downloadable materials, such as PDF guides and video tutorials, to support members in their vocal journeys․ These spaces foster collaboration and mutual support, allowing individuals to learn from one another and refine their skills․ Additionally, some forums host live webinars or Q&A sessions with voice experts, further enriching the collective understanding of natural vocal expression․ These communities serve as vital hubs for ongoing learning and growth․

Empowering individuals to embrace their natural voice, this approach fosters authentic expression, transforming communication and performance through mindful techniques and breath awareness․

Kristin Linklater’s Freeing the Natural Voice offers a comprehensive approach to vocal liberation, emphasizing breath, relaxation, and overcoming social inhibitions․ The book details exercises to develop vocal expression, benefiting actors, public speakers, and individuals seeking authentic communication․ Linklater’s methodology focuses on freeing the voice from constraints, fostering spontaneity and emotional connection․ The revised edition expands on her original work, providing practical tools and reflections from students․ Widely acclaimed, the book has become a cornerstone in voice training, empowering individuals to embrace their natural voice and unlock its full potential for personal and professional growth․

Final Thoughts on Vocal Freedom

Kristin Linklater’s work underscores the transformative power of vocal freedom, enabling individuals to express themselves authentically․ By addressing both physical and emotional barriers, her approach empowers actors, speakers, and everyone to embrace their natural voice․ The revised edition’s inclusion of student reflections and expanded exercises enhances its accessibility and depth․ Linklater’s philosophy reminds us that true vocal expression is a blend of technique, imagination, and emotional connection․ This book remains a vital resource for anyone seeking to unlock their vocal potential and find freedom in communication, both on and off the stage․

greenworks 1800 psi pressure washer manual

The Greenworks 1800 PSI Pressure Washer is a powerful, eco-friendly cleaning solution for domestic use, ideal for vehicles, decks, and driveways, offering high performance and energy efficiency.

Overview of the Greenworks 1800 PSI Pressure Washer

The Greenworks 1800 PSI Pressure Washer is a versatile, electric-powered cleaning tool designed for efficient home and outdoor use. With a maximum pressure of 1800 pounds per square inch (PSI) and a flow rate of 1.1 gallons per minute (GPM), it delivers strong cleaning power for various surfaces. This model is ideal for cleaning vehicles, decks, patios, driveways, and more, making it a practical solution for maintaining outdoor spaces. Its compact design and lightweight construction ensure portability, while the eco-friendly electric motor provides a quieter and more environmentally responsible alternative to gas-powered washers. The washer is user-friendly, with a focus on safety and durability, making it a reliable choice for both light and moderate cleaning tasks around the house.

Key Features and Specifications

The Greenworks 1800 PSI Pressure Washer features a powerful 13-amp electric motor delivering up to 1800 PSI and a flow rate of 1.1 GPM. It includes a variety of nozzles, such as 25°, 40°, and turbo nozzles, for different cleaning tasks. The washer is lightweight and portable, with durable wheels for easy mobility. It operates at 120V and 60Hz, ensuring reliable performance for domestic use. The eco-friendly design reduces noise and emissions, making it an environmentally conscious choice. Additional features include an integrated soap dispenser for efficient cleaning and a robust frame built for longevity. This pressure washer is ideal for cleaning cars, driveways, and outdoor surfaces, offering a balance of power and versatility for home users.

Safety Precautions and Guidelines

Always wear protective gear like gloves and goggles. Avoid using the washer near open flames or sparks and keep children away. Ensure the area is clean and well-lit to prevent accidents.

Personal Protective Equipment (PPE)

Wearing proper Personal Protective Equipment (PPE) is essential when operating the Greenworks 1800 PSI Pressure Washer. Always wear gloves to protect your hands from high-pressure jets and potential abrasions. Goggles or safety glasses are crucial to shield your eyes from debris or chemical splashes. Additionally, wear closed-toe shoes and long sleeves to minimize skin exposure. Avoid loose clothing or jewelry that could get caught in the equipment. Using PPE ensures a safer and more controlled cleaning experience. Regularly inspect your PPE for damage and replace it as needed. By prioritizing safety gear, you can effectively operate the pressure washer while protecting yourself from potential hazards.

General Safety Tips for Operation

Always ensure the work area is clean and well-lit to prevent accidents. Keep the surface clear of clutter and hazards. Maintain proper footing and balance while operating the pressure washer to avoid slips or falls. Never overreach or stand on unstable surfaces. Avoid operating the equipment in explosive atmospheres or near open flames. Keep children and pets away from the work area. Do not use the pressure washer near electrical outlets or in wet conditions. Follow the manual’s instructions for proper usage and maintenance. Regularly inspect hoses, nozzles, and connections for damage or leaks. Avoid using the pressure washer at extreme angles or aiming it at people, animals, or delicate surfaces. Proper usage ensures safety and effectiveness while extending the lifespan of the equipment.

Assembly and Installation

Begin with unboxing and initial setup, then attach the handle and wheels. Install the gun holder following the manual’s instructions for correct assembly and functionality.

Unboxing and Initial Setup

When you unbox the Greenworks 1800 PSI Pressure Washer, ensure all components are included: the main unit, high-pressure hose, spray gun, nozzles, and user manual. Inspect for damage and read the manual thoroughly. Place the washer on a flat, stable surface and connect the hose to the machine and spray gun. Check for leaks by turning on the water supply briefly. Familiarize yourself with the controls and nozzles. Store extra nozzles securely. Before first use, ensure all connections are tight and the washer is on a level surface. Avoid over-tightening to prevent damage. Follow the manual’s setup instructions carefully to ensure proper function and safety. This initial setup will prepare your pressure washer for efficient and effective cleaning tasks. Always prioritize safety and proper assembly to maximize performance and longevity.

Attaching the Handle and Wheels

To assemble the Greenworks 1800 PSI Pressure Washer, begin by unpacking the handle and wheels from the box. Align the handle with the designated mounting points on the main unit and secure it using the provided bolts or screws. Tighten firmly to ensure stability. Next, attach the wheels by sliding them onto the axle and locking them in place with the supplied pins or clips. Ensure the wheels are securely fastened to prevent movement during operation. Once assembled, test the handle and wheels by gently pulling or pushing the unit to confirm smooth mobility. Properly attaching these components ensures easy maneuverability and stability while using the pressure washer. Always refer to the manual for specific torque settings or additional hardware requirements. This step is crucial for safe and efficient operation;

Installing the Gun Holder

Installing the gun holder on the Greenworks 1800 PSI Pressure Washer is a straightforward process that enhances convenience during use. First, locate the designated mounting area on the pressure washer, typically on the side or handle. Align the gun holder bracket with the pre-drilled holes or attachment points. Use the provided screws to secure the bracket firmly into place, ensuring it is tightly fastened to prevent any movement. Once the bracket is installed, simply clip or slide the gun into the holder, making sure it is securely locked in position. This setup allows easy access to the gun when needed and keeps it organized when not in use. Always ensure the gun holder is properly attached to maintain safety and functionality while operating the pressure washer.

Operating the Pressure Washer

To operate the Greenworks 1800 PSI Pressure Washer, plug it into a GFCI-protected outlet, pull the trigger to start, and adjust the nozzle for the desired spray pattern. Always maintain a safe distance from surfaces and follow manual guidelines for efficient cleaning and safety.

Starting the Pressure Washer

To start the Greenworks 1800 PSI Pressure Washer, ensure it is properly assembled and placed on a level surface. Plug the unit into a Ground Fault Circuit Interrupter (GFCI)-protected outlet to prevent electrical hazards. Turn on the water supply and connect the garden hose to the inlet. Ensure the water supply is clean and free of debris to avoid clogging. Select the appropriate nozzle for your task and attach it to the gun. With the safety lock off, squeeze the trigger to start the flow of water. If the pump is new or has been stored, prime it by squeezing the trigger a few times until water flows steadily. Always refer to the manual for specific startup procedures to ensure safe and effective operation.

Choosing the Right Nozzle

The Greenworks 1800 PSI Pressure Washer comes with four interchangeable nozzles (25°, 40°, soap, and turbo) to suit various cleaning tasks. The 25° nozzle is ideal for tough jobs like concrete or heavy stains, while the 40° nozzle is better for general cleaning of surfaces like decks or siding. The soap nozzle is designed for applying detergents, and the turbo nozzle provides a concentrated stream for deep cleaning. Always select the correct nozzle for your task to avoid damaging surfaces and ensure efficient cleaning. Using the wrong nozzle can lead to ineffective cleaning or potential surface damage. Refer to the manual for guidance on nozzle selection and usage to achieve the best results for your specific cleaning needs.

Using the Pressure Washer Effectively

To maximize efficiency, maintain the nozzle 12 inches away from surfaces and use both hands on the gun handle for better control. Start with a wide fan tip (40°) for delicate surfaces and switch to narrower tips (25°) for tougher stains. Keep the pressure washer moving in a consistent, sweeping motion to avoid concentrating pressure in one spot. Work in small, manageable sections to ensure thorough cleaning. For stubborn dirt or grime, consider using the turbo nozzle or applying detergent before rinsing. Always work in a shaded area to prevent soap from drying onto surfaces, and rinse thoroughly to remove all residue. By following these tips, you can achieve professional-grade cleaning results while protecting your surfaces from damage.

Maintenance and Troubleshooting

Regular cleaning and inspecting for blockages ensure optimal performance. Proper storage and lubrication of moving parts prevent damage and extend the washer’s lifespan effectively.

Cleaning and Storing the Pressure Washer

Regular cleaning and proper storage are essential to maintain the performance and longevity of the Greenworks 1800 PSI Pressure Washer. Start by flushing the system with clean water to remove any debris or detergent residue. Inspect and clean the filter to ensure proper water flow. Allow the pump and hose to dry completely after use to prevent moisture buildup. Store the unit in a dry, cool place, away from direct sunlight, and consider using a storage cover to protect it from dust. For seasonal storage, drain all water from the pump and hoses to avoid freezing damage. Follow these steps to keep your pressure washer in optimal condition for future use.

Troubleshooting Common Issues

If your Greenworks 1800 PSI Pressure Washer isn’t performing as expected, check for common issues like low pressure, leaking connections, or a malfunctioning motor. Ensure the water supply is adequate and the filter is clean. A clogged nozzle or incorrect nozzle size can reduce pressure, so try cleaning or replacing it. If the motor overheats, allow it to cool before restarting. Check for loose connections and tighten any hoses or fittings. For persistent problems, consult the manual or contact customer support. Regular maintenance, such as draining the pump in winter, can prevent issues like freezing damage. Addressing these common problems quickly ensures optimal performance and extends the life of your pressure washer.

Winterizing the Pressure Washer

To prepare your Greenworks 1800 PSI Pressure Washer for winter, drain all water from the pump, hoses, and fittings to prevent freezing damage. Disconnect the water supply and run the pump without water to clear it. Use a pump saver or antifreeze solution if recommended in the manual. Store the unit in a dry, cool place, away from direct sunlight and moisture. Remove and store nozzles and accessories separately. Insulate hoses or store them indoors to avoid cracking. Regular winterization ensures the pressure washer remains functional and extends its lifespan. Always follow the manual’s specific instructions for cold-weather preparation to maintain warranty coverage and performance.

Accessories and Additional Features

The Greenworks 1800 PSI Pressure Washer includes four nozzles (25°, 40°, soap, and turbo) for various cleaning tasks, plus a surface cleaner attachment and gun holder for added convenience and efficiency.

Included Accessories

The Greenworks 1800 PSI Pressure Washer comes with a range of essential accessories to enhance its functionality. These include four interchangeable nozzles: 25°, 40°, soap, and turbo, each designed for specific cleaning tasks. The 25° nozzle is ideal for tough jobs, while the 40° nozzle is gentler on surfaces. The soap nozzle allows for detergent application, and the turbo nozzle provides a concentrated cleaning power. Additionally, the package includes a durable gun holder for convenient storage and a surface cleaner attachment for large areas like driveways or patios. These accessories ensure versatility and efficiency, making the pressure washer suitable for a variety of cleaning projects around the home.

Optional Attachments and Upgrades

For enhanced functionality, several optional attachments and upgrades are available for the Greenworks 1800 PSI Pressure Washer. A popular choice is the Universal Surface Cleaner, which provides a wider cleaning path and is perfect for large areas like driveways or sidewalks. Additionally, users can opt for a Pressure Washer Hose Extension, increasing the reach and flexibility of the unit. Other upgrades include a Rotary Brush for gentle scrubbing of delicate surfaces and a Detergent Tank for convenient soap application. These optional accessories allow users to customize their pressure washer to meet specific cleaning needs, ensuring optimal performance and versatility for various tasks around the home or garden.

Environmental Considerations

The Greenworks 1800 PSI Pressure Washer is designed with eco-friendly features, including energy-efficient operation and minimal water usage, promoting sustainable cleaning practices while reducing environmental impact.

Eco-Friendly Features

The Greenworks 1800 PSI Pressure Washer is designed with sustainability in mind, offering a greener alternative to traditional gas-powered models. Its electric motor eliminates emissions, reducing carbon footprint and operating noise. The washer’s energy-efficient design minimizes power consumption while delivering strong cleaning performance. Additionally, it uses less water compared to garden hoses, making it a water-conserving option for outdoor cleaning tasks. The eco-friendly features promote environmentally responsible cleaning practices without sacrificing effectiveness. By choosing this pressure washer, users contribute to reducing environmental impact while maintaining high-quality results for cleaning vehicles, decks, and other surfaces.

Responsible Usage and Water Conservation

Responsible usage of the Greenworks 1800 PSI Pressure Washer involves minimizing water waste and optimizing cleaning efficiency. Always use the correct nozzle for the task to avoid excessive water flow. For lighter cleaning, the 40-degree nozzle is ideal, while the 25-degree nozzle is better for tougher stains. Regularly inspect and maintain the washer to prevent leaks, ensuring water is used efficiently. Avoid spraying surfaces unnecessarily or at high pressure when not needed, as this conserves water and reduces wear on the equipment. By following these practices, users can effectively clean while promoting water conservation and eco-friendly maintenance. Proper usage not only extends the lifespan of the pressure washer but also aligns with environmentally responsible cleaning habits.

The Greenworks 1800 PSI Pressure Washer is an efficient, eco-friendly solution for various cleaning tasks, offering great versatility and ease of use for home maintenance needs.

Final Thoughts on the Greenworks 1800 PSI Pressure Washer

The Greenworks 1800 PSI Pressure Washer stands out as a reliable and eco-friendly option for home cleaning tasks. Its compact design and efficient operation make it ideal for maintaining driveways, decks, and vehicles. With a powerful 1800 PSI output and adjustable nozzles, it offers versatility for various cleaning needs. The included accessories, such as multiple nozzle tips, enhance its functionality. While it may not handle heavy-duty commercial tasks, it excels in domestic use. Proper maintenance, as outlined in the manual, ensures longevity. Overall, it’s a cost-effective and environmentally conscious choice for homeowners seeking a durable pressure washer for everyday cleaning tasks.

Recommended Resources for Further Reading

For comprehensive understanding, refer to the Greenworks 1800 PSI Pressure Washer Manual, available as a downloadable PDF. This manual covers assembly, operation, and maintenance. Additionally, the Greenworks GPW1800 Owner’s Manual provides detailed troubleshooting guides and safety tips. Visit the official Greenworks Tools website for supplementary resources, including setup instructions and accessory compatibility. The Greenworks Surface Cleaner Attachment Manual is also recommended for enhanced cleaning efficiency. Lastly, explore technical data sheets like the 13A 1800 PSI Pressure Washer Manual for specifications and maintenance schedules. These resources ensure safe and effective use of your pressure washer.

number 39 bus timetable dundee to arbroath pdf

Overview of the Number 39 Bus Service

The number 39 bus service operates regularly‚ connecting Dundee and Arbroath with multiple stops‚ including Ninewells and Kingoodie. Operated by Stagecoach‚ it offers a reliable timetable‚ available as a downloadable PDF for easy journey planning.

1.1 Route Details

The number 39 bus route connects Dundee City Centre to Arbroath Bus Station‚ passing through key stops like Ninewells Hospital‚ Invergowrie‚ Inchture‚ Errol‚ St Madoes‚ and Kingoodie. The service operates with frequent departures‚ ensuring convenient travel between these destinations. Buses run regularly throughout the day‚ with specific timings available in the downloadable PDF timetable. The route spans from early morning to evening‚ catering to both commuters and leisure travelers.

1.2 Key Features of the Service

The number 39 bus service offers frequent departures‚ reliable schedules‚ and key stops like Dundee City Centre‚ Ninewells Hospital‚ and Arbroath Bus Station. The timetable is available as a downloadable PDF‚ enabling easy planning. Real-time tracking via the Stagecoach app adds convenience. The service runs throughout the day‚ including weekends‚ with adjusted schedules for holidays. Clean‚ comfortable buses and accessible seating accommodate all passengers‚ making it a practical choice for daily commutes and leisure trips between Dundee and Arbroath.

1.3 Importance of the Timetable

The number 39 bus timetable is crucial for efficient travel planning between Dundee and Arbroath. It provides precise departure and arrival times‚ ensuring passengers can coordinate their journeys seamlessly. The PDF format allows offline access‚ useful for areas with limited internet connectivity. Regular updates reflect service changes‚ while real-time tracking through the Stagecoach app complements the static schedule. This combination ensures reliability and flexibility for commuters and occasional travelers alike‚ making the timetable an essential resource for navigating the route effectively.

Downloading the Timetable

The number 39 bus timetable is available as a downloadable PDF from the Stagecoach website‚ ensuring easy access for planning journeys between Dundee and Arbroath offline.

2.1 Availability of the PDF

The number 39 bus timetable PDF is readily available on the Stagecoach website and via the Moovit app. It provides detailed departure times‚ route maps‚ and service updates‚ ensuring easy access for passengers. The PDF is valid from October 2022 and is frequently updated to reflect any service changes. Downloading the PDF allows users to plan their journeys offline‚ making it a convenient option for travelers between Dundee and Arbroath.

2.2 Steps to Download the Timetable

To download the number 39 bus timetable PDF‚ visit the Stagecoach website or use the Moovit app. Navigate to the “Timetables” section‚ select the route‚ and choose the “Download PDF” option. The PDF includes detailed schedules and route maps. Alternatively‚ search for “39 bus timetable Dundee to Arbroath” on the Stagecoach website to access the file directly. Ensure your device has sufficient storage for the download.

2.3 Offline Access and Usage

The downloaded PDF timetable for the number 39 bus service allows offline access‚ ensuring users can view schedules and route maps without internet. This feature is ideal for planning journeys in advance or in areas with limited connectivity. The offline PDF includes detailed timetables‚ stop information‚ and route visuals‚ enabling seamless navigation between Dundee and Arbroath. It is compatible with most devices and can be easily shared or printed for convenience.

Main Stops and Destinations

The number 39 bus service connects Dundee City Centre‚ Arbroath Bus Station‚ and key stops like Ninewells‚ Invergowrie‚ and Errol‚ providing essential travel links across the region.

3;1 Dundee City Centre Stops

The number 39 bus service includes key stops in Dundee City Centre‚ such as High Street‚ Seagate‚ and Souter’s Lane. These stops provide convenient access to the city’s central areas‚ with frequent departures throughout the day. The service also connects to major interchanges‚ ensuring seamless travel to destinations like Arbroath and Ninewells. Regular timetabling makes it an essential link for both commuters and visitors.

3.2 Arbroath Bus Station and Key Interchanges

Arbroath Bus Station serves as a primary interchange for the number 39 service‚ connecting passengers to destinations like Dundee and Ninewells. The station offers regular departures‚ with the PDF timetable providing detailed schedules. Key interchanges include links to other routes‚ ensuring smooth transfers. The station is well-served‚ making it a vital transport hub for both local and regional travel‚ with easy access to connecting services like the 73 and 226 routes.

3.3 Intermediate Stops and Connections

The number 39 bus service includes key intermediate stops such as Ninewells‚ Invergowrie‚ Inchture‚ Errol‚ and St Madoes. These stops provide essential connections to local communities and other transport links. Passengers can transfer to other Stagecoach services at these points‚ enhancing travel flexibility. The service operates regularly‚ ensuring reliable connections between Dundee and Arbroath‚ with intermediate stops supporting both commuter and leisure travel needs effectively.

Service Frequency and Schedule

The number 39 bus service operates frequently‚ with departures every 30 minutes during the day and every 60 minutes in the evening. Weekend schedules are slightly reduced but consistent‚ ensuring reliable travel options for commuters and leisure travelers alike.

4.1 Weekday Timetable Highlights

The number 39 bus operates frequently on weekdays‚ with multiple departures from early morning to evening. Services run every 30 minutes during peak times and every 60 minutes during off-peak hours. Key stops include Dundee City Centre‚ Arbroath Bus Station‚ and intermediate points like Ninewells and Kingoodie. The first departure is at 5:00 AM from Arbroath‚ and the last at 7:50 PM‚ ensuring convenient travel options for commuters and leisure travelers alike.

4.2 Weekend and Holiday Schedules

On weekends and holidays‚ the number 39 bus service operates on a reduced schedule‚ with departures every 60 minutes. Key stops‚ including Dundee City Centre and Arbroath Bus Station‚ are still served‚ but with fewer frequencies compared to weekdays. Services typically start later in the morning and end earlier in the evening. No buses run on Christmas Day‚ Boxing Day‚ or New Year’s Day‚ as noted in the timetable.

4.3 Special Notes on Service Variations

The number 39 bus service may experience variations‚ including route diversions due to roadworks or events. Additional stops are sometimes added during peak travel seasons to accommodate increased demand. Notably‚ services 39A and 39B operate on slightly altered routes‚ with 39A extending to Ninewells Hospital and 39B serving Kingoodie. Passengers should check the latest PDF timetable for specific updates and plan their journeys accordingly.

Operators and Contact Information

The number 39 bus service is operated by Stagecoach Bus. For enquiries‚ call 0871 200 22 33 (calls cost 12p per minute plus your phone company’s access charge).

5.1 Stagecoach Bus Service Details

Stagecoach operates the number 39 bus service‚ connecting Dundee and Arbroath with key stops including Ninewells Hospital and Kingoodie. The service runs frequently‚ with buses departing from Arbroath Bus Station and Dundee City Centre; Passengers can access real-time information via the Stagecoach Bus app or website. The timetable is available as a PDF download‚ making it easy to plan journeys in advance. Stagecoach ensures reliable and punctual service throughout the day‚ catering to both commuters and leisure travelers.

5.2 Customer Support and Enquiries

For enquiries about the number 39 bus service‚ passengers can contact Stagecoach customer support via phone or through their website. The Stagecoach Bus app also offers live chat and real-time updates‚ assisting with journey planning and timetable queries. Additional support is available at major stops like Arbroath Bus Station and Dundee City Centre‚ ensuring travelers receive timely assistance for a seamless travel experience.

5;3 Real-Time Tracking Options

Passengers can track the number 39 bus in real-time using the Stagecoach Bus app or the Moovit app‚ which provide live updates and push notifications. The Stagecoach website also offers a journey planner with real-time tracking‚ ensuring travelers can monitor their bus’s progress. Additionally‚ digital displays at key stops like Arbroath Bus Station and Dundee City Centre show live departure times‚ helping commuters plan their journeys efficiently and reduce waiting time.

Planning Your Journey

Use the PDF timetable to plan your trip‚ check service frequency‚ and identify key stops. Integrate with travel apps for real-time updates and seamless journey coordination.

6.1 Using the PDF Timetable Effectively

Download and review the PDF timetable to check departure times‚ plan your route‚ and identify key stops. Use the timetable to avoid peak-hour delays and ensure timely arrivals. Familiarize yourself with the route map to recognize intermediate stops and connections. Note any service variations for weekends or holidays. For real-time updates‚ integrate the PDF with the Stagecoach app or Moovit for accurate journey planning and adjustments on travel day.

6.2 Integrating with Other Travel Apps

Combine the PDF timetable with apps like Moovit or Stagecoach for enhanced journey planning. These apps offer real-time updates‚ live tracking‚ and route suggestions; Sync your PDF schedule with app data to receive alerts for delays or changes. Use the apps to plan connections with other transport modes‚ ensuring a seamless travel experience. Offline access in both the PDF and apps ensures you stay informed even without internet connectivity.

6.3 Tips for First-Time Users

For first-time users‚ download the PDF timetable in advance and familiarize yourself with key stops and arrival times. Use the Stagecoach app for real-time updates and plan your journey with the Moovit app. Consider arriving early at the bus stop to account for any delays. Carry a copy of the PDF or have it saved on your device for easy access during your trip between Dundee and Arbroath.

party pizza cooking instructions

Welcome to the world of party pizza cooking! This convenient and delicious option is perfect for gatherings, offering easy customization and quick cooking methods. Whether baked, microwaved, or air-fried, party pizza ensures a hit at any event.

Cooking Methods for Party Pizza

Explore versatile cooking methods for party pizza, including conventional oven, microwave, toaster oven, and air fryer. Each offers unique benefits, from crispy crusts to quick cooking times, ensuring perfection for any gathering.

Conventional Oven Instructions

For a classic and crispy party pizza, the conventional oven is a top choice. Preheat your oven to 450°F (232°C). Remove the pizza from its packaging and place it on the middle rack for 8-10 minutes. For a softer crust, position it on a cookie sheet and bake for 11-14 minutes. Ensure the cheese is melted and bubbly before removing. Let it cool for a few minutes, then slice and serve. This method yields a golden, evenly cooked crust perfect for any gathering. Always follow package instructions for precise times, as variations may occur based on pizza type and oven performance. Keep an eye on the pizza during the last few minutes to avoid overcooking. Enjoy your perfectly baked party pizza!

Microwave Cooking Guide

Cooking party pizza in the microwave is quick and convenient. Start by placing the pizza on a microwave-safe plate or pizza crisper. Cooking times vary based on your microwave’s wattage. For a 700-watt microwave, cook for 3 minutes and 30 seconds. If using a 1000-watt microwave, reduce the time to 2 minutes and 30 seconds, and for an 1100-watt microwave, cook for just 2 minutes. Always keep an eye on the pizza during cooking to avoid overheating. Once done, carefully remove it as it will be hot. The cheese should be melted and bubbly. Let it cool for a moment before slicing. This method is ideal for a fast, single-serving option. Ensure you follow the package instructions for the best results. Refrigerate any leftovers promptly. The microwave offers a hassle-free way to enjoy a delicious party pizza in minutes!

Toaster Oven Cooking Tips

Cooking party pizza in a toaster oven is a fantastic alternative to traditional methods, offering crispy results with minimal effort. Preheat your toaster oven to 450°F (232°C) for even cooking and a crunchier crust. Place the pizza directly on the oven rack for a crisper texture or on a cookie sheet for a softer crust. Cooking times vary slightly depending on the pizza variety, but typically range from 11-14 minutes on a cookie sheet and 17-18 minutes when placed directly on the rack. Keep an eye on the pizza during the last few minutes to ensure the cheese is melted and the crust is golden. For best results, follow the package instructions and adjust cooking times as needed. This method is perfect for smaller gatherings or when you want a quick, perfectly cooked party pizza without heating up a full-sized oven. Let it cool for a moment before serving, and enjoy the delicious outcome!

Air Fryer Cooking Instructions

Cooking party pizza in an air fryer is a quick and efficient method that delivers crispy results without the need for a full oven. Start by preheating the air fryer to 380°F (193°C) to ensure even cooking. Remove the pizza from its packaging and place it on a plate or cutting board. Depending on the size and your air fryer’s capacity, you may need to adjust the positioning for even cooking. Cook the pizza for 4-6 minutes, or until the crust is golden and the cheese is melted. For a crisper crust, you can increase the temperature to 400°F (204°C) during the last minute of cooking. Keep an eye on the pizza to avoid overcooking. Once done, let it cool for a few seconds before slicing and serving. This method is ideal for a fast, mess-free party pizza that’s perfectly cooked every time. Enjoy your delicious air-fried party pizza with minimal effort and cleanup!

Ingredients and Preparation

Essential ingredients for a delicious party pizza include pizza dough, sauce, shredded mozzarella, and your choice of toppings. Preheat the oven, assemble the pizza, and bake until the crust is golden and cheese is bubbly for a perfect dish.

Essential Ingredients for Party Pizza

A classic party pizza starts with a few key ingredients: pizza dough, tomato sauce, and shredded mozzarella cheese. For added flavor, include toppings like pepperoni, sausage, or vegetables. Optional ingredients such as olives, mushrooms, and onions can customize the pizza to your taste. For homemade dough, you’ll need flour, yeast, salt, and olive oil. Pre-made dough or crusts simplify the process. Don’t forget condiments like oregano, garlic powder, or red pepper flakes for extra seasoning. If using frozen pizzas, ensure they’re fully thawed before cooking. Fresh toppings should be evenly distributed to avoid overcrowding the pizza. Properly balancing ingredients ensures a crispy crust and evenly melted cheese. These essentials make party pizza a crowd-pleasing dish perfect for any gathering.

Preparation Steps Before Cooking

Before cooking your party pizza, ensure all ingredients are ready. If using frozen pizza, thaw it by leaving it at room temperature for 1-2 hours or refrigerate overnight. For homemade dough, roll it out on a floured surface to your desired thickness. Spread a thin layer of pizza sauce, leaving a small border around the edges. Sprinkle shredded mozzarella cheese evenly, then add your preferred toppings. Avoid overloading the pizza to ensure even cooking. Preheat your oven, toaster oven, or air fryer according to the chosen cooking method. If using a conventional oven, place the pizza on a greased baking sheet or oven rack; For crispy crusts, lightly brush the edges with olive oil. Keep all toppings chopped and ready to avoid delays. Proper preparation ensures a well-cooked, flavorful pizza with a crispy crust and evenly melted cheese.

Tips for a Successful Party Pizza

For a perfect party pizza, watch cooking times closely to avoid overcooking. Use a pizza crisper for a crispy crust and ensure even heating. Don’t overload with toppings for optimal results.

Thawing and Handling Frozen Pizza

Proper thawing and handling of frozen pizza are crucial for achieving the best results. Always keep the pizza frozen until you’re ready to cook it to maintain its texture and flavor. For thawing, place the pizza in the refrigerator overnight or thaw it in cold water for a few hours. Avoid thawing at room temperature, as this can lead to bacterial growth and a soggy crust. When handling the pizza, gently remove it from the packaging to prevent tearing the crust. Place it on a microwave-safe plate or oven-safe tray, ensuring it lies flat. If using a pizza crisper, position it in the center for even cooking. Never overlap pizzas during cooking, as this can cause uneven heating. For the best experience, cook the pizza immediately after thawing, and avoid refreezing once thawed. Proper handling ensures a crispy crust and evenly melted cheese, making your party pizza a delicious success.

Crust Preferences and Cooking Times

Crust preferences play a significant role in determining cooking times for party pizzas. A softer crust typically requires longer cooking times, while a crisper crust cooks faster. For example, a cheese pizza baked on an oven rack takes 11-12 minutes, while on a cookie sheet, it takes 13-14 minutes. In a toaster oven, the time increases to 17-18 minutes. Microwave cooking times vary by wattage: 3 minutes and 30 seconds for 700-watt models, 2 minutes and 30 seconds for 1000-watt models, and 2 minutes for 1100-watt models. Air fryer cooking at 380°F (193°C) ensures a crispy crust in just a few minutes. Always follow package instructions, as times may vary depending on the pizza variety and oven type. Adjust cooking times based on your preference for crust crispiness, and keep an eye on the pizza during the last few minutes to avoid overcooking. Proper timing ensures a perfectly cooked crust that complements your toppings, making your party pizza a delightful treat for everyone.

With the right techniques and tools, party pizza cooking is both simple and satisfying. Whether using a conventional oven, microwave, toaster oven, or air fryer, achieving a perfectly cooked pizza is within reach. By following package instructions and adjusting cooking times based on crust preferences, you can serve delicious, customizable pizzas at any gathering. Experiment with different toppings and methods to find your ideal combination, ensuring every party is a culinary success. Remember, the key to a great party pizza is even cooking and a crispy crust, so always keep an eye on your pizza during the final minutes. Enjoy the convenience and flavor of homemade or frozen party pizzas, perfect for any occasion. Happy cooking!

t6 pro smart thermostat installation manual

The Honeywell T6 Pro Smart Thermostat is a cutting-edge, Energy Star-rated device designed for seamless smart home integration, offering advanced temperature control and energy-saving features.

Overview of Features and Benefits

The Honeywell T6 Pro Smart Thermostat offers advanced features like geofencing, 7-day scheduling, and smart home integration with Apple HomeKit, Amazon Alexa, and Google Assistant. Its energy-saving algorithm optimizes heating and cooling, while the Lyric app enables remote temperature control. The thermostat supports up to 2 Heat/2 Cool conventional systems and is Energy Star certified, ensuring efficiency. With its user-friendly design, it automatically adjusts settings based on your location, providing comfort and energy savings. This device is ideal for homeowners seeking a seamless smart home experience with intuitive temperature management.

Compatibility with Smart Home Systems

The Honeywell T6 Pro Smart Thermostat seamlessly integrates with popular smart home systems, including Apple HomeKit, Amazon Alexa, and Google Assistant. This compatibility allows for voice control and remote temperature adjustments via the respective apps. Additionally, the thermostat works with the Lyric app, enabling advanced features like geofencing and scheduling. Its integration with smart home ecosystems enhances convenience and energy efficiency, making it a versatile choice for modern homes. This compatibility ensures that users can easily incorporate the T6 Pro into their existing smart home setups for a unified and streamlined experience.

System Requirements and Compatibility

The Honeywell T6 Pro Smart Thermostat is compatible with most HVAC systems, including heat pumps and conventional systems, and requires a 24V wiring setup for installation.

Compatible HVAC Systems

The Honeywell T6 Pro Smart Thermostat is designed to work seamlessly with a variety of HVAC systems, including heat pumps and conventional heating and cooling systems. It supports up to 2 stages of heat and 1 stage of cooling for heat pumps, and up to 2 stages of heat and 2 stages of cooling for conventional systems. This versatility ensures compatibility with most residential HVAC setups. Additionally, the thermostat is compatible with 24V wiring systems, making it suitable for a wide range of installations. Its advanced features, such as geofencing and smart home integration, further enhance its performance across different HVAC configurations.

Device Compatibility (Apple HomeKit, Amazon Alexa, Google Assistant)

The Honeywell T6 Pro Smart Thermostat is fully compatible with major smart home systems, including Apple HomeKit, Amazon Alexa, and Google Assistant. This integration allows users to control their thermostat with voice commands or through respective smart home apps. Apple HomeKit compatibility enables seamless control via Siri, while Amazon Alexa and Google Assistant provide voice-based temperature adjustments. The thermostat also integrates with smart home routines, enhancing automation and energy efficiency. This broad compatibility ensures the T6 Pro fits effortlessly into any smart home ecosystem, offering advanced convenience and control.

Tools and Materials Needed for Installation

Essential tools include screwdrivers, drill, and wire strippers. Materials provided are the thermostat unit, mounting hardware, and wires. Additional items like wire nuts may be required.

Essential Tools

For a successful installation, gather essential tools: a screwdriver (Phillips and flathead), a drill with bits, wire strippers, a level, pliers, and a voltage tester. A ladder may also be necessary for accessing wiring. Ensure all tools are readily available to streamline the process. These tools will help you safely and efficiently complete the installation of your Honeywell T6 Pro Smart Thermostat. Proper preparation ensures a smooth setup and minimizes potential issues during the process. Always follow safety guidelines when working with electrical systems.

Materials Provided in the Package

The Honeywell T6 Pro Smart Thermostat package includes the thermostat unit, a mounting bracket, screws, wire labels, and a quick-install guide. Additional materials such as a power extender kit may be included for compatibility with specific HVAC systems. The thermostat also comes with a user manual detailing installation steps and troubleshooting tips. These materials ensure a seamless installation process. Honeywell provides everything needed for a standard setup, reducing the need for additional purchases. The package is designed to support a user-friendly installation experience.

Step-by-Step Installation Guide

The Honeywell T6 Pro Smart Thermostat installation guide provides a detailed walkthrough, ensuring a smooth setup process. From wiring to final configuration, it covers all essential steps.

Preparing for Installation

Before starting, ensure the power to your HVAC system is turned off at the circuit breaker. Remove the old thermostat carefully, labeling each wire to match the terminal names. Check the wiring configuration against the manual to ensure compatibility. Clean the area around the wall plate to prevent dust interference. Assemble the new thermostat by attaching the wall plate and organizing components. Verify your HVAC system’s compatibility with the Honeywell T6 Pro. Once all preparations are complete, you’re ready to proceed with the installation.

Wiring and Mounting the Thermostat

Turn off the power to your HVAC system at the circuit breaker. Peel the adhesive backing from the wall plate and press it firmly onto the wall. Align the thermostat with the plate, ensuring it is level, and secure it using the provided screws. Gently insert each labeled wire into the corresponding terminal on the thermostat, matching the labels you created earlier. Tighten the terminal screws firmly. Once all wires are connected, restore power to the system. Double-check the installation to ensure everything is secure and properly aligned. Your thermostat is now mounted and wired.

Connecting to Your HVAC System

After mounting the thermostat, connect the wires to the appropriate terminals according to the labels you created earlier. Ensure the wires are securely inserted into the correct terminals to avoid loose connections. If your system uses a heat pump, set the slider to the “HP” position. For conventional systems, set it to “CONV.” Once all wires are connected, restore power to your HVAC system. Use the thermostat’s menu to test heating, cooling, and fan functions to confirm proper operation. Refer to your HVAC system’s compatibility with the T6 Pro to ensure optimal performance.

Setting Up the Thermostat

After installation, power on the thermostat and follow the on-screen prompts to set your location, preferences, and schedule. Use the Lyric app for Wi-Fi setup and device integration.

Initial Setup and Configuration

After powering on the Honeywell T6 Pro, follow the on-screen instructions to select your language and location. Choose your preferred temperature unit (°F or °C) and configure the time format. Next, enable geofencing to optimize energy savings based on your location. Pair the thermostat with the Lyric app by scanning the QR code or manually entering the code. Set up your HVAC system type and select the correct equipment configuration. Finally, create a 7-day schedule or allow the thermostat to learn your preferences for automated temperature adjustments, ensuring a seamless and personalized experience.

Connecting to Wi-Fi and Smart Devices

To connect your Honeywell T6 Pro to Wi-Fi, navigate to the settings menu on the thermostat, select Wi-Fi setup, and choose your network from the available list. Enter your password to establish a connection. Once connected, open the Honeywell Home app to link your thermostat with Amazon Alexa, Google Assistant, or Apple HomeKit. Enable voice control by authorizing the thermostat in the respective smart home apps. This allows seamless integration, enabling voice commands like adjusting temperatures or scheduling. Ensure your smart devices are compatible and properly configured for a smooth experience.

Troubleshooting Common Issues

Common issues include connectivity problems, incorrect wiring, or software glitches. Check wires, ensure proper power supply, and restart the system. Resetting the thermostat often resolves these issues.

Resolving Connectivity Problems

Connectivity issues with the Honeywell T6 Pro can often be resolved by checking your Wi-Fi network stability. Ensure the thermostat is connected to the correct network and restart your router if necessary. If the issue persists, verify that your device is updated to the latest software version. Additionally, check the Lyric app for any connectivity alerts or error messages. Resetting the thermostat by removing it from the app and re-pairing it can also resolve many connection-related problems. Always ensure a strong Wi-Fi signal reaches the thermostat for optimal performance.

Addressing Installation-Related Errors

If you encounter installation issues with the Honeywell T6 Pro, start by verifying that all wires are securely connected to the correct terminals. Common mistakes include incorrect wiring configurations or loose connections. Ensure the slider is set to the proper position based on your HVAC system type (e.g., heat pump or conventional). If the thermostat fails to power on, check the circuit breaker or fuse. Resetting the device to factory settings can also resolve installation-related errors; Refer to the wiring diagram in the manual for guidance. If problems persist, consult a licensed HVAC technician.

instruction manual for white sewing machine

Safety Precautions

Always unplug the machine before cleaning or changing needles to avoid accidents. Handle sharp objects like needles and blades with care. Keep children away while operating. Regular maintenance ensures proper function and prevents injury. Follow all safety guidelines provided in the manual to ensure safe and efficient operation.

  • Never touch electrical components with wet hands.
  • Store the machine in a dry, cool place.
  • Avoid distractions while sewing to prevent accidents.

Ensure the sewing area is well-lit and clear of clutter. Supervise children when the machine is in use. Proper precautions will extend the machine’s lifespan and ensure user safety.

1.1. Handling Sharp Objects and Electrical Components

Always handle sharp objects like needles, blades, and rotary cutters with extreme care to avoid injuries. Use needle inserters to avoid direct contact with sharp points. Store sharp objects securely, out of children’s reach. When handling electrical components, ensure the machine is unplugged to prevent shocks. Avoid touching electrical parts with wet hands or while standing on damp surfaces. Regularly inspect power cords for damage and replace them if worn. Never attempt to repair electrical components yourself; consult a professional. Proper handling of these elements ensures safe operation and prolongs the machine’s lifespan.

  • Use gloves when handling sharp parts for extra protection.
  • Keep electrical components away from heat sources.

1.2. Proper Use and Maintenance to Prevent Injury

Proper use and regular maintenance are crucial to ensure safe operation and prevent injuries. Always follow the manual’s guidelines for threading, tension adjustment, and stitch selection. Lubricate the machine as recommended to avoid mechanical failure. Replace worn or damaged parts promptly, such as needles and belts, to prevent accidents. Clean the machine regularly to remove lint and debris, which can cause jams or malfunctions. Store the machine in a stable, dry environment when not in use. Schedule professional servicing annually to maintain optimal performance and safety. Proper care extends the machine’s lifespan and ensures reliable operation.

  • Regularly inspect and replace needles to prevent breakage.
  • Use recommended accessories to avoid mechanical stress.

Parts Identification

Familiarize yourself with the bobbin, spool, needles, and tension dials. Locate the free arm function and extension table for versatile sewing options. Understand each component’s role for efficient operation.

2.1. Understanding the Bobbin and Spool

The bobbin and spool are essential for threading the machine. The spool holds the thread, while the bobbin stores the underside thread. Properly winding the bobbin ensures smooth stitching. Always use the correct bobbin size for your machine to prevent thread breakage. The spool pin should be adjusted to fit different spool sizes. Keep the bobbin area clean to avoid jams. Regularly check the bobbin tension for consistent stitching. Incorrect bobbin usage can lead to uneven stitches or machine malfunction. Ensure the bobbin is securely placed in the bobbin case before sewing. Proper bobbin and spool management enhances sewing efficiency and quality.

2.2. Exploring the Free Arm Function

The free arm function allows for easier sewing of cylindrical or hard-to-reach areas like sleeves and pants hems. To use it, simply remove the extension table, revealing the free arm. This feature provides better control and visibility when working on small or intricate projects. The free arm is especially useful for sewing cuffs, collars, and children’s clothing. Always ensure the machine is stable before converting to free arm mode. This function enhances versatility, making it ideal for various sewing tasks. Regularly check the alignment of the free arm to maintain proper stitching. Proper use of the free arm expands your creative possibilities.

  • Use the free arm for precise control over curved seams.
  • It’s perfect for sewing delicate fabrics and intricate designs.

Consult your manual for diagrams and specific instructions on converting to free arm mode.

Basic Operations

Start by turning on the machine and selecting the desired stitch type. Use the foot pedal to control sewing speed. Always keep fabric steady. Consult the manual for specific operation guidance. Begin with simple projects to familiarize yourself with the machine’s functions. Adjust settings as needed for different fabrics. Properly thread the machine before starting. Keep the work area clean and organized. Regularly check the needle and bobbin for damage. This ensures smooth operation. Practice on scrap fabric to refine your sewing skills. Follow safety guidelines at all times. Keep the machine well-maintained for optimal performance. Experiment with stitch options to expand your sewing capabilities. Enjoy creating with your White sewing machine!

3.1. Threading the Machine

Threading the White sewing machine is essential for smooth operation. Insert the thread through the spool pin and gently guide it through the tension discs. Use the take-up lever to ensure proper thread flow. Pass the thread through the needle from front to back, leaving a small loop. Pull the thread gently to seat it. Always use high-quality thread suitable for your fabric type. Avoid pulling the thread too tightly, as this can misalign the tension. If the thread does not flow smoothly, check for tangles or knots. Proper threading ensures even stitches and prevents machine jamming. Refer to the manual for specific threading diagrams. Keep the thread at room temperature to avoid brittleness. Regularly inspect the thread for wear and replace it if necessary. Threading correctly is key to achieving professional results.

  • Never force the thread through the machine.
  • Trim excess thread after threading.
  • Use the correct thread type for your project.

Threading the machine properly ensures consistent stitching and prolongs the machine’s life. Always thread with the machine turned off for safety. If unsure, consult the manual or a professional. Proper threading is the foundation of successful sewing. Keep the machine clean and well-maintained to ensure thread flows smoothly. By following these steps, you can achieve perfect stitches every time. Happy sewing!

3.2. Setting the Tension

Setting the tension on your White sewing machine is crucial for achieving even stitches. Turn the tension dials to adjust the upper and lower thread tightness. Start with the recommended settings in the manual. Test the tension by sewing on scrap fabric. If the stitches are uneven, tighten or loosen the dials as needed. Proper tension ensures balanced stitching and prevents fabric puckering. Always adjust the tension with the machine turned off for safety. Use the same thread type in the bobbin and spool for consistency. Avoid over-tightening, as this can damage the machine or break the thread. Adjusting the tension correctly ensures professional-looking results.

  • Always test tension on scrap fabric first.
  • Gently turn the dials to avoid sudden changes.
  • Consult the manual for specific tension settings.

Regularly check and adjust the tension, especially when switching fabrics or threads. Proper tension ensures smooth operation and prevents common sewing issues. Adjusting the tension is a simple process that improves the quality of your stitches. Keep the machine well-maintained for optimal performance. Adjust the tension with care to achieve the best results for your sewing projects.

Stitching Options

Your White sewing machine offers various stitch options for diverse sewing needs. Choose from straight, zigzag, and decorative stitches to enhance your projects. Use the stitch selector to pick the desired pattern. Adjust stitch length and width for customization. The machine’s versatility allows you to tackle different fabrics and techniques with ease. Explore the stitching options to expand your creative possibilities and achieve professional results.

4;1. Types of Stitches Available

Your White sewing machine features a variety of stitches to suit different sewing tasks. The straight stitch is ideal for basic sewing and repairing. The zigzag stitch is perfect for stretching fabrics like knits. Decorative stitches add elegance to your projects, while the overlock stitch prevents fraying. Additionally, the machine offers stretch stitches for elastic materials, reverse stitches for securing seams, and utility stitches for everyday use; Each stitch type is designed to handle specific fabrics and applications, ensuring versatility and professional results for both beginners and experienced sewers. Explore the stitch options to enhance your creative projects.

4.2. Selecting the Right Stitch for Your Project

Selecting the right stitch is essential for achieving professional results. For delicate fabrics like silk or cotton, use the straight or precision stitch. Stretch fabrics such as knits require the zigzag or stretch stitch to allow flexibility. Decorative stitches are perfect for embellishing fabrics, while the overlock stitch is ideal for finishing seams to prevent fraying. Heavy-duty fabrics benefit from reinforced or utility stitches. Always consult your manual to match the stitch type with your fabric and project needs. Testing stitches on scrap fabric ensures the best results. Proper stitch selection enhances durability and aesthetics, making your sewing projects stand out.

Maintenance and Care

Regularly clean your machine by removing lint and debris. Lubricate moving parts to ensure smooth operation. Store in a dry, cool place to prevent rust. Follow manual guidelines for routine maintenance to extend lifespan and performance. Schedule professional servicing if issues arise. Proper care ensures optimal functionality and longevity of your sewing machine.

5.1. Cleaning the Machine

Regular cleaning is essential to maintain your sewing machine’s performance. Turn off and unplug the machine before starting. Use a soft brush to remove lint and debris from the bobbin area, tension discs, and stitch plate. Dampen a cloth with distilled water and gently wipe down the exterior, avoiding any openings. For stubborn lint, use compressed air carefully. Never use harsh chemicals or abrasive materials, as they may damage the finish or internal components. Cleaning after each project prevents dust buildup and ensures smooth operation. Refer to your manual for specific cleaning instructions tailored to your machine model.

5.2. Oiling the Machine

Regular oiling is crucial for maintaining your White sewing machine’s smooth operation. Use high-quality sewing machine oil, applied sparingly to moving parts like the hook area and shuttle race. Avoid over-oiling, as excess can attract lint and dust. Turn the handwheel manually to distribute the oil evenly. For models with automatic oiling systems, follow the manual’s specific instructions. Always unplug the machine before oiling to ensure safety. Oiling prevents friction, reduces wear, and keeps the machine running quietly. Refer to your manual for recommended oiling intervals and locations to ensure optimal performance and longevity.

  • Use only sewing machine-specific oil.
  • Avoid touching internal components with bare hands.
  • Wipe away excess oil with a clean cloth.

Troubleshooting Common Issues

Identify and resolve common issues like thread breakage or jamming by referring to the manual. Regular maintenance and proper thread tensioning often prevent these problems. Clean the machine frequently to ensure smooth operation.

  • Check for loose threads or debris inside the machine.
  • Ensure the needle is correctly installed and aligned.

6.1. Identifying and Resolving Thread Breakage

Thread breakage is a common issue that can disrupt sewing. It often occurs due to incorrect threading, excessive tension, or using low-quality thread. To resolve this, first, check the thread path for any obstructions or tangles. Ensure the thread is properly seated in the tension discs and take-up lever. If the issue persists, rethread the machine following the manual’s guidelines. Always use high-quality thread suitable for your fabric type. Adjust the tension settings as recommended in the manual. Regularly cleaning the machine and lubricating moving parts can also prevent thread breakage. By addressing these factors, you can minimize interruptions and maintain smooth sewing operations.

  • Inspect the thread for damage or knots before use.
  • Ensure the needle is compatible with the thread and fabric.

6.2. Preventing and Fixing Machine Jamming

Machine jamming can be frustrating but is often preventable. Regular cleaning and oiling of moving parts help maintain smooth operation. Always use the correct needle size and type for your fabric to avoid fabric bunching. If a jam occurs, turn off the machine and carefully remove any tangled thread or debris. Avoid forcing parts, as this can cause further damage. Check for misaligned or loose components, such as the bobbin or presser foot, and ensure they are properly secured. Proper maintenance and adherence to the manual’s guidelines can significantly reduce the risk of jamming and ensure efficient sewing.

  • Use high-quality threads and needles to minimize friction.
  • Regularly inspect and clean the bobbin area and feed dogs.

corpus hermeticum pdf

The Corpus Hermeticum is a collection of ancient texts attributed to Hermes Trismegistus, exploring theology, cosmology, and philosophy․ Its writings, including Poemandres and Asclepius, are now widely available in PDF format for modern readers․

1․1 Overview of the Corpus Hermeticum and its Significance

The Corpus Hermeticum is a collection of ancient texts attributed to Hermes Trismegistus, exploring theology, cosmology, and philosophy․ These writings significantly influenced Western thought, especially during the Renaissance, shaping alchemy, astrology, and spiritual traditions․ Their availability in PDF format has made them accessible for modern readers, offering insights into Hermetic philosophy and its enduring relevance in spiritual and intellectual studies․

1․2 Historical Context and Attribution to Hermes Trismegistus

The Corpus Hermeticum is a collection of texts compiled in the early Christian era, though mistakenly believed to be much older․ Attributed to Hermes Trismegistus, a syncretic figure blending the Greek god Hermes and the Egyptian god Thoth, these writings were brought to Europe after the fall of Constantinople in 1453․ They gained prominence during the Renaissance, influencing philosophy, alchemy, and spirituality, and remain central to Hermetic tradition․

Structure and Content of the Corpus Hermeticum

The Corpus Hermeticum consists of 18 books, structured as dialogues between Hermes Trismegistus and other figures, exploring divine truths and cosmic wisdom․ Key texts include Poemandres and Asclepius, offering spiritual and philosophical insights, now widely accessible in PDF format for modern readers․

2․1 The 18 Books of the Corpus Hermeticum

The Corpus Hermeticum comprises 18 books, each presenting divine truths through dialogues between Hermes Trismegistus and other figures․ Key texts include Poemandres, Asclepius, and the Sacred Sermon, offering profound insights into spirituality, gnosis, and cosmology․ These writings, now widely available in PDF format, explore the nature of the divine, humanity’s role in the cosmos, and the path to spiritual liberation, making them foundational to Hermetic philosophy․

2․2 Key Texts: Poemandres, Asclepius, and the Sacred Sermon

Poemandres, Asclepius, and the Sacred Sermon are cornerstone texts of the Corpus Hermeticum․ Poemandres explores the creation of the cosmos and humanity’s divine origin․ Asclepius delves into the nature of the divine and humanity’s spiritual potential․ The Sacred Sermon offers guidance on achieving gnosis and unity with God․ These texts, available in PDF, are essential for understanding Hermetic philosophy and its timeless wisdom․

Themes and Philosophy in the Corpus Hermeticum

The Corpus Hermeticum explores gnosis, the divine, and human liberation, emphasizing the unity of macrocosm and microcosm․ It teaches the path to enlightenment through self-discovery and divine wisdom․

3․1 Gnosis and the Path to Spiritual Liberation

The Corpus Hermeticum emphasizes gnosis as the direct experience of divine truth, essential for spiritual liberation․ It guides seekers through introspection, self-purification, and unity with the divine, offering a path to transcend worldly illusions and achieve eternal enlightenment․ This philosophy underscores the transformative power of knowledge and the soul’s ascent to higher consciousness․

3․2 Cosmology and the Nature of the Divine

The Corpus Hermeticum presents a cosmology where the universe is a harmonious system created by the Divine․ It describes the Supreme Intelligence as the source of all being, with the cosmos reflecting divine will․ The Logos, or divine word, governs creation, emphasizing the unity of macrocosm and microcosm, where humanity mirrors the celestial order, illustrating the interconnectedness of all existence․

Availability of the Corpus Hermeticum in PDF Format

The Corpus Hermeticum is widely available in free PDF formats from sources like Global Grey and archive․org, offering translations by G․R․S․ Mead and Juan Balboa․

4․1 Sources for Downloading the Free PDF

The Corpus Hermeticum is accessible in free PDF formats through platforms like Global Grey, archive․org, and PDFy․ Translations by G․R․S․ Mead and Juan Balboa are popular, with some editions featuring cover art by William Blake․ These sources provide easy access to the complete 18 books, including Poemandres and Asclepius, ensuring widespread availability for spiritual and academic exploration․

4․2 Translations and Editions Available Online

Prominent translations of the Corpus Hermeticum include works by G․R․S․ Mead and Juan Balboa, offering diverse interpretations․ Editions vary, with some featuring introductions by scholars like Arthur Darby Nock․ The PDF versions often include original Greek texts alongside translations, enhancing accessibility․ Editors like Jan van Rijckenborgh provide insightful commentary, enriching the reader’s understanding of Hermetic philosophy․ These editions cater to both scholars and general readers, ensuring a broad reach․

Influence of the Corpus Hermeticum on Western Thought

The Corpus Hermeticum significantly influenced Western thought, particularly in alchemy and astrology during the Renaissance, shaping philosophical and spiritual frameworks that endure to this day․

5․1 The Renaissance and the Revival of Hermeticism

The Renaissance saw a resurgence of interest in the Corpus Hermeticum, fueled by its rediscovery and translation by scholars like Marsilio Ficino․ This revival shaped Western philosophy, alchemy, and spirituality, as Hermeticism became central to intellectual and esoteric movements, influencing figures like Leonardo da Vinci and Michelangelo․ Its teachings on the unity of macrocosm and microcosm resonated deeply, inspiring new perspectives on nature and humanity․

5․2 Impact on Alchemy, Astrology, and Philosophy

The Corpus Hermeticum deeply influenced alchemy, astrology, and philosophy, shaping Western esoteric traditions․ Alchemists revered Hermes Trismegistus as a patriarch, linking his teachings to the Emerald Tablet and the Great Work․ Astrology benefited from Hermetic insights into celestial forces and their earthly reflections․ Philosophically, its emphasis on the unity of macrocosm and microcosm inspired Renaissance thinkers, fostering a holistic view of nature and humanity․

Modern Translations and Interpretations

Jan van Rijckenborgh’s work, such as The Egyptian Arch-Gnosis, offers modern interpretations of the Corpus Hermeticum, focusing on spiritual liberation and the unity of God and humanity․

6․1 The Translation by G;R․S․ Mead

G․R․S․ Mead’s translation of the Corpus Hermeticum, published in the early 20th century, remains a cornerstone of Hermetic studies․ His work includes Poemandres, Asclepius, and other key texts, offering insights into Gnosticism and Hermetic philosophy․ Available in PDF, Mead’s translation is widely accessed, providing a foundational resource for scholars and enthusiasts alike, with editions like the 1906 version remaining popular for its clarity and depth․

6․2 The Work of Jan van Rijckenborgh and the Egyptian Arch-Gnosis

Jan van Rijckenborgh’s work on the Egyptian Arch-Gnosis explores the spiritual wisdom of the Corpus Hermeticum․ His analysis, spanning multiple volumes, delves into the path of liberation, drawing from texts like the Tabula Smaragdina and the first two books of the Corpus․ These works, available in PDF, offer a deeper understanding of Hermetic philosophy, guiding readers toward spiritual transformation and enlightenment, aligning with the teachings of Hermes Trismegistus․

Academic and Scholarly Analysis

Scholars focus on the historical context and linguistic nuances of the Corpus Hermeticum․ Research by Matveev Mikhail Yurevich and others explores its theological and philosophical depths, while editions by Nock and Festugière provide critical insights, aiding academic study through accessible PDF translations․

7․1 Historical Research and Dating of the Texts

The Corpus Hermeticum was once believed to be of ancient origin but is now dated to the early Christian era․ Scholarly research, particularly in the 15th century, revealed its true historical context․ The oldest manuscripts are Byzantine, brought to Europe after the fall of Constantinople in 1453․ This corrected dating aligns with linguistic and theological analysis, providing clarity on its origins and influence․

7․2 Comparative Studies with Other Hermetic Texts

Comparative studies highlight the Corpus Hermeticum’s relationship with other Hermetic texts, such as the Emerald Tablet and the Kybalion․ Scholars analyze shared themes like gnosis and divine unity, tracing influences across alchemy, astrology, and philosophy․ These comparisons reveal the evolution of Hermetic thought and its integration into wider esoteric traditions, offering insights into its enduring philosophical and spiritual impact across centuries․

The Role of the Corpus Hermeticum in Gnosticism

The Corpus Hermeticum plays a central role in Gnosticism, emphasizing gnosis as the path to spiritual liberation․ It explores the unity of God and humanity, influencing Gnostic thought deeply․

8․1 The Corpus Hermeticum as a Gnostic Text

The Corpus Hermeticum is a foundational Gnostic text, emphasizing gnosis as the path to spiritual liberation․ It explores the unity of the divine and human, advocating for the soul’s ascent through introspection and divine wisdom․ Its teachings resonate deeply with Gnostic principles, offering insights into the nature of the cosmos and humanity’s divine potential, making it a cornerstone of Gnostic philosophy and study․

8․2 The Concept of the Unity of God and Humanity

The Corpus Hermeticum underscores the unity of God and humanity, positing that the divine spark resides within each individual․ Through gnosis, or spiritual insight, humans can transcend material boundaries and realize their divine essence․ This concept centralizes the idea that humanity’s true nature is intertwined with the divine, emphasizing introspection and self-realization as the path to unity and cosmic harmony․

The Corpus Hermeticum and Its Connection to Alchemy

The Corpus Hermeticum deeply influenced alchemy, shaping material transmutation and spiritual transformation․ The Emerald Tablet embodies Hermetic philosophy, linking alchemy to divine wisdom․

9․1 The Emerald Tablet and Its Relationship to the Corpus Hermeticum

The Emerald Tablet, attributed to Hermes Trismegistus, is a cornerstone of Hermetic philosophy․ It encapsulates the principles of transformation and unity, central to both alchemy and the Corpus Hermeticum․ These texts share themes of divine wisdom, cosmology, and the interconnectedness of all things, providing spiritual and practical insights that have shaped alchemical practices and philosophical thought for centuries․

9․2 The Influence of Hermetic Philosophy on Alchemical Practices

Hermetic philosophy profoundly shaped alchemical practices, emphasizing the unity of macrocosm and microcosm․ The Corpus Hermeticum’s principles, such as “As above, so below,” influenced alchemists’ pursuit of transformation and the Philosopher’s Stone․ Its teachings on divine wisdom and the interconnectedness of all things aligned with alchemy’s spiritual and material goals, inspiring a synthesis of philosophical and practical endeavors․

The Corpus Hermeticum remains a cornerstone of esoteric wisdom, offering profound insights into spirituality and philosophy․ For deeper exploration, download the free PDF and explore translations by G․R․S․ Mead and Jan van Rijckenborgh;

10․1 The Enduring Legacy of the Corpus Hermeticum

The Corpus Hermeticum’s enduring legacy lies in its profound influence on Western thought, shaping alchemy, astrology, and philosophy․ Its timeless wisdom continues to inspire spiritual seekers․ Available in PDF, its teachings remain accessible, bridging ancient and contemporary understanding of divine truths․

10․2 Recommended Resources for Deeper Study

For deeper exploration, G․R․S․ Mead’s translation is highly recommended, offering insights into Hermetic philosophy․ Jan van Rijckenborgh’s works provide spiritual analysis, while Juan and Maria Balboa’s modern translation is accessible in PDF․ These resources enrich understanding of the Corpus Hermeticum’s teachings and their timeless relevance․

instructional coach training

Instructional coach training equips educators with strategies to enhance teaching practices and student outcomes. It focuses on developing leadership, communication, and coaching skills to support teachers effectively. The training emphasizes data-driven methods, classroom observations, and collaborative goal-setting to foster professional growth and improve educational environments.

The Importance of Instructional Coaching in Education

Instructional coaching plays a pivotal role in enhancing educational outcomes by empowering teachers to refine their instructional strategies. By providing personalized support, coaches help educators address specific challenges, adopt innovative teaching methods, and align practices with curriculum goals. This collaborative approach fosters a culture of continuous improvement, leading to improved student engagement and academic performance. Instructional coaching also promotes teacher retention by offering professional development opportunities, which can boost confidence and job satisfaction. Moreover, it bridges the gap between theory and practice, ensuring that teachers are equipped to meet the diverse needs of their students. The impact of instructional coaching extends beyond the classroom, contributing to a more effective and resilient education system. By focusing on teacher growth and student success, instructional coaching is an essential component of modern educational reform efforts.

Core Competencies of an Effective Instructional Coach

An effective instructional coach must possess a combination of skills and knowledge to support teachers in improving their instructional practices. Core competencies include a deep understanding of teaching methodologies, curriculum design, and student learning strategies. Strong communication and interpersonal skills are essential for building trust and fostering collaboration with educators. Coaches must also demonstrate emotional intelligence, enabling them to navigate diverse personalities and school dynamics effectively. Additionally, they should be adept at analyzing data to identify areas of improvement and inform coaching strategies. The ability to model instructional techniques and provide constructive feedback is critical. Coaches must stay current with educational research and best practices, ensuring their guidance is evidence-based. Furthermore, they need to be flexible and adaptable, capable of tailoring their approach to meet the unique needs of individual teachers and schools. Finally, ethical standards and confidentiality are paramount, as coaches often work with sensitive information. These competencies collectively ensure that instructional coaches can make a meaningful impact on teacher development and student success.

The Role and Responsibilities of an Instructional Coach

An instructional coach plays a pivotal role in enhancing teacher effectiveness and student achievement by providing targeted support and professional development. Their primary responsibility is to work collaboratively with teachers to improve instructional practices through modeling, observing, and delivering feedback. Coaches often facilitate professional learning sessions, such as workshops and one-on-one coaching cycles, to help educators adopt evidence-based teaching strategies. They also assist in curriculum implementation and assessment design, ensuring alignment with educational standards. Additionally, instructional coaches analyze student and teacher data to identify areas needing improvement and tailor coaching strategies accordingly. They act as a resource for educators, offering guidance on classroom management, technology integration, and differentiated instruction. Importantly, coaches do not evaluate teachers but instead focus on fostering a culture of continuous improvement and collaboration. By building trust and fostering growth mindsets, instructional coaches empower teachers to create engaging and effective learning environments that benefit all students.

Instructional Coaching Models and Strategies

Alright, so I’m trying to write a section about Instructional Coaching Models and Strategies for a training program. I’m not super familiar with all the details, but I know instructional coaching is about helping teachers improve their teaching methods. From what I remember, there are different approaches or models that coaches use.

First, I think there’s something called the “Coaching Cycle.” I believe it involves planning, implementing, and reflecting on teaching strategies together with the coach and teacher. That makes sense because it’s a structured way to ensure continuous improvement.

Then there’s “Peer Coaching,” where teachers coach each other. This could be a good way to build a supportive environment among educators. It might help in sharing best practices and reducing the workload on a single coach.
I’ve also heard about “Data-Driven Coaching.” This probably involves using student performance data to identify areas where teachers might need more support. It sounds logical because data can pinpoint specific challenges and help in targeting interventions effectively.

There’s also “Technology-Enhanced Coaching,” which likely involves using digital tools to facilitate coaching. Maybe through online platforms for feedback or virtual meetings. This could be especially useful for remote coaching or in large districts where in-person meetings aren’t always possible.

“Coaching for Differentiated Instruction” must be about tailoring coaching to meet the diverse needs of teachers and students. Coaches would help teachers adapt their methods to fit different learning styles and abilities, which is crucial for inclusive education;

“Coaching for Cultural Responsiveness” seems important too. It probably focuses on helping teachers understand and address the cultural backgrounds of their students to create a more inclusive classroom environment. This is essential for promoting equity in education.

“Coaching for Teacher Leadership” might involve developing leadership skills among teachers so they can take on more responsibilities within the school. This could include leading professional development sessions or mentoring other teachers.
“Coaching for Professional Learning Communities (PLCs)” sounds like it involves working with groups of teachers to share practices and solve problems together. This collaborative approach can foster a sense of community and shared responsibility for student success.

“Coaching for Instructional Technology Integration” is likely about helping teachers effectively use technology in their classrooms. With the increasing role of technology in education, this seems like a key area for coaching.

“Coaching for Project-Based Learning” probably involves guiding teachers in designing and implementing project-based lessons that emphasize hands-on learning and real-world applications.

“Coaching for STEM Education” might focus on supporting teachers in science, technology, engineering, and math fields, which are critical for future careers and often require specialized teaching approaches.

“Coaching for English Language Learners (ELL)” is probably centered on helping teachers meet the needs of students who are non-native English speakers. This could involve strategies for language acquisition alongside academic content.

“Coaching for Special Education” would involve supporting teachers who work with students with special needs, ensuring that they have the strategies and resources to provide appropriate accommodations and modifications.

“Coaching for Early Childhood Education” focuses on the unique needs of young learners, helping teachers create developmentally appropriate and engaging learning experiences.

“Coaching for Adult Education” might involve strategies for teaching adult learners, who often have different motivations and needs compared to younger students.

“Coaching for Online and Blended Learning” is probably about adapting coaching strategies for virtual or hybrid learning environments, which have become more prevalent in recent years.

“Coaching for Social-Emotional Learning (SEL)” likely involves helping teachers integrate skills like emotional intelligence, self-awareness, and relationship management into their teaching practices.

“Coaching for Literacy and Numeracy” would focus on improving teaching practices in reading and mathematics, which are foundational skills for all students.

“Coaching for Higher Education” might be about supporting professors and instructors in universities to enhance their teaching methods and engage students at the post-secondary level.
“Coaching for Career and Technical Education (CTE)” probably involves helping teachers in vocational and technical fields to better prepare students for specific careers and workforce demands.

“Coaching for Gifted and Talented Education” would focus on strategies to challenge and support high-ability learners, ensuring they are adequately stimulated and supported in their educational journey.

“Coaching for Bilingual Education” likely involves supporting teachers who work with students in bilingual programs, helping them navigate the challenges of teaching in multiple languages.

“Coaching for Environmental Education” might involve integrating environmental awareness and sustainability into the curriculum, helping teachers educate students about ecological issues.

“Coaching for Financial Literacy” could focus on helping teachers incorporate personal finance and economic concepts into their lessons, preparing students for real-world financial decisions.

“Coaching for Digital Citizenship” probably involves teaching students about online safety, ethics, and responsibility, with coaches helping teachers integrate these topics effectively.

“Coaching for Media Literacy” would focus on helping teachers educate students to critically analyze and evaluate information from various media sources, an essential skill in today’s information age.
“Coaching for Civic Education” might involve strategies to enhance students’ understanding of government, history, and civic responsibilities, preparing them for active participation in society.

“Coaching for Health Education” would focus on helping teachers deliver accurate and effective health information, promoting healthy lifestyles and disease prevention among students.

“Coaching for Arts Education” likely involves supporting teachers in integrating arts into the curriculum, whether through music, visual arts, drama, or other creative disciplines.

“Coaching for Physical Education” would involve helping physical education teachers design engaging and effective programs that promote physical fitness and lifelong health.

“Coaching for Character Education” might focus on teaching values and ethical decision-making, helping students develop positive character traits that contribute to a well-rounded education.

“Coaching for Global Education” could involve preparing students to understand global issues, different cultures, and international perspectives, fostering global awareness and cooperation.

“Coaching for Service Learning” would integrate community service with academic learning, helping teachers design projects that promote both student learning and community engagement.

“Coaching for Entrepreneurship Education” might involve teaching students the skills and mindset needed to start and run businesses, fostering innovation and economic growth.

“Coaching for Sustainability Education” would focus on teaching students about sustainable development, environmental stewardship, and social responsibility, preparing them to address global challenges.

“Coaching for Human Rights Education” likely involves helping teachers educate students about human rights issues, promoting empathy, respect, and activism for social justice.

“Coaching for Disaster Education” might involve preparing teachers to educate students on disaster preparedness, response, and recovery, ensuring they are equipped to handle emergencies.

“Coaching for Climate Change Education” would focus on teaching students about climate science, its impacts, and ways to mitigate and adapt to climate change, fostering environmental stewardship.

“Coaching for Cybersecurity Education” probably involves helping teachers integrate cybersecurity concepts into the curriculum, preparing students to navigate online risks and protect digital information.

“Coaching for Artificial Intelligence Education” might focus on teaching students about AI concepts, ethical implications, and applications, preparing them for future careers in tech.

“Coaching for Data Science Education” would involve helping teachers deliver data analysis and interpretation skills, enabling students to work with data effectively in various fields.

“Coaching for Coding and Computer Science Education” likely involves supporting teachers in instructing programming and computer science concepts, fostering digital literacy and coding skills.

“Coaching for Robotics Education” would focus on helping teachers integrate robotics into the curriculum, teaching students about mechanical and software engineering principles.

“Coaching for Engineering Education” might involve preparing students for careers in engineering by teaching design thinking, problem-solving, and hands-on building skills.

“Coaching for Mathematics Education” would focus on improving the teaching of mathematical concepts, helping students develop problem-solving abilities and numerical literacy.

“Coaching for Science Education” likely involves supporting teachers in delivering effective science instruction, fostering curiosity and scientific literacy among students.

“Coaching for History Education” would focus on helping teachers engage students in historical inquiry, critical thinking, and understanding of past events and cultures.

“Coaching for Geography Education” might involve teaching students about the physical world, human environments, and global issues, promoting spatial awareness and cultural understanding.

“Coaching for Language Arts Education” would focus on enhancing the teaching of reading, writing, and literature, helping students develop strong communication and analytical skills.

“Coaching for Philosophy Education” likely involves encouraging critical thinking and ethical reasoning, helping students explore fundamental questions about existence, knowledge, and reality.

“Coaching for Psychology Education” would focus on teaching students about human behavior, cognition, and mental processes, preparing them for careers in psychology and related fields.

“Coaching for Sociology Education” might involve helping teachers educate students about social structures, relationships, and institutions, fostering an understanding of human society.

“Coaching for Economics Education” would focus on teaching students about economic systems, principles, and global markets, preparing them for careers in business and finance.

“Coaching for Political Science Education” likely involves helping teachers educate students about government, politics, and public policy, fostering informed civic engagement.

“Coaching for Anthropology Education” would focus on teaching students about human cultures, behaviors, and biological characteristics, promoting cross-cultural understanding and appreciation.

“Coaching for Linguistics Education” might involve helping teachers instruct students in the scientific study of language, covering phonetics, syntax, and semantics.

“Coaching for Astronomy Education” would focus on teaching students about the universe, stars, planets, and space exploration, fostering curiosity and interest in space science.

“Coaching for Geology Education” likely involves helping teachers educate students about Earth’s physical structure, composition, and processes, promoting an understanding of our planet.

“Coaching for Biology Education” would focus on teaching students about living organisms, ecosystems, and biological processes, preparing them for careers in life sciences.

“Coaching for Chemistry Education” might involve helping teachers deliver effective instruction in chemical principles, reactions, and lab practices, fostering an understanding of matter and its transformations.

“Coaching for Physics Education” would focus on teaching students about the fundamental laws of nature, energy, and matter, preparing them for careers in

Professional Development for Instructional Coaches

Professional development is essential for instructional coaches to enhance their skills and stay updated on effective coaching practices. This development often includes workshops, training sessions, and conferences that focus on new teaching strategies, classroom management, and technology integration. Hands-on training allows coaches to practice these techniques, ensuring practical application. Mentorship programs pair experienced coaches with newcomers, providing guidance and support. Online courses offer flexibility, catering to busy schedules, and cover various coaching aspects. Certification programs ensure coaches meet specific standards, maintaining high-quality coaching. Collaborative learning encourages innovation and resource sharing among coaches. Feedback and reflection, through peer reviews or reflective practices, help coaches improve continuously. Technology, such as virtual simulations, aids in skill development. Overall, professional development for instructional coaches is a blend of formal and informal learning, crucial for their effectiveness in supporting teachers and improving student outcomes.

Measuring the Impact of Instructional Coaching on Student Outcomes

Measuring the impact of instructional coaching on student outcomes is crucial to understanding its effectiveness and identifying areas for improvement. This process involves collecting and analyzing data to assess how coaching influences teaching practices and student performance. Common methods include standardized test scores, formative assessments, and teacher feedback surveys. Observing changes in classroom dynamics and teacher confidence also provides valuable insights. Additionally, longitudinal studies can track the long-term effects of coaching on student achievement and teacher retention. The data collected helps determine whether coaching programs are meeting their goals and informs future professional development strategies. By evaluating both quantitative and qualitative metrics, educators can ensure that instructional coaching contributes meaningfully to student success and educational excellence.

The Future of Instructional Coach Training and Education

Common Challenges Faced by Instructional Coaches

Instructional coaches often encounter several challenges while supporting educators and improving student outcomes. One of the primary challenges is resistance from teachers who may be hesitant to adopt new teaching methods or may feel threatened by the coaching process. Coaches must navigate these dynamics with empathy and clear communication to build trust and collaboration.

  • Time constraints and balancing multiple responsibilities, such as coaching, mentoring, and administrative tasks, can be overwhelming.
  • Coaches may struggle with maintaining confidentiality while providing constructive feedback, which requires a delicate balance of honesty and sensitivity.
  • The lack of standardized coaching models and tools can lead to inconsistency in approach and outcomes.
  • Measuring the direct impact of coaching on student performance can be difficult due to the indirect nature of the role.
  • Staying updated with educational trends, research, and technologies is a continuous challenge, requiring ongoing professional development.

Addressing these challenges requires strong interpersonal skills, adaptability, and a commitment to fostering collaborative relationships within the educational community. By overcoming these obstacles, instructional coaches can maximize their influence and contribute effectively to improving teaching and learning environments.

singerco com manuals

SingerCo.com provides comprehensive digital manuals, promoting sustainability and easy access to user guides, stitch charts, and maintenance tips for optimal sewing machine performance and creativity.

Overview of SingerCo.com Manuals

SingerCo.com manuals offer detailed guides for sewing machines, including user manuals, stitch guides, and maintenance tips. They are designed to help users optimize their machine’s performance and troubleshoot common issues. Available exclusively online, these manuals support Singer’s Green Initiative, reducing environmental impact. With comprehensive instructions and multi-language support, they ensure seamless operation for both new and vintage models, catering to all skill levels and sewing needs.

Importance of Using Singer Manuals

Using Singer manuals ensures proper machine operation, prevents damage, and enhances sewing results. They provide troubleshooting tips and maintenance guidance, reducing errors and extending machine lifespan. Manuals are essential for understanding model-specific features and safety precautions, making them indispensable for both beginners and experienced users. By following these guides, users can optimize their sewing experience and achieve professional-quality results consistently.

Where to Find Singer Manuals

Singer manuals are available on SingerCo.com, third-party websites, and the Internet Archive. These platforms offer free downloads, ensuring easy access to guides for various models.

Official Singer Website Resources

The official Singer website offers a dedicated section for manuals and updates, providing free downloads for user manuals, stitch guides, and maintenance tips. Users can easily search by model number to access comprehensive guides tailored to their specific sewing machine. This resource supports Singer’s commitment to the Green Initiative, reducing environmental impact by making manuals exclusively available online. It ensures seamless operation and troubleshooting for all Singer sewing machines.

Third-Party Websites for Vintage Models

For vintage Singer sewing machines, third-party websites like the Internet Archive offer a wealth of resources. These platforms provide free access to scanned manuals, parts lists, and repair guides, preserving the legacy of classic models. Enthusiasts can download these documents to maintain and restore their machines, ensuring they remain functional and cherished. Such sites are invaluable for owners of older models, offering detailed insights and practical advice tailored to their unique needs and characteristics.

Internet Archive and Other Reliable Sources

The Internet Archive is a trusted resource for accessing vintage and hard-to-find Singer manuals. This platform offers free downloads of digitized manuals, ensuring that even rare or discontinued models remain supported. Additionally, other reputable sources like official Singer websites and specialized sewing forums provide verified links and organized archives. These sources are invaluable for enthusiasts and collectors, offering comprehensive guides and detailed instructions to help maintain and restore classic sewing machines effectively.

Types of Singer Manuals Available

Singer offers user/owner manuals, stitch guides, and maintenance updates to support seamless operation. These resources cover setup, troubleshooting, and advanced techniques, ensuring optimal performance for all skill levels.

User/Owner Manuals

Singer’s user/owner manuals provide detailed guidance for setting up, operating, and maintaining sewing machines; These comprehensive guides cover basic functions, advanced features, and troubleshooting tips, ensuring users can address common issues. Available for both new and vintage models, the manuals are accessible online in PDF format, making it easy to download and reference anytime. They are essential for optimizing machine performance and achieving seamless functionality across various sewing projects.

Stitch Guides

Stitch guides are invaluable resources for mastering various sewing techniques. They include step-by-step instructions for different stitch types, such as straight, zigzag, and decorative stitches, helping users enhance their sewing projects. These guides often feature visual aids and tips for selecting the right needles, threads, and fabrics. Available online, Singer’s stitch guides empower sewists to explore creative possibilities and achieve professional results with precision and confidence.

Machine Updates and Maintenance Guides

Machine updates and maintenance guides ensure your Singer sewing machine operates at peak performance. These resources provide detailed instructions for firmware updates, routine cleaning, and lubrication. They also include troubleshooting tips for common issues like jammed threads or uneven stitches. Regular maintenance extends the machine’s lifespan and prevents mechanical failures. Singer’s guides are designed to help users keep their machines in optimal condition, ensuring smooth operation and consistent results for all sewing projects.

Troubleshooting Common Issues

This section addresses frequent challenges, such as bobbin winding, threading, and stitch quality problems. Singer manuals offer practical solutions and diagnostic tips to resolve these issues effectively.

Bobbin Winding Problems

Bobbin winding issues are common and often due to improper threading or misalignment. Manuals suggest checking thread tension, ensuring the bobbin is correctly seated, and verifying the machine is set to bobbin-winding mode. If the thread doesn’t catch, consult the troubleshooting guide for model-specific solutions. Regular maintenance and following the manual’s step-by-step instructions can prevent such issues. Always refer to your Singer manual for precise guidance tailored to your machine model.

Threading and Stitch Quality Issues

Threading issues and poor stitch quality are often caused by incorrect tension, misaligned threads, or improper needle installation. Manuals advise checking the take-up lever position, ensuring the presser foot is up, and verifying thread flow. For uneven stitches, consult the troubleshooting section to adjust settings or clean lint buildup. Proper threading techniques and regular machine maintenance, as outlined in Singer manuals, can resolve most stitch quality problems and ensure consistent sewing performance.

Maintenance and Repair Tips

Regular maintenance is key to extending the life of your Singer sewing machine. Manuals recommend cleaning lint and debris from the bobbin area and tension discs. Oiling internal parts, when applicable, ensures smooth operation. For repairs, refer to diagnostic guides in the manual to identify and resolve common issues. Updating machine software and using genuine Singer parts can also enhance performance and prevent mechanical failures, keeping your machine in optimal condition for years of reliable use.

How to Download Singer Manuals

Visit SingerCo.com, navigate to the manuals section, and search by model number. Download the PDF manual, ensuring a stable internet connection and a PDF reader installed.

Step-by-Step Guide

To download Singer manuals, visit SingerCo.com and navigate to the Manuals and Updates section. Enter your sewing machine model number in the search bar. Select the desired manual from the results. Click the download button to save the PDF file; Ensure a stable internet connection and a PDF reader is installed on your device. Follow the on-screen instructions to complete the download and access the manual for your Singer sewing machine.

System Requirements for Viewing Manuals

Ensure your device meets the necessary requirements to view Singer manuals. A PDF reader, such as Adobe Acrobat or similar software, is essential. Manuals are compatible with desktops, laptops, tablets, and smartphones. A stable internet connection is required for downloading. Adequate storage space should be available to save the manual. For optimal viewing, ensure your device’s operating system and PDF reader are up to date. This guarantees smooth access to SingerCo.com manuals and guides.

Accessibility of Manuals

SingerCo.com manuals are accessible in multiple languages, ensuring global usability. Vintage and modern models are supported, with PDF downloads available for seamless access on various devices.

Vintage Singer Manuals

Vintage Singer manuals are now digitized and accessible online, preserving legacy models’ guidance. Platforms like the Internet Archive offer free downloads, ensuring heritage sewing machines remain functional. These manuals cover classic models, providing detailed instructions for maintenance, threading, and stitch settings. Singer’s commitment to sustainability through digital access supports users of both modern and retro machines, fostering creativity and resourcefulness across generations of sewists.

Multi-Language Support

SingerCo.com manuals are available in multiple languages, catering to a global audience. Models like the Heavy Duty 4432 offer manuals in Finnish, Danish, Norwegian, and Swedish. This linguistic diversity ensures users worldwide can operate their machines effectively, regardless of their native language. Singer’s inclusive approach promotes accessibility, making sewing guides and troubleshooting tips universally understandable and user-friendly for all customers.

Organizing and Storing Manuals

Effective organization and storage of SingerCo;com manuals ensure easy access and preservation. Digital files can be saved in dedicated folders or cloud storage, while physical copies should be kept in protective binders or labeled envelopes to maintain clarity and prevent loss. This systematic approach helps users quickly locate the necessary guides for their sewing machines.

Digital Storage Solutions

Digital storage solutions offer a convenient and space-saving way to manage SingerCo.com manuals. Users can store PDF manuals in cloud services like Google Drive, Dropbox, or OneDrive, ensuring accessibility across devices. Organizing files into clearly labeled folders, such as by machine model or manual type, enhances efficiency. Additionally, digital tools allow for keyword searches and regular updates, making it easier to maintain and retrieve essential guides for seamless sewing operations.

Physical Storage Options

Physical storage options provide a practical way to keep SingerCo.com manuals organized and easily accessible. Users can store printed manuals in binders or folders, labeled by model or type for quick reference. Shelves or drawers offer additional storage solutions, while protective covers or page protectors help maintain the manuals’ condition. This method ensures that essential guides remain readily available for offline use, complementing digital backups for a comprehensive storage approach.

Legal and Copyright Information

SingerCo.com manuals are protected by copyright. Users must adhere to terms of use and respect intellectual property rights, aligning with the Green Initiative for digital accessibility.

Terms of Use

The terms of use for SingerCo.com manuals outline the rights and responsibilities for accessing and utilizing the provided resources. Users are granted permission to download, view, and print manuals for personal use only. Distribution, modification, or commercial use is prohibited. By accessing the content, users agree to respect Singer’s intellectual property rights and adhere to the guidelines set forth. These terms support the Green Initiative by promoting digital access and sustainability. Singer reserves the right to update these terms at any time.

Copyright Policies

All SingerCo.com manuals and related materials are protected under copyright law. Users are permitted to download and use the content for personal, non-commercial purposes only. Reproduction, distribution, or modification without explicit permission is strictly prohibited. Singer retains all intellectual property rights, ensuring content remains authentic and up-to-date. Users must respect these policies to maintain access to Singer’s resources, supporting the company’s commitment to sustainability and customer support.

Common Mistakes When Using Manuals

Ignoring safety guidelines and skipping model-specific instructions are common errors. Always read manuals thoroughly to avoid operational issues and ensure proper machine functionality.

Ignoring Safety Precautions

Ignoring safety precautions can lead to accidents or machine damage. Always follow guidelines in Singer manuals, such as proper threading, avoiding overloading, and using correct accessories. Failure to adhere to safety instructions may result in injury or equipment malfunction. Ensure you review and understand all safety measures before operating your sewing machine. This is crucial for protecting both the user and the machine, ensuring optimal performance and longevity.

  • Never bypass safety features.
  • Keep loose clothing tied back.
  • Avoid overloading the machine.

Safety first is essential for a seamless sewing experience.

Overlooking Model-Specific Instructions

Overlooking model-specific instructions can lead to improper machine operation and common issues like bobbin winding problems or threading errors. Each Singer sewing machine model has unique features and requirements, as highlighted in their manuals. Using generic instructions can result in suboptimal performance or damage. Always refer to the exact manual for your model to ensure proper setup, maintenance, and troubleshooting. This avoids costly repairs and ensures seamless functionality.

  1. Incorrect threading methods for your specific model.
  2. Using settings not optimized for your machine.
  3. Improper maintenance routines.

Model-specific guidance is essential for avoiding these pitfalls and maximizing your sewing experience;

Additional Resources

Explore SingerCo.com for customer support contacts, user forums, and online communities to enhance your sewing experience with expert advice, troubleshooting tips, and creative inspiration.

Customer Support Contact Information

For assistance, visit SingerCo.com and navigate to the contact page for detailed support information. Reach Singer’s customer service via email, phone, or live chat for troubleshooting, manual downloads, or product inquiries. The support team is available to address repair needs, warranty questions, and technical issues, ensuring seamless operation of your Singer sewing machine. Connect with experts to resolve any concerns promptly and efficiently.

Online Communities and Forums

Engage with Singer’s vibrant online communities and forums for peer-to-peer support and shared knowledge. These platforms offer troubleshooting tips, user experiences, and advice from experienced sewists. Discuss manual interpretations, maintenance tips, and creative projects with enthusiasts. Many forums also provide access to vintage and hard-to-find manuals, fostering a collaborative environment for sewing enthusiasts to thrive and learn together, ensuring your Singer machine operates at its best.

Exploring SingerCo.com manuals empowers users to maximize their sewing machine’s potential. With resources ranging from troubleshooting to creative guides, these manuals ensure seamless operation and inspire creativity. By leveraging official websites, forums, and digital archives, sewists can access reliable support. Embrace the convenience of online manuals to maintain, repair, and enhance your Singer machine, fostering a lifelong passion for sewing with confidence and precision.

ashton lane fireplace tv stand assembly instructions

Welcome to the Ashton Lane Fireplace TV Stand assembly guide. This manual helps you safely and efficiently assemble your Ameriwood HOME Fireplace TV Stand, supporting TVs up to 65 inches, with step-by-step instructions and essential safety precautions to ensure a successful installation.

Overview of the Product and Its Features

The Ashton Lane Fireplace TV Stand is a stylish and functional furniture piece designed to enhance your living space. It combines a sturdy TV stand with a built-in electric fireplace, creating a cozy and modern entertainment setup. Available in various finishes like Magnolia Oak and Columbia Walnut, it complements both rustic and contemporary decor. The stand supports TVs up to 70 inches, offering ample space for media devices and decorative items. Its sleek design includes shelves for storage and a realistic flame effect for ambiance. Durable and easy to assemble, this product is perfect for homeowners seeking a practical and aesthetic solution for their entertainment needs.

Importance of Following the Assembly Instructions

Following the assembly instructions for the Ashton Lane Fireplace TV Stand is crucial for ensuring a safe and successful installation. Proper assembly prevents structural instability, which could lead to accidents or damage. The instructions provide clear, step-by-step guidance to help you avoid common mistakes, such as incorrect hardware usage or misaligned parts. Adhering to the manual ensures the fireplace and TV stand function correctly, maintaining safety standards and maximizing durability. Additionally, following the instructions helps you make the most of the product’s features, such as the electric fireplace’s realistic flame effect and storage capabilities. Always prioritize safety by reading the manual thoroughly before starting and following all precautions, such as securing the unit to the wall to prevent tipping. This careful approach guarantees a sturdy, functional, and visually appealing final product.

Tools and Materials Required for Assembly

Tools needed include a flathead screwdriver, Phillips screwdriver, and hammer. Hardware provided consists of bolts, screws, and wood dowels for secure assembly.

List of Necessary Tools

To assemble the Ashton Lane Fireplace TV Stand, you will need a flathead screwdriver, a Phillips head screwdriver, and a hammer. Additional tools like a power drill or screwdriver can be used but with caution. Ensure all tools are readily available before starting. Organize the hardware provided, such as bolts, screws, and wood dowels, to streamline the process. Having a clean workspace and proper tools will make assembly efficient and safe. Refer to the manual for specific hardware identification and usage instructions. Always follow safety guidelines when using power tools, and avoid over-tightening screws to prevent damage. Gather all tools and materials beforehand to ensure a smooth assembly experience.

Hardware and Components Provided

The Ashton Lane Fireplace TV Stand comes with all necessary hardware and components for assembly. This includes bolts, screws, dowels, and other fittings required to secure the frame, shelves, and supports. The package also contains the fireplace insert and its associated components, such as the electric firebox and decorative trim. Additional items like wood cam locks and plastic spacers are provided to ensure proper alignment and stability. All hardware is labeled and organized in separate bags for easy identification. It’s essential to verify the completeness of the provided components against the manual’s parts list before starting assembly. Organizing the hardware and components beforehand will help streamline the process and ensure a successful build. Always refer to the instruction booklet for specific part usage and assembly sequences. Proper organization ensures a smooth and efficient assembly experience.

Safety Precautions and Preparation

Ensure the workspace is clear and stable. Read the manual thoroughly for safety guidelines. Anchor the unit to prevent tipping. Avoid overloading to maintain stability. Always follow precautions to ensure a secure and safe assembly process. Proper preparation is key to avoiding accidents and ensuring a successful assembly.

Preparing the Workspace

Begin by clearing a large, flat, and stable workspace to accommodate the TV stand and all components. Cover the floor and surrounding surfaces with protective material to prevent damage. Gather all tools and hardware, ensuring they are easily accessible. Charge power tools like drills or screwdrivers if needed. Organize the parts and hardware in labeled groups to avoid misplacement. Estimate the assembly time and ensure at least 1-2 people are available, as recommended. Properly prepare the area to ensure a smooth and safe assembly process. Follow all safety guidelines to prevent accidents and ensure a successful installation. A well-prepared workspace will make assembling the Ashton Lane Fireplace TV Stand more efficient and enjoyable. Always double-check that all necessary items are within reach before starting.

Step-by-Step Assembly Process

Follow detailed instructions for assembling the Ashton Lane Fireplace TV Stand, starting with the base, then attaching shelves, and finally installing the fireplace insert securely.

Assembling the Base and Frame

Begin by carefully unboxing and organizing all components. Use a flathead screwdriver to attach the legs to the base panel, ensuring stability. Next, align the side panels with the base and secure them using the provided screws. Tighten firmly but avoid overtightening. Attach the back panel to the assembled base for added support. Use the Allen wrench to secure the frame’s crossbars, enhancing structural integrity. Double-check all connections for proper alignment and stability. If using a power drill, proceed cautiously to avoid stripping screws. Once the base and frame are fully assembled, place the unit on a level surface to ensure even balance. This step is crucial for preventing future instability or wobbling. Proceed to the next section for attaching shelves and supports.

Attaching Shelves and Supports

Once the base and frame are assembled, focus on attaching the shelves and supports. Begin by identifying the pre-drilled holes on the side panels for shelf placement. Use the Phillips screwdriver to secure the shelf brackets to the frame, ensuring they are evenly spaced and aligned. Carefully place the shelves onto the brackets, verifying they fit snugly. Tighten the screws firmly to prevent movement. Next, install the additional support beams to reinforce the structure, especially if you plan to mount a heavy TV or decorative items. Double-check all connections for stability and proper alignment. Ensure shelves are level to maintain balance and prevent items from tipping. This step ensures the stand is sturdy and ready for the fireplace insert installation. Proceed methodically to avoid errors;

Installing the Fireplace Insert

After assembling the base, frame, and shelves, carefully install the fireplace insert. First, ensure the area is clear of debris and all previous steps are completed. Locate the designated compartment for the insert, typically at the center of the stand. Remove any protective packaging from the insert and align it with the predrilled mounting holes. Secure the insert using the provided screws, tightening them firmly to prevent movement. Connect the electrical components as outlined in the manual, ensuring all wires are safely routed and out of sight. Once installed, test the fireplace functions, such as the flame and heat settings, to confirm proper operation. Make sure to read and follow all safety guidelines provided in the insert’s manual to avoid hazards. This step completes the integration of the fireplace into your TV stand, enhancing your living space with warmth and ambiance.

Final Assembly and Installation

Secure the TV stand to a wall using the provided hardware to ensure stability. Connect all electrical components safely and test the fireplace insert for proper function.

Mounting the TV Stand to the Wall

To ensure stability and safety, mount the TV stand to the wall using the provided hardware. Locate wall studs and attach the brackets securely. Use a level to align the stand properly. Tighten all screws firmly to prevent tipping. Follow the manufacturer’s instructions for anchor placement and weight limits. Ensure the stand is stable before placing the TV or using the fireplace. Double-check all connections and hardware for tightness. This step is crucial for preventing accidents and ensuring long-term durability. Always adhere to safety guidelines provided in the manual to secure your unit properly.

Connecting Electrical Components

Connect the electrical components carefully to ensure proper functionality. Start by plugging the fireplace insert into the designated power outlet on the TV stand. Secure all cords using cable ties or clips to maintain a tidy setup. Ensure the electrical connections are tight and not loose to prevent hazards. Refer to the manual for specific wiring instructions if additional components are included. Always use the provided hardware for connections to avoid compatibility issues. Double-check that all plugs are firmly inserted and that no wires are pinched or damaged. Once connected, test the fireplace and TV functions to ensure everything works correctly. Follow all safety guidelines to avoid electrical hazards and enjoy your newly assembled unit. Proper connection ensures optimal performance and safety.